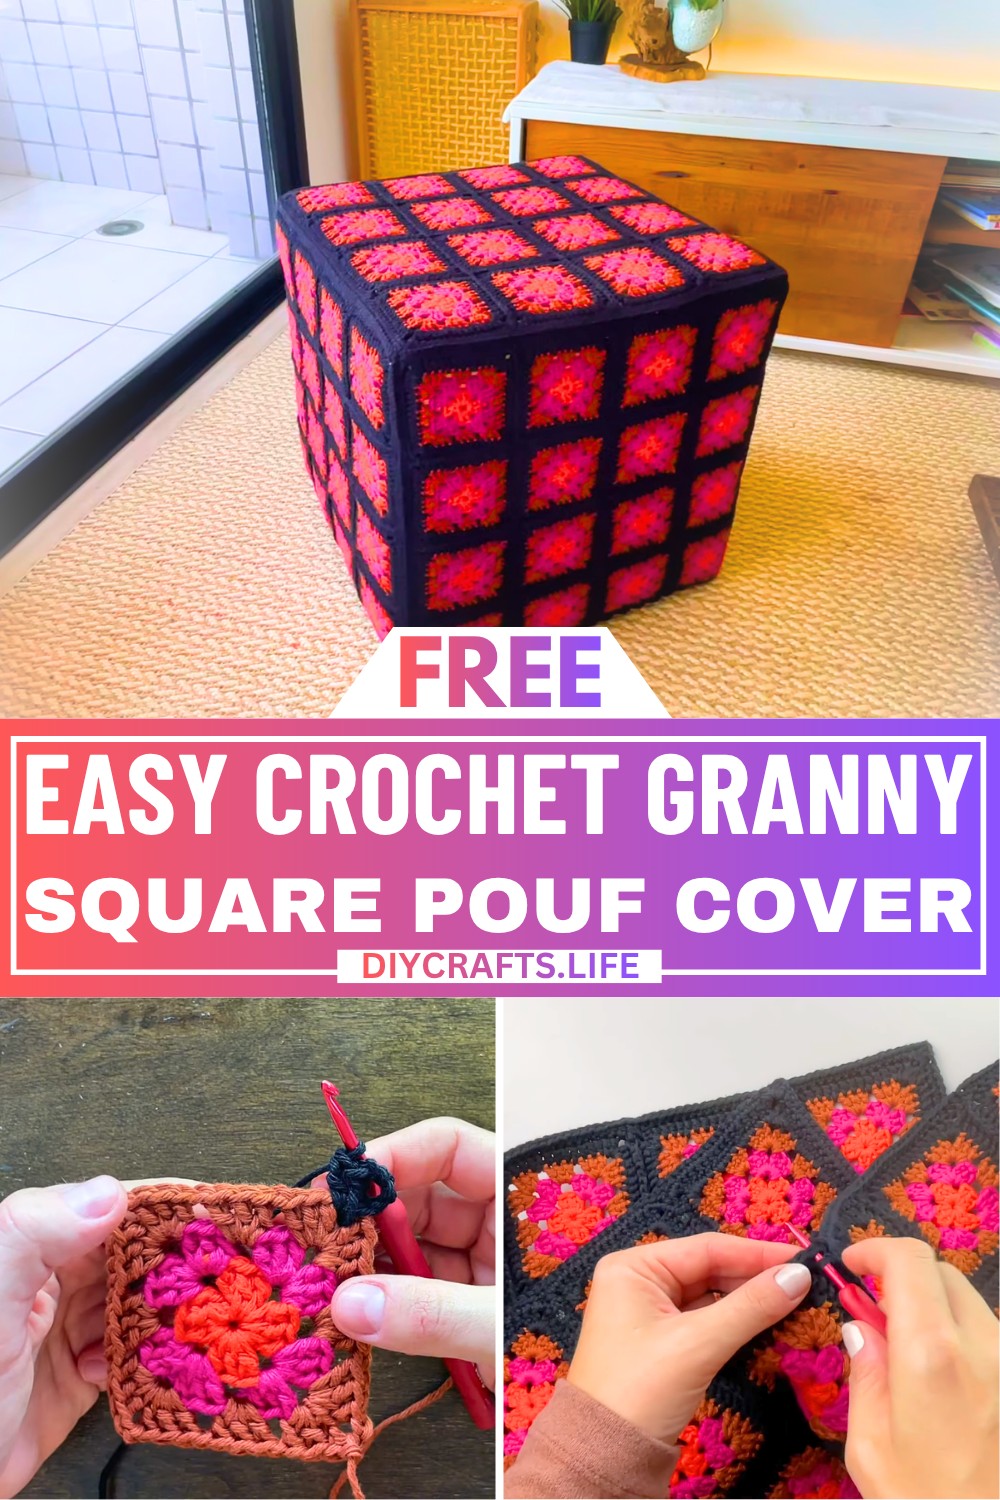
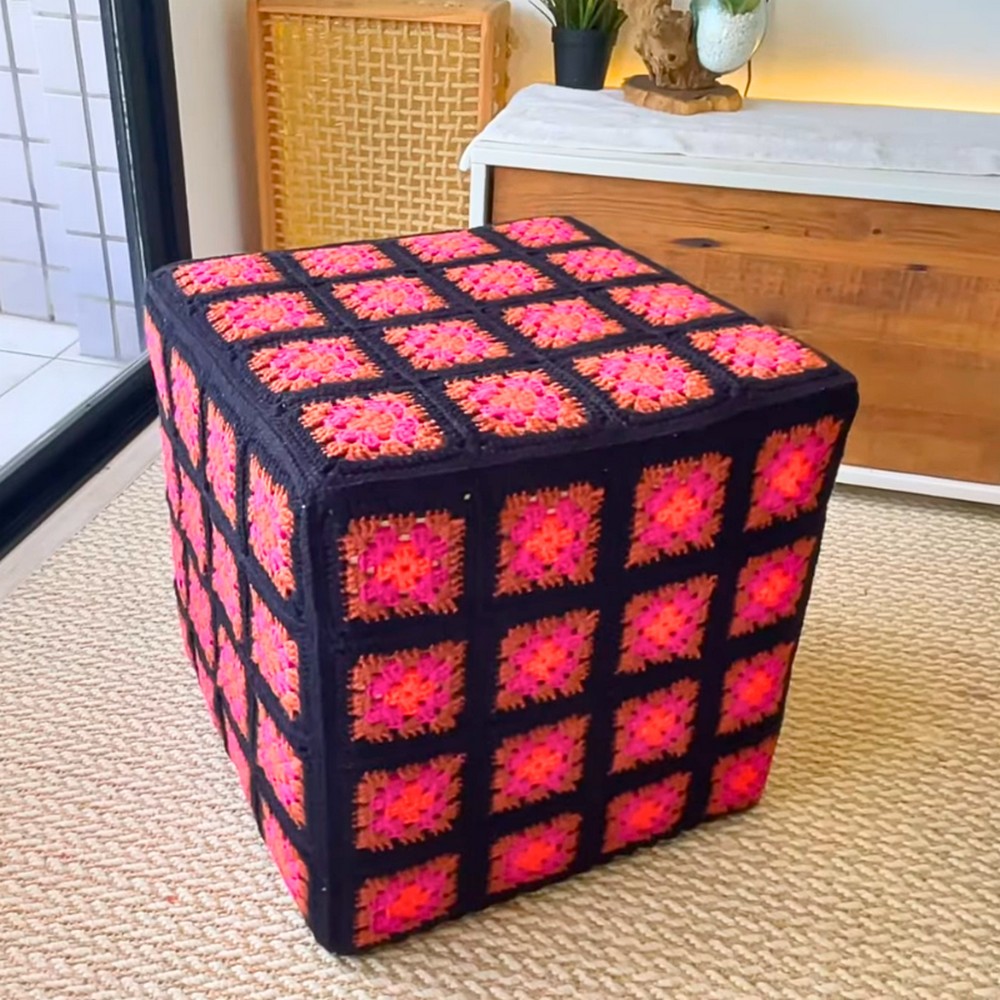
A crochet granny square pouf cover is a cozy and colorful way to breathe life into your living space. It’s soft, unique, and perfect for giving an old pouf a fresh, handmade look. Whether you want something vibrant or neutral, the granny square design lets you mix and match colors to suit your style. Plus, it’s not just lovely decor – it’s durable and ready for daily use!
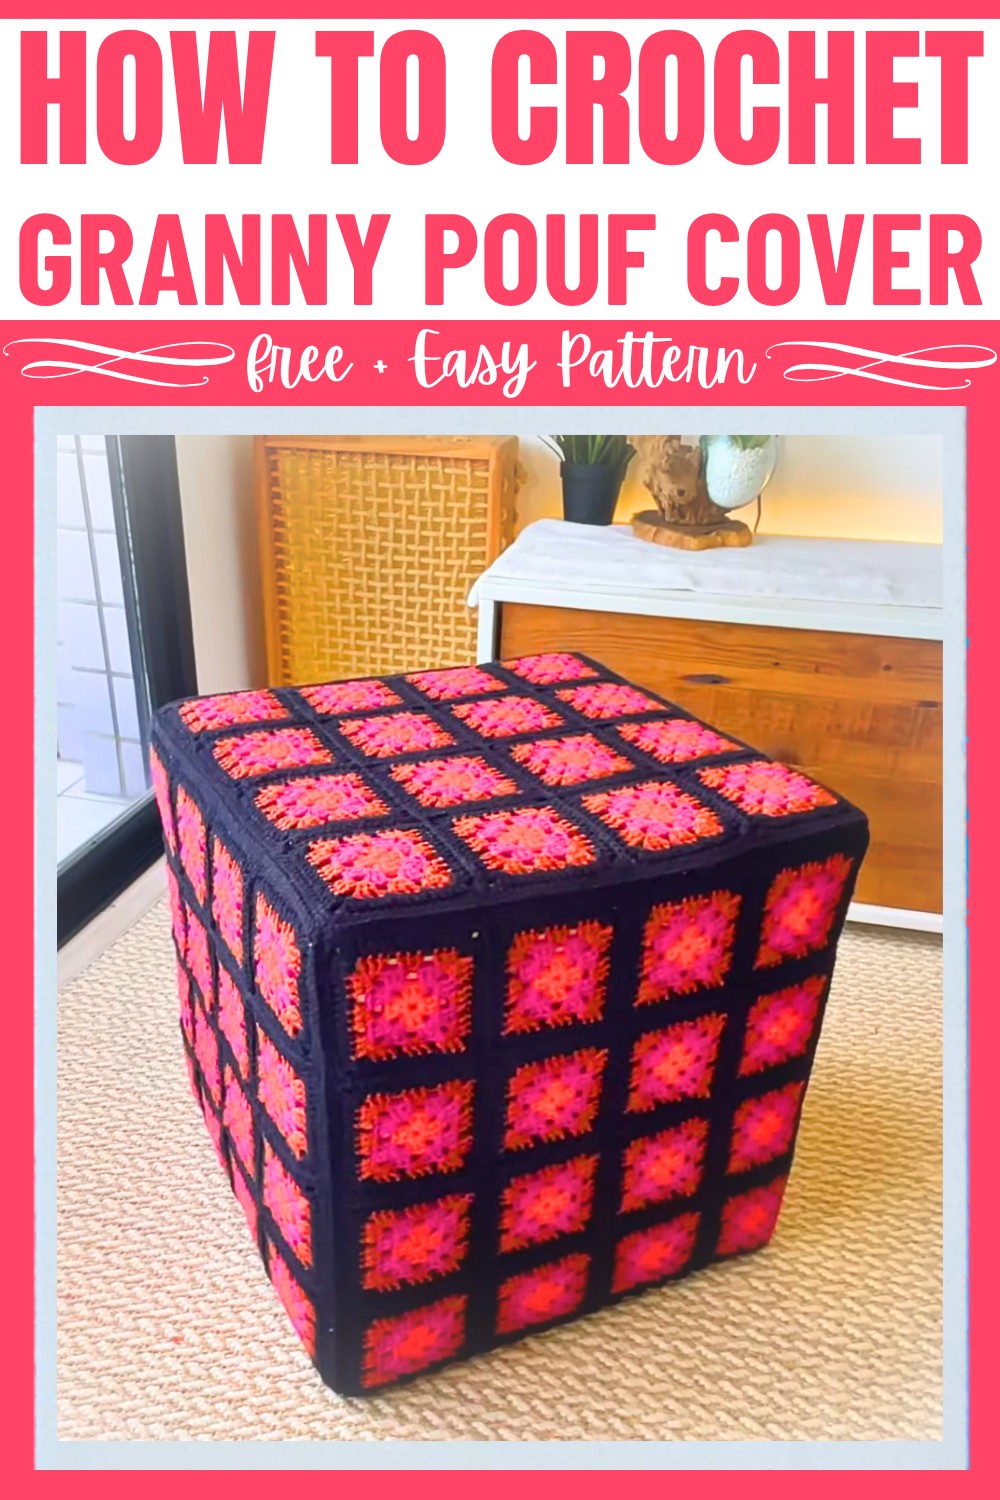
To make this pouf cover, you'll work with simple granny squares stitched together into a large cover. The exciting part is choosing your yarn colors! You’ll need 80 granny squares for the sides and top, connected using a neat slip-stitch method that creates sharp, clean edges. Once finished, you'll have a snug fit for your pouf, and the durable crochet pattern ensures it holds up during family fun or quiet relaxation. Perfect for anyone new to crochet, this pattern yields impressive results without being too tricky.
Credit Sasha and Crochet
Materials & Tools Needed
- Yarn: 100% cotton, 6-ply yarn (452 meters per roll)
- Colors used in the tutorial:
- Orangey red (almost neon-like)
- Walnut brown
- Black (for borders and joining)
- Colors used in the tutorial:
- Crochet Hook: 4 mm
- Tapestry/Weaving Needle: For weaving ends
- Measuring Tape: To ensure proper dimensions
- Steam Iron: Optional, for finishing and shaping
Finished Size & Customization Ideas
- Pouf Dimensions:
- Side Dimensions: 16 in x 16 in or 41 cm x 41 cm
- Total Granny Squares: 80, split across 5 panels (16 squares per panel—top and four sides; bottom excluded in the tutorial).
- Customization Ideas:
- Adjust the number of granny squares to fit your pouf’s dimensions.
- You can use different color combinations or even variegated yarn to create unique patterns.
Pattern Abbreviations & Terminology
- ch: Chain
- sl st: Slip Stitch
- dc: Double Crochet
- hdc: Half Double Crochet
- sc: Single Crochet
- st(s): Stitch(es)
- sp: Space
- rnd: Round
- RS: Right Side
Step-by-Step Detailed Crochet Instructions
Granny Square Instructions
Each granny square involves multiple rounds. You’ll repeat these steps for 80 squares.
Round 1: Foundation
- Start: Make a slip knot and chain 4.
- Form a loop: Slip stitch into the first chain to create a small circle.
- Begin the round: Chain 5 (counts as: 3 dc + 2 ch).
- In the center of the circle:
- Work 3 dc, then chain 2.
- Repeat: Work 3 dc, chain 2, for a total of 4 clusters.
- Finish: Slip stitch into the 3rd chain of the starting chain-5.
- Fasten off with a slip stitch and cut your yarn.
Round 2: Add Second Color
- Attach the second color: Create a slip knot and insert it in one of the corner chain spaces from Round 1.
- Corner Clusters:
- Chain 5 (counts as: 3 dc + 2 ch).
- Work 3 dc into the same corner space.
- Move to the next corner space:
- Chain 1, work 3 dc + 2 ch + 3 dc.
- Repeat this for all corners. Finish the round by:
- Working 2 dc into the starting corner (because chain-5 counts as one dc).
- Slip stitch into the 3rd chain at the beginning.
- Fasten off and weave ends.
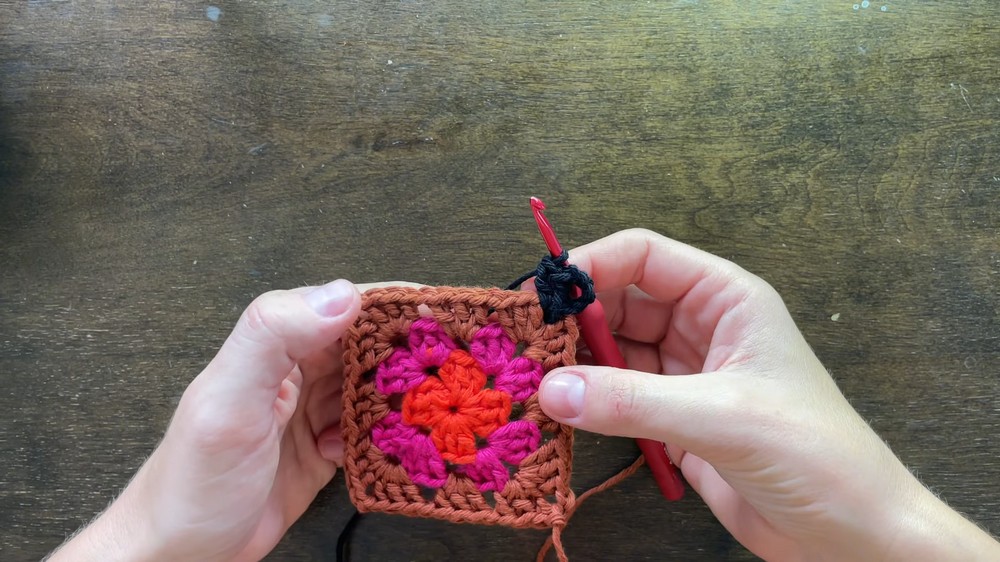
Round 3: Add Third Color
- Attach the third color in a corner space.
- Corner Clusters: Work 3 dc + 2 ch + 3 dc into each corner space.
- Side Spaces: Work 3 dc, chain 1 in each side space.
- Repeat for all corners and sides. Finish as before:
- Work 2 dc in the starting corner space (to complete the cluster).
- Slip stitch into the 3rd chain.
- Fasten off and weave ends.
- Measure the square. Adjust to 4 in x 4 in by adding a final Round 4 (optional):
- Use black yarn to outline the square with dc stitches in all edges and corners.
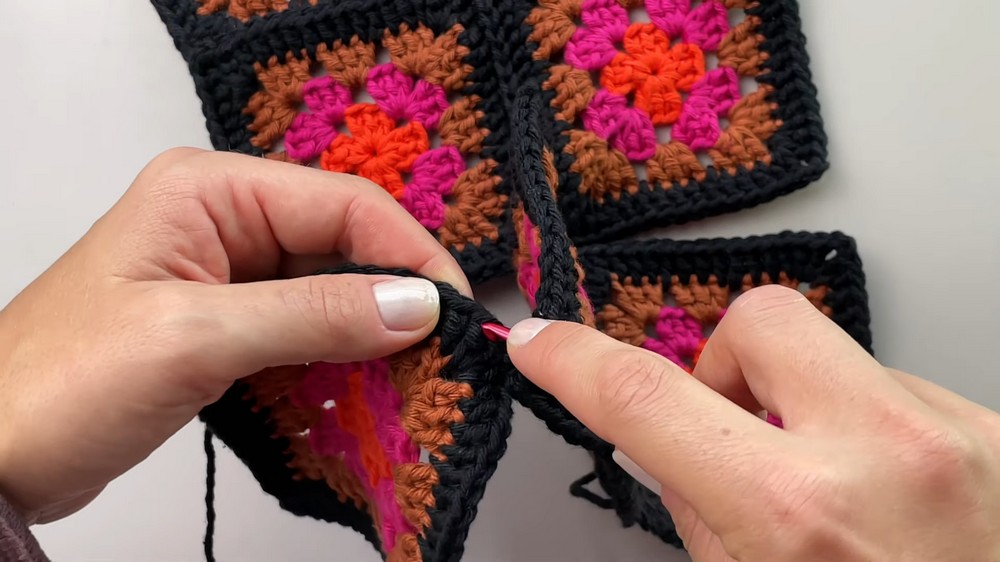
Joining Granny Squares
This tutorial uses slip stitch to join squares. Follow these steps:
- Arrange 16 squares: Lay them out in a grid matching the panel design.
- Start Joining Vertically:
- Make a slip knot with black yarn.
- Insert your hook through the back loops of the two adjoining squares.
- Work sl st into the back loop of each st across the edges.
- Corners:
- At intersections, chain 1 between squares to ensure flexibility.
- Repeat: Continue joining squares vertically, ensuring the braid-like look forms in the center seam.
- Horizontal Joining:
- After completing vertical seams, repeat the slip stitch method for each horizontal seam.
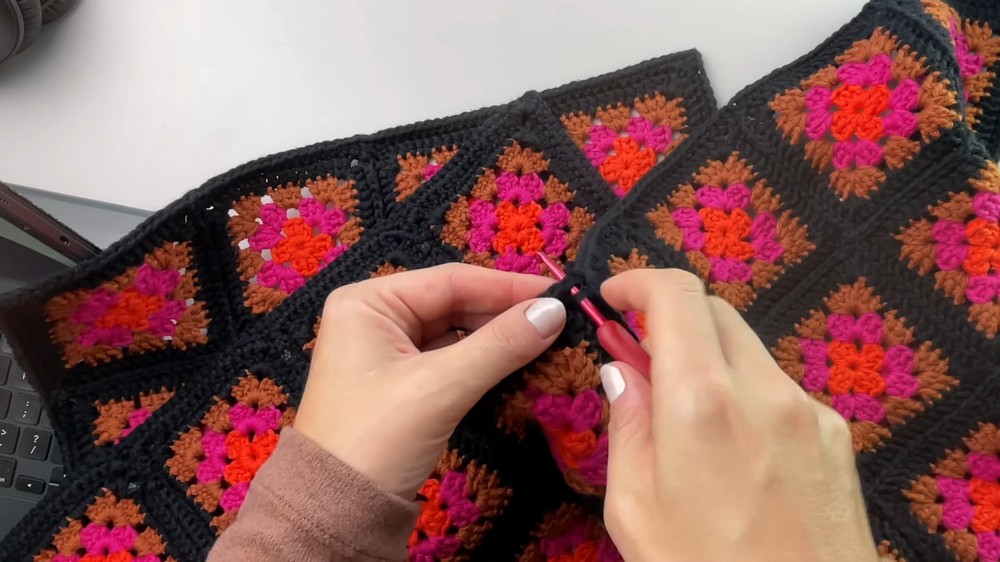
Assembling the Pouf Cover
- Connect Panels:
- Start with the top panel and one side panel.
- Use slip stitch and back loops to join sides.
- Add the remaining three sides one at a time.
- Corners:
- Ensure sharp 90° edges by slip stitching neatly into the corners.
- Final Edge:
- Single crochet around the entire cover to create a clean border.
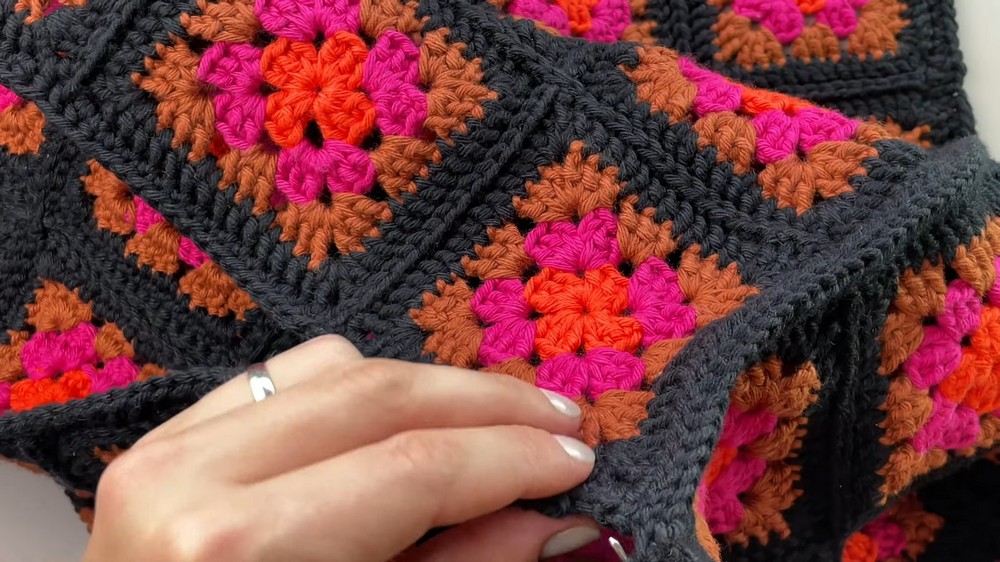
Finishing Techniques
- Steam Block:
- Press each large square with a steam iron (set to cotton).
- Start with the wrong side, then iron the right side gently for a polished look.
- Turn Right Side Out: After joining all panels, turn the cover RS out.
- Stretch the Cover: Place the cover over your pouf, ensuring a snug fit.
Tips for Success
- Use stitch markers to track starting points or significant seams.
- Take breaks when sewing panels together – it’s the most time-consuming part!