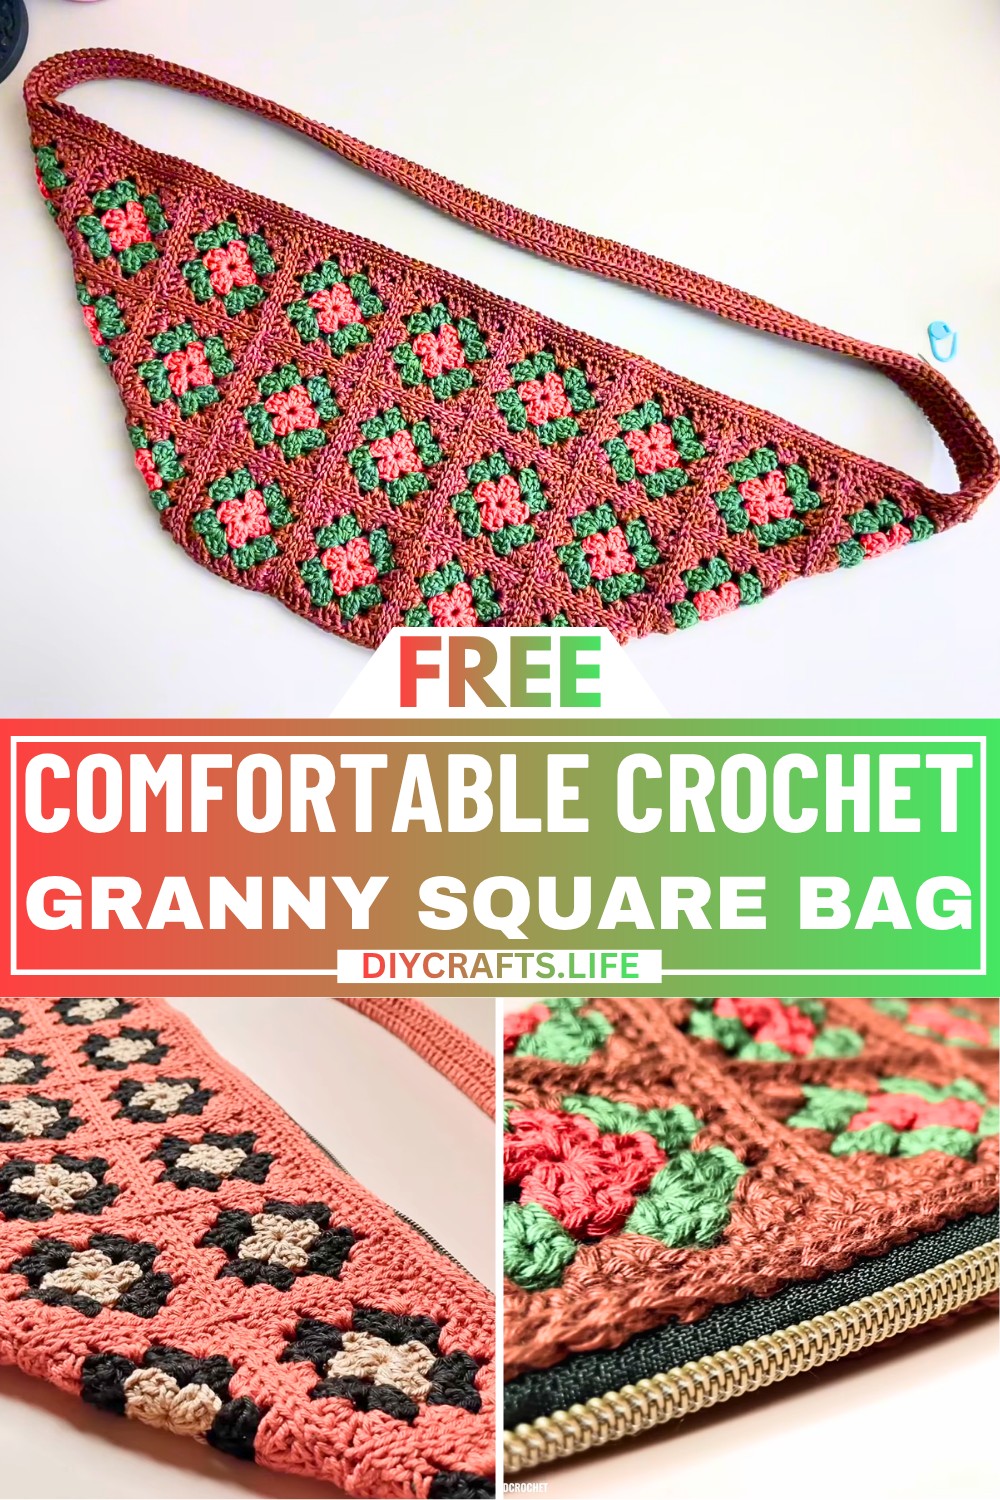
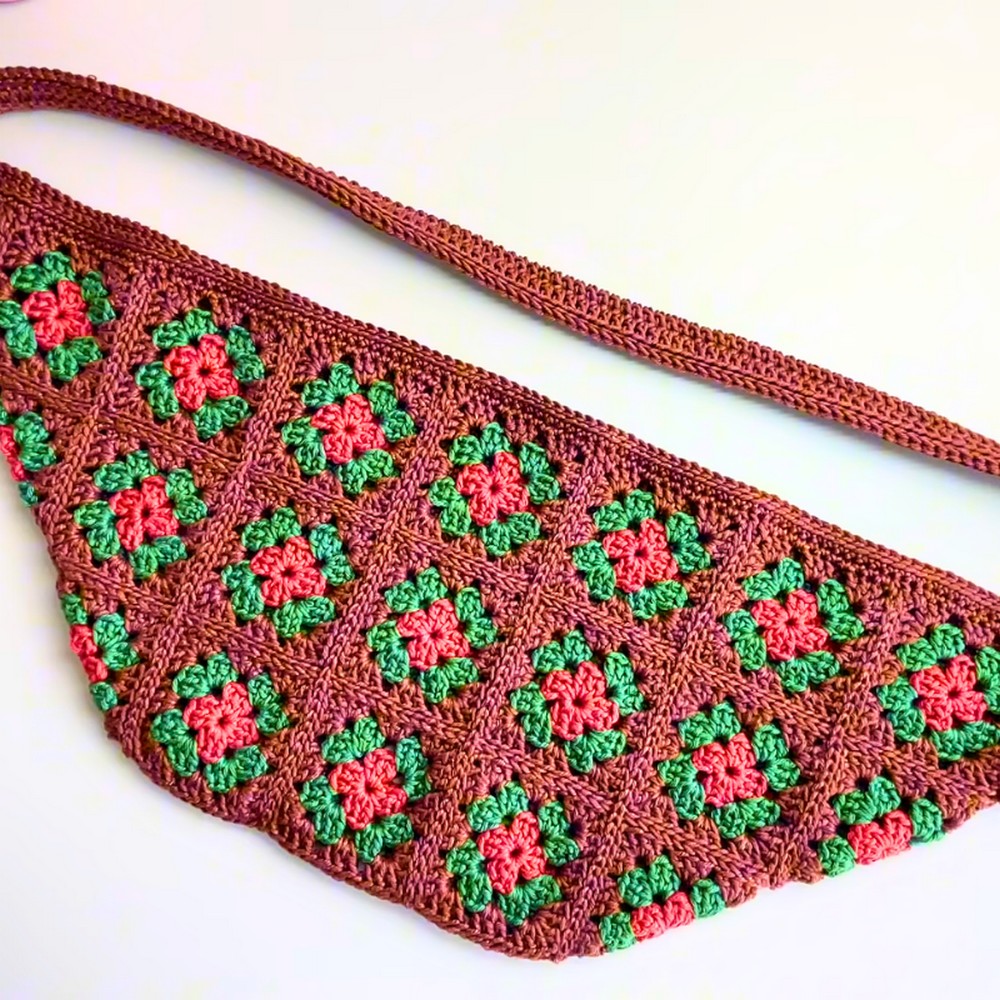
This Granny Square Crochet Bag is a beautiful and functional piece that you can make yourself! Made up of colorful granny squares, this sling-style bag is perfect for carrying your essentials in style. Whether you’re heading out to the market, meeting friends, or simply adding a pop of personality to your outfit, this bag is a great companion. Its fun design makes it modern and trendy while staying simple and timeless.
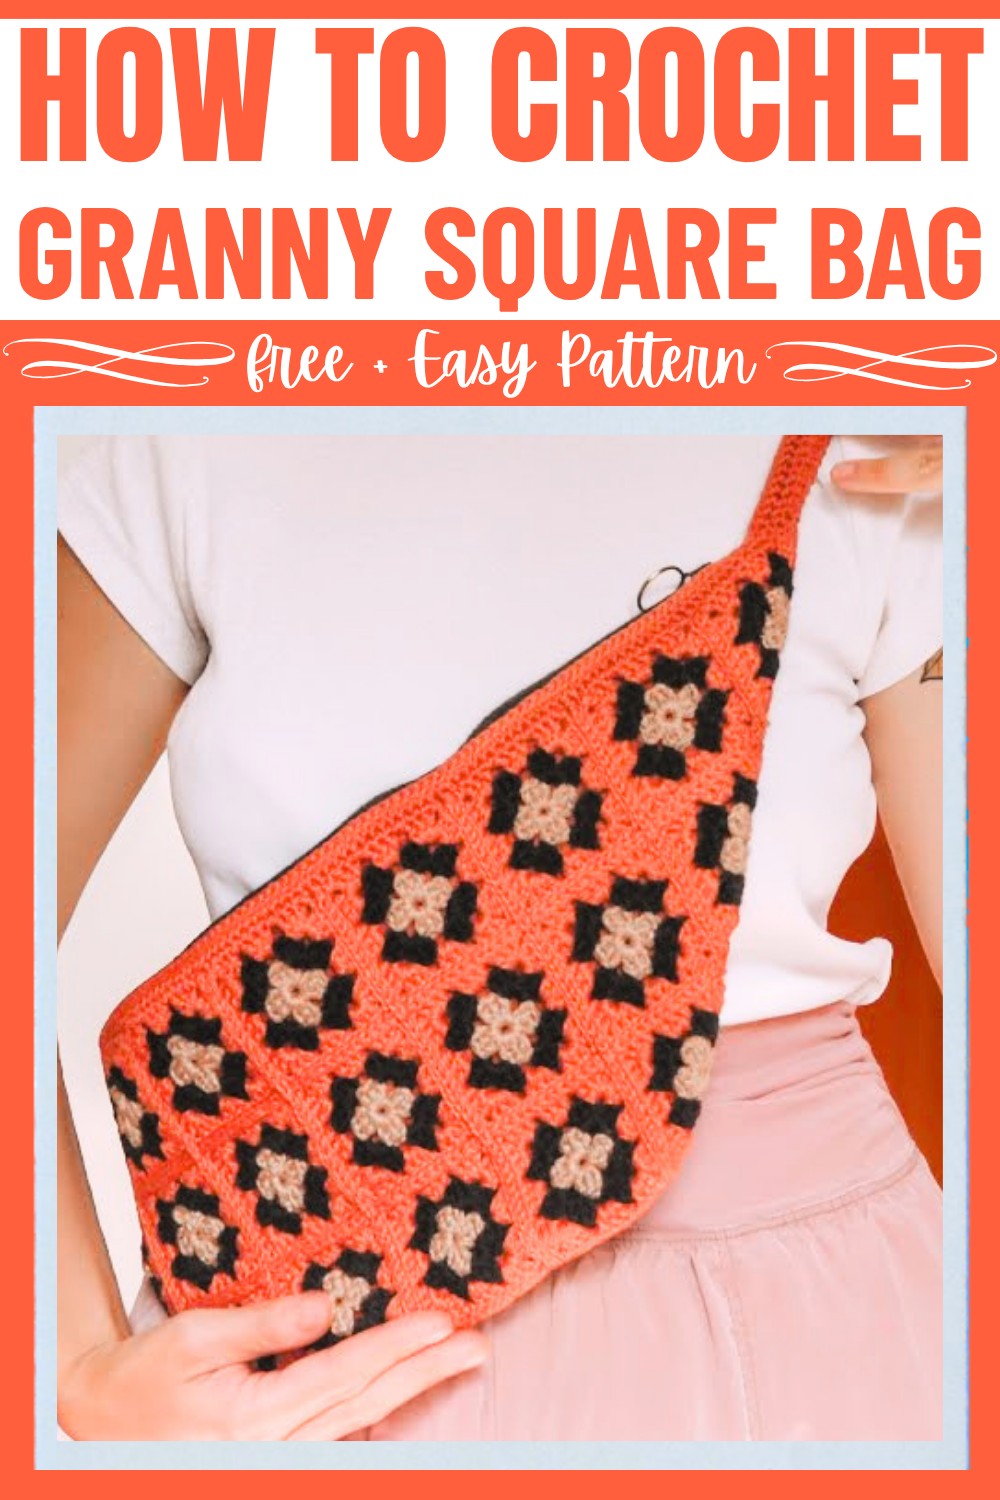
This crochet bag is made by creating 36 granny squares using three different yarn colors, then connecting them to form the body and sides. A simple handle is added to give it a crossbody or shoulder strap design. You can even add a lining and zipper if you want to keep your bag sturdy and safe for all your precious belongings. Plus, you can mix and match different color combinations to make a bag that’s unique to you.
This pattern is perfect for anyone wanting to learn how to crochet something useful and stylish. So grab your crochet hook, some pretty yarn, and follow the instructions below to bring this fun bag to life!
Credit Sasha and Crochet
Materials & Tools Needed
- Yarn: 3 colors of cotton yarn (similar to Amigurumi by Circulo, medium/fine weight).
- Main color: ~2 skeins.
- Accent colors: ~1 skein each.
- Hook: 3.5 mm crochet hook (or U.S. size “E”/6).
- Additional Tools:
- Small weaving/darning needle.
- Scissors.
- Optional: Super glue (to secure loose ends).
- Lining: Optional fabric for bag lining and zipper (if applicable).
Finished Size & Customization Ideas
- Bag dimensions: Approx. 36 squares total (sized as per a typical granny square bag: 15 squares each side + 6 for sides). The strap is designed to sit as a crossbody or sling bag; adjust strap length for personal preference.
- Customization Ideas:
- Use varied granny square colors for a patchwork-style bag.
- Replace zipper closure with buttons or a snap (if adding a lining isn't needed).
- Create larger squares for a bigger bag or fewer/smaller squares for a petite size.
Pattern Abbreviations & Terminology
U.S. Crochet Terms
- ch: Chain
- dc: Double Crochet
- sl st: Slip Stitch
- sc: Single Crochet
- hdc: Half Double Crochet
- rep: Repeat
- rnd: Round
Step-by-Step Detailed Crochet Instructions
Weaving a sling bag requires making 36 granny squares, connecting them using slip stitching, and adding a continuous strap. Below is a breakdown of the process.
Part 1: Making the Granny Square
Each granny square consists of 3 rounds. You will need to make 36 total squares.
Starting the Square:
- Foundation Circle:
- Create slip knot.
- ch 4, connect with sl st into first ch to form a ring.
- This creates a stronger foundation ring compared to a magic circle.
- Round 1: Base Round
- ch 5 (counts as 1 dc + 2 ch for corner).
- Into the center of the ring, work:
- 3 dc, ch 2 (this creates 1 corner).
- Rep 2 more times: 3 dc, ch 2.
- Finish with 2 dc (to complete the last set of 3 including the starting ch 3-dc).
- Sl st into the back loop of the top of the starting chain 3.
- Round 2: Add Color (if desired)
- Join new yarn with a slip knot (insert into any corner space).
- ch 5 (counts as 1 dc + 2 ch for corner), then:
- Into the next corner space: 3 dc, ch 2, 3 dc.
- Work ch 1, 3 dc into each side space (chain space between corner sets).
- For the final corner: 3 dc, ch 2, 2 dc.
- Sl st to beginning ch.
- Round 3: Final Round (optional third color)
- Repeat steps for corners and sides, ensuring smooth transitions on edges.
- Cut yarn, and weave ends with darning needle.

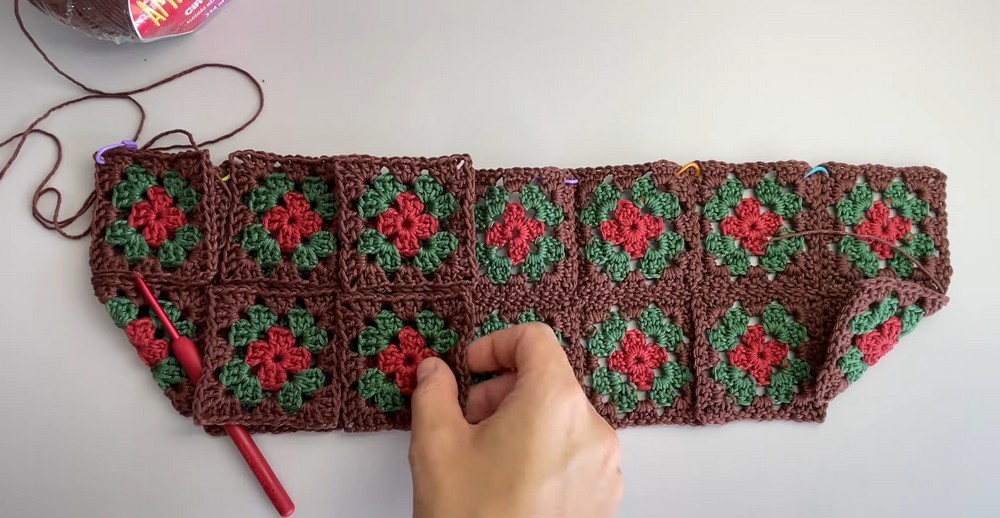
Part 2: Connecting the Granny Squares
You need 36 total squares:
- 15 for each side (front and back).
- 6 for the sides (to connect front and back and create depth).
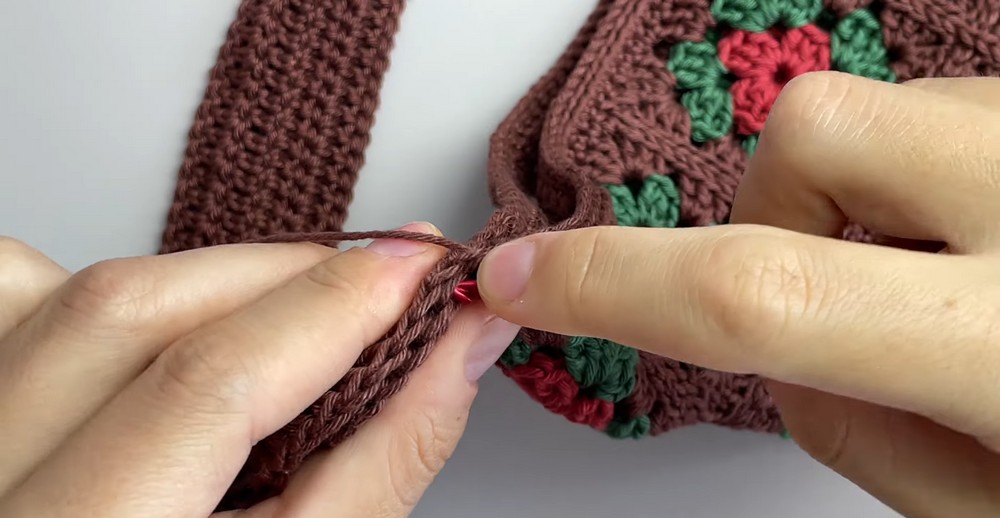
Slip Stitch Joining Method:
- Align two squares and hold them together with wrong sides facing.
- Insert hook into back loop only of both squares (corner chain on both sides).
- Pull yarn through both loops and work sl st across:
- Back loops of corner chains first.
- Back loops of dc stitches next.
- Maintain tension to form a seamless braided join.
- Continue joining squares horizontally and vertically, alternating joins between rows.
Positioning:
- First, slip stitch join all squares horizontally for front/back/sides.
- Next, join all squares vertically, ensuring folded edges form neat side sections.
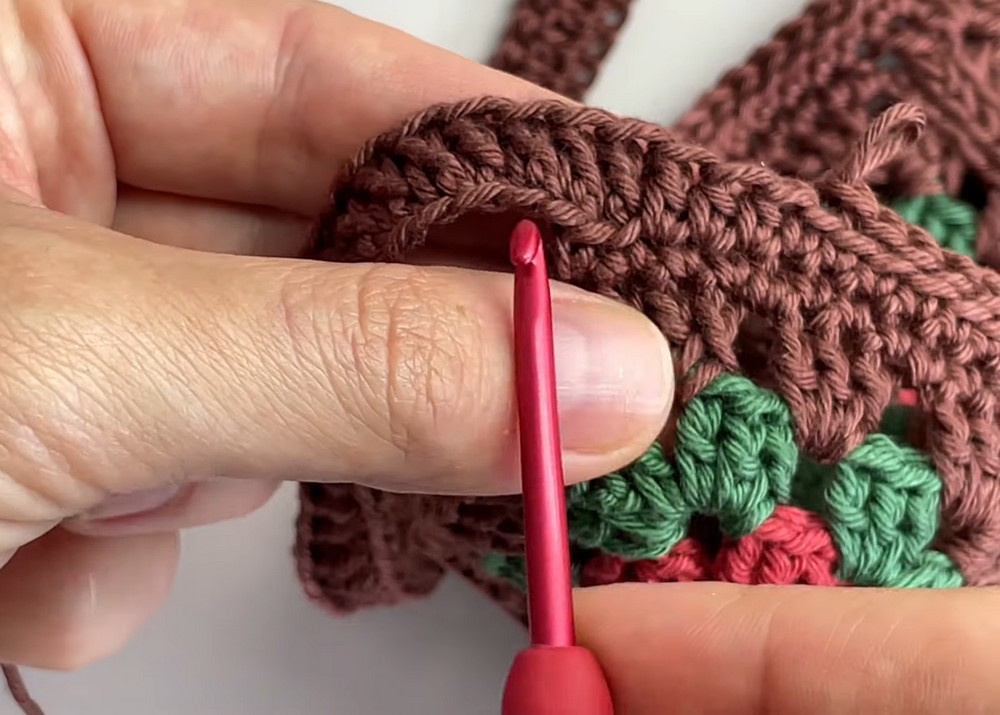
Part 3: Adding the Strap
The strap is a continuous piece worked into the top edges of the bag.
- Start with a slip knot. Insert hook into a side square edge (around the middle dc).
- Work single crochets all around the edge of the bag:
- Smooth dips with hdc and dc as needed between gaps (refer to dips in tutorial).
- For the strap:
- Once you reach the top corner of the bag, chain 120 (or desired strap length).
- Slip stitch back to opposite corner and work into loops only for neatness.
- Add a second round to reinforce the strap:
- Transition into hdc/dc as needed for smooth finishes on dips.
Part 4: Optional Lining and Zipper
While optional, lining the bag adds durability. Cut fabric to fit the inside of the bag. Seam edges with adhesive or sewing. Attach a zipper along the top edge following standard placement.
Finishing Techniques
- Weave in Ends: On all squares, strap, and connections. If desired, secure ends with super glue.
- Block Your Bag: Steam block for neat square alignment.
- Add lining/zipper if needed.
Customization and Notes
- Adjust dimensions by increasing or decreasing square sizes.
- You can swap a zipper for buttons or leave open for casual use.