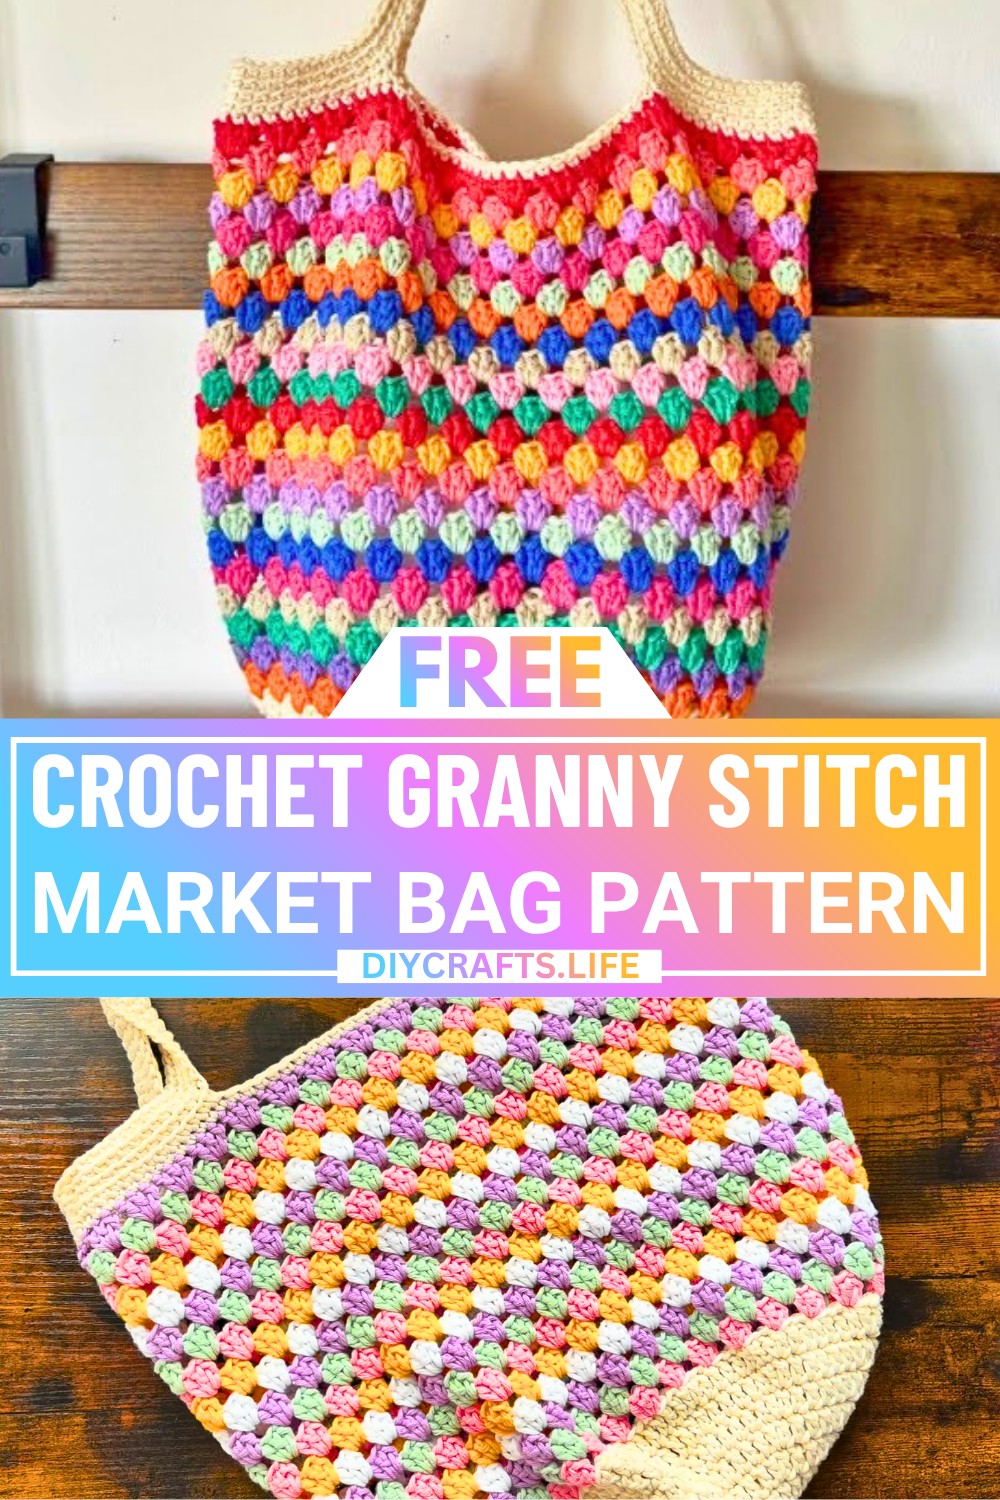
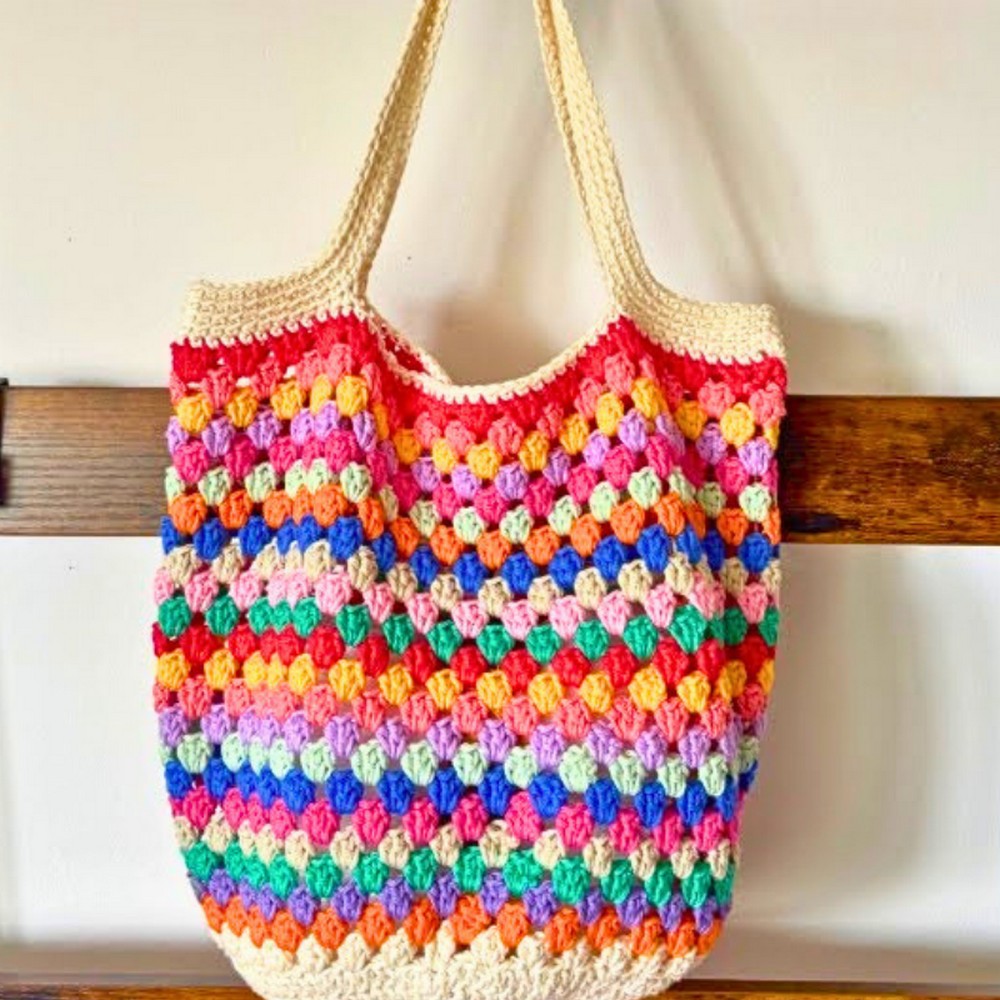
Looking for a stylish and reusable bag that’s both beautiful and practical? The Crochet Granny Stitch Market Bag is the perfect pick! With its colorful design and timeless crochet pattern, this lightweight bag is great for carrying groceries, books, or even your crafting supplies. It’s a durable and eco-friendly alternative to plastic bags, and it adds a cheerful splash of color to your daily errands.
Made using the popular granny stitch, this Crochet market bag is light yet sturdy, with a spacious base and comfortable handles. You can choose colors you love—pastels, bold tones, or even scrap yarn—making it a fun way to express your creativity. The simple stitch pattern builds up quickly, so it’s suitable for beginners looking to try something new. This bag is not only practical but also an enjoyable way to relax while crocheting.
Crdit Crafted by Cat
Materials & Tools Needed
- Yarn: Cotton Aran weight yarn (~100% cotton)
- Suggested brands: Drops Paris, Yarnsmith’s Aran, or Paintbox Cotton Aran.
- Amount: Approximately six 50g balls.
- Base and strap: ~50g
- Each granny stitch round: ~15g
- Hook: 5 mm crochet hook
- Scissors
- Darning needle (for weaving in ends)
- Optional: Stitch markers (to track the start of each round)
Finished Size & Customization Ideas
- Finished size: Adjustable based on the number of granny stitch rounds.
- Example from tutorial: 23 granny stitch rounds for a standard market bag size. You can increase or decrease the number of rounds based on your preference.
- Customization Ideas:
- Use pastel colors or bright scraps for unique designs.
- Alternate colors for each round, or use a single color for a cohesive design.
Pattern Abbreviations & Terminology
This pattern uses U.S. crochet terminology:
- ch: Chain
- st(s): Stitch(es)
- sl st: Slip stitch
- dc: Double crochet
- sc: Single crochet
- sk: Skip
- blo sc: Back Loop Only Single Crochet
- magic circle: Magic ring to begin the base
- cluster: A group of stitches worked into the same space
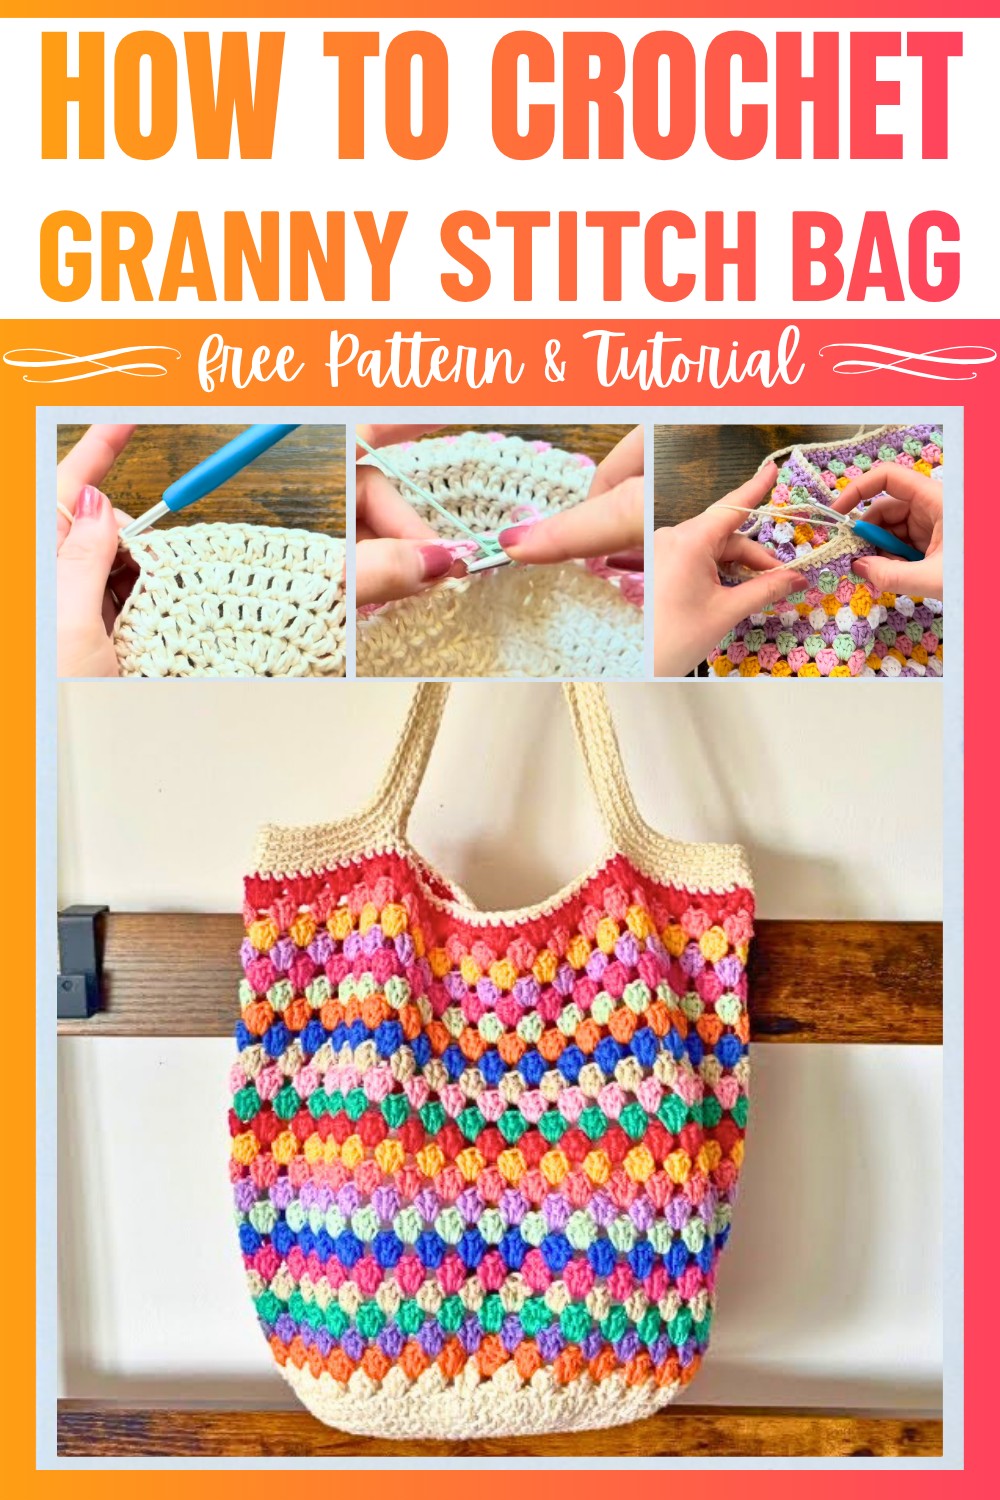
Step-by-Step Crochet Instructions
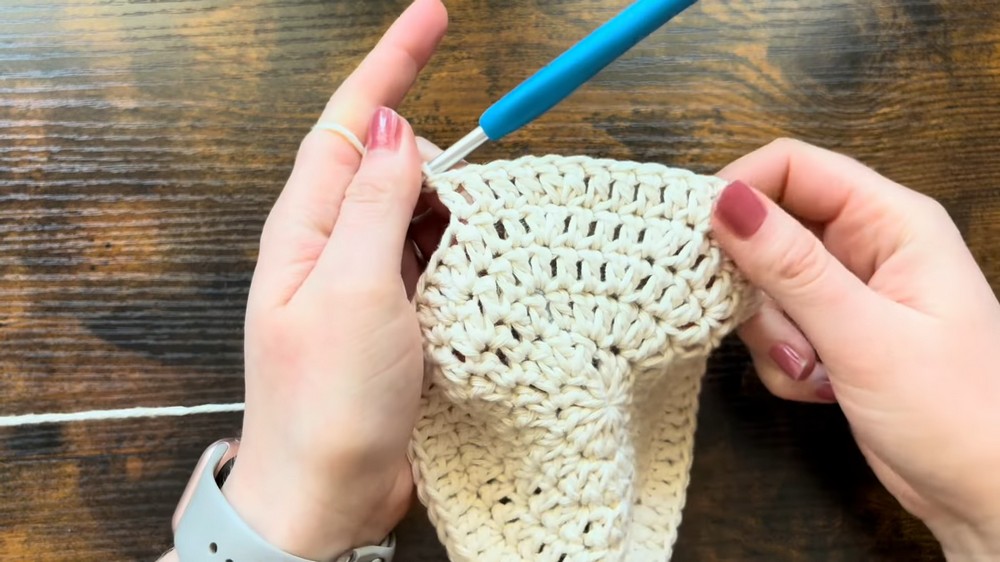
Base of the Bag
- Round 1:
- Start with a magic circle: Wrap yarn around fingers, cross it into an "X," insert hook under the first strand, pull up a loop, and twist the hook. Secure with a chain.
- Ch 2 (counts as the first dc).
- Work 11 dc into the magic circle (12 total stitches including the ch-2).
- Pull the tail to close the magic circle.
- Work continuously into rounds (do not join with a sl st).
- Round 2:
- 2 dc into each st around (starting with the top of the ch-2 from the previous round).
- Place a stitch marker to mark the beginning of the round.
- Total stitches: 24 dc
- Round 3:
- Pattern: 2 dc into the first st, 1 dc into the next st. Repeat all the way around.
- Total stitches: 36 dc
- Round 4:
- Pattern: 2 dc into the first st, 1 dc into the next 2 sts. Repeat all the way around.
- Total stitches: 48 dc
- Round 5:
- Pattern: 2 dc into the first st, 1 dc into the next 3 sts. Repeat all the way around.
- Total stitches: 60 dc
- Round 6:
- Pattern: 2 dc into the first st, 1 dc into the next 4 sts. Repeat all the way around.
- Total stitches: 72 dc
- Round 7:
- Pattern: 2 dc into the first st, 1 dc into the next 5 sts. Repeat all the way around.
- Total stitches: 84 dc
- Round 8:
- Pattern: 2 dc into the first st, 1 dc into the next 6 sts. Repeat all the way around.
- Total stitches: 96 dc
- Fasten off:
- Remove the marker, sl st to the first st to close the round, and fasten off.
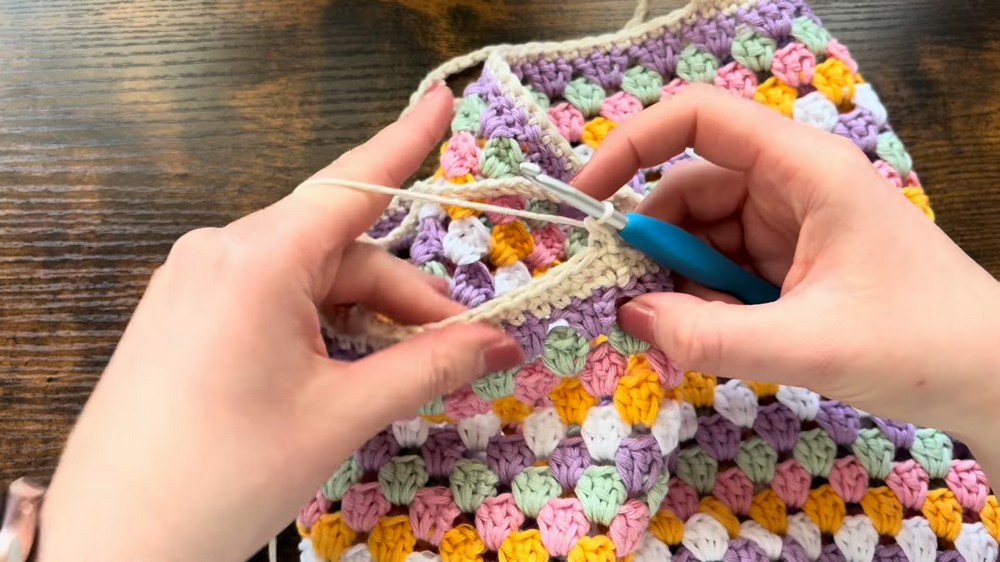
Granny Stitch Panel
- Join Yarn:
- Attach your first color yarn to the area where you fastened off using a sl st.
- Granny Stitch Round 1:
- Ch 3 (counts as the first dc).
- Work 2 dc in the same st to form the first cluster.
- Sk 2 sts, then work 3 dc into the next st.
- Repeat the pattern (sk 2 sts, 3 dc in next st) around.
- When 2 sts remain, sl st to the top of the ch-3 to close the round. Fasten off.
- Granny Stitch Round 2:
- Change to a new color (optional).
- Join yarn in the space between clusters from the previous round with a sl st.
- Ch 3, 2 dc in the same space.
- Work 3 dc in the space between each cluster from the previous round. Repeat all around.
- Sl st to the top of the ch-3 to finish the round. Fasten off.
- Repeat Granny Stitch Rounds:
- Continue working granny stitch rounds (changing colors as desired) until you reach 23 rounds, or the desired length.
- Fasten off and weave in ends.
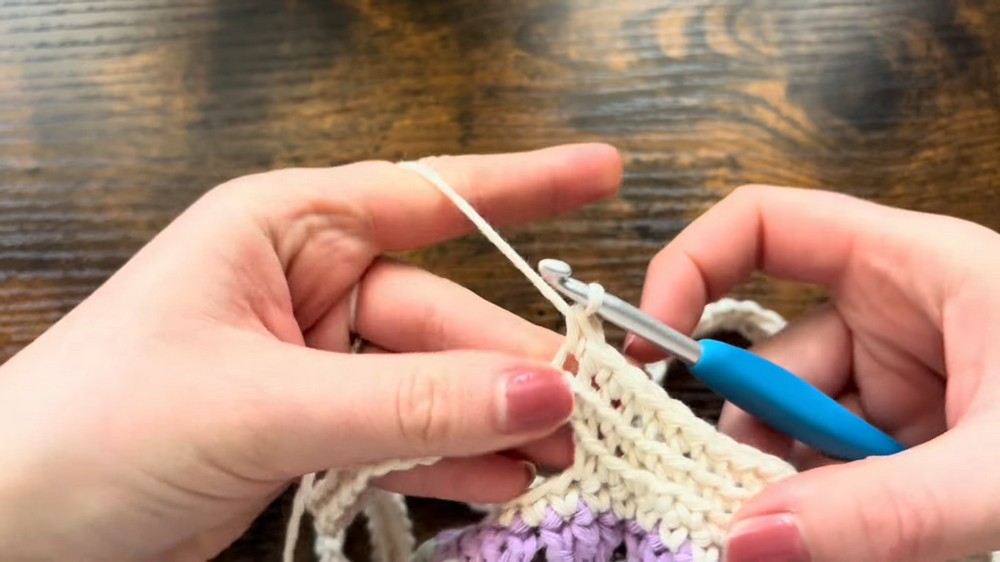
Top Border & Handle
- Single Crochet Border:
- Join yarn at the place where you fastened off your granny stitch rounds.
- Ch 1 (does not count as a stitch).
- Work 1 sc into each st around the top edge of the bag.
- Sl st to the first sc.
- Handles:
- Work single crochets: Sc into the next 12 sts.
- Chain for the handle: Ch 55, then sk 23 sts, and join with an sc into the 24th st.
- Continue sc: Sc into the next 24 sts.
- Repeat handle: Ch 55, sk 23 sts, and join with an sc into the 24th st.
- Sc into the remaining 12 sts.
- Sl st to the first sc and fasten off.
- Strengthen Handles (Optional Rounds):
- Add 2 additional rounds of blo sc (back loop only single crochets):
a. Work 1 blo sc in each stitch around, including the chains forming the handle.
b. Sl st to the first sc and repeat for a second round.- Fasten off and weave in all ends.
- Add 2 additional rounds of blo sc (back loop only single crochets):
Finishing Touches
- Weave in all loose ends neatly using a darning needle.
- Block the bag if necessary to shape it properly.
- Your Granny Stitch Market Bag is now complete!