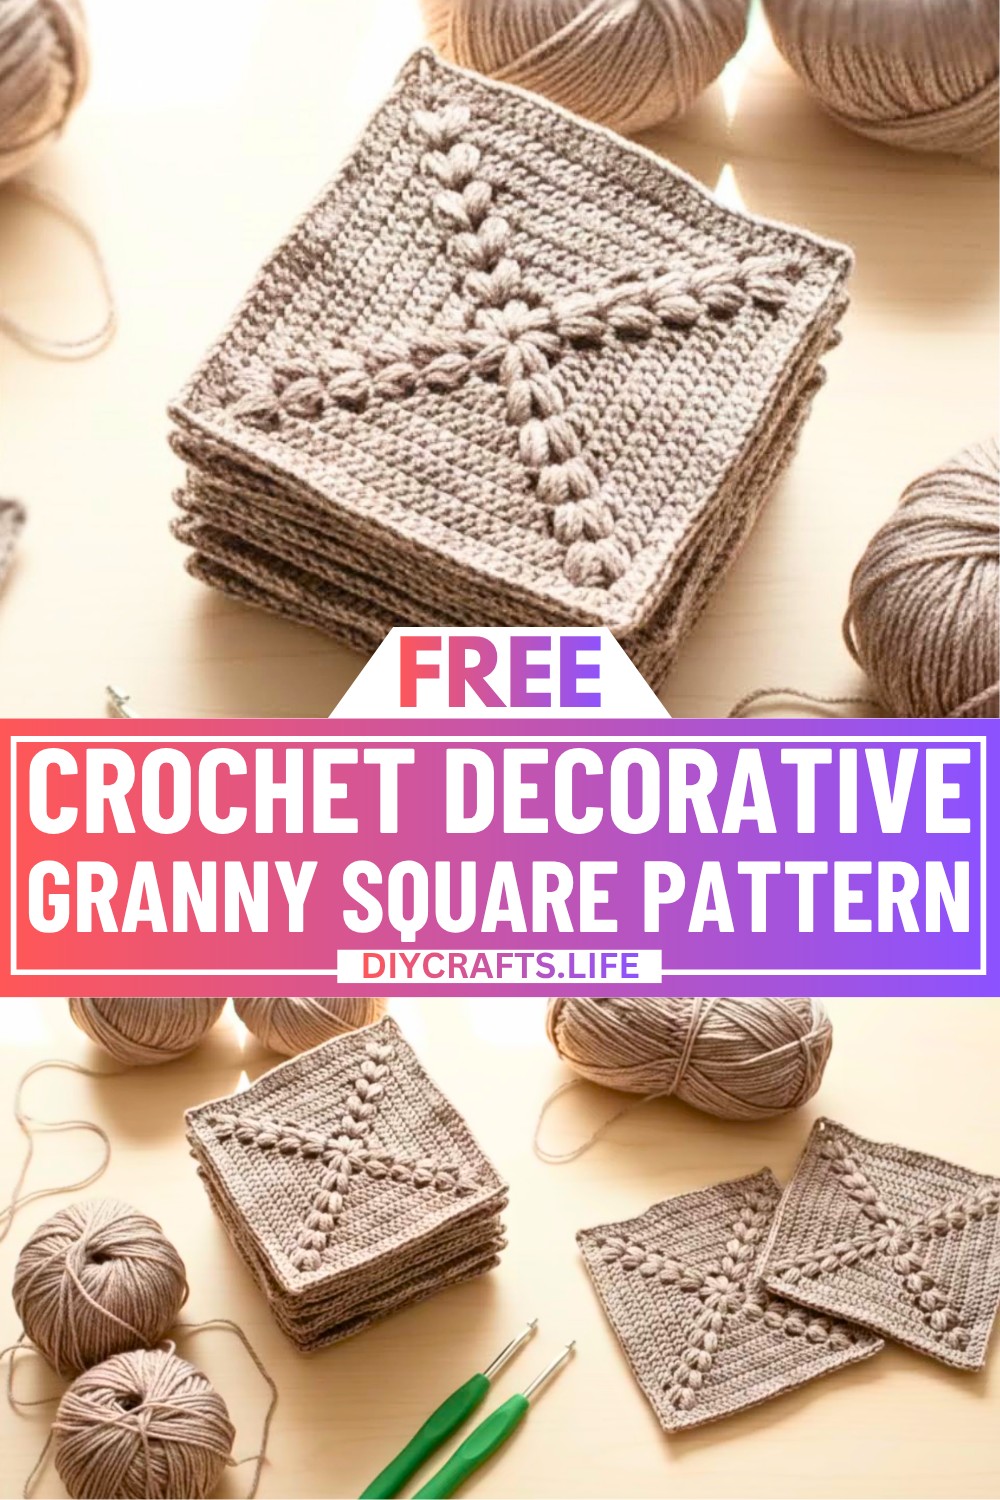
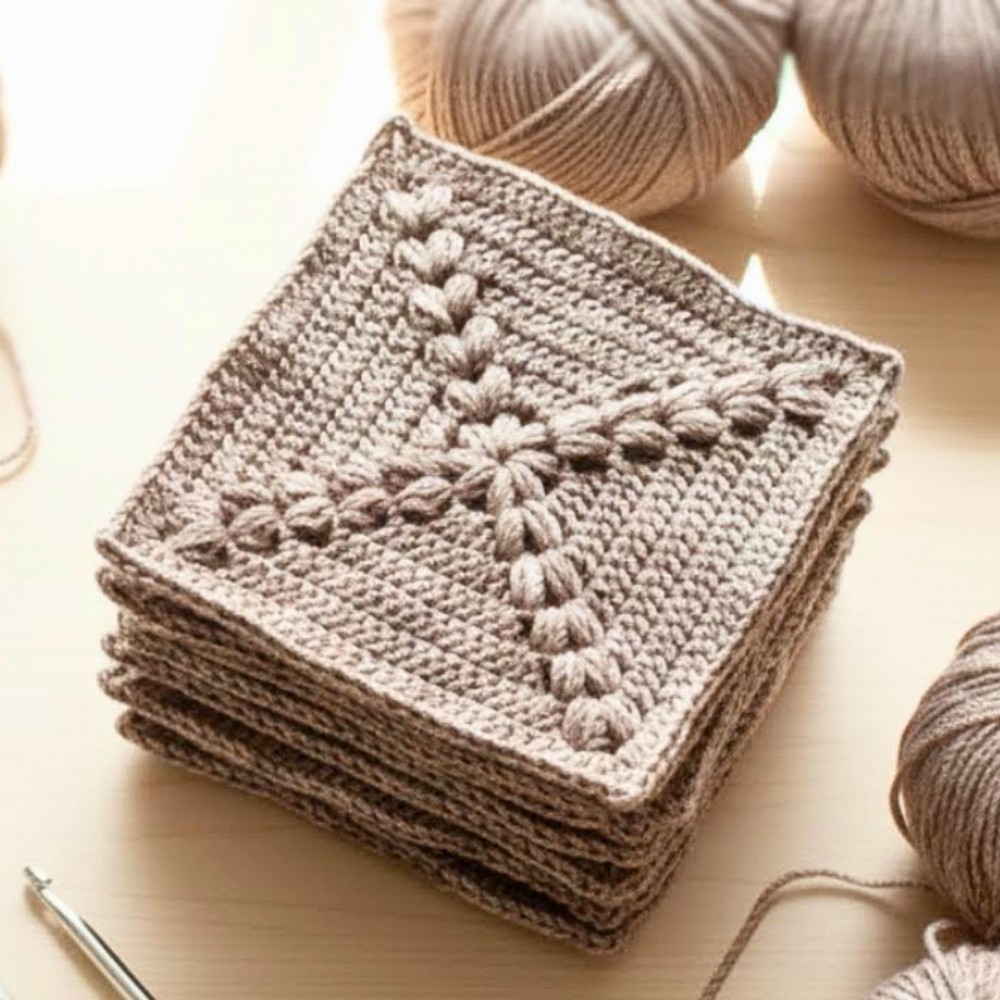
A decorative granny square is a lovely creation that combines beauty and versatility. With its puff stitches and intricate design, this pattern stands out for its elegance. Whether you want to make cozy blankets, unique pillow covers, or stunning wall hangings, this charming square can add a special touch to your space or gift ideas.
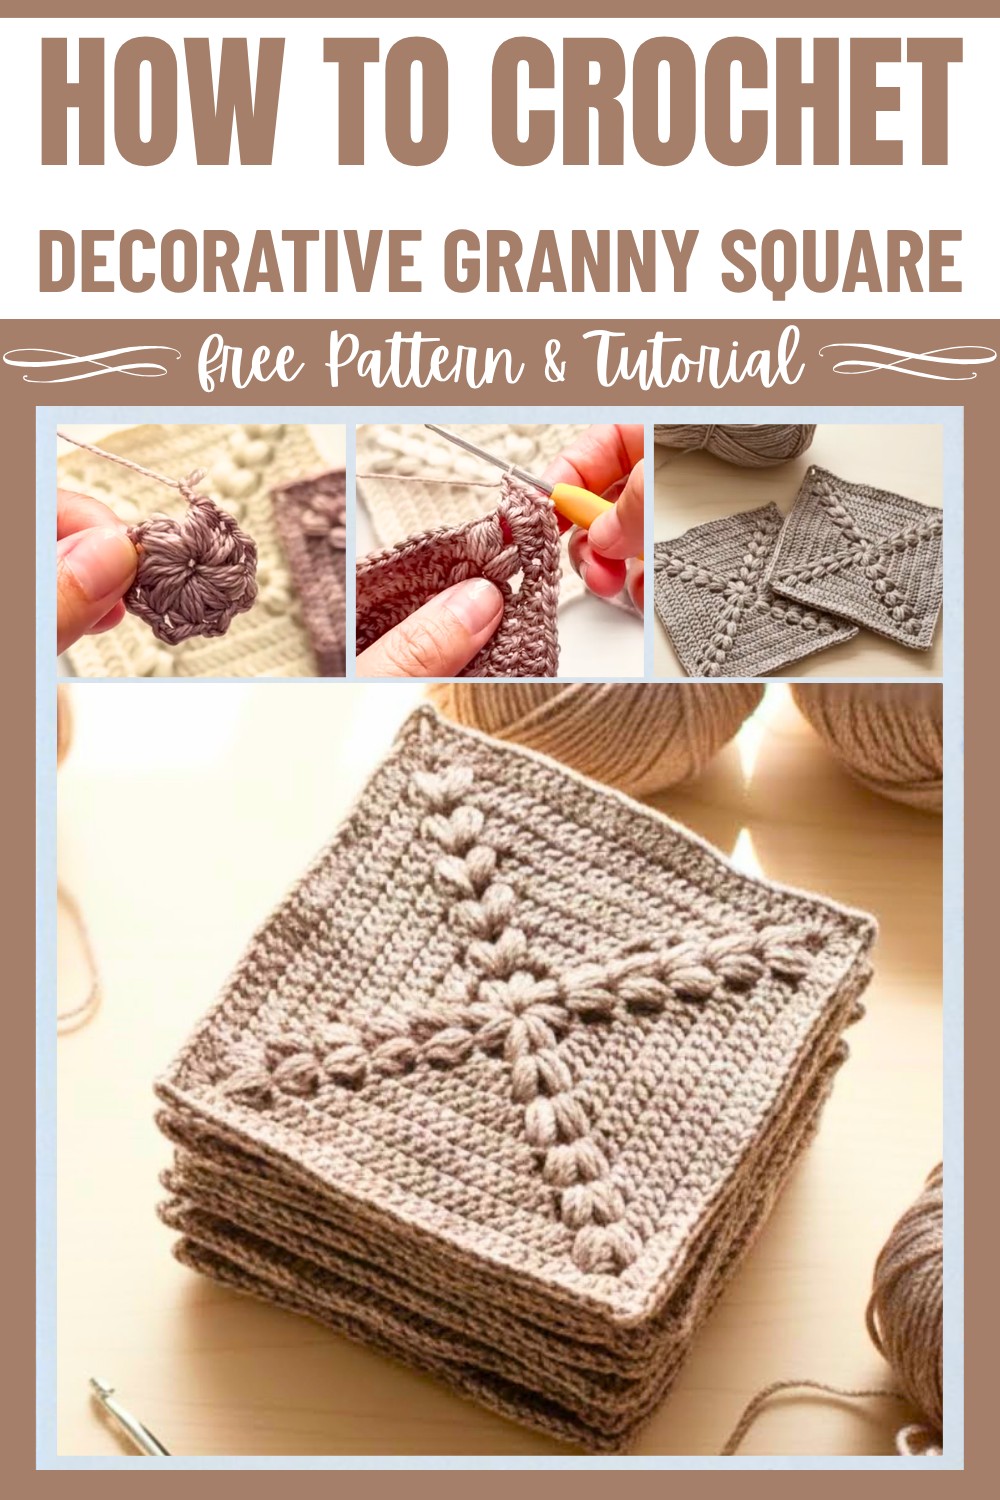
The process is simple yet stunning—a combination of puff stitches, double crochets, and neat corners creates its signature look. You’ll be amazed by how beautifully the edges grow with every round, making it customizable to any size. The bright idea behind this tutorial is a progress bar at the bottom of the video, showing each row and making it easy to pause and pick up again anytime. Simply grab your yarn and hook, and watch the square bloom into something both functional and beautiful.
Credit Tasty Dumpling Living
Materials & Tools Needed
- Yarn: Choose a medium-weight yarn in any color or combination for customization.
- Crochet Hook: Use a size appropriate for your yarn (typically recommended on the yarn label).
- Scissors: To cut off your yarn at the end of the project.
- Tapestry Needle: For weaving in ends.
Finished Size & Customization Ideas
- The finished size of the granny square depends on the number of rounds you complete. With basic rounds (example from the video), you create a small decorative square ideal for coasters, motifs, or assembling into larger projects.
- Customization Ideas:
- Change yarn colors between rows to add contrast.
- Use bulkier yarn for larger squares, perfect for pillows or blankets.
- Add additional rounds to increase size.
Pattern Abbreviations & Terminology
- ch: Chain
- sl st: Slip Stitch
- dc: Double Crochet
- puff st: Puff Stitch
- sp: Space
- Rnd: Round
Step-by-Step Detailed Crochet Instructions
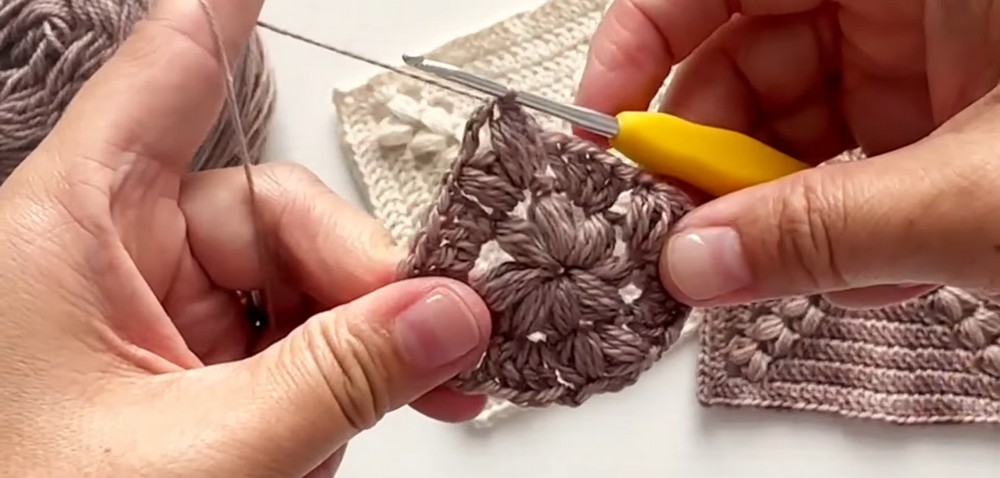
Round 1: Begin the Center with Puff Stitches
- Slip Knot & Chain 6: Start with a slip knot. Chain 6 (ch 6).
- Make a Loop: Slip stitch (sl st) into the first chain to form a ring.
- Foundation Chain: Chain 3 (ch 3). This counts as the starting height of the puff stitch section.
- Create 8 Puff Stitches:
- Yarn over and insert hook into the ring.
- Pull up a loop (repeat this 3 more times for a total of 4 loops on the hook).
- Yarn over and pull through all loops on the hook.
- Chain 3 (ch 3) to separate the puff stitches.
- Repeat 7 more times for a total of 8 puff stitches.
- Close the Round: Slip stitch into the top of the first puff stitch.
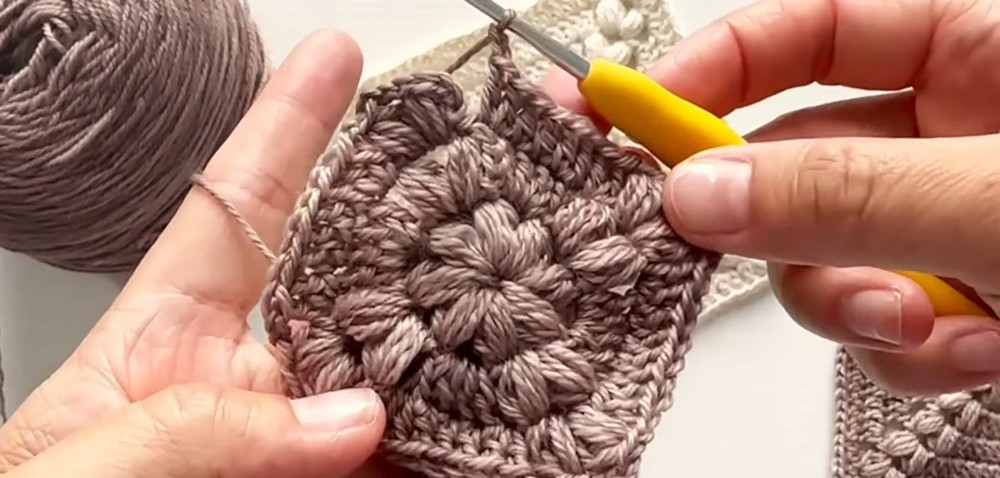
Round 2: Forming the Corners
- Start the Round: Slip stitch into the adjacent chain-3 space.
- Foundation Chain: Chain 3 (ch 3).
- First Corner Puff Stitch:
- Make one puff stitch.
- Chain 3 (ch 3).
- Add a second puff stitch in the same chain-3 space.
- Chain 2 (ch 2) to finish the corner.
- Next Side – Double Crochets:
- In the next chain-3 space, work 4 double crochets (dc) in the space.
- Chain 2 (ch 2) to separate sections.
- Repeat Steps 3 & 4: Create the next corner with 2 puff stitches (separated by ch 3, followed by ch 2) and fill the next chain space with 4 double crochets.
- Complete the Round: Work all corners and sides. End with a slip stitch in the top of the first puff stitch to close.
Round 3: Expanding with Double Crochets
- Start the Round: Slip stitch into the nearest chain-3 space.
- Foundation Chain: Chain 3 (ch 3).
- First Corner Puff Stitch:
- Create 1 puff stitch, chain 3, then the second puff stitch.
- Chain 2 (ch 2) to complete the corner.
- Side Expansion:
- Work 2 double crochets (dc) into the chain-2 space before the main side section.
- Work double crochets across all previous 4 dc (total of 4 dc).
- Work another 2 dc in the next chain-2 space.
- Chain 2 (ch 2) to separate sections.
- Repeat Steps 3 & 4: Create all corners and expand all sides accordingly.
- Complete the Round: Slip stitch into the first puff stitch.
Round 4 and Beyond: Increasing
- Corners:
- Work 2 puff stitches (separated by ch 3) in each corner space.
- Chain 2 (ch 2) to separate each section.
- Sides:
- For every new round, add 2 double crochets in the chain-2 gaps before and after the central double crochets on each side.
- The number of central double crochets increases by 4 with each round.
- Chain 2 (ch 2) to separate sections.
- Repeat: Continue working all corners and sides.
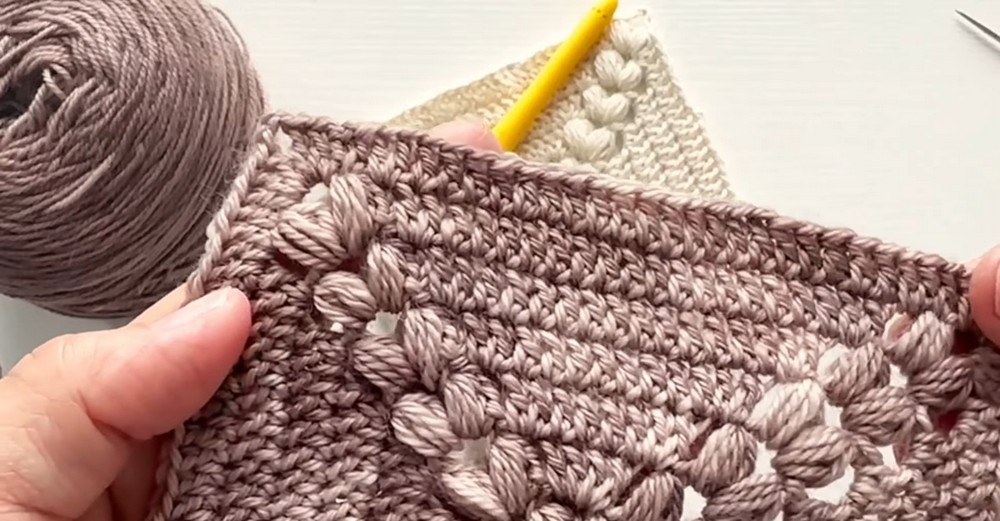
Final Round – Decorative Edge
- Start the Round: Slip stitch into a corner.
- Corners:
- Work 3 double crochets (dc), followed by chain 3 (ch 3), and another 3 double crochets (dc) into the same corner space.
- Sides:
- Work double crochets (dc) into all stitches on the side.
- Add 2 double crochets in each chain-2 space.
- Replace puff stitches with 1 double crochet on top.
- Complete the Round: Work all remaining corners and sides. Slip stitch into the starting chain-3 to finish.
- Fasten Off: Cut the yarn and use a tapestry needle to weave in ends.
Finishing Techniques
- Weaving Ends: Use a tapestry needle to secure and hide thread ends on the backside of your square.
- Blocking (Optional): Lightly block the square to ensure it lays flat and the stitches are evenly shaped.