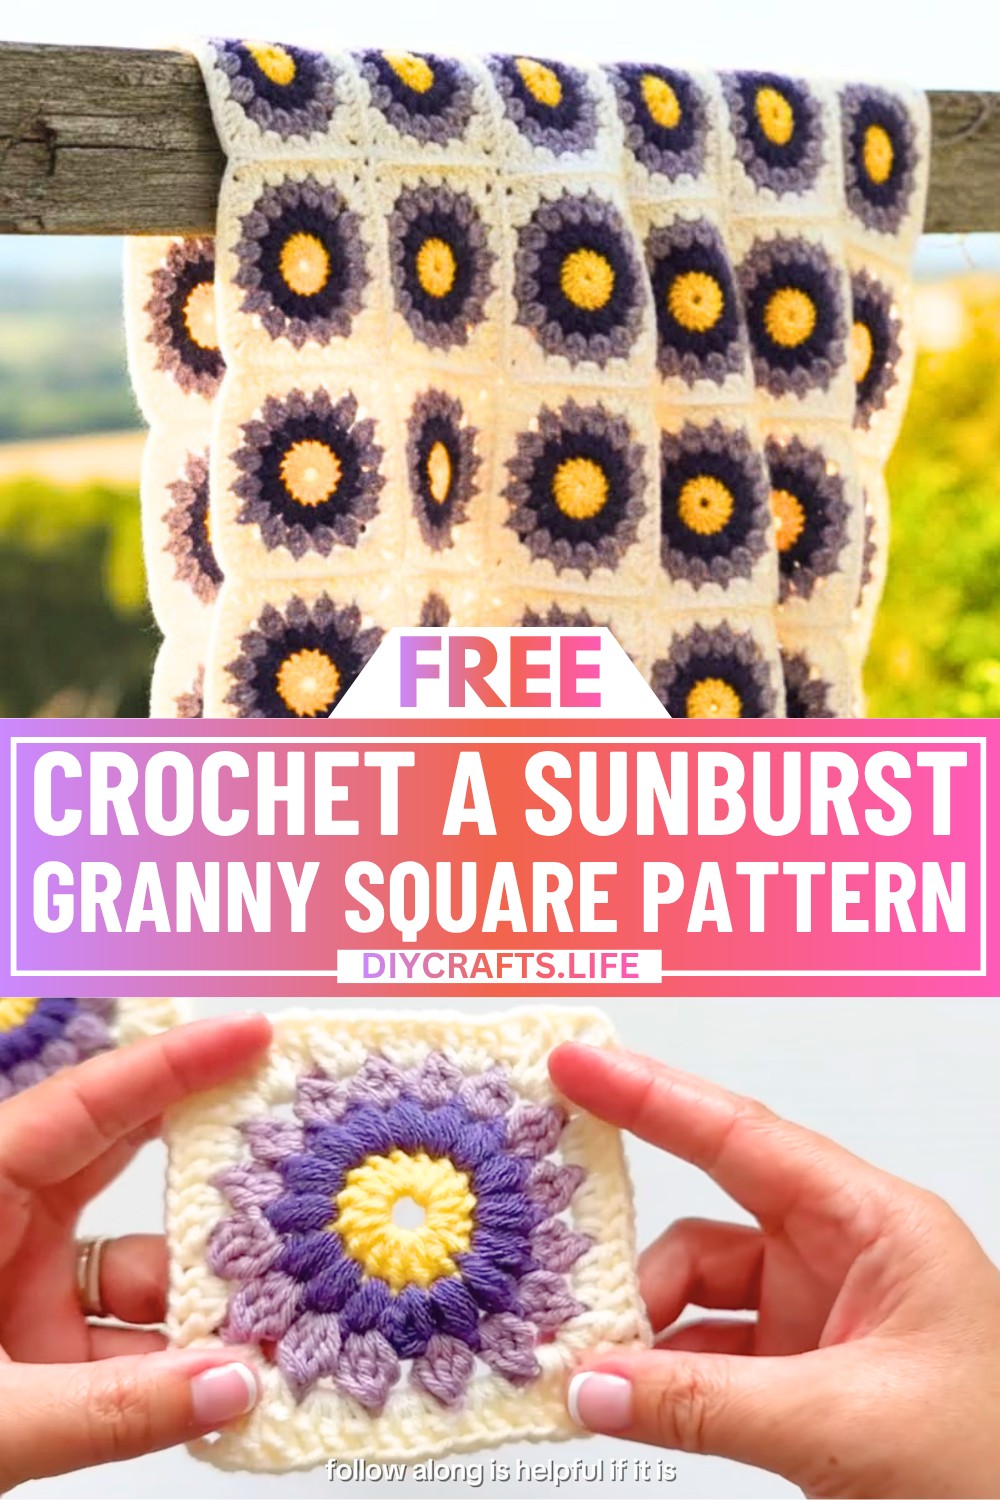
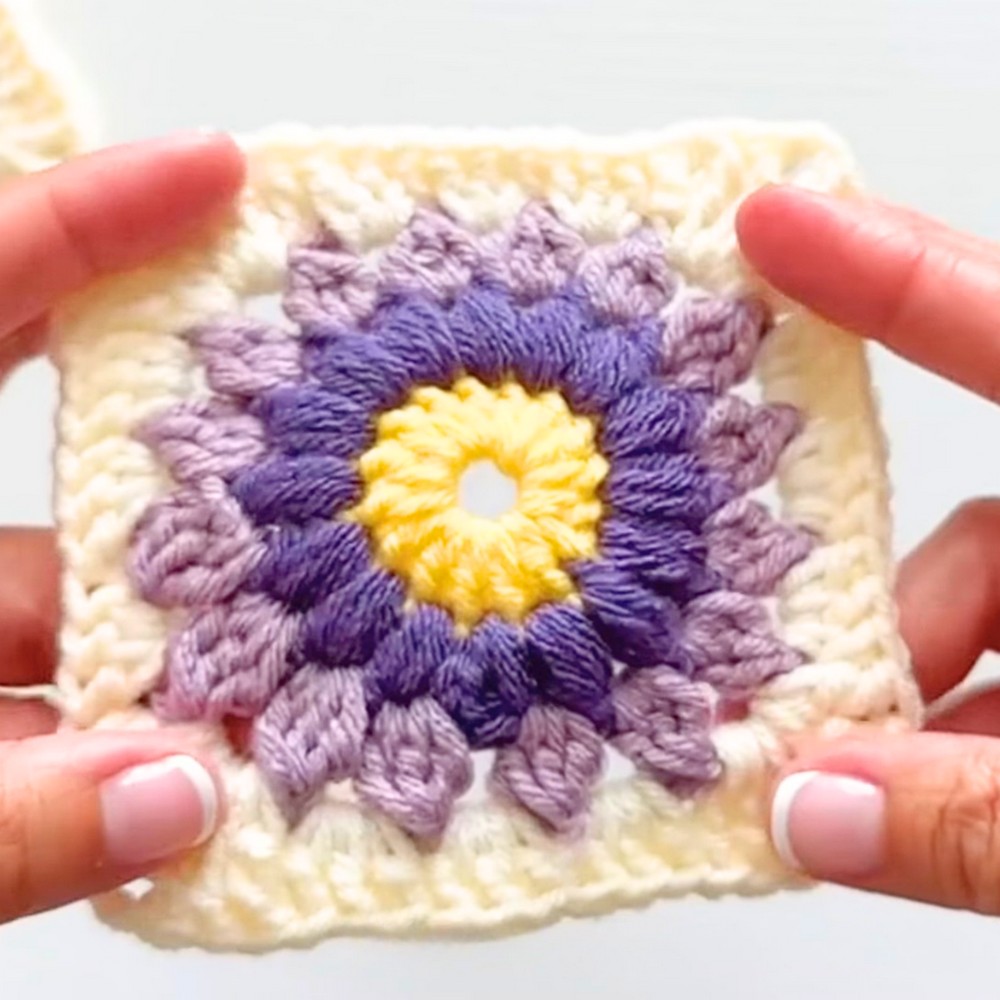
A sunburst granny square is a bright and cheerful crochet design made of soft layers, radiating outward like rays of sunshine. With its lively colors and textured stitches, it’s perfect for adding a touch of warmth and charm to almost anything. You can use sunburst granny squares to create cozy blankets, decorative pillows, or even small bags and unique wearables. Their versatility and uplifting look make them a joy to make and use.
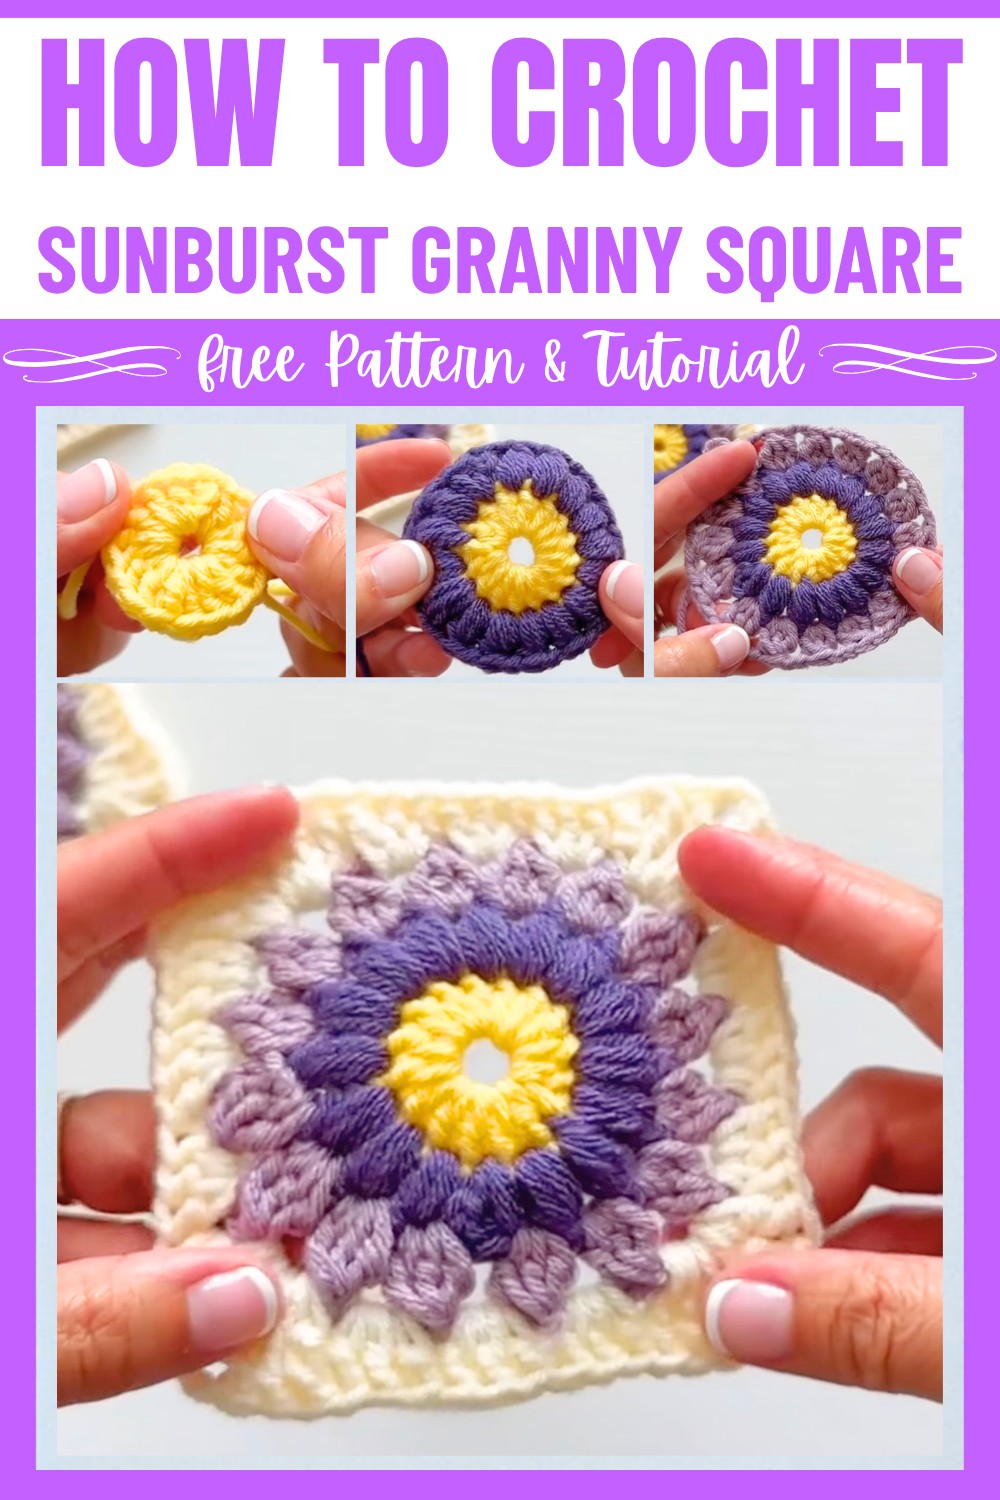
Creating this granny square is a step-by-step process where you’ll combine beautiful stitches to form a structured yet delicate design. The tutorial takes you through the rounds, blending colors to give the square its "sunburst" effect. Even for beginners, the guide is approachable since each stitch and round is broken down clearly. This pattern is an excellent way to enjoy crochet while building something lovely and useful.
Credit Tasty Dumpling Living
Materials & Tools Needed
- Yarn: Medium-weight yarn of your choice (the tutorial uses yarn compatible with a 3–3.5 mm crochet hook).
- Hook: 3 mm crochet hook (the tutorial uses this to achieve a tighter square).
- Additional Tools:
- Scissors.
- Tapestry needle (for finishing).
Finished Size & Customization Ideas
- The finished size of the square varies depending on your yarn thickness and hook size. If using the same tools as the video (3 mm hook), the square will be compact and suitable for projects like bags or blankets.
- Customization Ideas:
- Use different colors for each round to create a vibrant effect.
- Join multiple squares for larger projects like throws or garments.
Pattern Abbreviations & Terminology
- Magic Ring: A loop of yarn used to begin crochet in the round.
- CH: Chain.
- DC: Double Crochet.
- SL ST: Slip Stitch.
- HDC: Half Double Crochet.
- BOBBLE: Cluster stitches worked together (explained below).
- TC: Treble Crochet.
Note: The pattern uses U.S. crochet terminology.
Step-by-Step Detailed Crochet Instructions
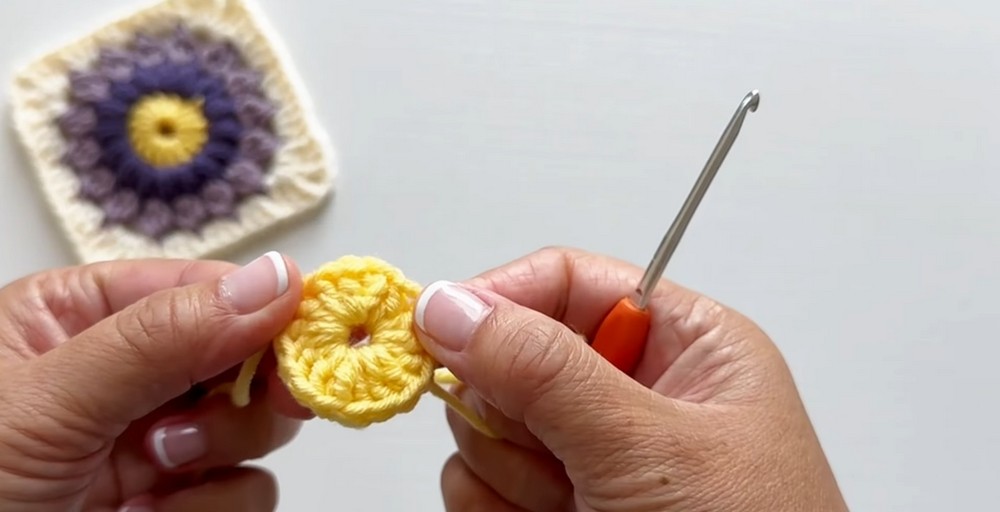
Round 1: Foundation
- Create a magic ring. Tighten but leave space to crochet into the loop.
- CH 3 (counts as the first DC).
- Crochet 15 DC into the magic ring. (Total stitches = 16, including CH 3).
- DC explanation: Yarn over, insert the hook into the magic ring, pull up a loop (3 loops on hook), yarn over, pull through 2 loops, yarn over, pull through last 2 loops.
- Tighten the center of the magic ring by pulling the tail.
- Connect the round with a SL ST into the top of the CH 3.
- Cut the yarn and fasten off.
(Tip: Work the loose end into the stitches to save time sewing them in later.)
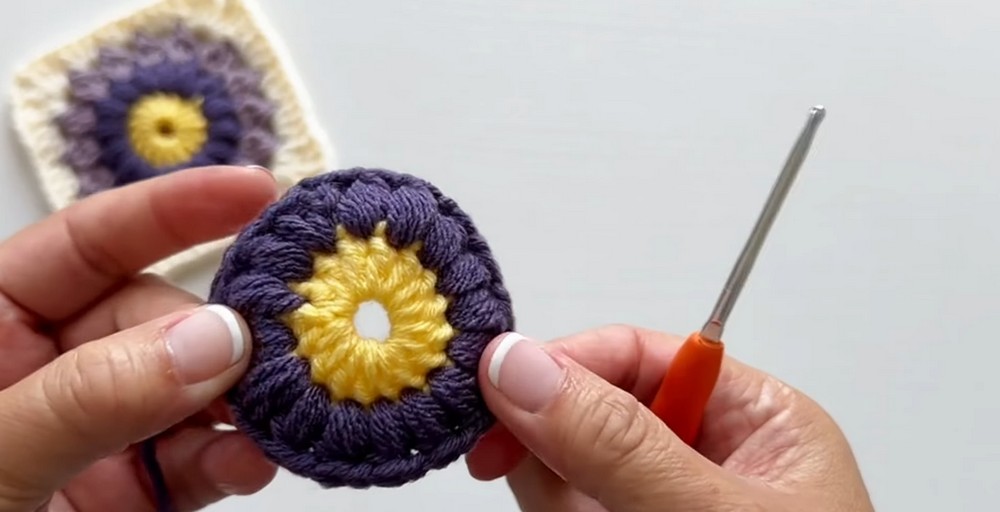
Round 2: Half Double Bobble Stitches
- Attach a new color with a SL ST into any CH space from Round 1.
- CH 3 (counts as part of the first Half Double Bobble stitch).
- Yarn over, and insert the hook into the same stitch. Pull up a loop (3 loops).
- BOBBLE Stitch:
- Yarn over, pull up a loop again (5 loops).
- Yarn over, pull through all loops on the hook.
- CH 1 to secure the BOBBLE stitch.
- Repeat in each stitch:
- Yarn over, insert hook into the next stitch, pull up a loop.
- Yarn over, repeat twice more into the same stitch (total 5 loops).
- Yarn over, pull through all loops, then CH 1 to finish each bobble.
- Complete 16 bobble stitches total, working into every stitch from Round 1.
- Join the round with a SL ST into the CH 3 of the first bobble stitch.
- Fasten off and secure your tail end.
Round 3: Double Crochet Bobble Stitches
- Attach a new color in any space between two bobbles from Round 2.
- CH 3 (counts as part of the first DC bobble).
- Yarn over, insert the hook into the same space, pull up a loop.
- DC Bobble Stitch:
- Yarn over, pull through 2 loops, leaving loops on the hook.
- Repeat until there are 4 loops total on the hook.
- Yarn over, pull through all 4 loops.
- CH 2 to create space between bobbles.
- Repeat in every gap between bobbles:
- Work 3 unfinished DC into the gap (4 loops on hook).
- Yarn over, pull through all loops, CH 2.
- Complete 16 DC bobble stitches total, working around the entire round.
- Join the round with a SL ST into the CH 3 of the first bobble.
- Fasten off and secure the tail end.
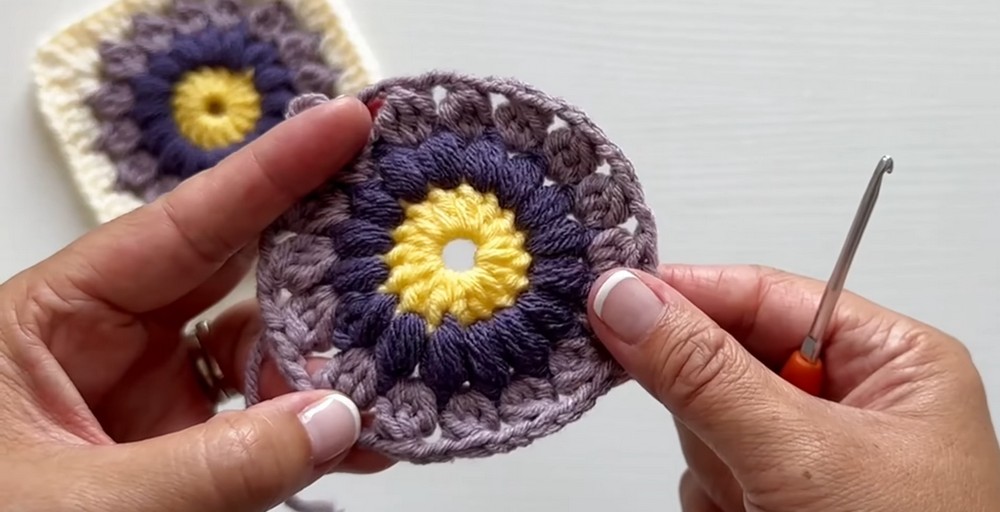
Round 4: Straight Edges and Corners
- Attach a new color into any gap between bobbles from Round 3 with a standing TC:
- Make a slip knot, yarn over twice, insert into the gap, pull up a loop (4 loops).
- Yarn over and pull through 2 loops on the hook. Repeat twice more.
- Complete the corner:
- Crochet 2 more TC into the same space.
- CH 2, then crochet 3 TC into the same gap.
- Move to the side:
- Work 3 DC into each of the next three gaps along the edge.
- Create the next corner:
- Crochet 3 TC, CH 2, 3 TC into the same gap.
- Repeat the pattern (Corners = TC clusters, Sides = DC clusters) around the square.
- Complete the round by joining with an invisible join using your tapestry needle:
- Thread the needle through the second TC of the first corner.
- Insert back into the last stitch from front to back through the middle back loop.
- Adjust the stitches to match size and finish by securing the tail end.
Finishing Techniques
- Weave and secure any remaining loose ends on the back of the square.
- Block the square if necessary to keep it even and neat.
Customization Options
- Change Colors: Swap colors between rounds to create vibrant designs.
- Expand the Pattern: Add additional rounds with double crochet clusters to make the square larger.
- Joining Squares: Use slip stitching or sewing to join multiple squares for blankets, bags, or garments.