
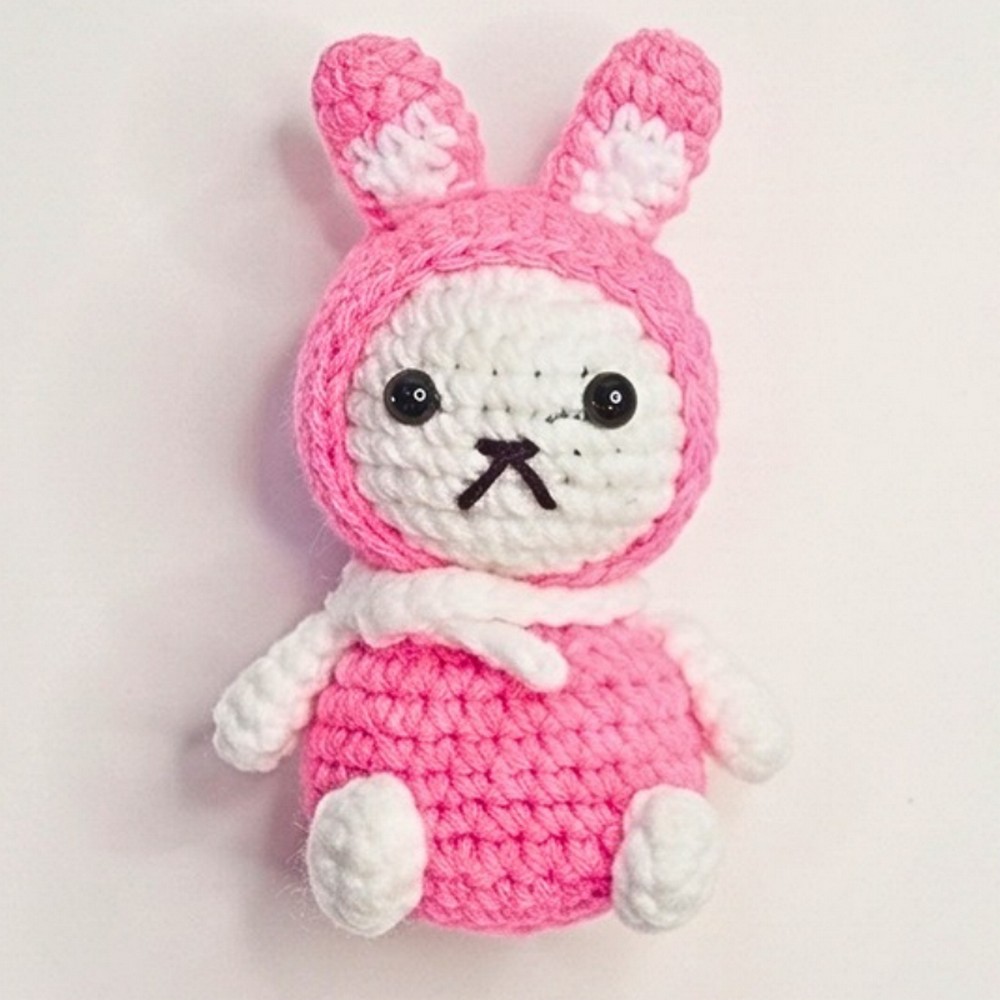
A tiny crochet bunny keychain amigurumi can brighten everyday moments most sweetly. This crochet bunny keychain is small enough to tag onto your keys, bag, or backpack. While adding a playful handmade touch wherever it goes.
Its round shape, floppy ears, and cheerful look make it a delightful piece that's just as fun to display as it is to carry. The pattern below walks you through each stage, making it easy to bring this little bunny to life.

Every few crochet stitches, the bunny starts showing more personality, turning simple yarn into an adorable pocket-sized companion. The steps are clear, beginner-friendly, and easy to follow without feeling overwhelming. While experienced crocheters can enjoy a quick and relaxing make. By the end, you'll have a charming amigurumi keychain that's perfect for gifting, collecting, or keeping close as a handmade favorite.
Credit Mangleasy
Materials & Tools Needed
- Yarn
- Color A: White/Cream (bunny head, hands, tail)
- Color B: Contrast color for outfit/hood, shoes, and ears
- Color C: Accent color (scarf)
- Acrylic or cotton yarn (medium-weight or fine/sport for a smaller size)
- Crochet Hook: 2.0 mm to 2.5 mm (to keep stitches tight)
- Fiberfill Stuffing
- Safety Eyes: 5 mm–6 mm or black embroidery thread
- Yarn Needle & Embroidery Needle
- Keychain Ring/Hardware
Finished Size & Customization Ideas
- Size: ~2.5–3 inches tall (excluding ears), ideal for keychains or bag charms.
- Customization Ideas:
- Add blush using makeup/fabric marker.
- Adjust hood ears to create a bear, cat, or frog design.
Abbreviations & Terminology (US Terms)
-
MR: Magic Ring
-
ch: Chain
-
sl st: Slip stitch
-
sc: Single crochet
-
inc: Increase (2 single crochet in the same stitch)
-
dec: Decrease (single crochet two stitches together using the invisible decrease method)
-
BLO: Back Loop Only
-
FLO: Front Loop Only
-
[ ] x 6: Repeat instructions inside the brackets the specified number of times.
-
ST count: Indicated in parentheses at the end of each round (e.g.,
(12))
Note on Construction: Each round is joined with a slip stitch (sl st) to the first stitch, and started with a chain 1 (ch 1) (which does not count as a stitch).
Step-by-Step Crochet Instructions
1. Head (Color A)
- Round 1: MR, ch 1, 6 sc in ring; sl st. (6)
- Round 2: Ch 1, [inc] x 6; sl st. (12)
- Round 3: Ch 1, [sc, inc] x 6; sl st. (18)
- Round 4: Ch 1, [2 sc, inc] x 6; sl st. (24)
- Rounds 5–11: Ch 1, sc in each st around; sl st. (24)
- Round 12: Ch 1, [2 sc, dec] x 6; sl st. (18)
- Round 13: Ch 1, [sc, dec] x 6; sl st. (12)
- Stuff firmly and add safety eyes between Rounds 8 and 9 (~4–5 stitches apart).
- Embroider the nose/mouth between the eyes.
- Round 14: Ch 1, [dec] x 6; sl st. (6) Finish off, close, and hide tail.

2. Body/Outfit (Color B)
- Round 1: MR, ch 1, 6 sc in ring; sl st. (6)
- Round 2: Ch 1, [inc] x 6; sl st. (12)
- Round 3: Ch 1, [sc, inc] x 6; sl st. (18)
- Round 4: Ch 1, [2 sc, inc] x 6; sl st. (24)
- Round 5: Ch 1, [3 sc, inc] x 6; sl st. (30)
- Rounds 6–12: Ch 1, sc in each st around; sl st. (30)
- Round 13: Ch 1, [3 sc, dec] x 6; sl st. (24)
- Round 14: Ch 1, [2 sc, dec] x 6; sl st. (18)
- Leave a long tail for sewing.

3. Outer Hood (Color B)
- Repeat Rounds 1–13 of the Body pattern. Finish off; no need to stuff.
4. Bunny Ears (Make 2 - Color Blocked)
- Round 1 (Color B): MR, ch 1, 6 sc; sl st. (6)
- Round 2: Ch 1, [sc, inc] x 3; sl st. (9)
- Round 3: Ch 1, sc in each st around; sl st. (9)
- Round 4: Work 3 sc (Color B), 3 sc (Color A), 3 sc (Color B); sl st. (9)
- Rounds 5–6: Repeat Round 4.
- Finish off and leave a tail for sewing.

5. Hands (Make 2 - Color A)
- Round 1: MR, ch 1, 6 sc; sl st. (6)
- Rounds 2–5: Ch 1, sc in each st around; sl st. (6)
- Finish off. Don't stuff.
6. Feet/Shoes (Make 2 - Color B)
- Row 1: Ch 6. From 2nd ch, sc 4, 3 sc in last ch. Work along opposite side: 3 sc, inc in last loop; sl st. (12)
- Row 2: Ch 1, BLO: sc in each st around; sl st. (12)
- Finish off.
7. Tail (Color A)
- Round 1: MR, ch 1, 6 sc; sl st. (6)
- Rounds 2–3: Ch 1, sc in each st around; sl st. (6)
- Finish off.

8. Scarf (Color C)
- Row 1: Ch 40. From 2nd ch, sc across. (39)
- Finish and weave in ends.

Assembly & Finishing Instructions
- Position Outer Hood
- Slide outer hood onto head. Place the body below the head and lightly stuff it.
- Attach Ears
- Sew ears to hood (around Rounds 3–5) close and upright.
- Join Head & Body
- Use long tail from the body to attach it securely to the head. Ensure alignment.
- Attach Limbs
- Sew hands to the sides of the body right below the neck.
- Sew feet to the bottom of the body so the bunny can sit.
- Sew the tail to the center back of the body as a stabilizer.
- Final Touches
- Tie the scarf around the neck.
- Attach the keychain hardware to the top center of the hood (between the ears).