This cute and quirky bunny doll is the perfect companion for hugs, gifts, or even as a cheerful decoration on a shelf. Its unique design and funny expression make it stand out and bring smiles to everyone who sees it! It's soft, squishy, and oh-so-cuddly, making it a delightful addition to your handmade collection.

To make this bunny, you'll crochet the body, ears, arms, legs, tail, and even the little eye patches step by step. All you need are a 2.0 mm crochet hook, soft milk cotton yarn, safety eyes, and some stuffing to bring your bunny to life. If you’re new to crocheting, don’t worry! Each part is made using simple crochet techniques, like short stitches, and can be tackled by beginners one step at a time.
Once completed, you can use this bunny as a playful toy for little ones, a charming desk buddy, or a thoughtful handmade gift for someone you care about. Its silly yet adorable look makes it perfect for brightening up any space or mood.
Credit Crochet By Hui
Materials & Tools Needed
- Yarn: 4 strands of milk cotton yarn (in desired colors).
- Crochet hook: 2.0 mm.
- Eyes: 6 mm safety eyes.
- Stitch markers: Marker buttons for keeping track of rounds.
- Stuffing: Fiberfill or similar material for stuffing the doll.
- Scissors.
- Needle: For sewing/seam finishing.
Finished Size & Customization Ideas
- Approximate Size: The bunny doll size depends on your tension, yarn, and hook, but it typically measures about 8–12 inches tall when completed.
- Customization Ideas:
- Use different yarn colors for creative variations.
- Customize expressions by using embroidery for the face.
- Add accessories like bows, scarves, or hats.
Pattern Abbreviations & Terminology
(Terminology assumes standard US crochet terms):
- CH: Chain.
- SC: Single crochet.
- INC: Increase (2 stitches in the same stitch).
- DEC: Decrease (single-crochet 2 stitches together).
- ST(S): Stitch(es).
- SL ST: Slip stitch.
- FO: Fasten off.
- REP: Repeat.

Step-by-Step Crochet Instructions
Part 1: Hands (Make 2)
- Start with a magic ring or loop.
- Round 1: Make 6 SC inside the loop. Tighten the loop. Join the first and last stitches. (6 sts)
- Round 2: [1 SC, INC] × 3. (9 sts)
- Rounds 3–9: SC in each stitch around. (9 sts per round)
- Stuff hand lightly (do not overfill).
- FO, leaving a long tail for sewing. Repeat for the second hand.

Part 2: Ears (Make 2)
- Begin with a magic ring or loop.
- Round 1: Make 6 SC inside the loop. Tighten the loop, then join. (6 sts)
- Round 2: INC in all 6 stitches. (12 sts)
- Rounds 3–9: SC in each stitch around. (12 sts per round)
- For one ear, FO and leave a long tail for sewing. For the second ear, continue directly with the body.
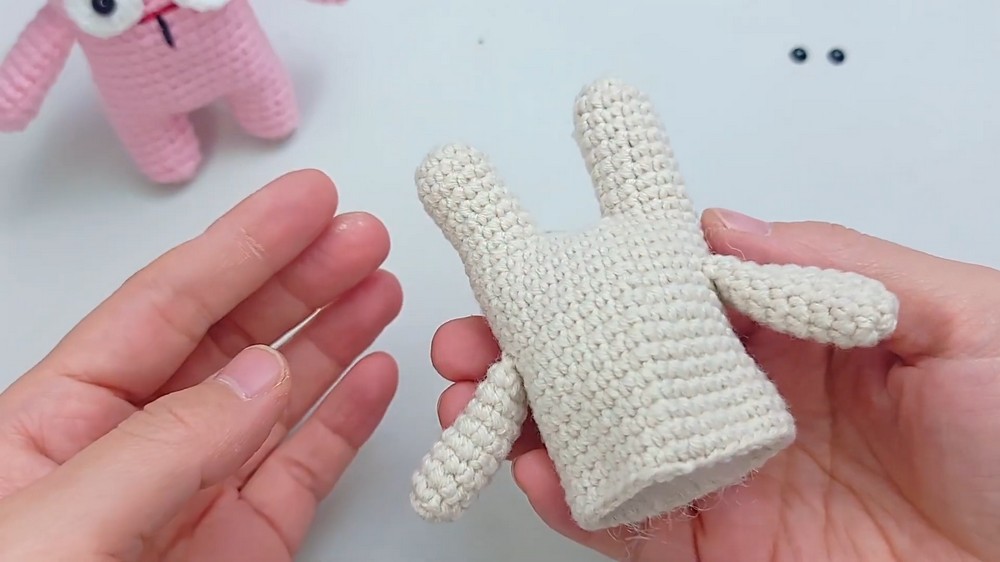
Part 3: Body
- With the second ear still attached, CH 4 to connect to the first ear.
- Round 10: Continue with 12 SC around the first ear, 4 SC across the CH (bridge between ears), then 12 SC around the second ear. Place a stitch marker to mark the start of this round. (32 sts)
- Rounds 11–15: SC in each stitch around. (32 sts per round)
- Round 16: Attach the hands. SC 4, connect first hand by folding it in half and crocheting through 2 stitches of hand + body for 4 SC. SC 12 across the body, attach the second hand in the same way, finish the round (32 sts).
- Rounds 17–26: SC in each stitch around for 10 rounds. (32 sts)
- FO, leaving long tails for sewing. Stuff the body firmly.
Part 4: Legs (Make 2)
- Attach yarn to the body where legs will begin.
- Round 1: SC 12 around one of the body portions marked for the leg. (12 sts)
- Rounds 2–5: SC in each stitch around. (12 sts per round)
- FO, leaving a long tail. Stuff lightly, then sew the leg opening shut.
- Repeat for the second leg.

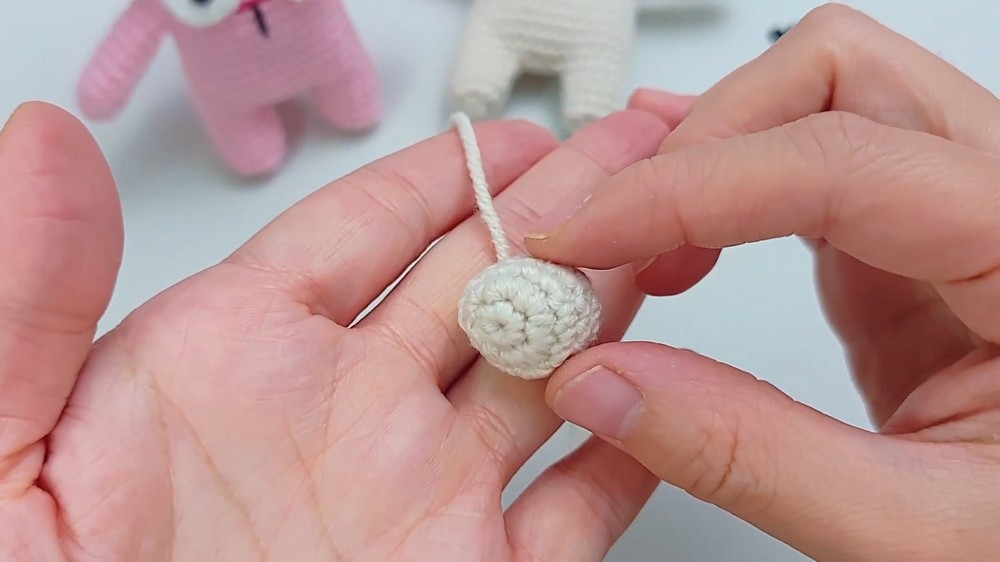
Part 5: Tail
- Start with a magic ring.
- Round 1: SC 6 in the loop. Tighten and join. (6 sts)
- Round 2: INC in all stitches. (12 sts)
- Round 3: [3 SC, INC] × 3. (15 sts)
- Round 4: SC in each stitch around. (15 sts)
- Round 5: [3 SC, DEC] × 3. (12 sts)
- Stuff lightly and sew the tail to the back of the body.
Part 6: Facial Details
- Large Eye Circles:
- Round 1: SC 6 in a magic ring. Tighten and join. (6 sts)
- Round 2: INC in all stitches. (12 sts)
- FO and leave a tail to sew to the face.
- Small Eye Circles: Follow the same instructions but stop after Round 2.
- Attach small and large circles to the head, then sew safety eyes onto the circles.
- Mouth/Expression: Use red or pink thread to embroider a cute, funny expression for the bunny.

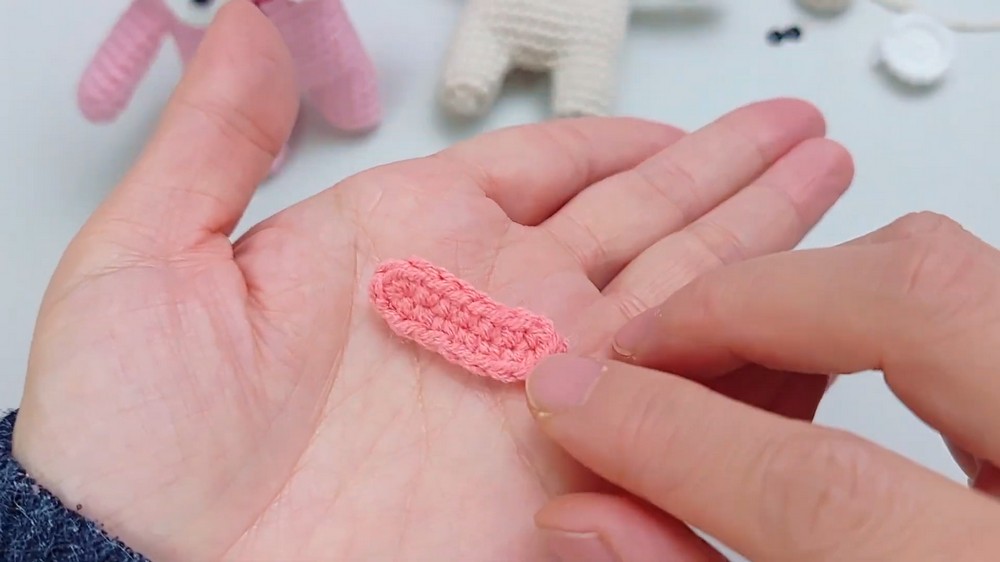
Part 7: Ear Patches
- CH 8.
- Starting in the second CH from the hook, make 6 SC. Add 3 SC in the last CH to turn the corner.
- Continue working on the other side of the foundation chain: 5 SC, then 1 SC + INC in the last stitch. (16 sts total)
- FO and sew the patch to the inside of the ear. Repeat for the second ear.
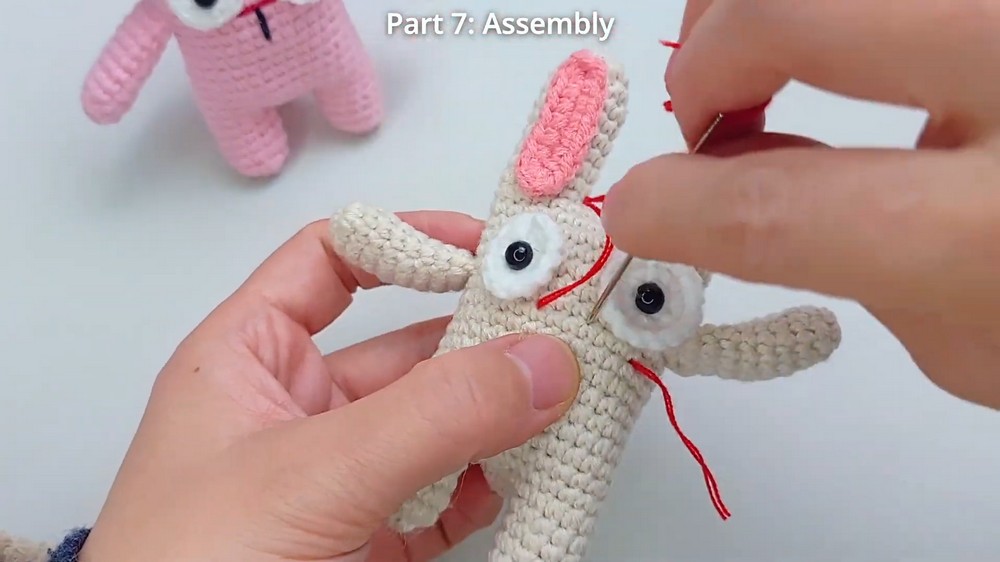
Assembly
- Sew the ears to the top of the body.
- Attach the tail between the legs on the back.
- Attach the large and small eye circles to the face, then secure the safety eyes.
- Embroider the mouth.
- Adjust stuffing, making sure the doll is evenly padded.
Finishing Touches
- Check all attachments for firmness and add extra stitches where necessary.
- Adjust stuffing to ensure an even, neat finish.
- Add any final touches (bows, hats, etc.) for decoration!


