A crochet bandana is a lovely, lightweight accessory that you can wear for casual outings, sunny days, or just to add a cute, personal touch to your outfit. What makes this bandana special is its elegant net-style stitch pattern, which gives it a timeless look. Plus, the tassels at the edges offer a playful finish that adds extra charm! Whether you want a simple bandana or make it larger as a scarf or shawl, this item is both versatile and beautiful to wear.

Crocheting this bandana is easy for beginners and doesn't require much time or thread! Using medium-thick cotton yarn is recommended for a neat look, but you’re free to use other types of thread to customize it for yourself. This repetitive pattern is gentle to follow, making it perfect for anyone starting to crochet. You can enjoy wearing the bandana or turn it into a thoughtful handmade gift!
Credit أميرة و الكروشيه Crochet Princess
Materials & Tools Needed:
- Yarn: Medium-thick cotton threads are preferred for bandanas. For larger shawl-like versions, you can use medium-thick wool or thinner/cotton yarn depending on your preference. Examples mentioned:
- Alize Diva (thin)
- Alize Cotton Gold (thicker cotton)
- Any "cat thread" (or similar Italian cotton thread) for additional texture.
- Hook: Use a crochet hook size suitable for your chosen yarn (refer to the yarn label for guidance, but 3.5 to 4.5 mm is often ideal for cotton threads).
- Scissors
- Needle: For weaving ends and securing threads.
Finished Size & Customization Ideas:
- Default Bandana Size: The base size described in the video uses approximately 35-40 doses of thread and creates a typical wearable bandana.
- Customization Tips:
- For Shawls or Scarves: Increase the rows by following the same net-stitch pattern until you achieve the desired length.
- Tassels: You can enhance the bandana with tassels for additional style.
- Keep in mind that the crochet fabric will stretch after washing (especially with cotton), so consider this when determining the final size.

Step-by-Step Crochet Instructions:
We’ll break this pattern into three sections: the Net-Stitch Pattern, Lace Edging, and Making Tassels. Adjust the instructions to create larger or smaller garments.
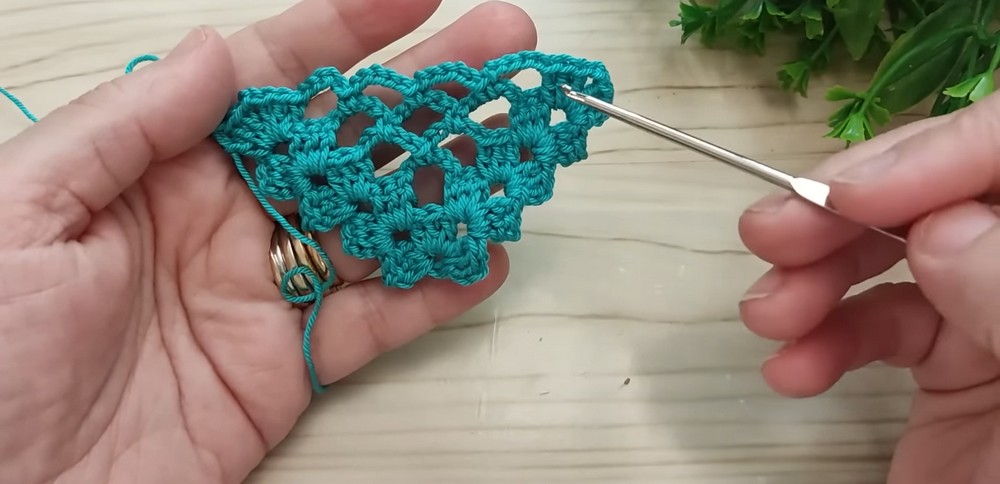
Part 1: Net-Stitch Pattern
The core of the bandana is made with an easy net-stitch pattern that repeats one row.
- Start the Foundation:
- Make a slip knot.
- Chain 4 and join with a slip stitch into the first chain to form a small ring.
- Row 1: Shell Stitch Base
- Chain 3 (acts as the first double crochet).
- Work 2 more double crochets into the ring (total of 3 double crochets).
- Chain 2 and make another group of 3 double crochets into the ring.
- Chain 2, and repeat a third group of 3 double crochets into the ring.
- End Row 1 with 3 groups of 3 double crochets, separated by 2 chains.
- Row 2: Transition to the Net Pattern
- Turn your work.
- Slip stitch across the first double crochet cluster and into the chain-2 space.
- Start with 3 chains, then create 2 double crochets into the chain space (acts as a shell).
- Chain 5 to form a long space.
- In the next chain-2 space, create another shell (3 double crochets, chain 2, 3 double crochets).
- Continue this sequence to finish the row with one shell on each end and a long chain space between them.
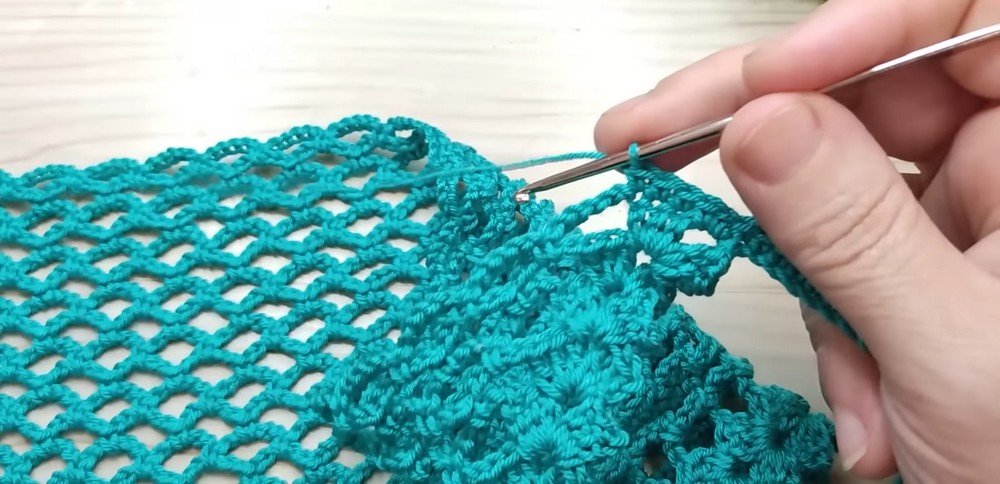
- Row 3 Onwards: Repeating Pattern
- Continue turning your work.
- Repeat the same steps as Row 2: Work a shell stitch at the start and end of each row, and add 1 more chain space (5 chains) in the middle for each new row.
- For every additional row, one new chain 5-space will be added between the shells.
Tip: Continue repeating this pattern until your bandana reaches your desired size or width.
Part 2: Lace Edging
The lace edging is added after the body of the bandana is completed to give it a more decorative finish.
- Create the Lace Foundation:
- Slip stitch into one chain-2 space.
- Chain a number of stitches according to the desired length of the lace edge (for example, chain 60 for about 10–20 cm of length).
- Work the Lace Design:
- Follow this pattern: (skip 2 chains, insert hook into the 3rd chain, work a decorative puff stitch as follows):
- Yarn over, insert into the chain, pull through a loop (3 loops on the hook).
- Yarn over and insert into the same chain again, pull through (5 loops on the hook).
- Yarn over and insert one more time, pull through (7 loops on the hook).
- Pull through all loops on the hook.
- Secure with a slip stitch into the same chain to form a closed puff or "circle."
- Work a single crochet stitch into every chain for the remainder of the lace section. Turn and repeat this pattern.
- Follow this pattern: (skip 2 chains, insert hook into the 3rd chain, work a decorative puff stitch as follows):
- Attach Lace:
- Attach the lace along the edges of the bandana using single crochet stitches.
- For the edges, place 5 stitches into every chain-5 space to secure the lace detail.
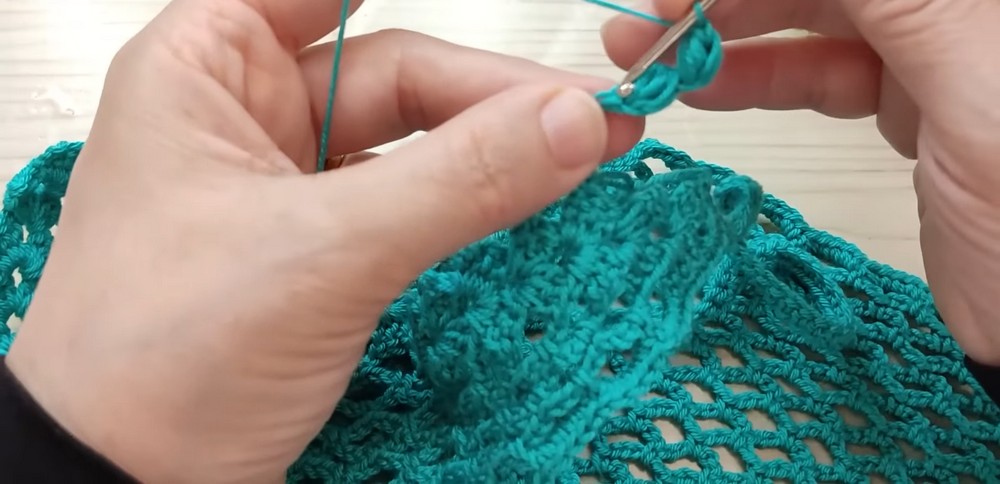
Part 3: Tassels
Finish your bandana with beautiful tassels at the edges of the triangular points.
- Create the Tassel Base:
- Lift the loop on your working yarn upwards.
- Work a love knot stitch (pull the loop up, chain 1, and secure under the thread with a single crochet).
- Continue adding puff stitches (similar to step 2 of the lace).
- Attach Tassels:
- Skip one shell, and secure the tassel into the second column of the next shell with a single crochet.
- Repeat for Full Edging:
- Continue creating tassels and attaching them to the shell clusters or chain-2 spaces for the entire edge of the bandana.
- You can mix yarn thickness/colors to make the tassels more prominent.
Finishing Steps:
- Weave in all loose ends using a darning needle to prevent unraveling.
- Block the bandana (optional): Wash and stretch the fabric gently to maintain its shape if needed.
- Enjoy wearing or gifting your completed crochet bandana!
Notes and Tips:
- Stretch Factor: Cotton and some other fibers will stretch after washing. Consider this when determining the length and size of your bandana.
- Yarn Choice: Thicker yarn like Alize Cotton Gold will create more prominent stitch patterns, while thinner yarns like Alize Diva produce a delicate and airy look.
- Experimentation: This pattern is versatile—you can use it to create not just bandanas but also shawls or scarves by increasing rows.