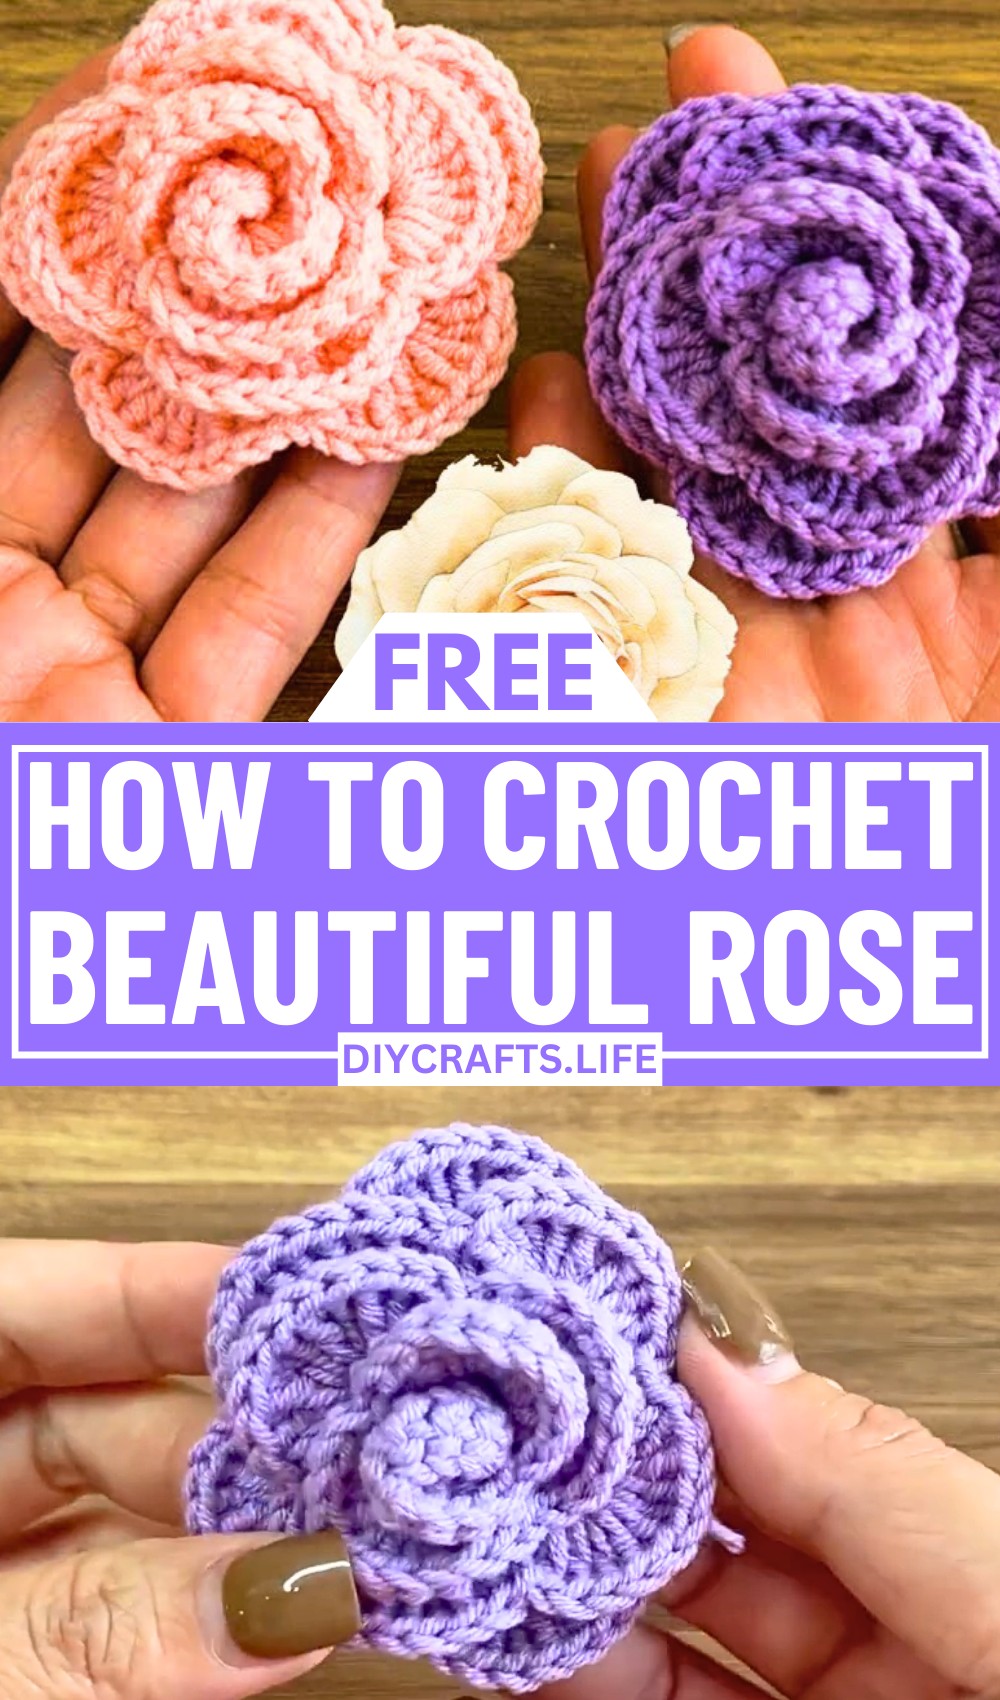
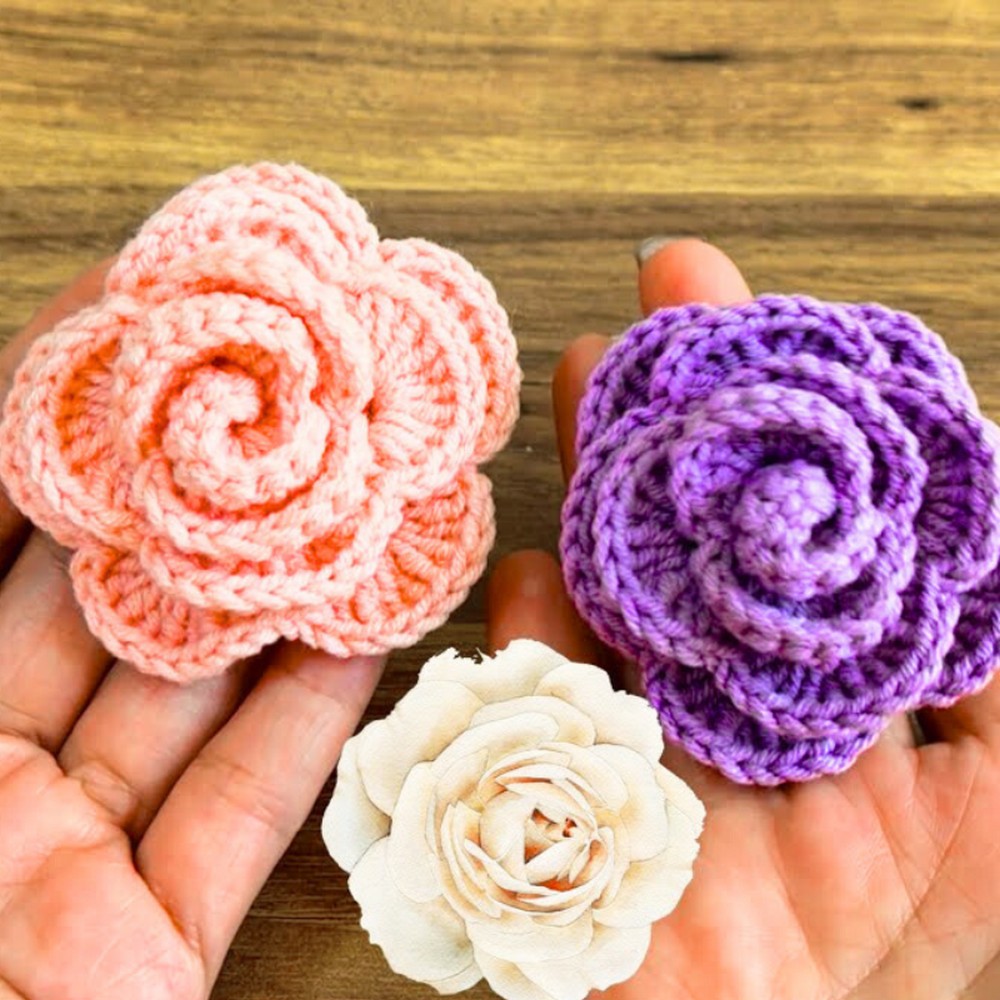
Turn simple yarn into something magical with this stunning crochet rose flower pattern! Capturing the timeless beauty of roses, this design transforms your craft into a gorgeous floral masterpiece that blooms right in your hands. Perfect for any season, this crochet rose will add a soft, charming touch to your projects—from home décor to wearable art.
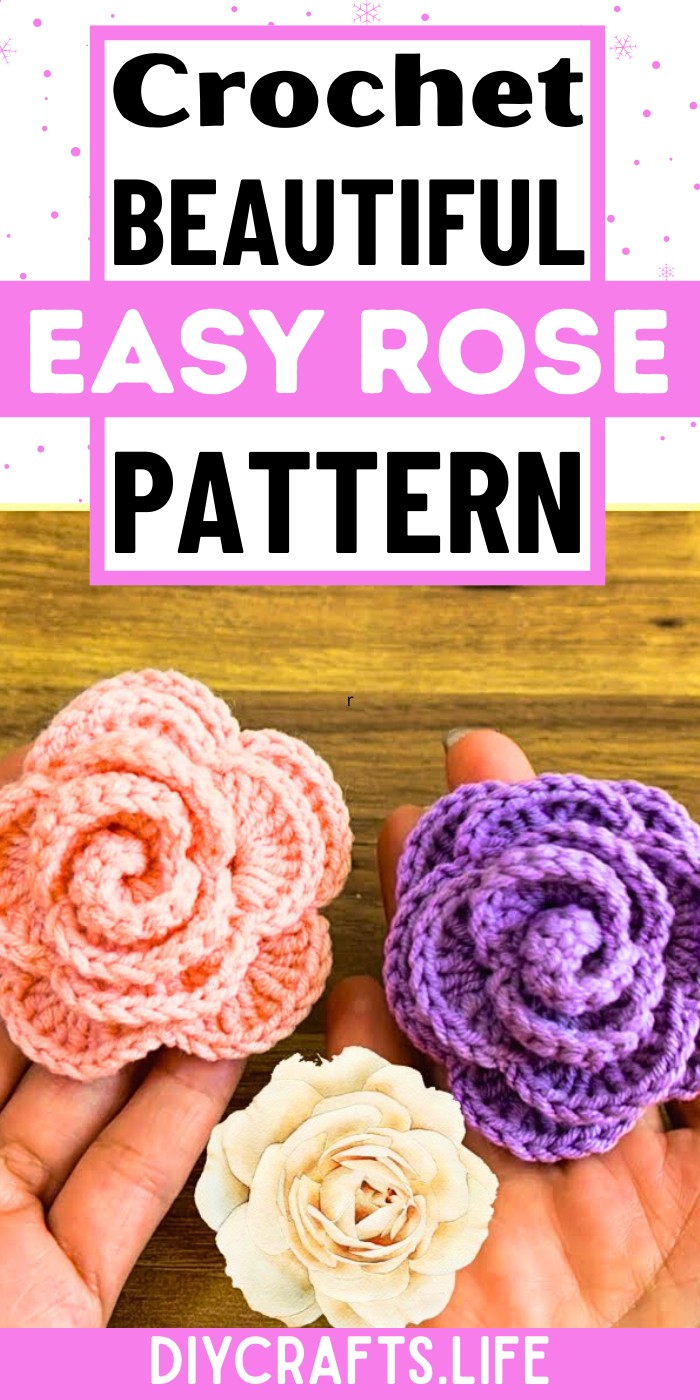
Crochet Rose Pattern
This unique crochet pattern stands out with its elegant flow and intricate details. Starting with a foundation of 54 chains, this design uses carefully placed double crochets and chain stitches to create beautiful petal shapes that fold into a realistic blossom. The result is a versatile floral accent that blends creativity with personal expression. Whether used to embellish bags, hats, scarves, or as a standalone craft, this pattern delivers timeless artistry while giving you room to customize colors and sizes to match any style.
Credit ANDREI Crafts Show
Required Materials:
- Crochet Hook: 2.5 mm hook
- Yarn: Your choice of yarn suitable for crocheting flowers
- Scissors: For cutting the yarn
- Tapestry Needle: Optional, for weaving in ends
Important Notes:
- Starting with Chain 54: The base of the rose starts with chaining 54 stitches, so ensure your tension is consistent.
- Pattern Repeats: Pay close attention to the instructions for repeating steps—this establishes the rose's shape correctly.
- Turning Rows: After the first set of rows, you'll turn your work and begin adding additional details like double crochets.
- Tail for Assembly: Leave a long yarn tail at the end to assist in forming the rose shape.
Step-by-Step Instructions:
Step 1: Start with the Base Chain
- Begin with a slip knot on your hook.
- Chain 54 stitches.

Step 2: Work the First Row
- Skip the first three chains from the hook.
- Double Crochet (DC) into the fourth chain.
- Now:
- Chain 4.
- Double Crochet (DC) in the same stitch.
- Skip three chains, count to the fourth chain, and:
- Double Crochet (DC).
- Chain 4.
- Double Crochet (DC) in the same stitch.
- Repeat this process (double crochet, chain 4, double crochet in every fourth chain) across the row until you reach the starting point.
Step 3: Begin the Second Row
- After reaching the end of the first row, finish with a single double crochet in the last stitch.
- Chain 2 and turn your work.
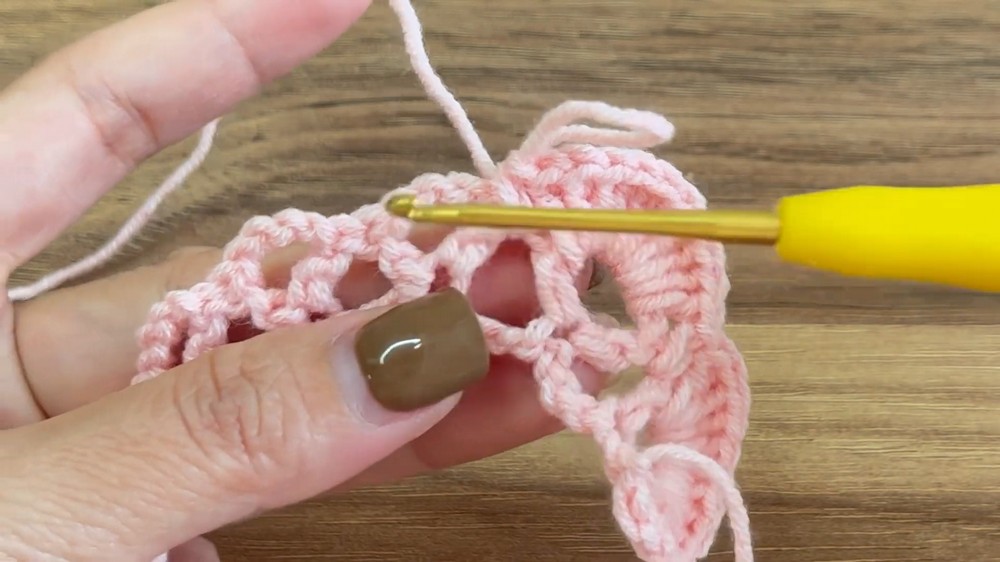
Step 4: Add Detail with Double Crochets
- From the turned position:
- In the first large chain space from the previous row, make 10 double crochets.
- Place a single crochet between the double crochets from the previous row (in the middle space).
- Add 10 double crochets in the next large chain space.
- Continue this pattern (10 double crochets, single crochet between previous row's stitches) until you complete the second row.
- In the final space:
- Add a single crochet followed by 10 double crochets.
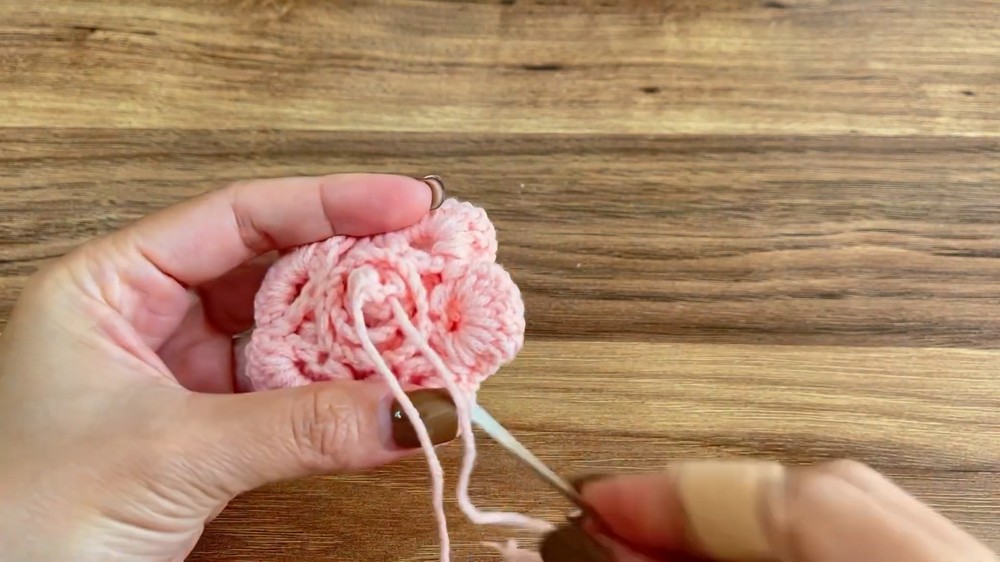
Step 5: Finish and Form the Flower
- After completing the second row:
- Secure the last double crochet with a slip stitch.
- Leave a long yarn tail to facilitate rolling the crocheted piece into a rose shape.
- Roll the crocheted piece, starting at one end, to form the rose shape. Secure the base of the rose using the yarn tail.
Step 6: Final Adjustments
- Adjust the petals by spreading them out for a realistic look.
- Use the yarn tail and/or tapestry needle to secure the rose tightly at the base.
Closing Notes:
This tutorial provides a simple and elegant method to create a beautiful crocheted rose. The pattern can be adjusted by using different hook sizes or yarn weights to create varying sizes of roses.