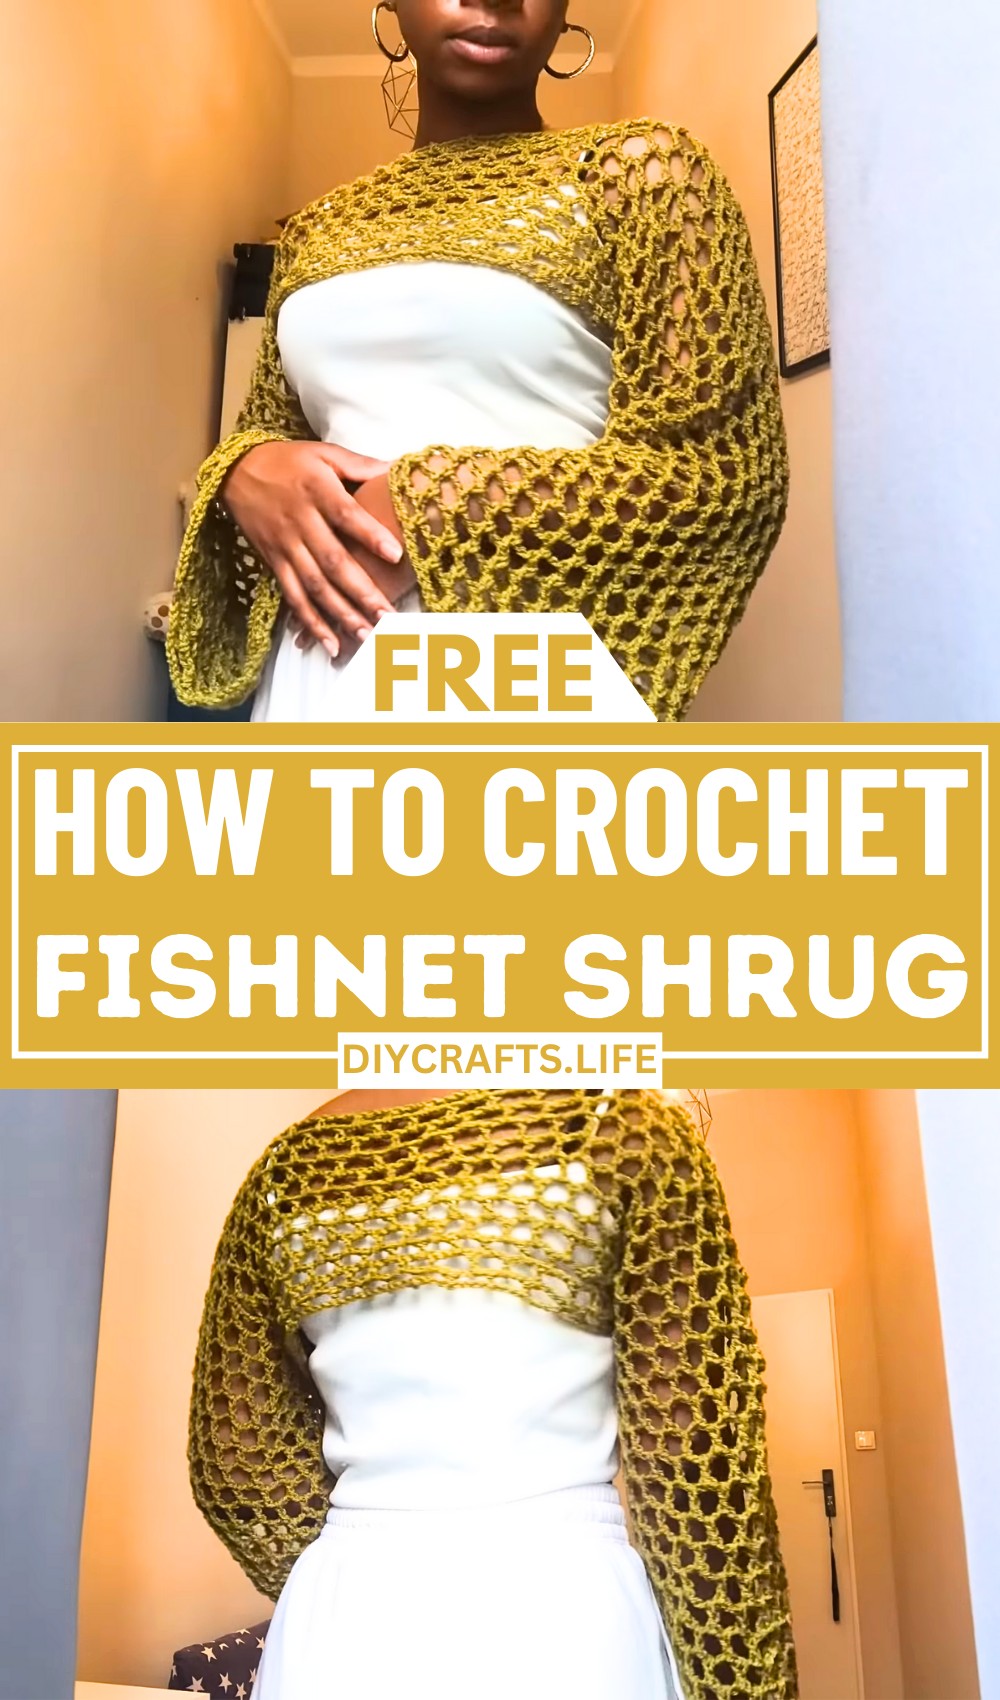
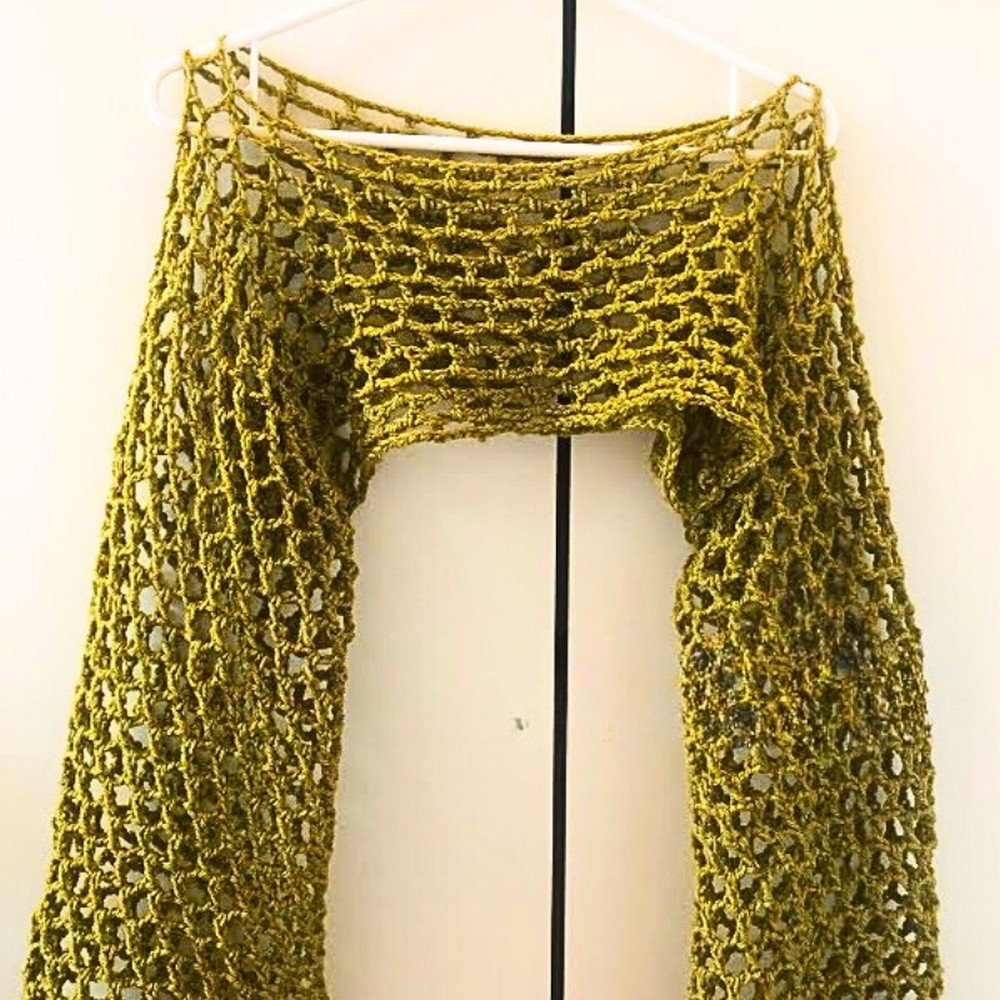
Add a touch of elegance and effortless charm to your wardrobe with this lightweight crochet fishnet shrug. Perfect for layering, this shrug pairs beautifully with both casual and formal outfits, bringing a unique dimension to your style. It's breezy, timeless, and an essential statement piece for those who love to stand out with handmade fashion.
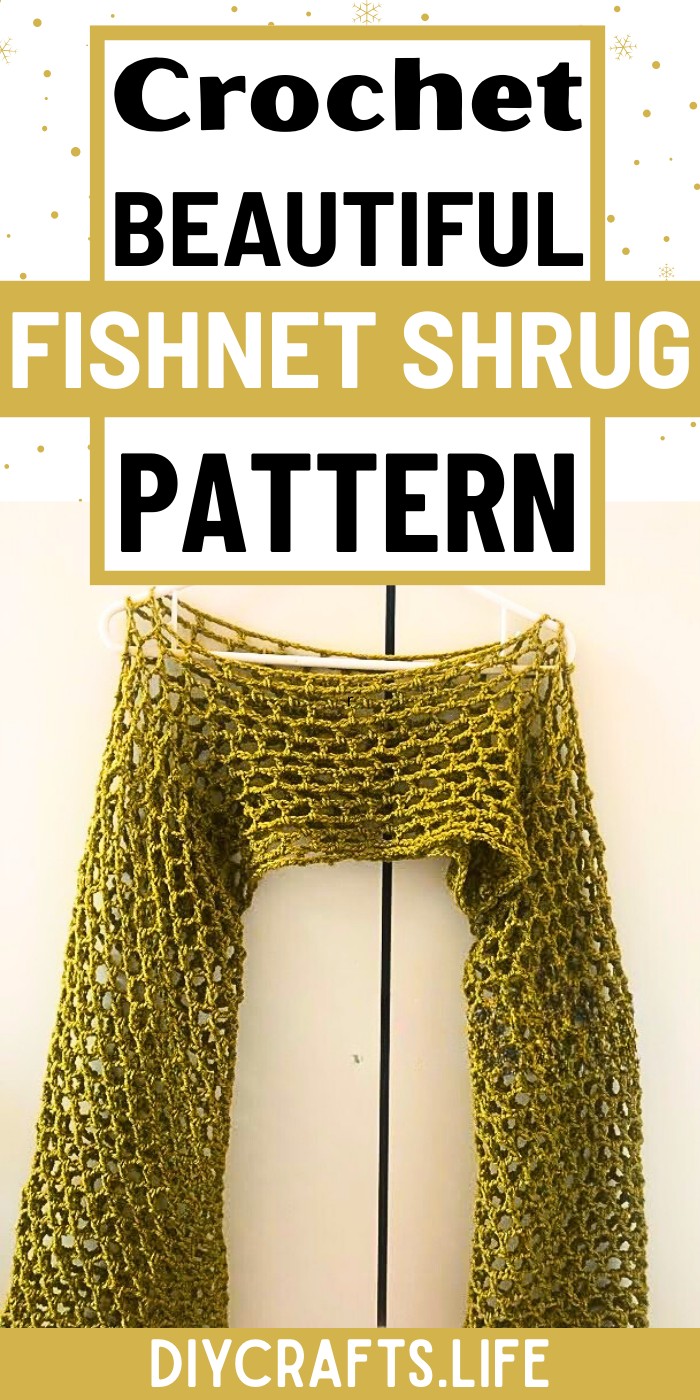
Crochet Fishnet Shrug
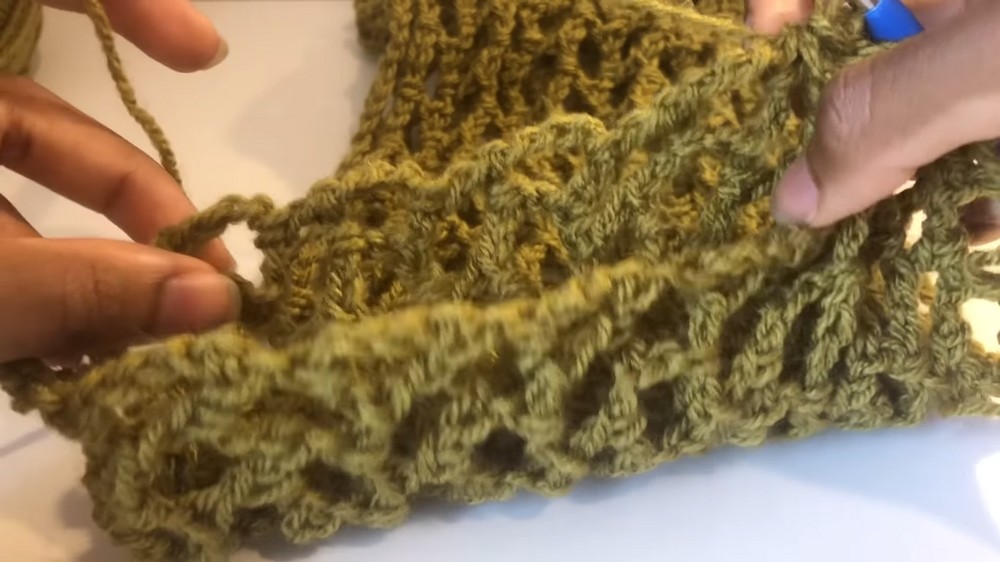
This crochet fishnet shrug features a beautiful openwork pattern that mixes simplicity with bold design. Its airy texture, created using basic crochet stitches, offers a delicate yet striking look. The adaptable design ensures a comfortable fit, and its relaxed sleeves enhance the shrug's laid-back but stylish vibe. Whether draped over a summer dress or paired with jeans, this pattern is the ultimate blend of functional creativity and effortless sophistication.
Credit Anna .Jisalo
Materials & Tools Needed
- Yarn:
- A lightweight or medium-weight yarn (e.g., cotton, acrylic, or blends).
- Yarn choice determines the flow of the shrug. Choose cotton for summer wear or acrylic for warmth.
- Example: Use a worsted-weight yarn (size 4) for structure. Opt for solid or gradient-colored yarn based on your style.
- Crochet Hook:
- 6.0 mm hook (as demonstrated in the video). A larger hook ensures loose, airy stitches for the fishnet look.
- Scissors:
- To trim yarn ends neatly.
- Measuring Tape:
- To measure chain length and check fit across your chest and armhole dimensions.
- Tapestry Needle:
- For weaving in the loose ends neatly during finishing steps.
- Optional: Stitch Markers:
- These can help mark sections such as neck holes or the start/end points during assembly.
Finished Size & Customization Ideas
Approximate Size:
- In this tutorial, the initial chain length is 66 stitches (including 9 extra chains), which measures approximately 17.5 inches across the chest.
- Each panel (front and back) measures 6.5 inches in height.
- Sleeves have a suggested length of around 19.5 inches, but this can be adjusted.
Customization Suggestions:
- Adjust the Fit:
- To increase the width across your chest, chain more than the example's 66 foundation chains. For a smaller size, chain fewer stitches.
- Adjust the front/back panel rows to add or reduce the length of the shrug.
- Sleeve Adjustments:
- The sleeve length can be extended or shortened depending on preference by adding or subtracting rows.
- Yarn Weight Variations:
- Choose lightweight yarn for a delicate, summer-friendly shrug or medium-weight yarn for a warmer, cozier version.
- A chunkier yarn could also create a unique, oversized "fishnet" shrug.
- Color Customization:
- Use a single color, gradient yarns, or alternate colors to create stripes in the fishnet pattern.
- Style Variations:
- Add a decorative border or edging (shell stitch, scallops, etc.) to the sleeves and shrug opening for a polished look.
Pattern Abbreviations & Terminology
Below are standard crochet abbreviations used in the project:
- Ch: Chain
- St: Stitch
- DC: Double Crochet
- SL ST: Slip Stitch
- YO: Yarn Over
- Rep: Repeat
- Space/Hole: Refers to the open gaps created by chaining and skipping stitches.
Step-by-Step Detailed Crochet Instructions
Step 1: Start the Foundation
- Create a Slip Knot:
- Begin your project with a slip knot on your hook.
- Chain Across:
- Chain 66 stitches, or adjust the number of chains to fit the width of your shoulders (as per your chest measurement from one shoulder to the other).
- Optional: Ensure the chain is a multiple of 3 for the fishnet pattern to work evenly.
- Add Extra Chains for Spacing:
- Chain an additional 9 chains to account for the pattern setup.
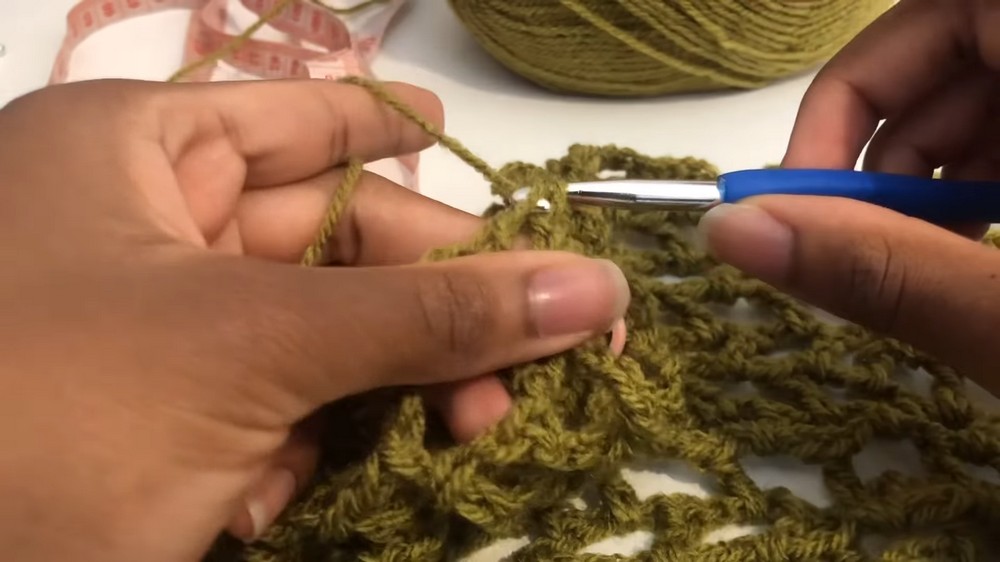
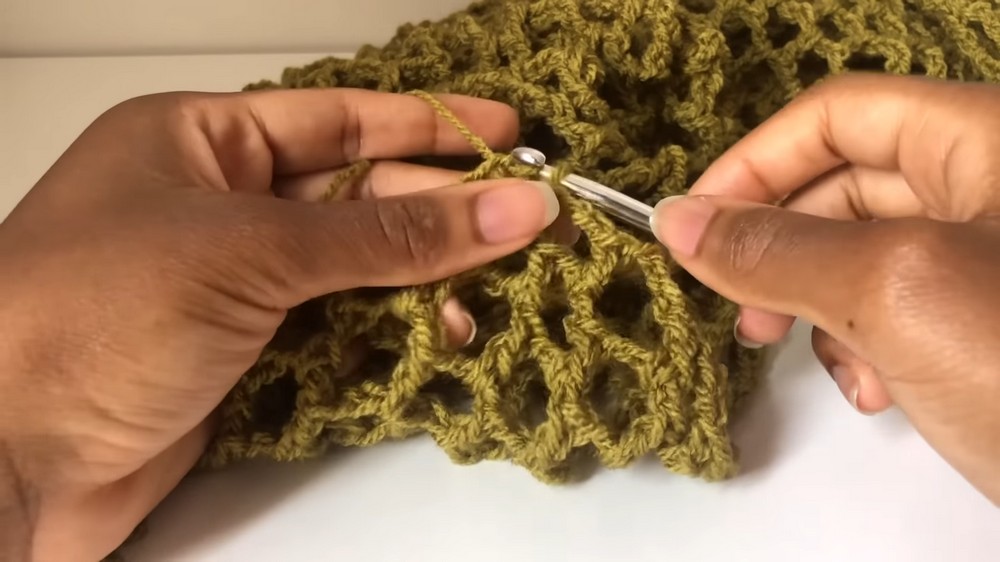
Step 2: Row 1 – Foundation Fishnet Pattern
- Skip and Double Crochet:
- Skip 9 stitches from the hook, and place your first Double Crochet (DC) into the 10th stitch.
- Chain Spaces:
- Chain 3, skip 3 stitches, then place 1 DC into the 4th stitch.
- Repeat:
- Repeat this pattern (Ch 3, skip 3 sts, DC in next st) across the row.
- End the row with 1 DC in the last stitch.
- Chain for Next Row:
- At the end of the row, chain 6 (acts as DC + 3 Ch for the next row).
Step 3: Row 2 – Fishnet Rows
- Turn Work:
- Turn your work and begin the new row.
- Work into Spaces:
- Place a DC into the first open space (hole) from the previous row.
- Chain 3, and place 1 DC into the next hole.
- Repeat:
- Continue this pattern of DC in each space, Ch 3, and DC across the row.
- Continue Rows:
- Repeat the same fishnet stitch (DCs and chain spaces) for multiple rows to form the front panel of the shrug.
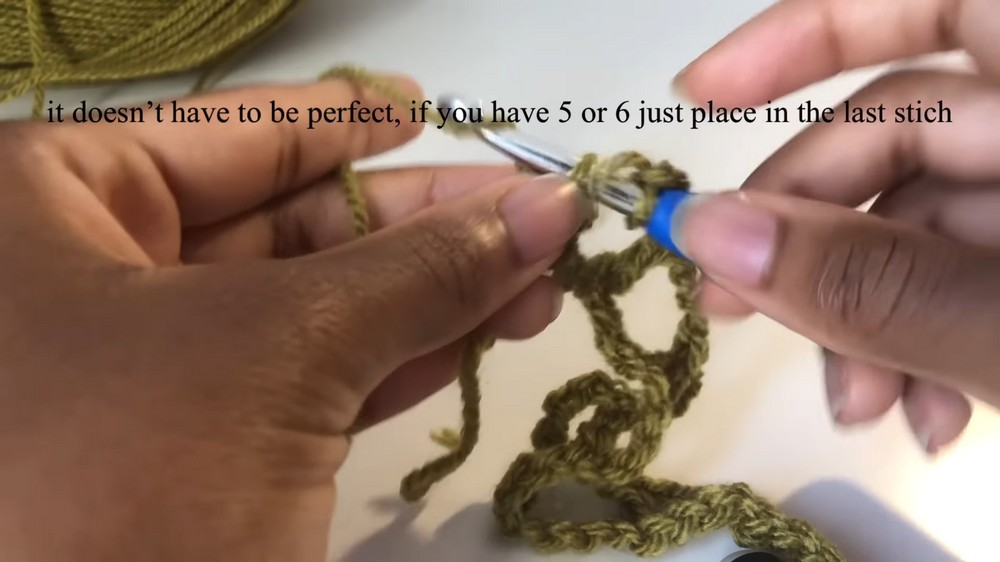
Step 4: Create the Neck Opening
- Count Holes:
- Count the number of "holes" (space between DCs in the fishnet) in your fabric. Example: 18 spaces.
- Separate for Neck Hole:
- Use equal portions of spaces to create the neck hole:
- Example: Place 4 spaces for the left front panel, 9 spaces for the neck hole, and 5 spaces for the right front panel.
- Use equal portions of spaces to create the neck hole:
- Chain for Neck Hole:
- Multiply spaces in the neck hole by 4:
- Example: For 9 spaces, chain 36 stitches to create the neck opening.
- Multiply spaces in the neck hole by 4:
- Rejoin Yarn:
- After chaining for the neck, ensure the chain isn't twisted and place your next DC into the appropriate hole on the other side.
- Resume the fishnet stitch pattern across the row.
Step 5: Repeat for the Back Panel
- Continue Rows:
- Repeat the fishnet pattern for the back panel until its height matches the front panel's length (e.g., 6.5 inches or more).
Step 6: Assemble the Body
- Create Armholes:
- Fold the shrug in half and align the edges.
- Leave space at the top for the armholes by slip stitching closed a portion of the side seams.
- Example: Slip stitch into 2–3 stitches at the bottom while leaving the top open for the arms.
- Secure:
- Make sure the slip stitches are tight and aligned properly for a clean armhole.
Step 7: Add Sleeves
- Start at Armhole:
- Attach yarn to the armhole edge and begin working the fishnet pattern in rounds.
- Fishnet Pattern for Sleeves:
- Chain 3, DC into the next open space, and Ch 3, DC into next space all the way around.
- At the end of the round, join with a Slip Stitch (SL ST).
- Adjust Length:
- Repeat the fishnet stitch for as many rounds as desired to create your sleeve length.
- Example: Extend to 19.5 inches or more.
- Finish Sleeve:
- After the last round, secure with a slip stitch, chain 1, and cut the yarn.
Step 8: Finishing Touches
- Add Second Sleeve:
- Repeat the same process on the second armhole to create the other sleeve.
- Weave in Loose Ends:
- Use a tapestry needle to weave in all ends neatly.
- Final Block (Optional):
- Lightly block your shrug for an even, polished finish.