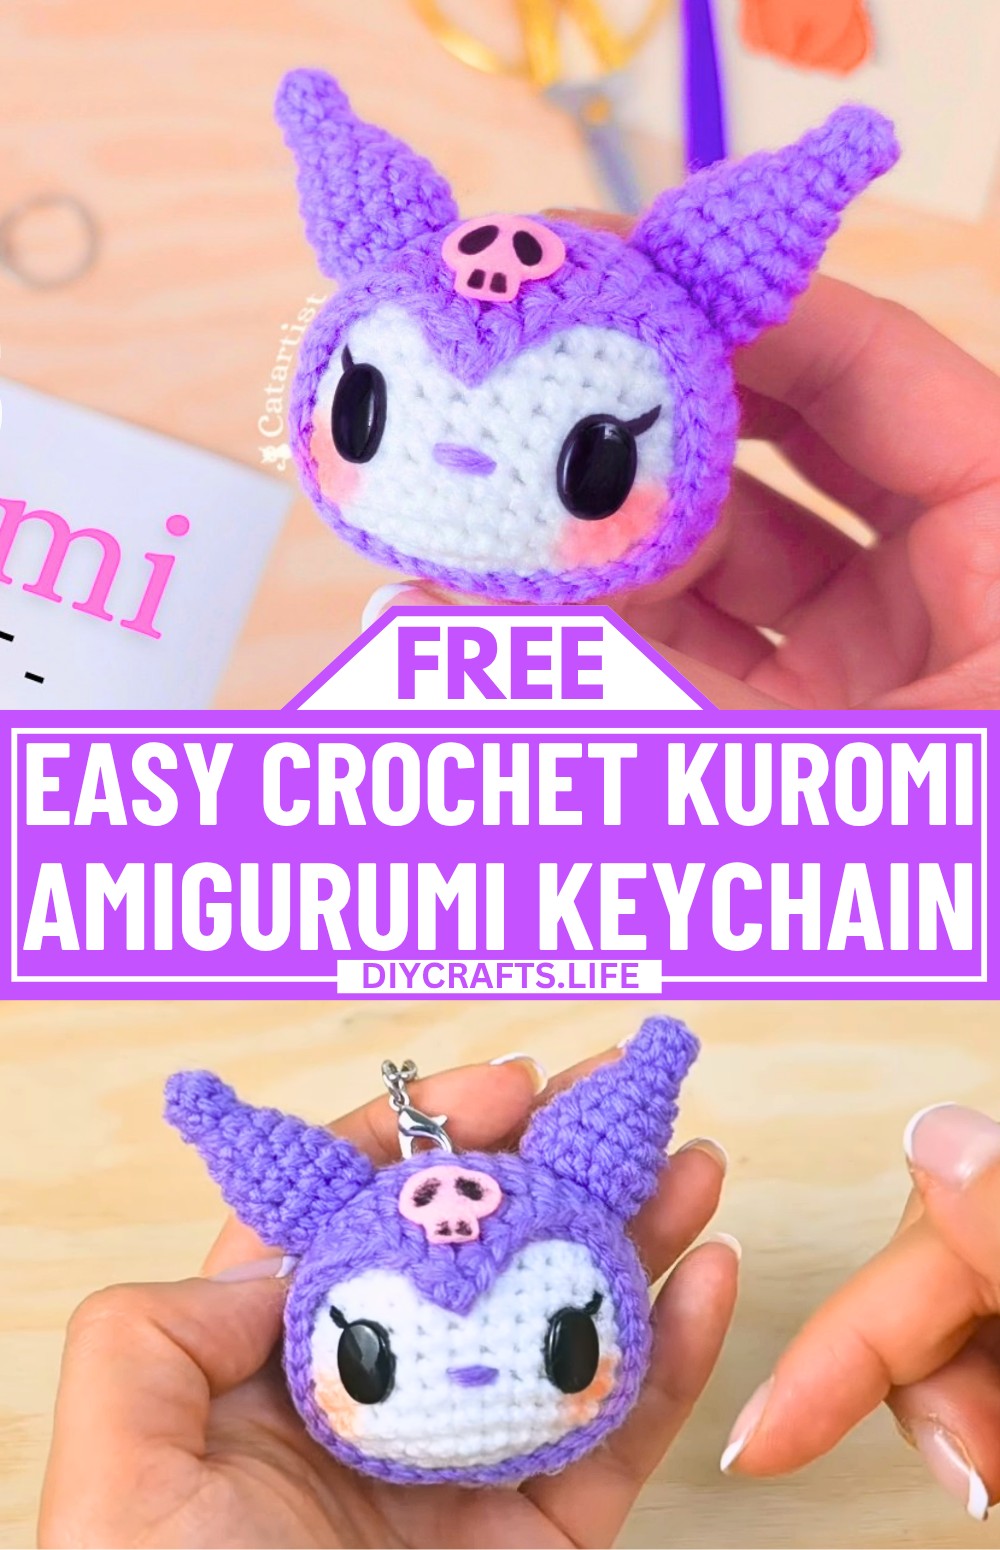
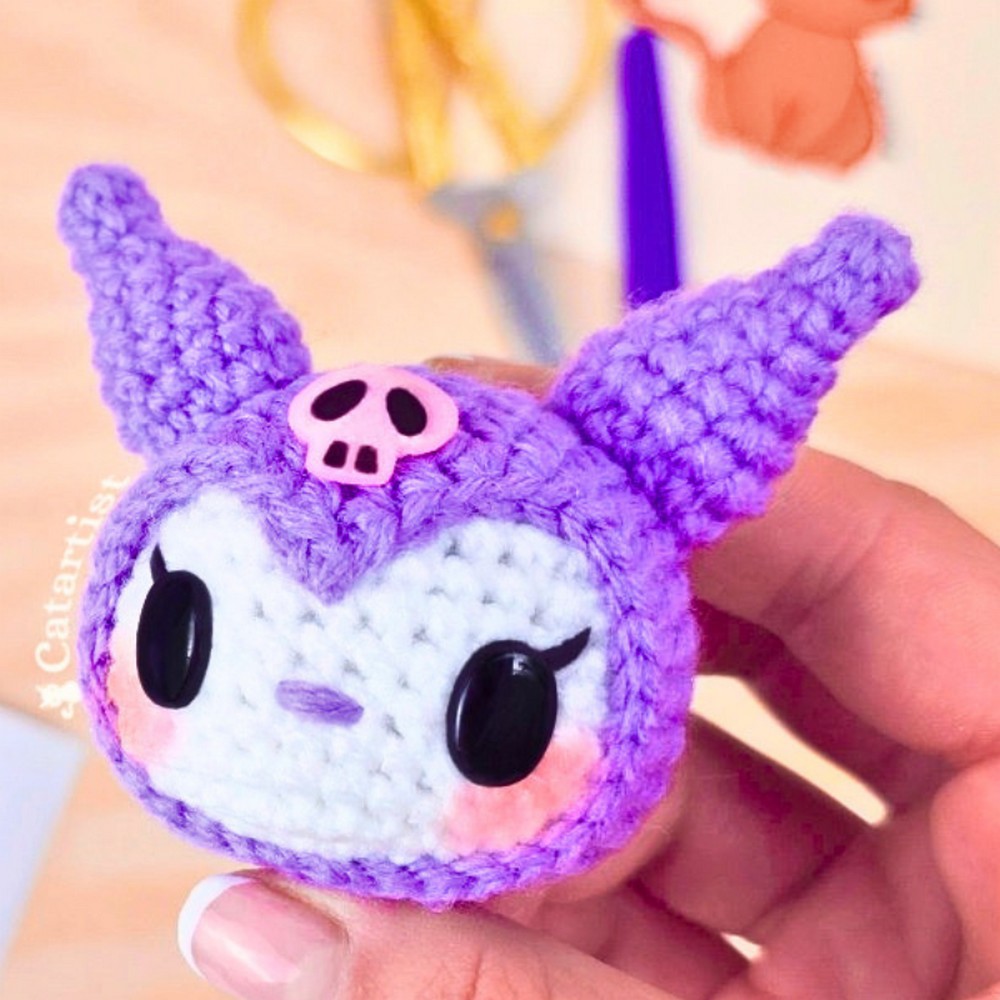
This adorable Kuromi keychain is a fun and simple crochet item you can make to add a touch of charm anywhere. Measuring just 4 cm, or 6 cm with its cute little ears, it’s small enough to clip onto your keys, backpack, or handbag. Its playful design makes it a fantastic accessory, a tiny collectible, or even a thoughtful gift for friends who love the Kuromi character or something kawaii.
Crochet a Kuromi Amigurumi Keychain
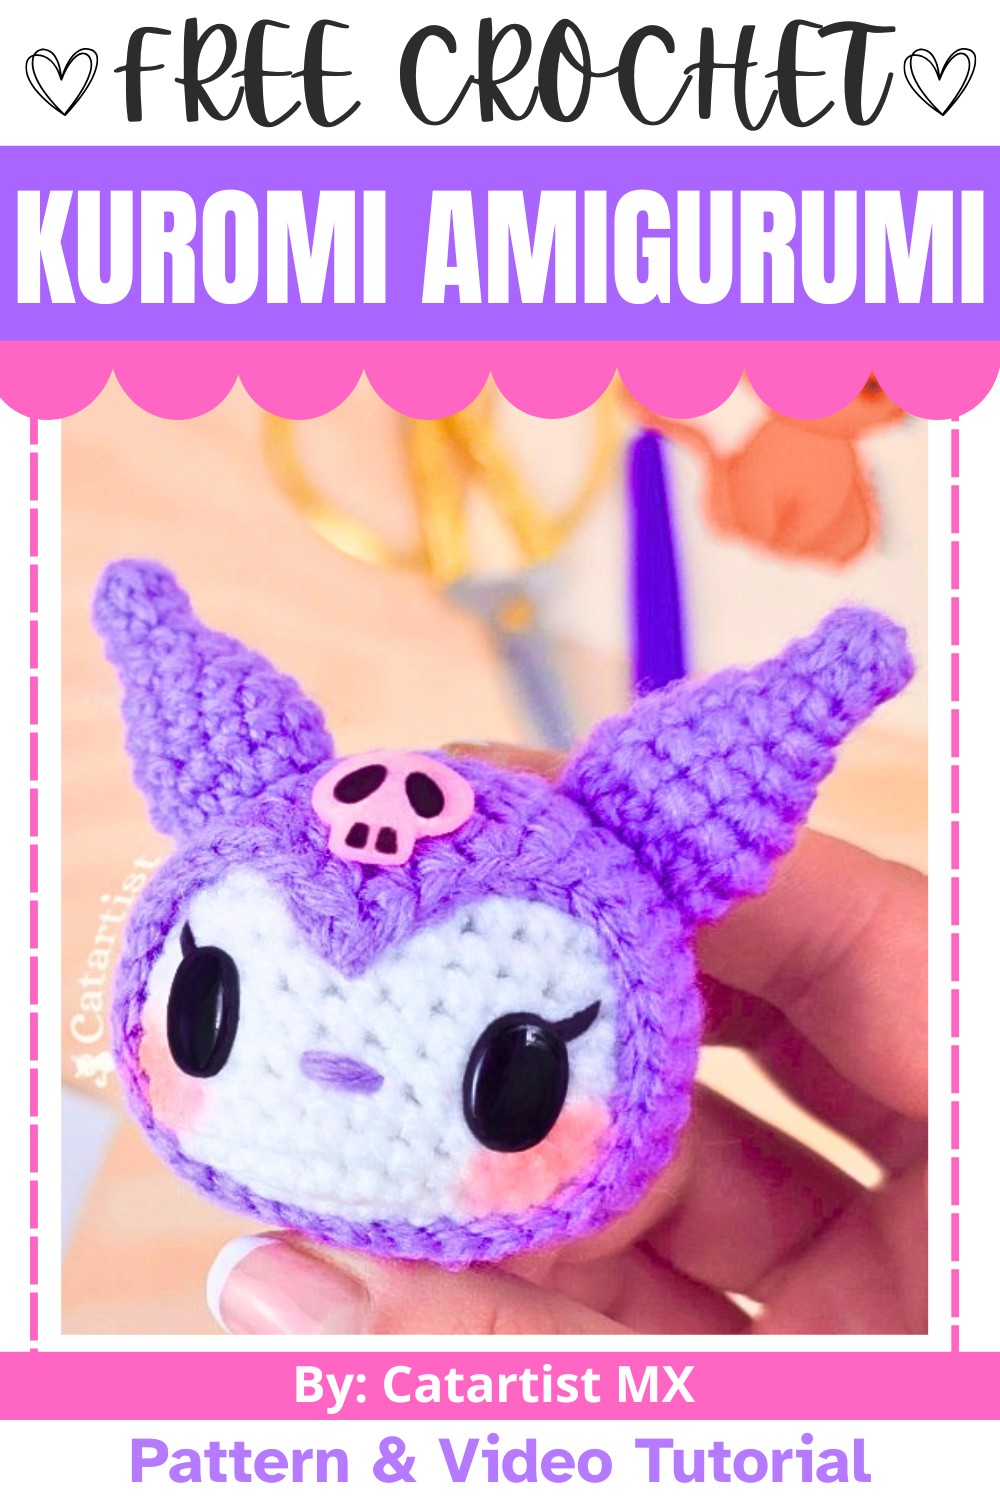
This Amigurumi tutorial breaks everything step-by-step, making it simple and fun even for beginners. You’ll crochet Kuromi’s iconic face, add her purple hat, and even cute little details like her ears and embroidered features. You get to make her signature accessory, a tiny skull on her hat, with pink felt. The kuromi crochet keychain final touches (like blush and eyelashes) make this piece truly special. Creating this Kuromi keychain is quick and simple, making it a fun creation that doesn’t take long to finish.
Credit Catartist MX
Materials & Tools Needed
- 3 mm crochet hook
- Black, purple, and pink yarn (fine-weight recommended for consistency with the video)
- Yarn needle
- Stuffing material (polyfill)
- Black thread/yarn for embroidery
- Pink felt or fabric for the skull design
- Fabric glue or adhesive
- Blush or pink eyeshadow (optional)
- Toy safety eyes (size and placement specified in the tutorial)
- Keychain ring
Finished Size & Customization Ideas
Finished Size:
- Without ears: ~4 cm
- Including ears: ~6 cm
Customization Ideas:
- Experiment with different colors for Kuromi's hat and accents (e.g., pastel purple instead of dark purple).
- Add glitter fabric paint to the felt skull for extra detail.
- Use safety eyes in different colors or embroider the eyes for a unique look.
- Replace the keychain ring with a charm loop for a hanging ornament.
- Personalize the cheeks by embroidering a tiny heart shape instead of painting them.
Pattern Abbreviations & Terminology
- MR: Magic Ring
- sc: Single Crochet
- inc: Increase (2 sc in one stitch)
- dec: Decrease (single crochet decrease over the front loops of two stitches)
- hdc: Half Double Crochet
- dc: Double Crochet
- tr: Treble Crochet
- dtr: Double Treble Crochet
- sl st: Slip Stitch
- ch: Chain Stitch
- picot: Picot Stitch (creates a small decorative peak)
Step-by-Step Detailed Crochet Instructions
Head
- Round 1: Start with a magic ring. Work 6 sc into the ring. [6 st]
- Round 2: Inc in each stitch around. [12 st]
- Close the magic ring tightly if needed. Either continue working in a spiral or close the round with sl st + ch at the start.
- Round 3: (1 sc, 1 inc) x6. [18 st]
- Round 4: (3 inc, 6 sc), then repeat. [24 st]
- Round 5: Work 24 sc around. [24 st]
- Round 6: (sc, inc) x3, 6 sc, sc, inc x3, 6 sc). [30 st]
- Rounds 7-12: Work 6 rounds of 30 sc each. This forms the head.Placement of eyes:
- Place toy safety eyes between rows 9 and 10, spacing them 7 stitches apart.
- Round 13: (sc, dec) x3, 6 sc, sc, dec x3, 6 sc). [24 st]
- Stuff the head and continue working.
- Round 14: (sc, dec) x8. [16th]
- Round 15: Work 8 decreases. [8 st]
Finish the head:
- Cut yarn and cast off.
- Using a yarn needle, weave the tail through the front loops of each remaining stitch, pull tightly to close, and secure with knots.

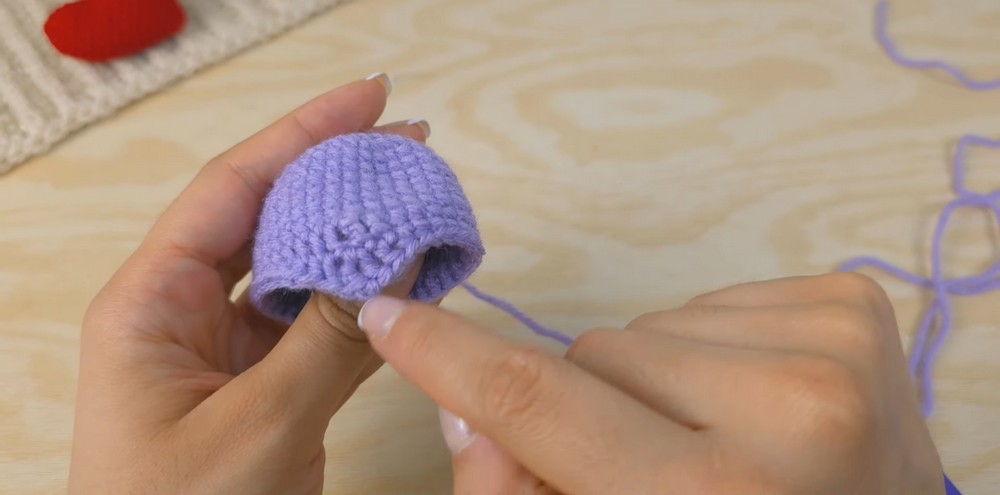
Hat
- Round 1: Start with a magic ring. Work 7 sc into the ring. [7 st]
- Round 2: Inc in each stitch. [14th]
- Round 3: (sc, inc) x7. [21 st]
- Round 4: (2 sc, inc) x7. [28 st]
- Round 5: (3 sc, inc) x7. [35 st]
- Rounds 6-12: Work 6 rounds of 35 sc each.Shaping details:
- For the hat's peak, crochet 14 sc, followed by the textured stitches:
- 2 hdc, 1 dc, 1 dtr, picot (ch, sl st).
- Work another dc, 2 hdc, and finish with 14 sc.
- Repeat for the other side to create a symmetrical brim.
- For the hat's peak, crochet 14 sc, followed by the textured stitches:
Ears
- Round 1: Start with a magic ring. Work 4 sc into the ring. [4 st]
- Round 2: (sc, inc) x2. [6 st]
- Round 3: (sc, dec) x2. [4 st]
- Round 4: Work 4 inc. [8 st]
- Round 5: Work 8 sc. [8 st]
- Round 6: (3 sc, inc) x2. [10 st]
- Round 7: (4 sc, inc) x2. [12 st]
- Round 8: (2 sc, inc) x4. [16 st]
- Round 9: Work 8 dec. [8 st]
- Cut yarn and cast off. Optionally stuff the ears.
Placement of ears:
- Attach the ears between rows 8 and 10 of the head, leaving 5-6 stitches between them.

Final Details
- Embroider eyelashes using black thread/yarn, placing them near the eyes.
- Use purple yarn to embroider the nose at the center, stitching between the eyes.
- Cut the pink felt into a skull shape and attach it to the hat with fabric glue. Use paint for finer details on the skull.
- Optionally apply pink blush or eyeshadow to the cheeks for a cute appearance.
- Attach the keychain ring securely to the top of the hat.