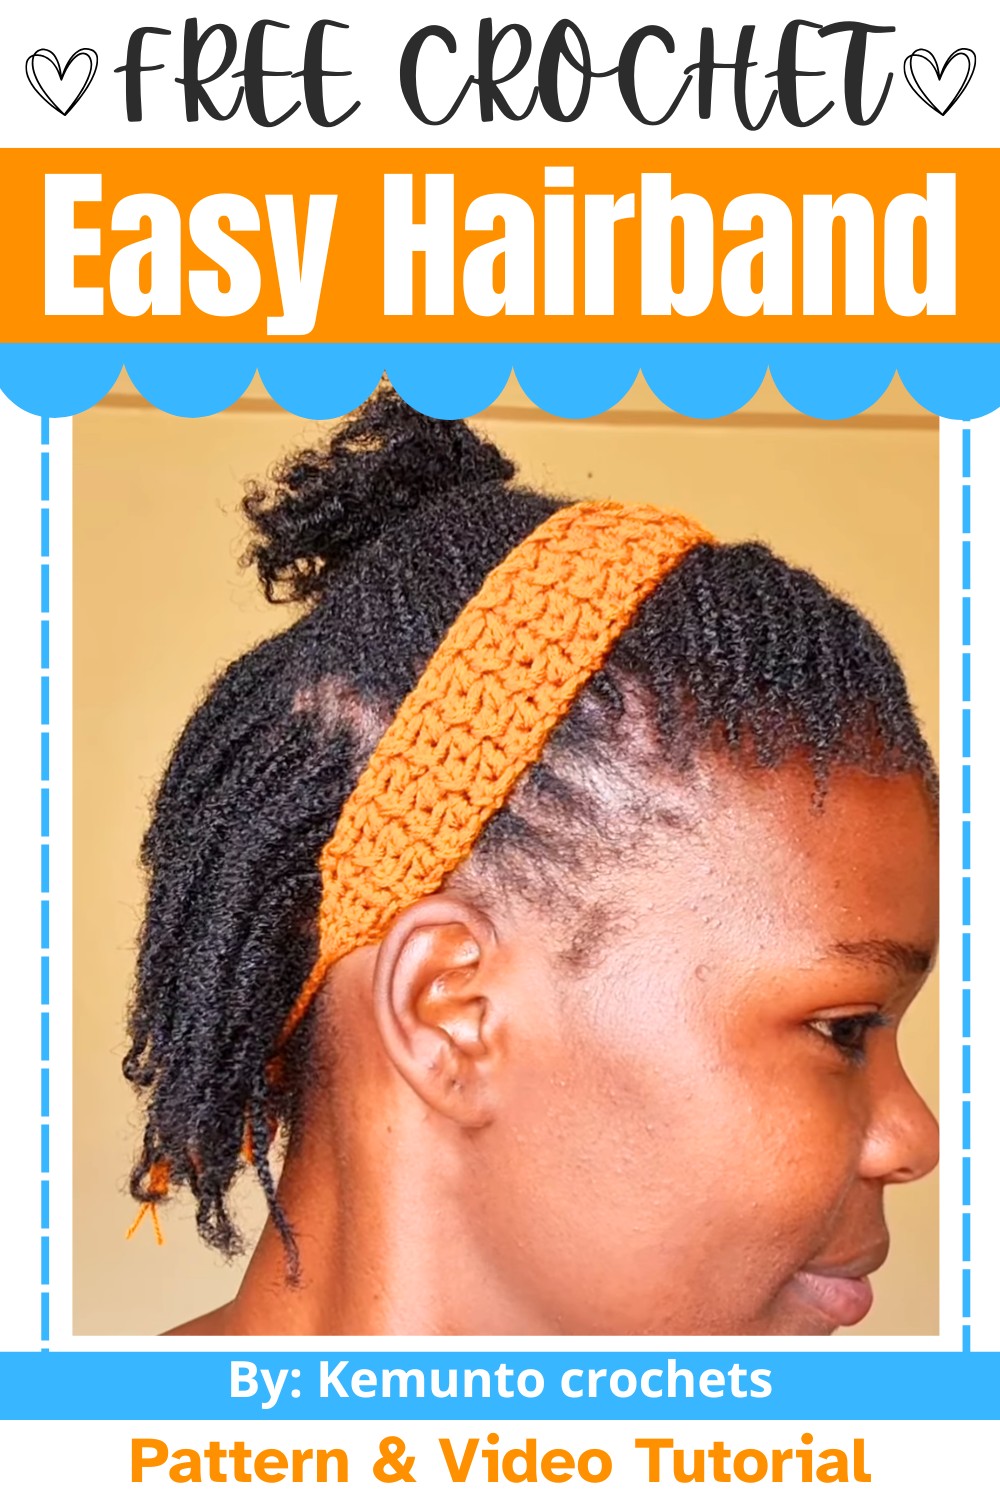
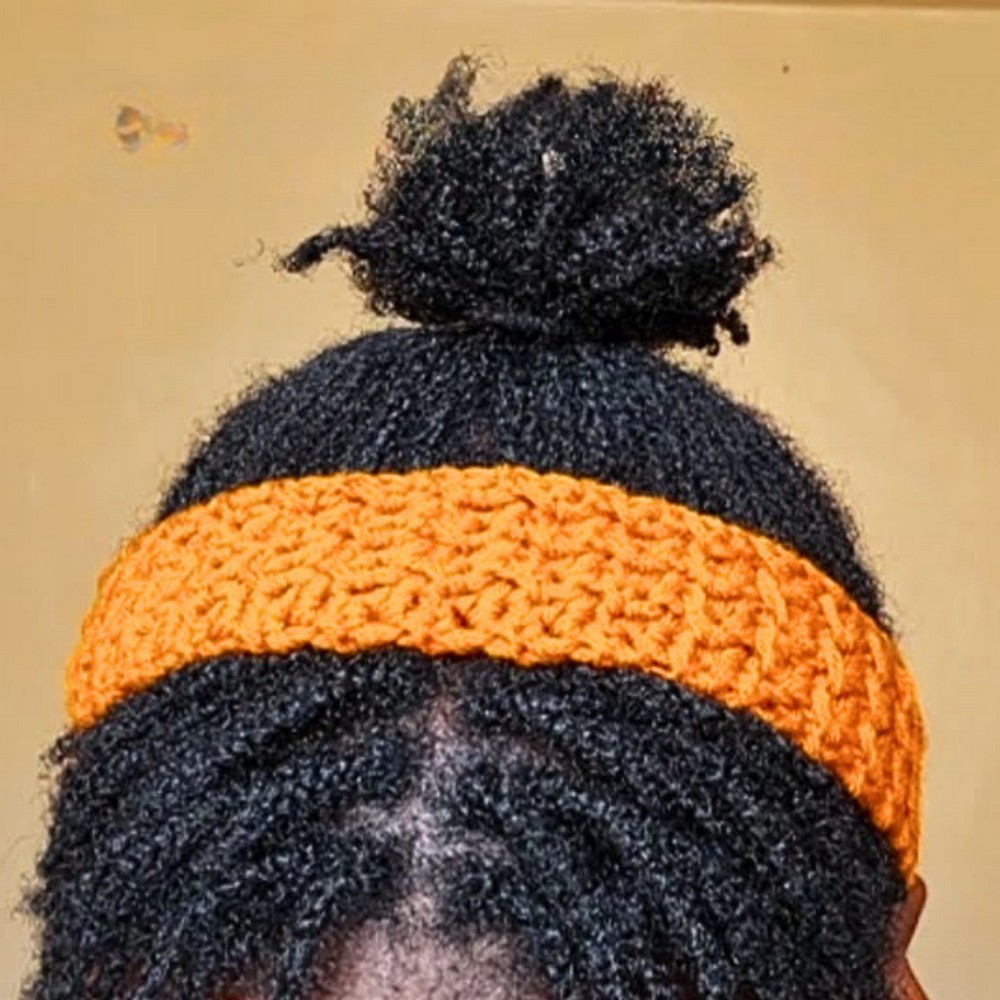
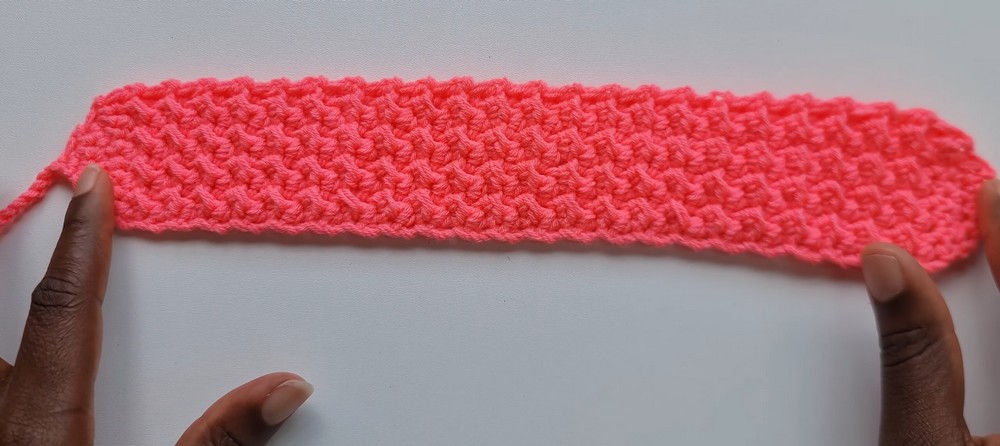
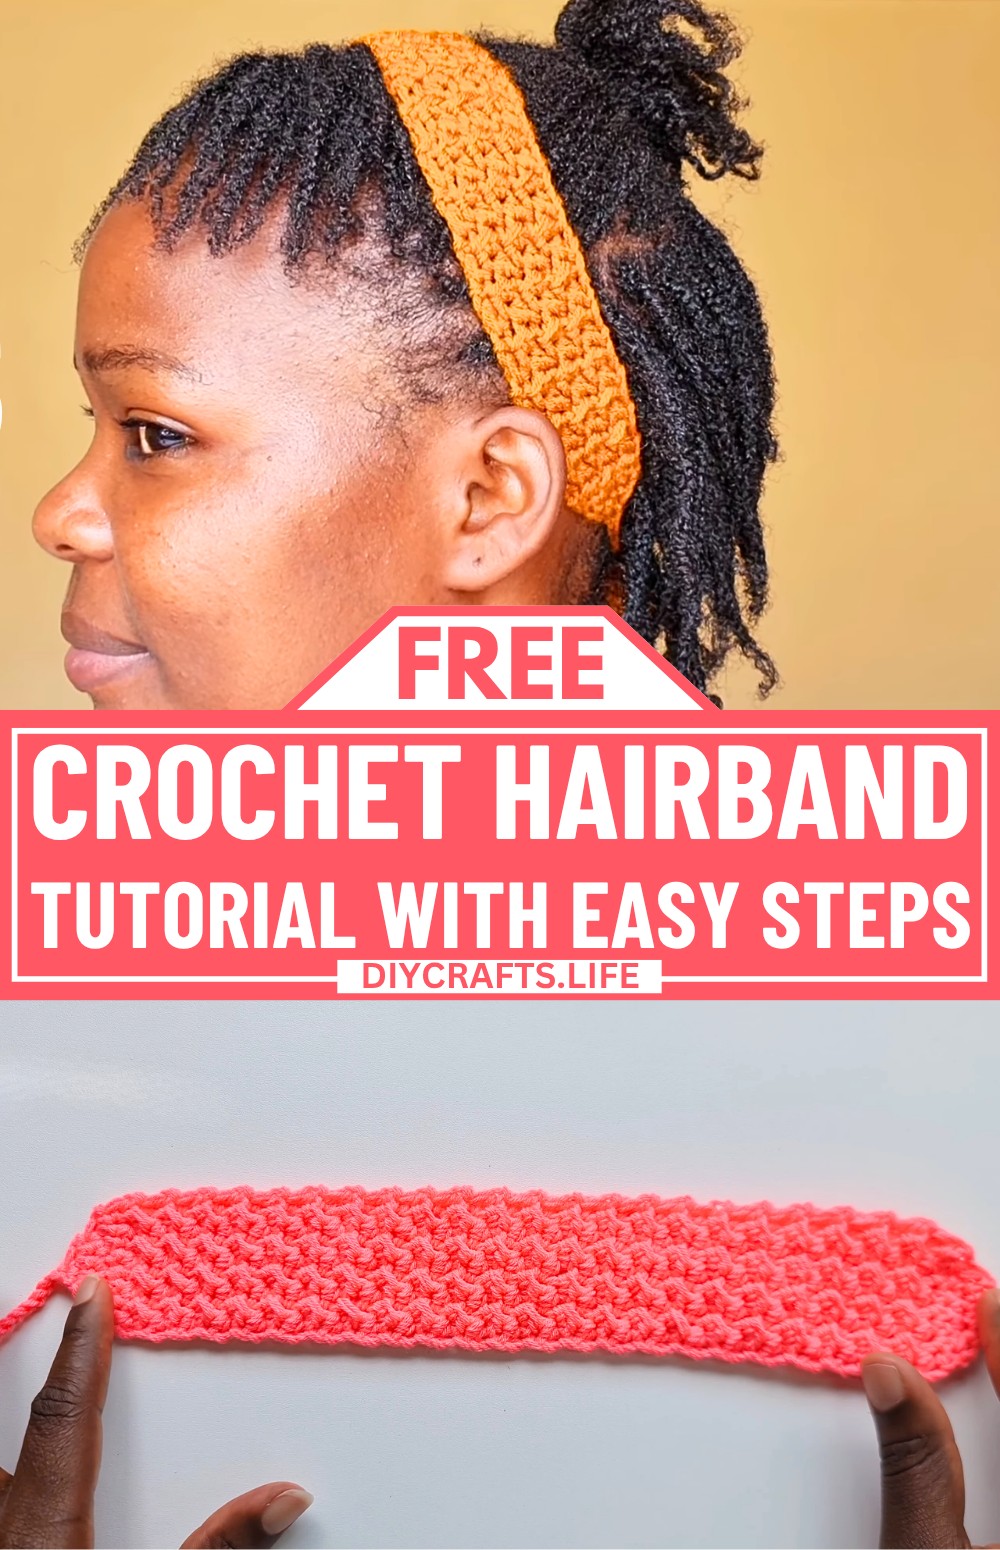
This easy crochet hairband is a simple yet stylish accessory perfect for everyday wear. Its soft and stretchy design ensures all-day comfort, while the well-balanced structure adds a touch of charm to any outfit. You can also adjust the length and width to fit comfortably. You can personalize it with your favorite colors, making it truly unique. Whether for everyday wear or as a heartfelt gift, this hairband is lovely for any occasion.
Crochet Hairband Tutorial
This crochet hairband is beginner-friendly, so even if you are just starting, you’ll find it easy to follow the steps. The design alternates between neat stitches for a textured, stretchy finish. You’ll start by crocheting rows and finish with a tidy, adjustable chain closure. There’s no need to worry about complex techniques; every part of the process is kept simple and approachable. Whether you make it for yourself or gift it to a loved one, this crochet hairband is a sweet and practical piece to add to your collection. You can complete the hairband in less than an hour.
Credit Kemunto crochets
Materials & Tools Needed
- Yarn: Fingering weight yarn (or any yarn of your choice based on desired texture and look)
- Hook: Crochet hook (size appropriate to your yarn; typically 3.5mm to 4.0mm for fingering weight)
- Scissors
- Measuring tape
- Tapestry needle: For weaving in ends
Finished Size & Customization Ideas
- Standard Size: The finished headband measures 12 inches long and 2 inches wide.
- Customization Ideas:
- Length Adjustment: You can add or reduce rows to adjust the length of the hairband.
- Width Adjustment: Start with fewer or more foundation chains.
- Color Customization: Use multiple colors or alternate rows for a striped effect.
- Texture Options: Choose yarn with unique textures or blends for variety in design.
Pattern Abbreviations & Terminology
- ch: Chain
- sc: Single Crochet
- sl st: Slip Stitch
- hdc: Half Double Crochet
- sc-dec: Single Crochet Decrease
- YO: Yarn Over
All stitches and instructions follow US crochet terminology.
Step-by-Step Crochet Instructions
Follow these steps carefully to replicate the exact pattern.
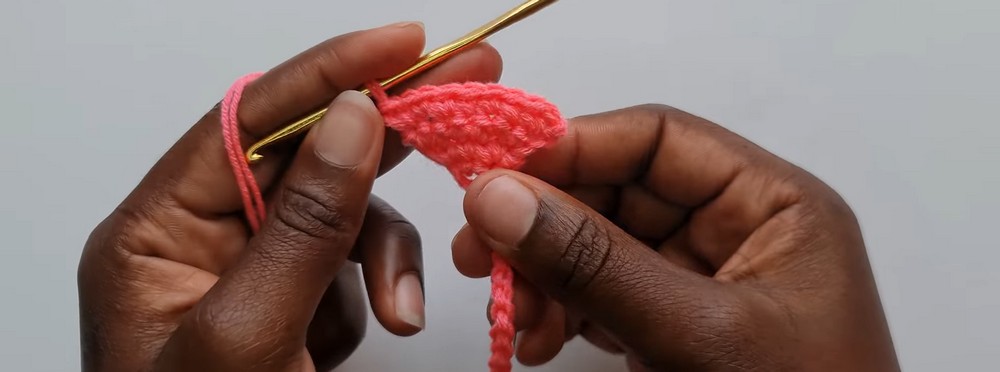
Foundation Chain
- Begin with a slip knot.
- Chain 45 (or adjust the number of chains based on width preference).
Row 1
- Tighten the last chain by pulling the loop on your hook up and down until the chain is secure.
- Ch 1 (turning chain).
- Skip the first chain, and in the second chain:
- Place 3 sc into the same chain.
- End of Row 1.
Row 2
- Ch 1, turn work.
- Into the first stitch, work 2 sc.
- Into the next stitch, work 1 sc.
- Into the last stitch, work 2 sc.
- You should now have a total of 5 stitches in Row 2.
Row 3
- Ch 1, turn your work.
- Into the first stitch, work 2 sc.
- Work 1 sc each into the next 3 stitches.
- Into the last stitch, work 2 sc.
- You should now have 7 stitches in Row 3.
Row 4
- Ch 1, turn your work.
- Into the first stitch, work 2 sc.
- Work 1 sc each into the next 5 stitches.
- Into the last stitch, work 2 sc.
- You should now have 9 stitches.
Row 5
- Ch 1, turn work.
- Alternate between hdc and sl st across the row:
- Start with hdc in the first stitch.
- Sl st into the next stitch.
- Continue alternating hdc and sl st until the final stitch.
- End Row 5 with hdc (if you start with hdc, you must end with hdc).
- Total stitches remain 9.
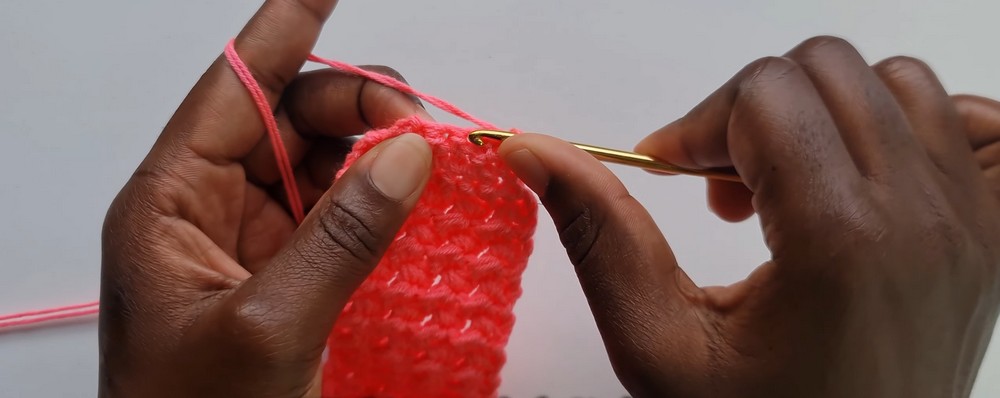
Row 6
- Ch 1, turn your work.
- Alternate between sl st and hdc:
- Start with sl st in the first stitch.
- Hdc into the next stitch.
- Continue alternating between sl st and hdc.
- End Row 6 with sl st (if you start with sl st, end with sl st).
- Total stitches remain 9.
Row 7
- Ch 1, turn your work.
- Alternate between hdc and sl st:
- Start with hdc in the first stitch.
- Sl st into the next stitch.
- Continue alternating.
- End Row 7 with hdc.
- Total stitches remain 9.
Row 8
- Ch 1, turn your work.
- Alternate between sl st and hdc, placing:
- Sl st in the first stitch.
- Hdc in the next stitch.
- Continue alternating between valley stitches (hdc) and heel stitches (sl st).
- End Row 8 with sl st.
- Note: Valleys = Hdc; Heels = Sl st.
Repeating Rows
Repeat Rows 7 and 8 alternately until Row 48:
- Ensure you maintain consistency:
- Row starts with hdc or sl st as per the pattern.
- End the row with the same stitch type you started with.
Decreasing Rows (49–52)
Row 49:
- Ch 1, turn your work.
- Sc dec over the first two stitches.
- Work 1 sc each in the next 5 stitches.
- Sc dec over the last two stitches.
- Total stitches: 7
Row 50:
- Ch 1, turn your work.
- Sc dec over the first two stitches.
- Work 1 sc each in the next 3 stitches.
- Sc dec over the last two stitches.
- Total stitches: 5
Row 51:
- Ch 1, turn work.
- Sc dec over the first two stitches.
- Work 1 sc into the next stitch.
- Sc dec over the last two stitches.
- Total stitches: 3
Row 52:
- Ch 1, turn work.
- Sc dec across all three stitches.
- Fasten off.
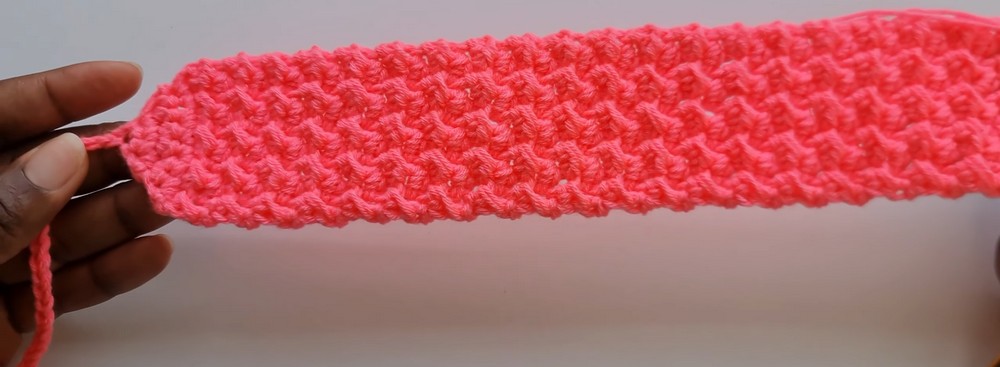
Final Steps
- Create matching chains: Chain 45 (same count as the foundation chain).
- Cut yarn and fasten off neatly.
- Align the two ends of the hairband and trim excess tails.
- Optional: Weave in loose ends.
Customization
- Adjust rows or chains to fit your preferences—longer for more stretch or wider for thickness.
- For dynamic effects, incorporate multi-colored yarn or striped rows.
Video Tutorial