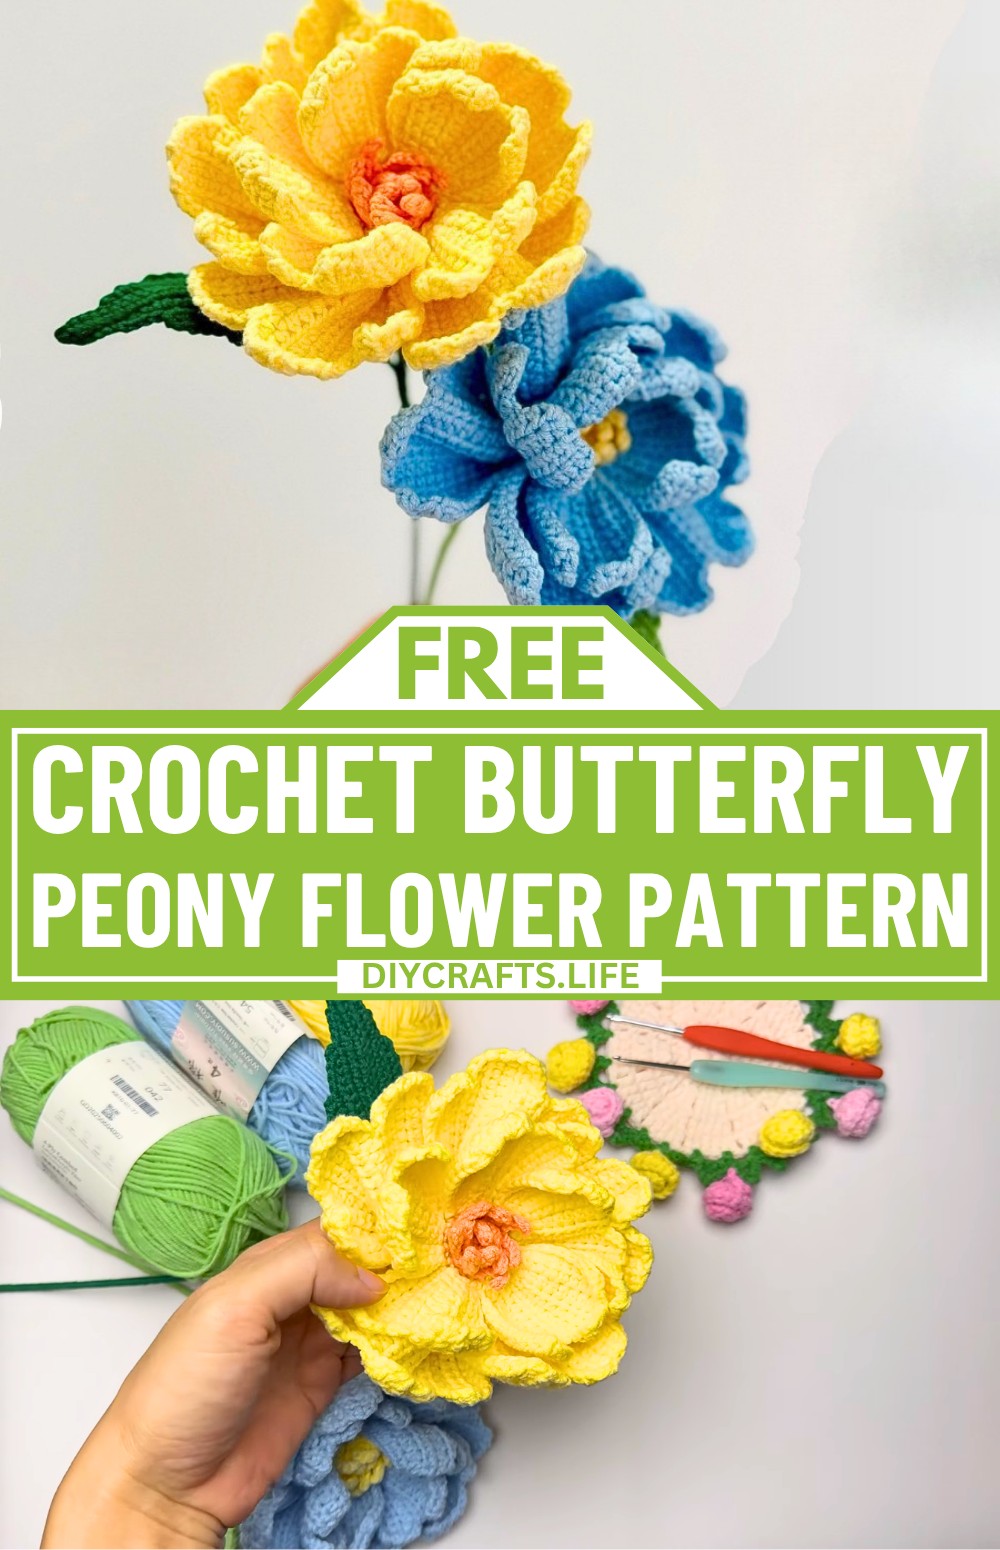
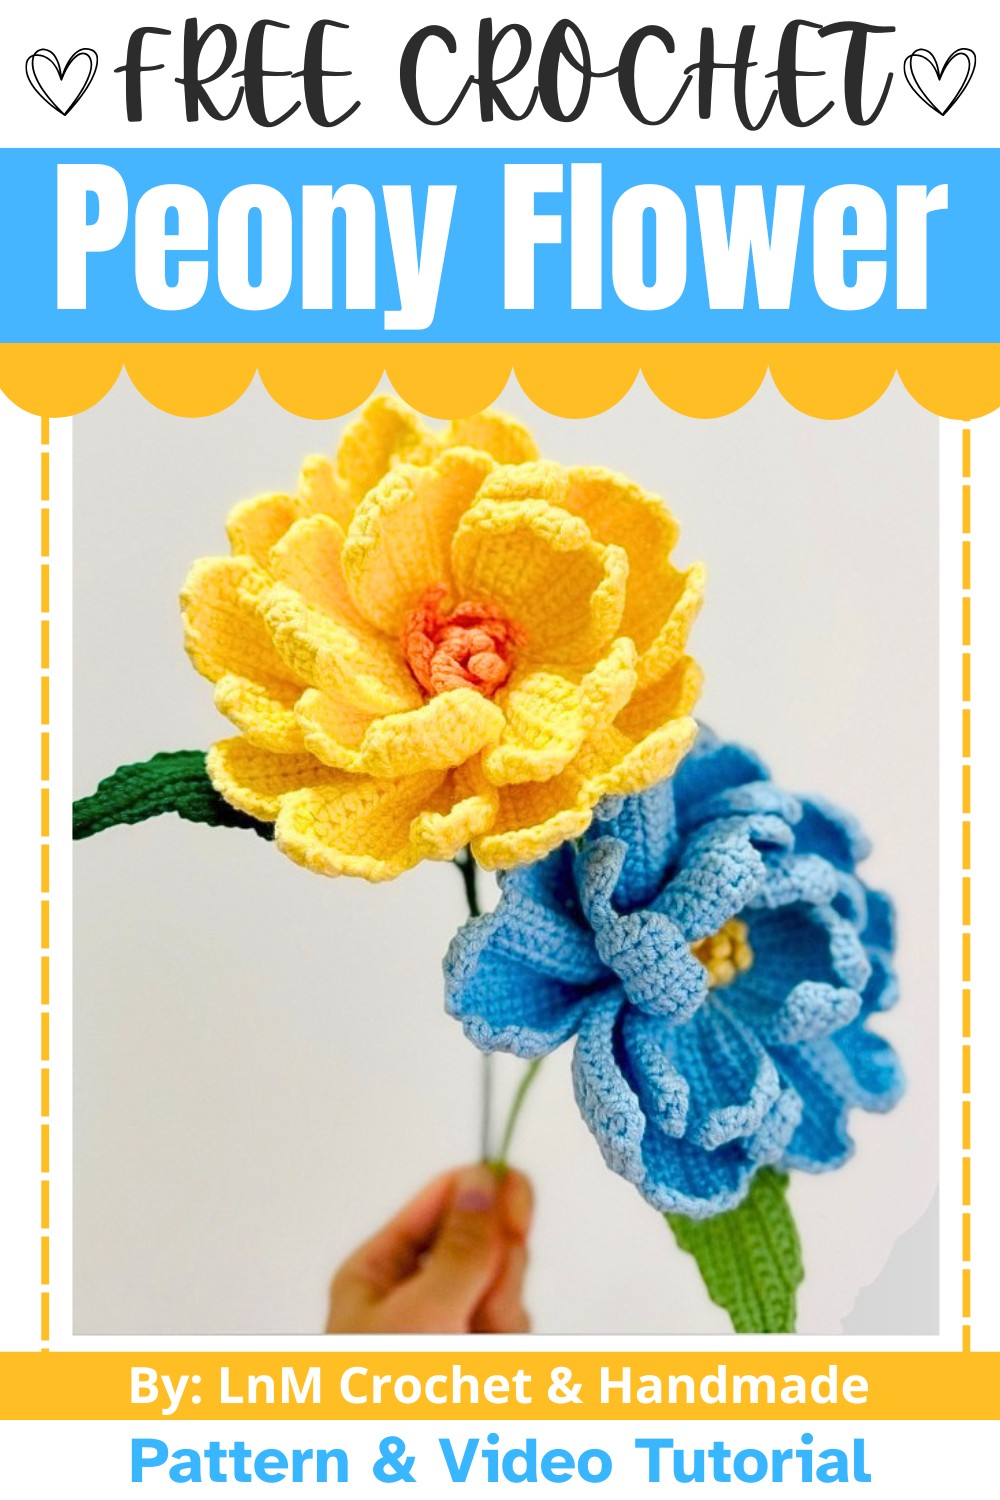
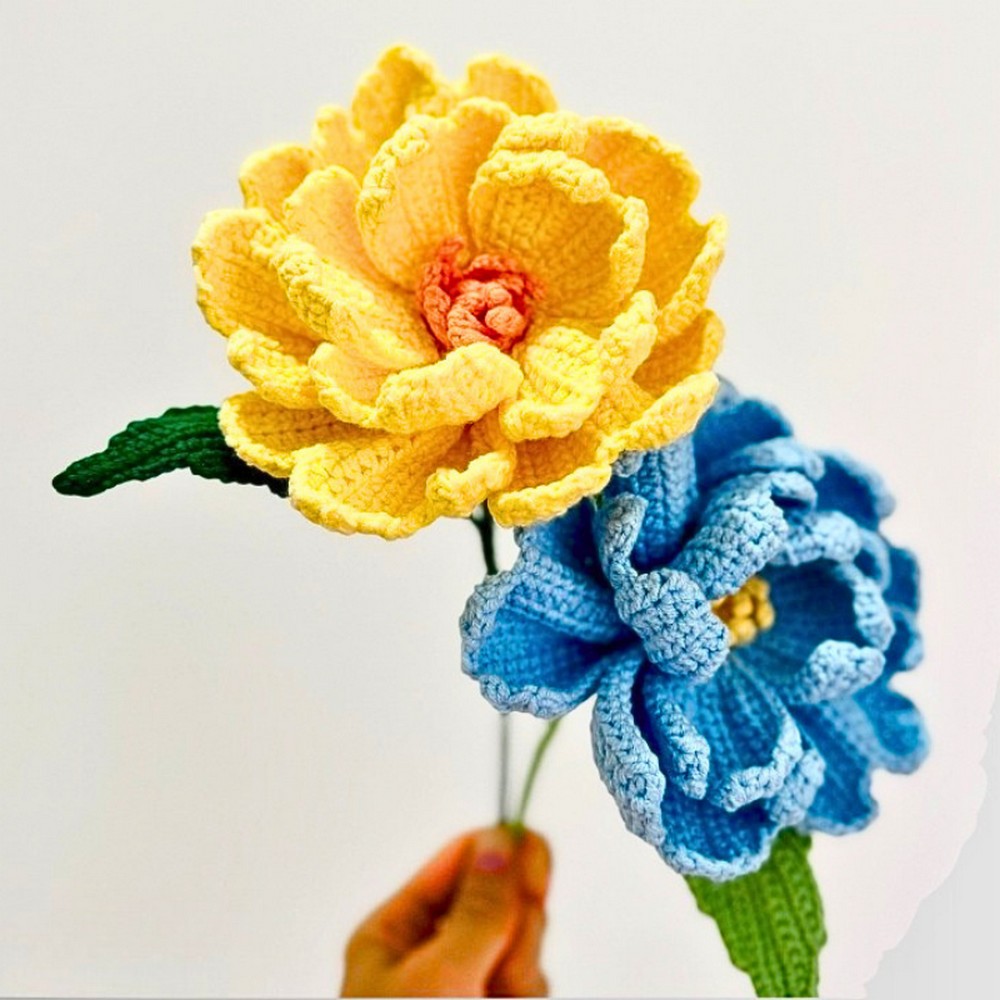
The butterfly peony flower is a stunning crochet creation that combines elegance and charm. Its delicate petals and intricate design make it a perfect addition to any space. This flower is not just beautiful but also versatile. Use it to decorate your home, create unique bouquets, or add a touch of beauty to gifts, clothing, or accessories. Its soft, layered petals and vibrant details resemble a real blooming flower, making it an eye-catching piece.
Crochet Butterfly Peony Flower
Making the butterfly flower involves layering petals, shaping leaves, and adding a realistic finish with a stem and sepals. The process may sound intricate, but with patience, anyone can create this lovely flower. This activity is not only a relaxing hobby but also a great way to make something truly special. Beginners and seasoned crocheters alike will enjoy the rewarding experience of seeing this flower come to life.
Credit LnM Crochet & Handmade
Materials & Tools Needed
- Yarn:
- Main flower color (e.g., pink, red, or any desired petal color)
- Green yarn for the sepals and leaves
- Hook Size: As recommended on your yarn label (commonly 2.5mm to 3.5mm for small floral work)
- Wire:
- 40 cm floral stem wire (for support and leaves)
- Tapestry Needle: For weaving in ends
- Scissors
- Stitch Markers (optional): To help mark positions, especially for petals and row counts
- Rubber Band (optional): To hold the completed petals while working on the next layers
- Stuffing (optional): If your flower needs extra fullness
Finished Size
The exact size will vary depending on your yarn and hook choice:
- Using medium-thickness yarn and a hook (e.g., 2.5mm), the flower will be approximately 4–5 inches in diameter.
- Petal size and density can be increased or decreased by adding or reducing rows and chains.
Customization Ideas
- Petal Count Variations: Increase or decrease petal rows or stitches for fuller or less dense flowers.
- Layer Colors: Use gradients (e.g., light pink-dark pink-yellow) or different colors for each petal layer.
- Leaves & Sepals: Add more decorative leaves to enhance the floral arrangement.
- Sparkle Yarn: Use sparkle or metallic thread for a shimmer effect.
Pattern Abbreviations & Terminology
- ch: Chain
- sc: Single Crochet
- sl st: Slip Stitch
- hdc: Half Double Crochet
- st(s): Stitch(es)
- inc: Increase (two stitches in the same stitch)
- dec: Decrease (combine two stitches into one)
- blo: Back Loop Only
- flo: Front Loop Only
- MR (Magic Ring): Adjustable loop to crochet in rounds
Pattern Notes:
- U.S. Terminology is used.
- Numbers in parentheses (e.g., (10 sts)) at the end of instructions indicate the stitch count for that row/round.
Step-by-Step Crochet Instructions
This flower consists of several distinct parts: the base, petals (2 layers), sepals, and leaves.
Part 1: Base Layer
- Magic Ring (MR): Start with MR, ch 1 (does not count as a stitch).
- Round 1: 5 sc into the ring. Pull the ring tight and sl st into the first sc. (5 sts)
- Round 2: Ch 1, 5 inc (work 2 sc in each st around). Sl st to the first sc (10 sts).
- Prepare for the next round:
- Work flo (front loop only) for the petals in the following rounds.
- Insert markers if necessary.
Part 2: Pistil
To create the pistil (inner detail):
- Round 3 (Front Loops Only):
- Ch 4, sl st in the 2nd ch, sl st in the following 2 ch.
- Sl st into the next front loop, ch 4, and repeat the process to create 7 small extensions.
Finishing Row 3: Sl st into the first stitch, fasten off, and cut.
Part 3: First Layer of Petals
- Reattach Yarn: Attach yarn to the back loop of Round 2, ch 1.
- Round 4 (Back Loops Only): Work (1 sc, 1 inc) repeat 5 times. Sl st to the first sc. (15 sts)
Creating Petals (5 petals in total):
Each petal uses 3 base stitches. Be mindful of where petals overlap on the base layer. Repeat for all five petals.
- Row 1 of Petal: Ch 11. Starting from the 2nd ch, hdc in the next 8 ch, sc in the next 2, and sl st into the second stitch (flo). Turn work.
- Row 2: Skip first st, sc in next 2 sts, hdc in next 8 sts. Ch 1, turn.
- Repeat 12–15 rows with slight decreases to form rounded petals.
- Each row involves fewer hdc at the top.
- End of Petal: When all rows are complete, sl st into the next unworked back loop stitch on Row 4 base.
Repeat Steps 3–6 for the remaining 4 petals.
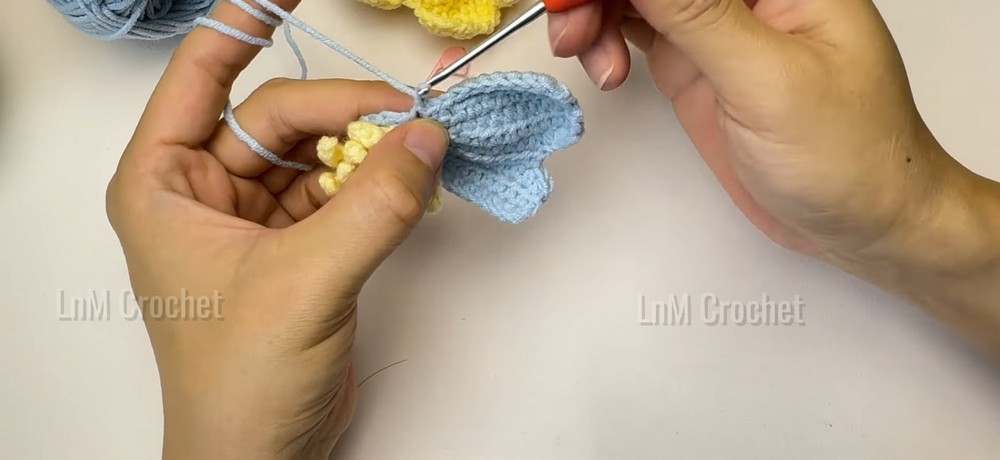
Part 4: Second Layer of Petals
- Reattach Yarn: Sl st into the next blo. Ch 1.
- Round 5 (Back Loops Only): Work (2 sc, 1 inc) repeat 5 times. Sl st to the first sc. (20 sts)

Creating Larger Petals (5 in total):
- Row 1 of Petal: Ch 13. Starting from the 2nd ch, hdc in the next 10 ch, sc in the remaining 2, sl st into the 2nd base stitch. Turn.
- Rows 2–15: Repeat the rounding process like the first petals but more extensive (longer rows at the start, gradually decreasing).
- This layer occupies 4 base stitches per petal.
Finishing: When all 5 petals are complete, sl st into the first stitch to close.
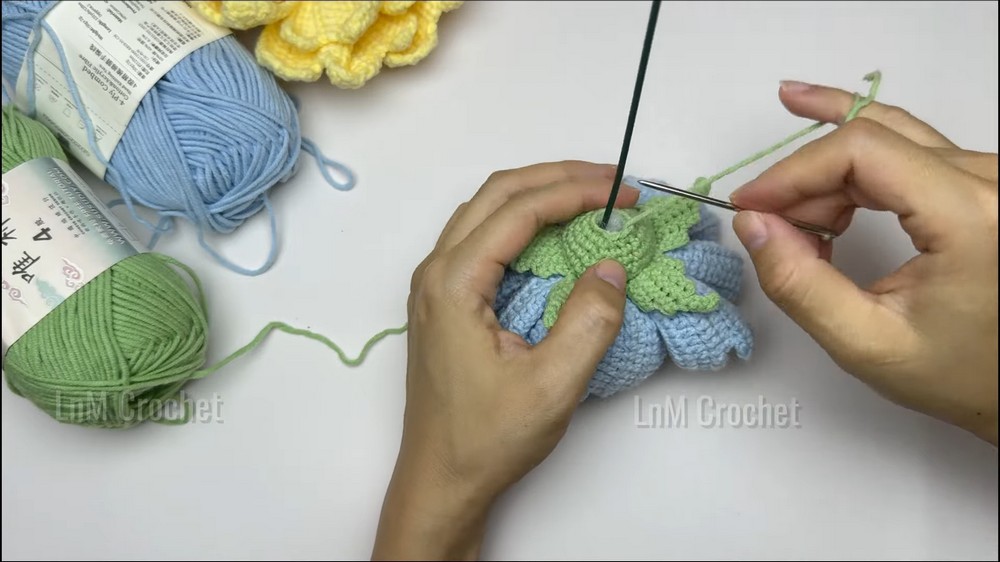
Part 5: Sepals
- Round 6: Reattach green yarn to the next unworked back loop. Ch 1.
- Work (1 sc, 1 inc) repeat around, sl st to the first sc. (30 sts)
Creating Sepals (5 in total):
- Row 1: Ch 5, start in 2nd ch, sl st to base.
- Add 3 rows of pointed stitch designs, increasing at the tip.
- Sl st at the base and proceed to the next section of stitches.
Part 6: Leaves
- Use green yarn and floral wire.
- Foundation Chain: Ch 29, attach the wire, and ch 2 more.
- Work around the wire using 17 sc, shaping around the wire.
- Continue forming leaf lobes with slip stitches and single crochets to achieve a natural shape.
Repeat for as many leaves as desired.
Assembly
- Attach Wire Stems: Insert green floral wire as a base, shaping the flower.
- Secure Petals: Carefully fan the petals, shaping them for the layered effect.
- Add Leaves: Wrap attached leaves to stems or floral tape.
- Optional: Use floral tape to combine multiple stems into a bouquet.