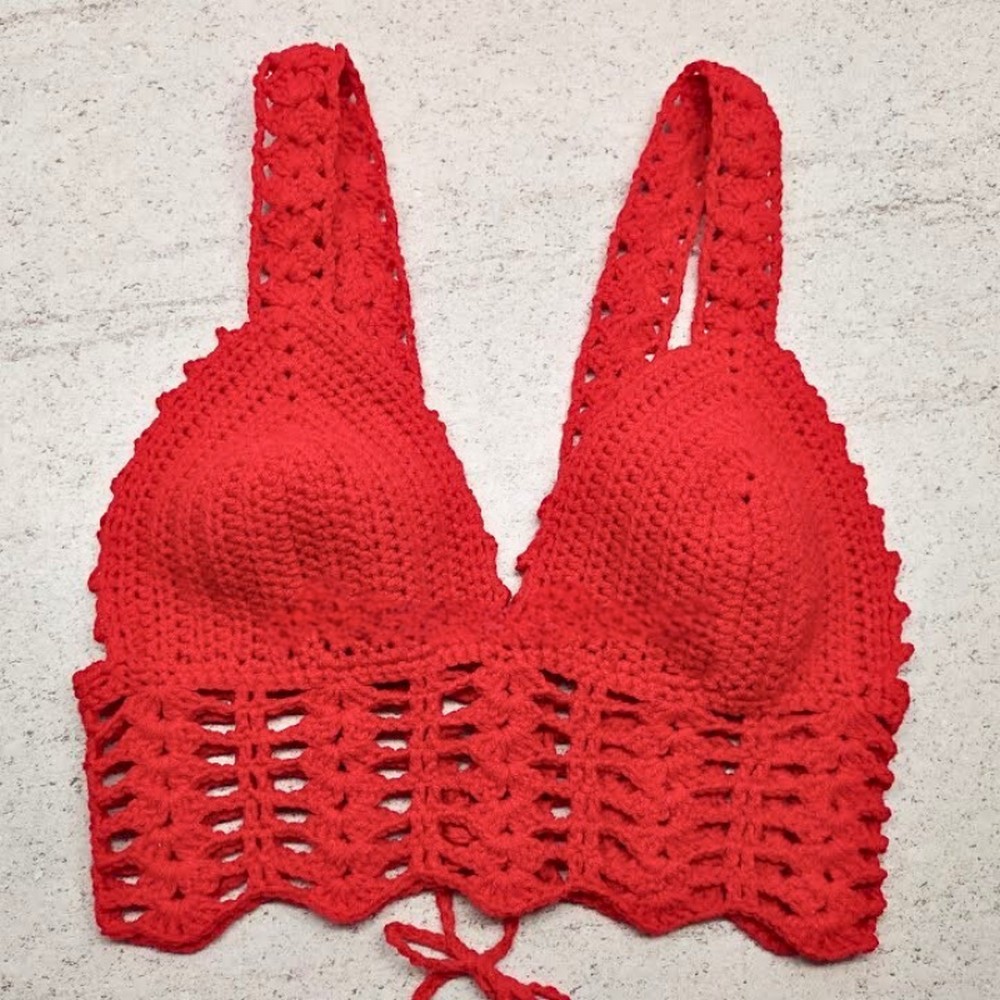
Transform your summer style with a sleek and stylish red crochet bralette! Perfect for pairing with beach cover-ups, this lightweight and customizable piece combines modern elegance with a bohemian vibe, making it ideal for sunny days, casual outings, or beach getaways.
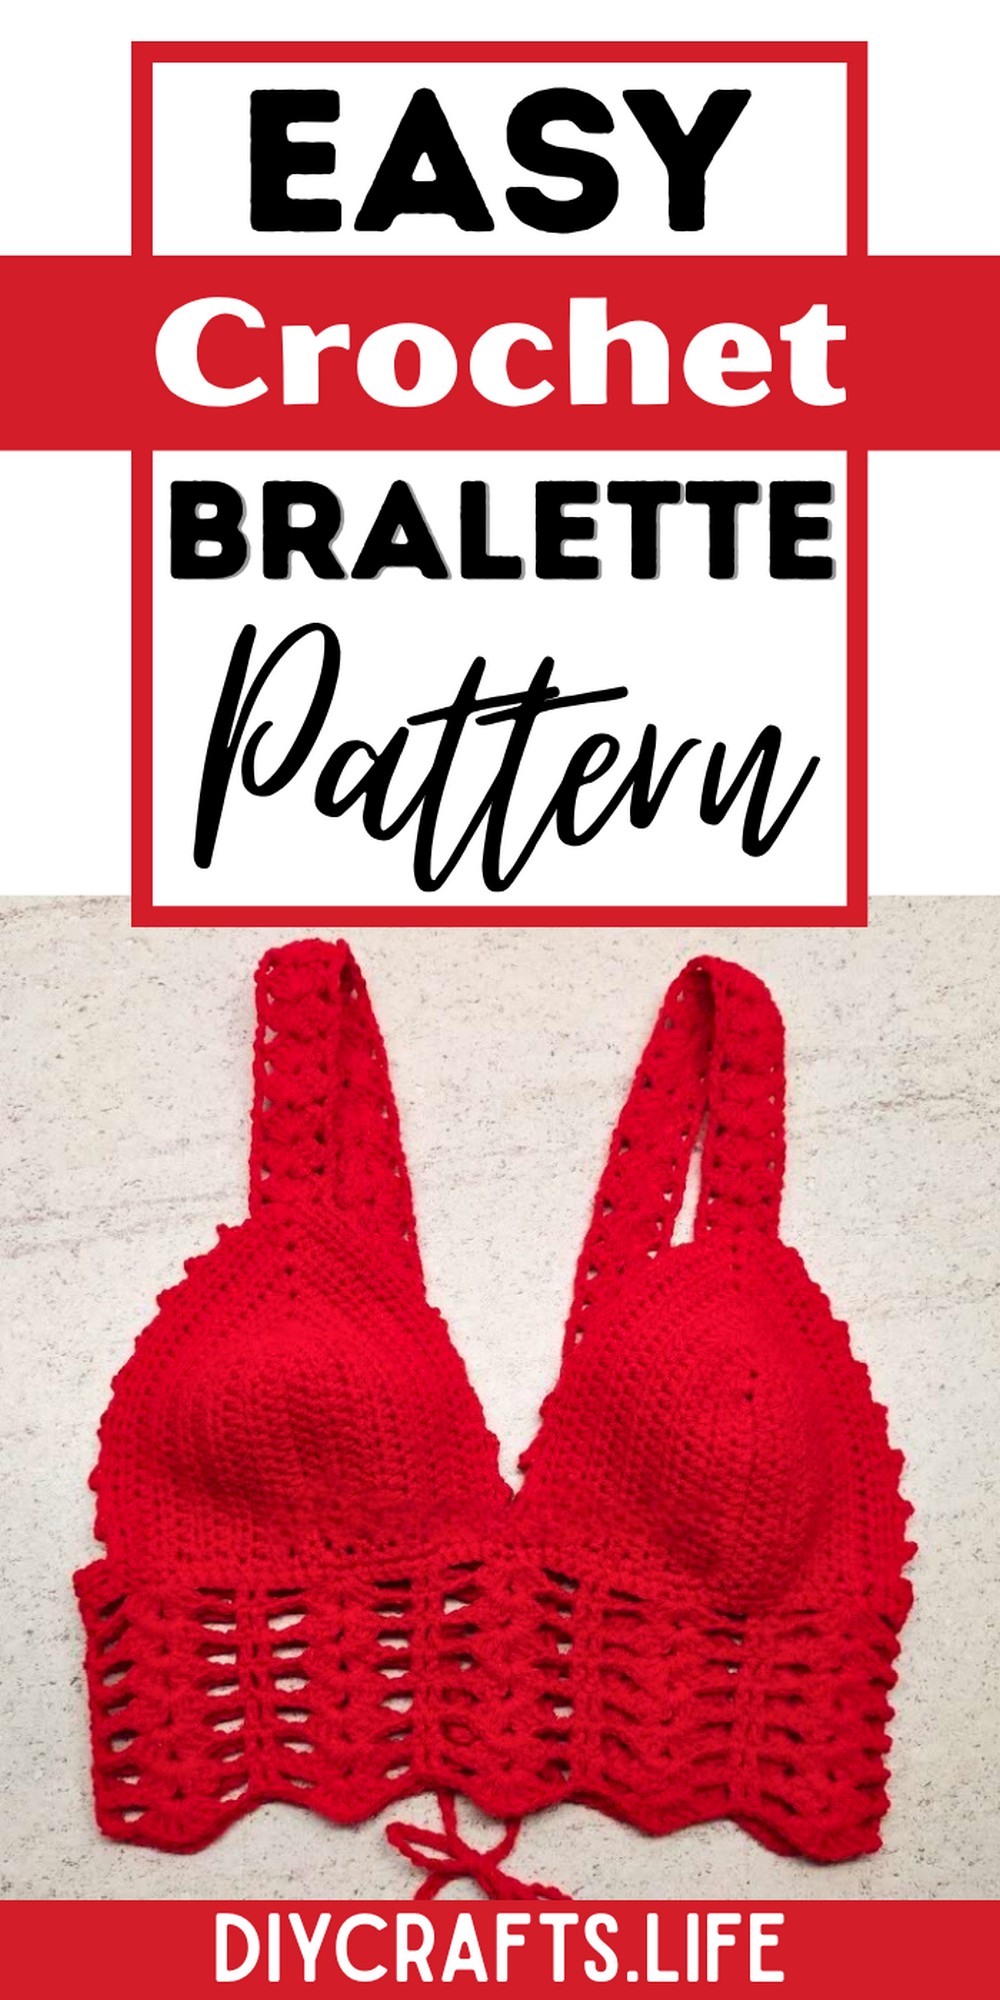
This handmade crochet bralette is as functional as it is gorgeous. Its snug yet comfortable fit ensures durability and support, while its intricate picot edges and delicate pattern add a timeless charm. Whether for casual wear or beach attire, it's a versatile addition to your wardrobe.
Crochet Bralette Pattern
Crafting this bralette is a joyful journey, suitable for crochet enthusiasts of all levels. With clear patterns, simple stitches like double crochets, and opportunities for customization, this project blends relaxation with creativity, resulting in a wearable work of art you’ll be proud to flaunt.
Materials and Preparation:
To crochet this stunning red bralette, you will need the following materials:
- Yarn: Alize Cotton Gold Yarn, Color No. 56 (Lightweight yarn).
- Hook: 3.5 mm crochet hook.
- Additional Tools:
- Stitch markers
- Scissors
- Measuring tape
Abbreviations and Notes:
Here are the crochet abbreviations used in this pattern and key notes to follow:
- CH: Chain
- HDC: Half Double Crochet
- SC: Single Crochet
- DC: Double Crochet
- ST: Stitch
- SL ST: Slip Stitch
- SK: Skip
- SP: Space
Key Notes:
- This tutorial is designed for a size small bralette. Adjusting for other sizes may require modifying the number of foundation chains or rows.
- Take care to keep stitches consistent to maintain symmetry for the bralette's overall design.
- Make a gauge swatch if you'd like to ensure size accuracy before starting the main project.
Gauge, Approximate Size, and Pattern Notes:
Gauge:
Although precise gauge details are not provided, the lightweight yarn combined with a 3.5 mm hook should result in smooth and compact stitches. A swatch of 4 inches by 4 inches should be worked to ensure correct tension. Adjust your hook size if necessary.
Approximate Size:
The finished bralette is best suited for a size small with adjustable straps.
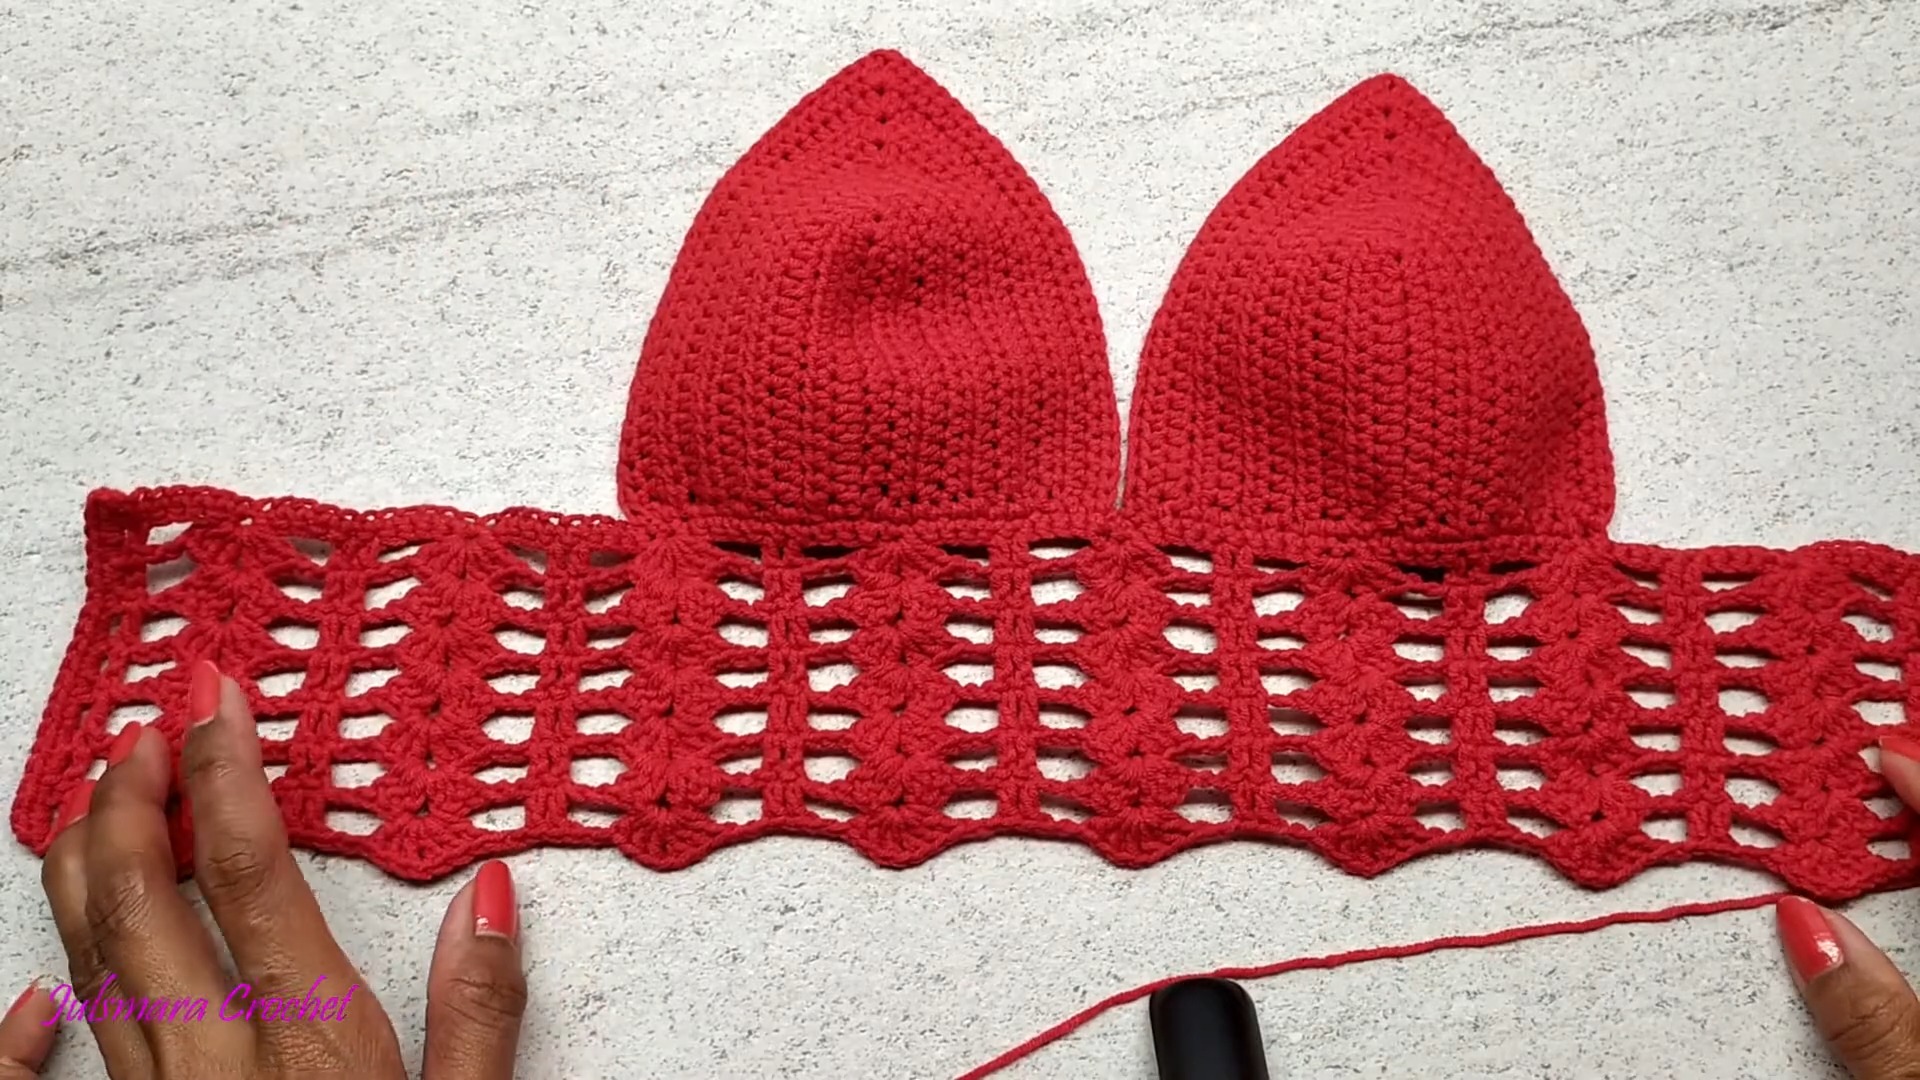
Step-by-Step Pattern:
Follow these instructions carefully to crochet your red bralette:
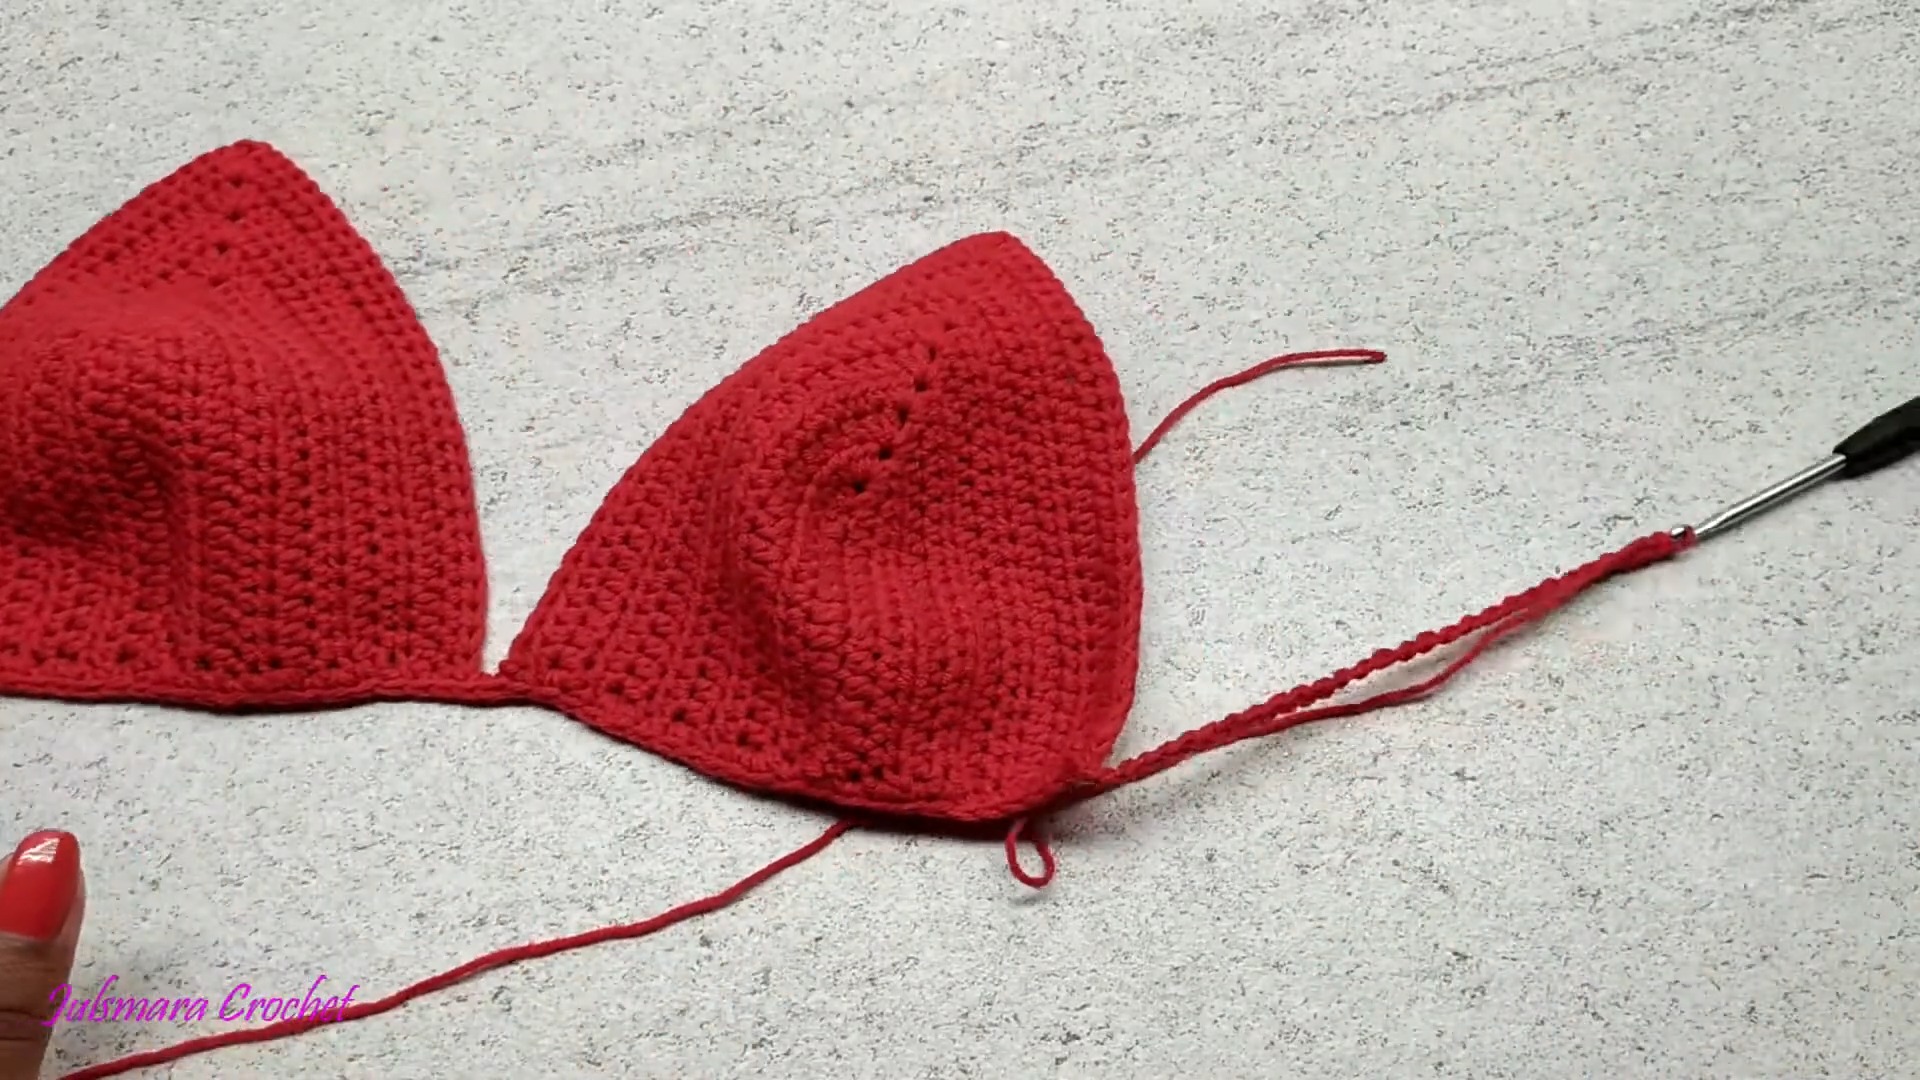
Step 1: Creating the Bra Cups
-
Start by chaining 15 to create the foundation chain.
-
Begin in the 14th CH:
- Yarn over, insert the hook into the stitch, pull through (3 loops on the hook).
- Yarn over again and pull through all 3 loops to create a HDC.
-
Continue creating HDC stitches across the foundation chain. You should have 14 HDCs in this row.
-
At the last ST, add:
- 2 HDC, CH 1, and 2 more HDC (for shaping).
-
Turn your work, chain 1, and repeat the row process:
- Place a single HDC in each stitch until you reach the CH 1 space.
- In the CH 1 space: Add 2 HDC, CH 1, and 2 HDC. Continue down the next side.
-
Repeat this process to widen the bra cup until you have completed 10 rows.
-
Make a second bra cup by repeating Steps 1-6.
Step 2: Connecting the Bra Cups
- Chain 2 and place the second bra cup beside the first one.
- Join the cups by working a slip stitch through the first ST of both bra cups. CH 1 and cut the yarn.
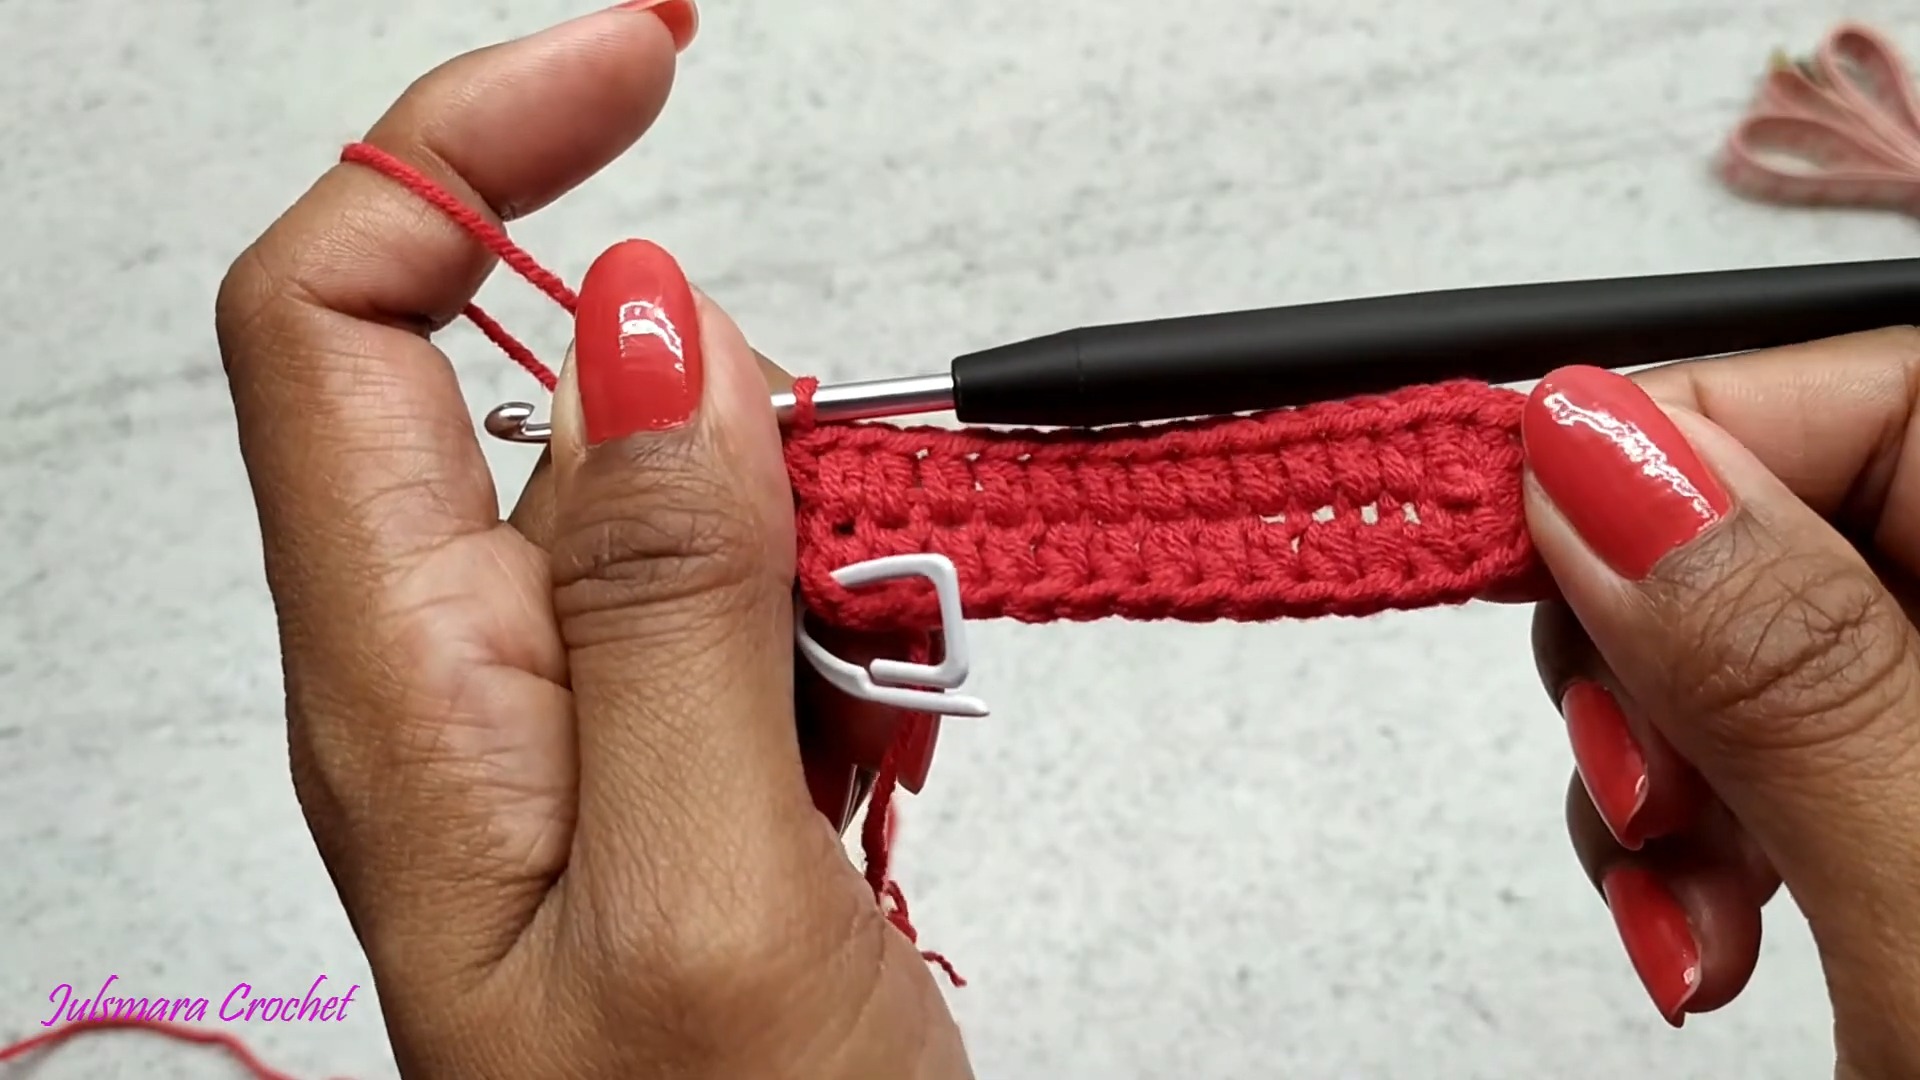
Step 3: Adding the Bralette Band
-
Begin by chaining 28 stitches (this will form the side strap).
-
Work SC stitches as follows:
- Across the first bra cup, work 22 SC.
- Place 2 SC in the center join of the cups.
- Work 22 SC across the second bra cup.
- Chain 28 stitches for the opposite side strap.
-
You will have a total of 102 stitches around the band.
-
For the next row, work SC stitches evenly across to create a stable base.

Step 4: Decorative Shell Pattern
-
Now we’ll start with the decorative shell pattern for the bralette.
-
Begin with CH 3, turn your work, then work as follows:
- SK 4 ST, in the next ST, work:
- 3 DC, CH 1, 3 DC (all in the same ST to form the shell).
- CH 2, SK 4 ST, then work 1 DC in the next 2 stitches.
- Repeat this sequence across.
- SK 4 ST, in the next ST, work:
-
For the next row:
- Begin with CH 3, turn.
- Into the CH 1 space of each shell, work: 3 DC, CH 1, 3 DC.
- CH 2 and place DC on top of the previous rows' DC.
-
Repeat this pattern for a total of 7 rows, or until your desired height is reached.
Step 5: Picot Edging and Straps
-
To create a decorative edging, add picot stitches:
- Work SC along the edge of the bralette. For every SC, chain 3, SL ST into the first SC, and continue with SC.
-
Create straps for tying:
- Attach the yarn at the corners of the bra cups and work 150 chains.
- Secure the strap with a SL ST and weave in the ends.
Step 6: Finishing Touches
- Add any additional rows if a longer band or length is required. Optional: Attach fringe along the bottom edge for a beachy look.
- Weave in all loose ends using a yarn needle.

Pattern Question:
Q: How do I ensure that the bralette fits perfectly?
A: Measure yourself carefully before starting and follow the pattern's foundation chain recommendations. You can customize the sizing by adding or reducing rows for the bra cups or straps, ensuring a snug and comfortable fit.
Conclusion
This crochet bralette is the perfect combination of elegance, creativity, and practicality. Whether you're crafting it for yourself or as a gift, you'll enjoy the process and the stunning end result. Don’t miss the chance to add this gorgeous, handmade creation to your crochet repertoire!