

This adorable crochet butterfly keychain is a simple yet beautiful accessory that adds a touch of charm wherever you use it. Whether attached to your keys, a bag, a zipper, or gifted to someone special, it’s a wonderful way to add a personal, handmade touch to everyday items.

Making it is fun and easy, especially since you can customize the colors to match your style or mood. You’ll only need a bit of yarn, a crochet hook, and a few simple steps to create this delightful design. Perfect for beginners, this Keychain pattern is approachable and rewarding, resulting in a butterfly that you’ll want to make over and over again.
Credit Crochet Craftsman
Materials & Tools Needed:
- Yarn: Himalaya Himagurumi cotton yarn (or similar medium-weight cotton yarn).
- Crochet Hook: 2.5 mm crochet hook.
- Keyring Clip: For attaching the butterfly to a keychain.
- Scissors: To cut the yarn.
- Yarn Needle: For weaving in the ends.
- Stitch marker (optional – to help keep track of rounds).
Finished Size & Customization Ideas:
- Size: Depending on your yarn and hook, the butterfly will be small enough to serve as a keychain embellishment.
- Customizations:
- Change the colors for a personalized butterfly (e.g., use pastel colors for a soft look or bold shades for vibrancy).
- Adjust the size by using different yarn weights and hook sizes.
- Decorate further with beads or embellishments around the butterfly's body.
Pattern Abbreviations & Terminology:
(American Crochet Terminology is used)
- Ch: Chain
- Sl st: Slip Stitch
- Sc: Single Crochet
- Dc: Double Crochet
- Magic Ring: An adjustable ring that starts a project worked in the round.

Step-by-Step Detailed Crochet Instructions:
Creating the Butterfly Wings
Start the Butterfly Base:
- Begin with a magic ring.
- Round 1:
- Ch 3 (counts as the first dc).
- Into the magic ring: Work 2 dc, Ch 2.
- Repeat this sequence: 2 dc, Ch 2 into the magic ring until you have 8 groups of 2 dc.
- After the 8th group, Ch 2, then Sl st to the top of the starting Ch 3 to join the round.
- Tighten the magic ring slightly.
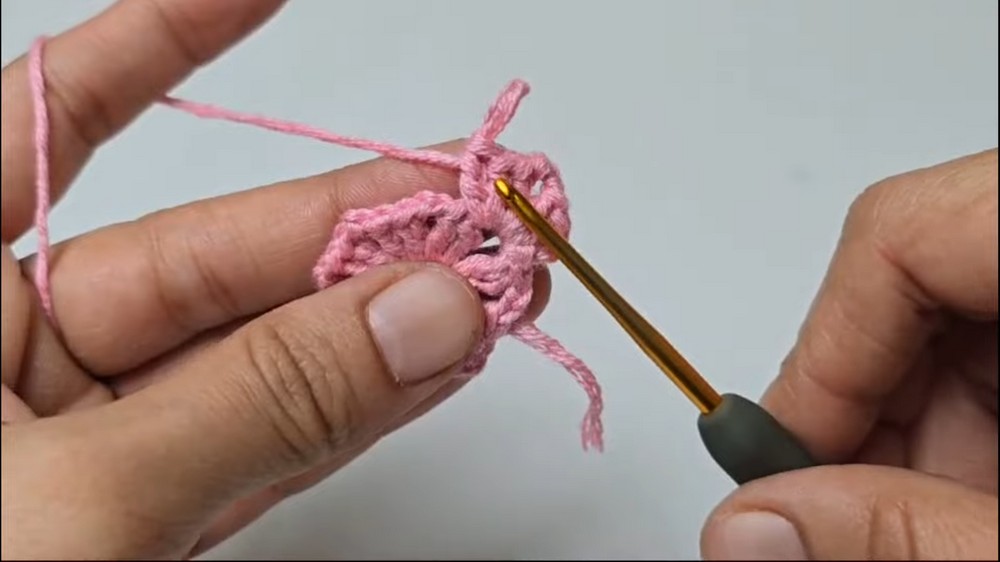
- Round 2:
- Work into each ch-2 space from the previous round:
- Ch 3 (counts as the first dc), 2 dc, Ch 3, 3 dc.
- Repeat the stitch pattern (3 dc, Ch 3, 3 dc) around all 8 spaces.
- Sl st to the top of the first Ch 3 to close the round.
- Work into each ch-2 space from the previous round:
Adding Colorful Outer Wings
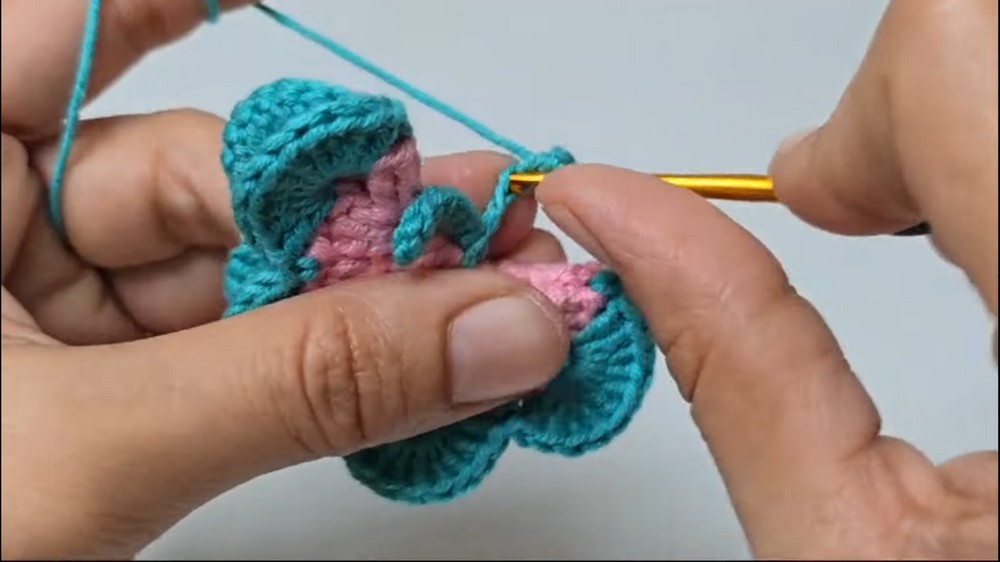
- Switch to a second color.
Attach the new yarn to any Ch-3 space from the previous round. - Work into Ch-3 spaces:
- Ch 3, then work 9 dc into the same space (10 dc total, including the starting Ch 3).
- In the space between the next 2 double crochet groups (from Round 2), make 1 sc.
- Continue this pattern around:
- In each Ch-3 space: Work 10 dc.
- Between every 2 groups of 3 dc: Make 1 sc.
- Once all 8 groups of 10 dc are completed (for the outer wings):
- Sl st to the top of the first Ch 3 to close the round.
Forming the Butterfly Body
- Fold the piece in half horizontally so that the right side of the work is facing out.
- Ensure that the top and bottom groups align symmetrically (2 wings on each side).
- Slip stitch down the folded edge, working vertically toward the center ring (about 5 slip stitches).

Creating the Antennae:
- After reaching the magic ring space:
- Ch 8.
- Starting from the second chain from the hook, work 7 slip stitches (1 in each chain).
- Sl st into the top of the 5th slip stitch (this secures the first antenna).
- Turn the body, then Ch 8 again.
- Starting from the second chain, work 7 slip stitches.
- Sl st into the top of the slip stitch on the opposite side (creating symmetry).
Finishing Touches:
- Chain 1, then cut your yarn, leaving a tail for attaching the keyring.
- Use the yarn tail to securely attach a keyring clip.
- Tighten your magic ring and weave in all the ends with a yarn needle.
Key Tips for Success:
- Tight Magic Ring: Ensure the magic ring is pulled snugly at the end to keep the butterfly's center neat.
- Consistent Tension: Maintain an even tension throughout to avoid gaps between the stitches.
- Color Choice: Choose contrasting colors for the wings and body for a striking finish.


