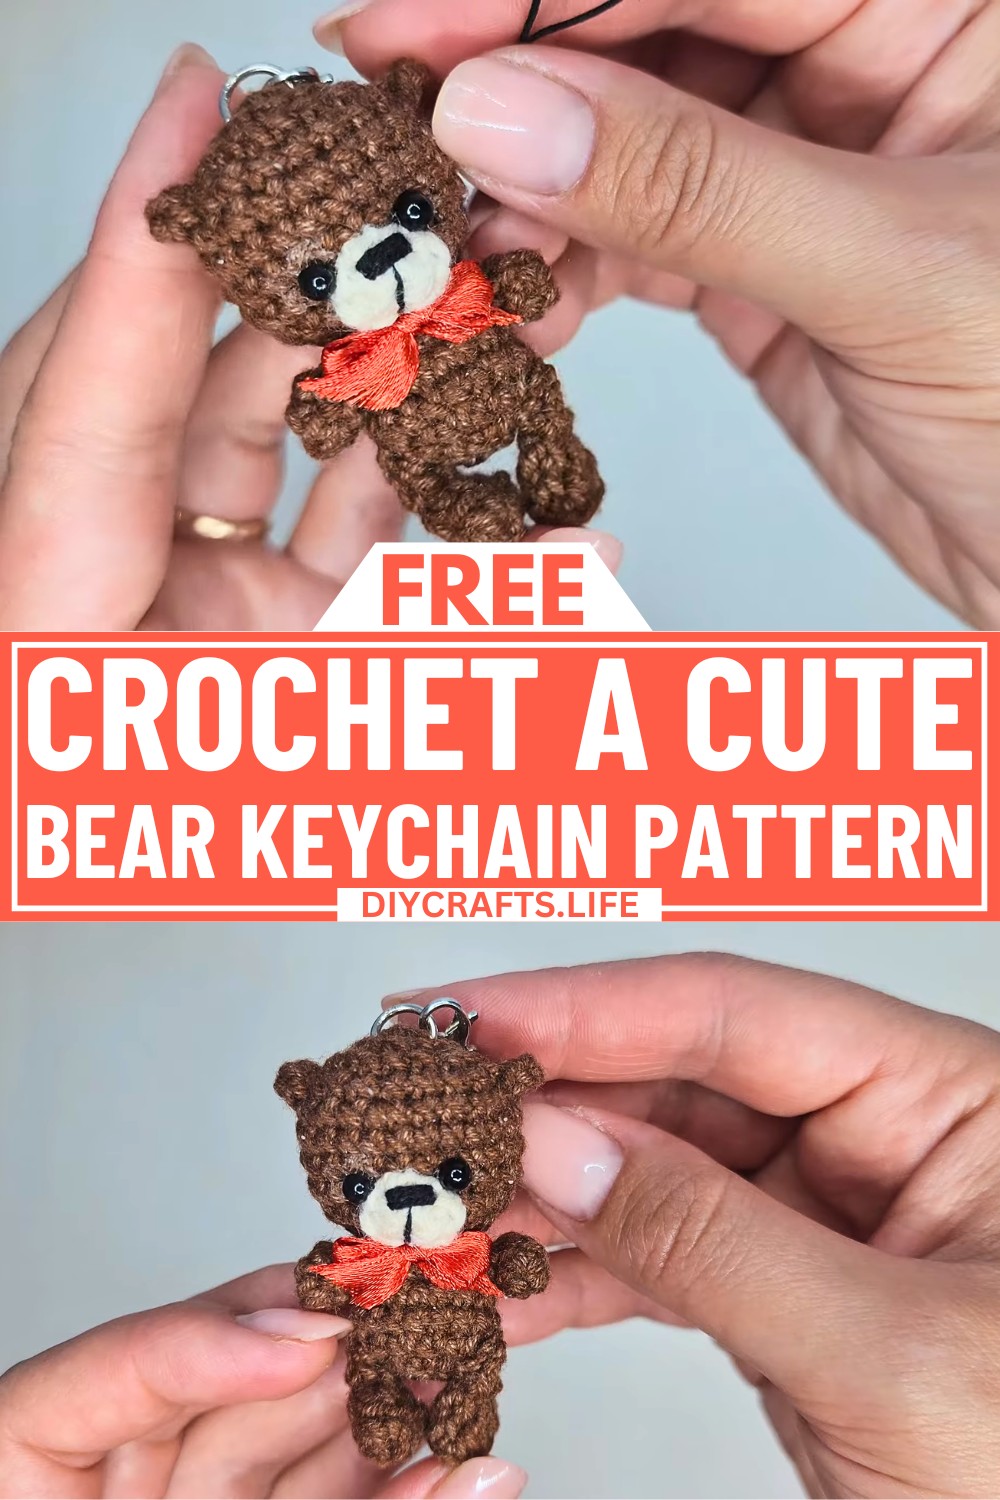
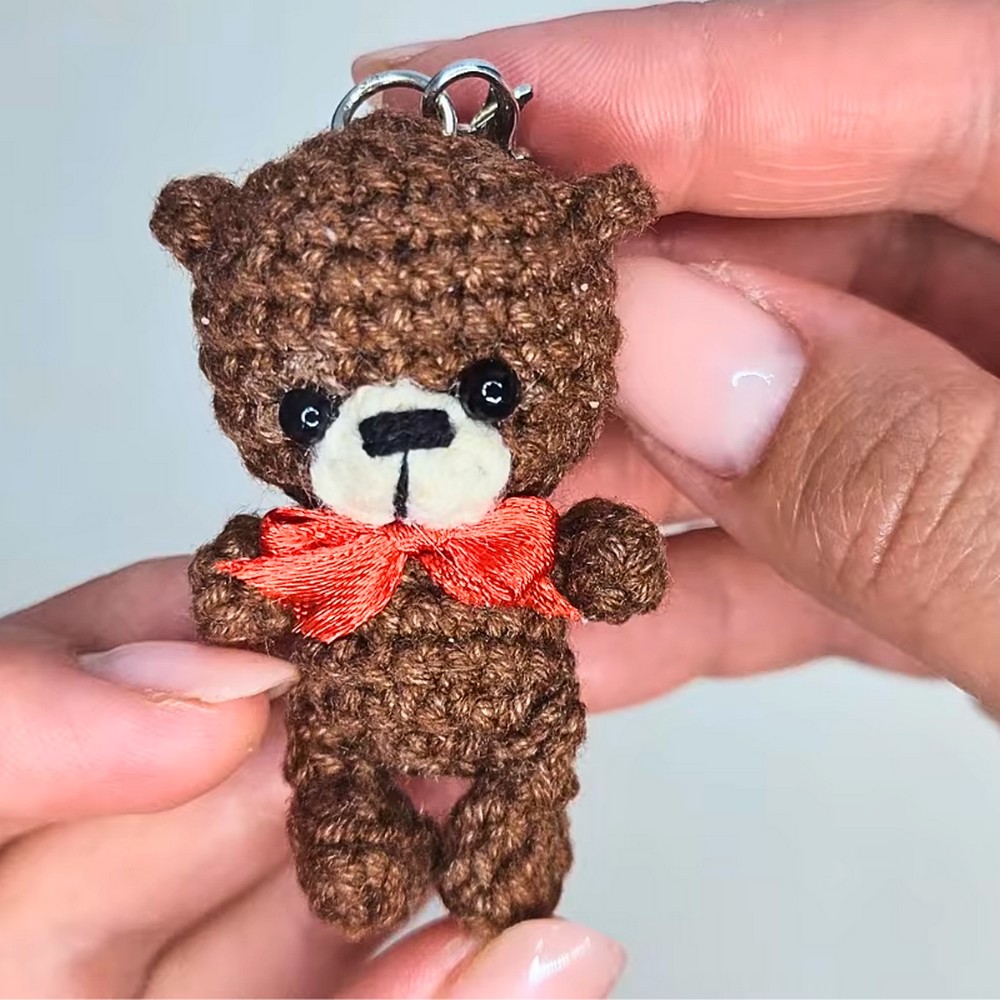
Looking for something adorable and fun to brighten up your day? This crochet bear keychain will be the great idea. This little bear is bursting with charm, ready to add a touch of happiness to your keys, bags, or anywhere you’d like it to hang. It’s more than just a keychain; it’s a tiny bundle of joy that brings coziness and creativity wherever it goes.
How to Crochet a Cute Bear Keychain
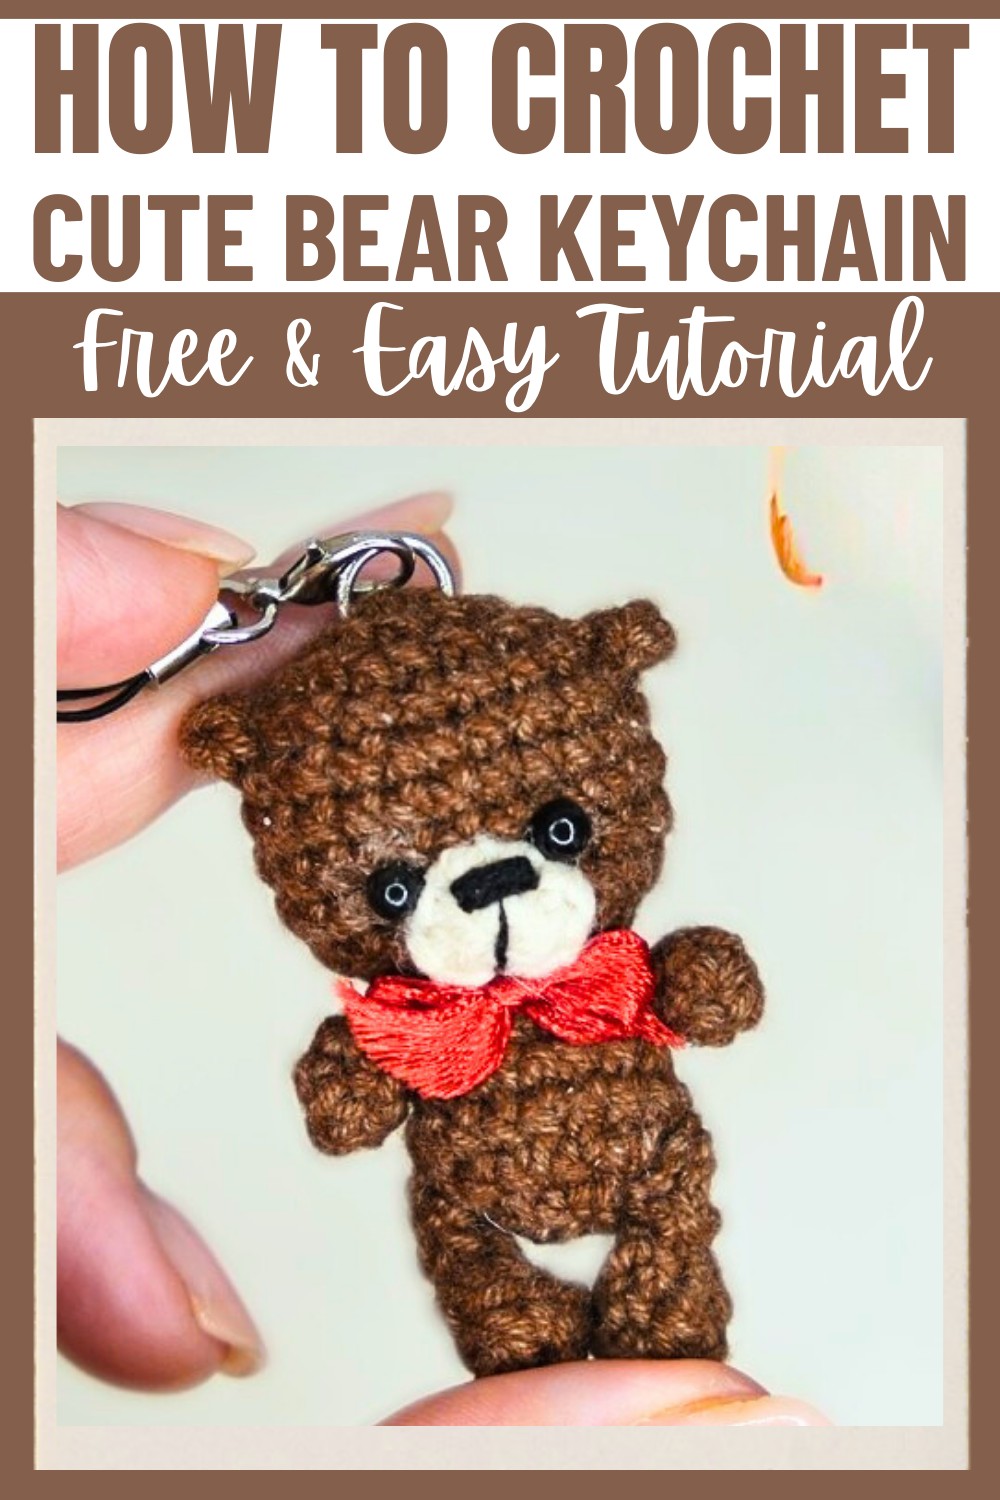
This crochet Bear design is simple yet magical. Its soft and cuddly shape gives you endless possibilities, from using plush yarn for a bigger, fluffier bear to choosing thinner yarn for a delicate, detailed look. The pattern includes special touches, like carefully crafted ears, a sculpted muzzle, and embroidered details to personalize the bear in your favorite style. Whether you decorate it with bows or add unique eyes, this Keychain pattern blends adorable art with everyday fashion—perfect for gifts or personal keepsakes.
Credit DidyToys
Materials & Tools Needed
- Yarn: 2 colors (e.g., plush yarn for a larger bear, or thinner yarn for a smaller one).
- For smaller bear: Use 1.9 mm crochet hook with matching yarn.
- For larger bear: Use 4 mm crochet hook with plush yarn.
- Crochet hook: Size matches yarn, e.g., 1.9 mm or 4 mm.
- Fiberfill: For stuffing the bear.
- Amigurumi eyes: 4 mm for smaller bears, 8 mm for plush bears; options for either safety eyes or glued-on eyes.
- Transparent glue: To fix eyes (if not using washers).
- Dark brown embroidery floss & needle: For embroidering the bear's nose.
- Pins: For positioning and attaching details.
- Scissors: For trimming yarn ends.
- Metal yarn needle: For attaching parts and weaving in ends.
- Keychain hardware: Keychain base and a metal ring for attachment.
Optional: Ribbon or accessories to decorate the finished bear.
Finished Size & Customization Ideas
- Small Bear: About 4 cm (1.5 inches) tall using thinner yarn and a 1.9 mm hook.
- Larger Plush Bear: About 7–9 cm (3–3.5 inches) tall using plush yarn and a 4 mm hook.
- Customization Ideas:
- Use different colors for the bear's head, body, or ears.
- Add accessories, such as fabric bows, mini scarves, or tiny hats.
- Experiment with different eye styles (safety eyes, buttons, or embroidery).
- Add a tail for extra cuteness (as demonstrated in the pattern below).
Pattern Abbreviations & Terminology
The pattern uses US crochet terminology.
| Abbreviation | Meaning |
|---|---|
| ch | Chain |
| sc | Single Crochet |
| inc | Increase (2 sc in same stitch) |
| dec | Decrease (sc two stitches together) |
| FLO | Front Loop Only |
| BLO | Back Loop Only |
| st(s) | Stitch(es) |
| sl st | Slip Stitch |
| rnd | Round |
Step-by-Step Crochet Instructions
Below is the detailed crochet pattern for the bear's components:
- Note: Add stuffing after completing each main part (head, body, etc.).
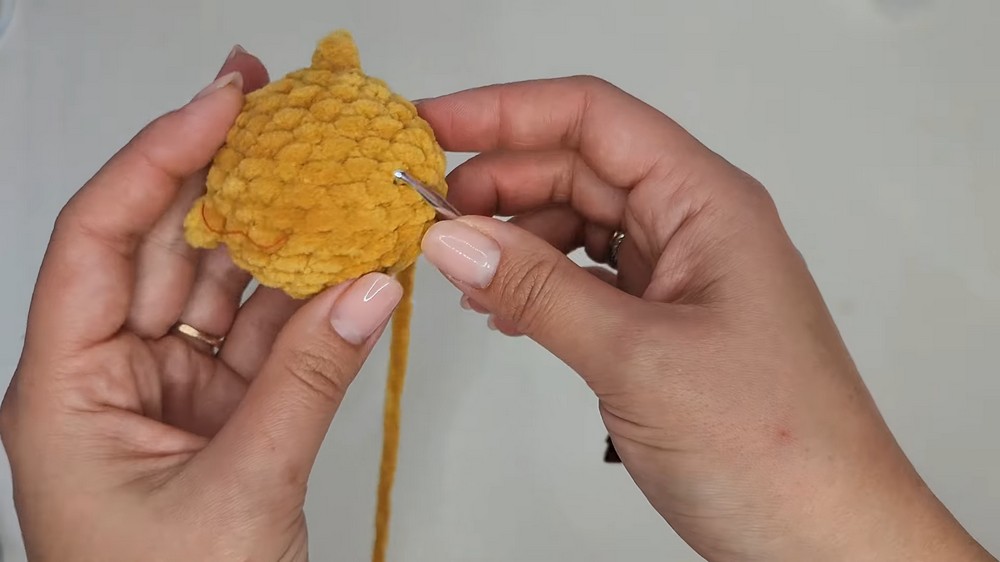
Head
- Start in main color: Create magic circle or chain 2.
- Rnd 1: 6 sc in the first ch. (6 sts)
- Rnd 2: 6 inc. (12 sts)
- Rnd 3: 1 sc, inc, repeat 6 times. (18 sts)
- Rnd 4: 4 sc, 5 sc FLO (for ear 1), 8 sc, 5 sc FLO (for ear 2), 4 sc. (18 sts)
- Rnd 5: Crochet BLO on ear stitches: 2 sc, inc, repeat 6 times. (24 sts)
- Rnd 6-8: 3 even rnds of sc in each st. (24 sts per rnd)
- Rnd 9: 2 sc, dec, repeat 6 times. (18 sts)
- Rnd 10: 1 sc, dec, repeat 6 times. (12 sts)
- Rnd 11: 6 dec. (6 sts)
Do not fasten off—continue directly into the body.
Body
- Rnd 1: 6 inc. (12 sts)
- Rnd 2: 1 sc, inc, repeat 6 times. (18 sts)
- Rnd 3: sc in each st. (18 sts)
- Rnd 4: 1 sc, dec, repeat 6 times. (12 sts)
Stuff the body.
- Rnd 5: 6 dec. (6 sts)
- Cut yarn, fasten off, and weave in ends.
Muzzle
- Ch 2 (magic circle alternative).
- Rnd 1: 8 sc in the first ch. (8 sts)
- Cut yarn, leaving a long tail for sewing.
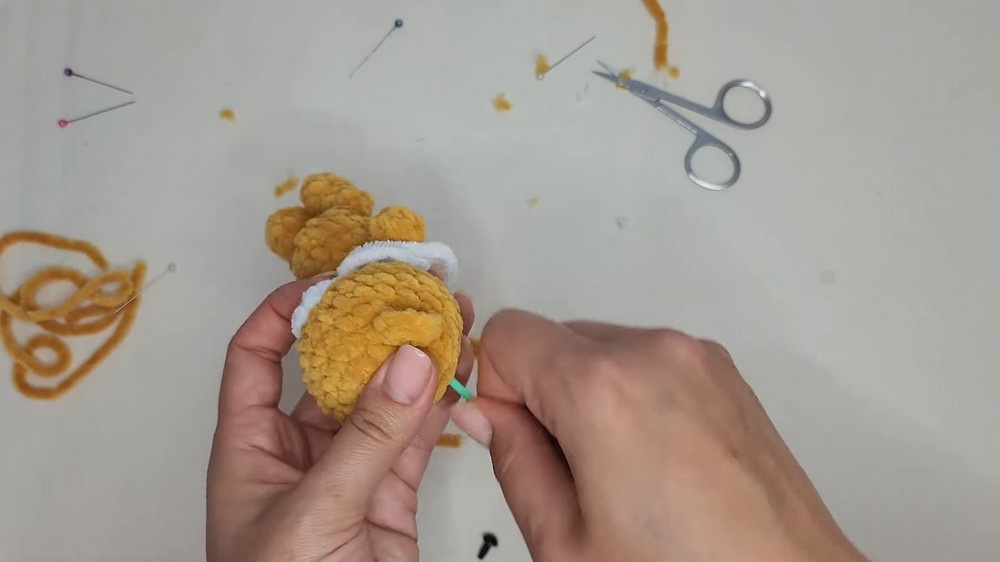
Attach the muzzle to the bear's head and embroider a nose using dark brown thread. Sculpt the muzzle using a needle and strong yarn if desired.
Legs (Make 2)
- Ch 3.
- Rnd 1: Start in 2nd ch from hook; crochet 1 inc, 4 sc in the last ch, 1 inc. (8 sts)
- Rnd 2: BLO, sc in each st. (8 sts)
- Rnd 3: 4 dec. (4 sts)
Close bottom with 4 sc, leaving a long tail for sewing.
Arms (Make 2)
- Ch 2.
- Rnd 1: 6 sc in first ch. (6 sts)
- Rnd 2-3: Sc in each st around. (6 sts per rnd)
Create tiny loops at the end if preferred for attachment. Leave tail for sewing.
Tail
- Attach yarn to the back of the body (optional).
- Ch 1, crochet 2 sc into the same st.
- Pull tight, fasten off.
Assembly
- Position all the components (arms, legs, muzzle) using pins.
- Sew each piece into place, ensuring symmetry.
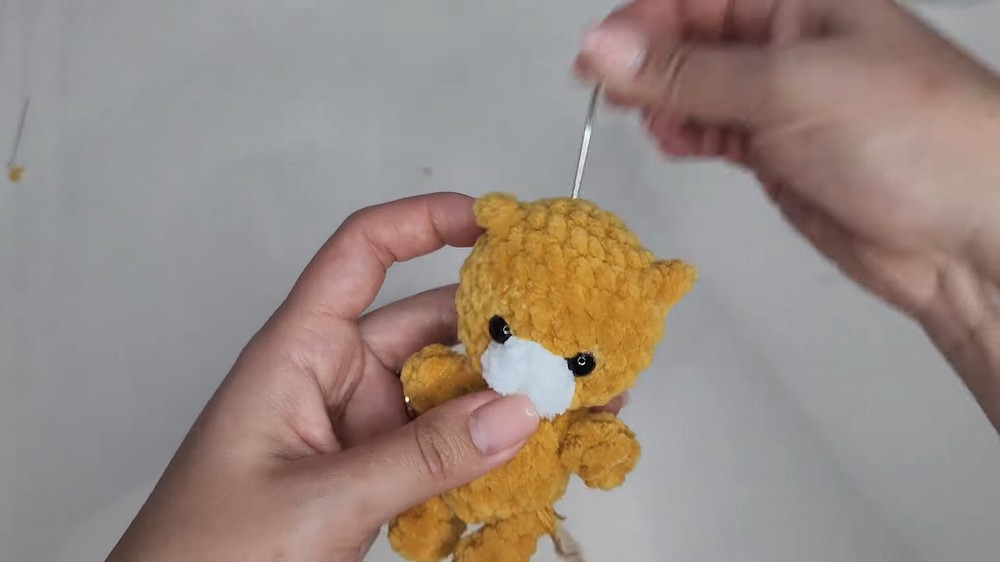
- Attach the safety eyes or glue them securely above the muzzle.
- Sculpt the muzzle if desired and embroider the nose.
- Add any additional accessories, such as a bow.
- Attach keychain hardware through the top of the head.
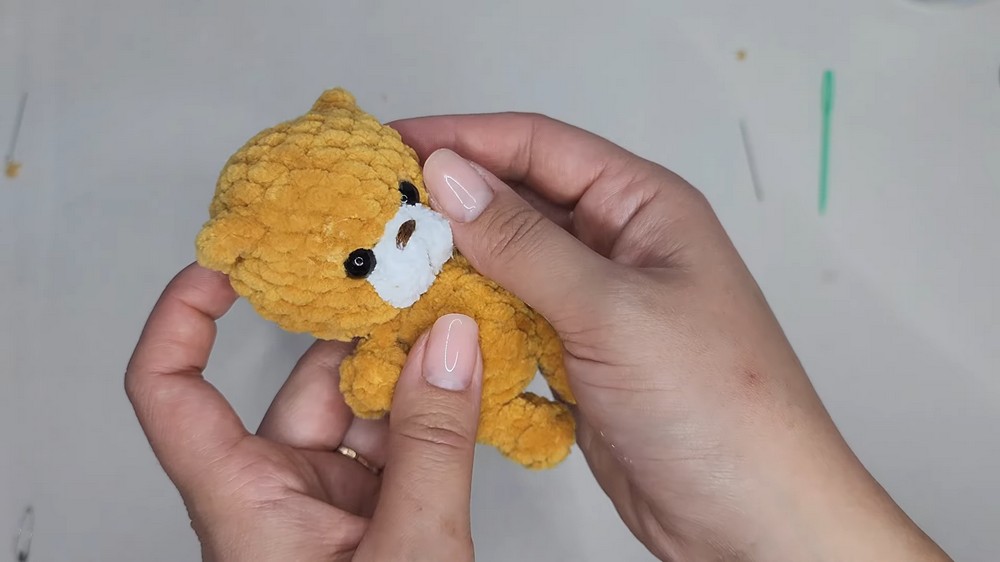
Finishing Touches
- Check all pieces are securely attached.
- Shape the bear with your hands for an even look.
- Sew or glue on a decorative bow or any additional flair.