Looking for a whimsical yet functional crochet project? The Crochet Bunny Coaster is the perfect combination of adorable and practical. Its charming design adds personality to your space while protecting your surfaces from spills. Whether for springtime fun or everyday use, this project will brighten your day!

The Crochet Bunny Coaster is ideal for cups, mugs, and glasses. Its sturdy, soft texture ensures durability while giving surfaces a playful decorative touch. The project is a great option for handmade gifts, festive table settings, or simply adding character to your coffee breaks!
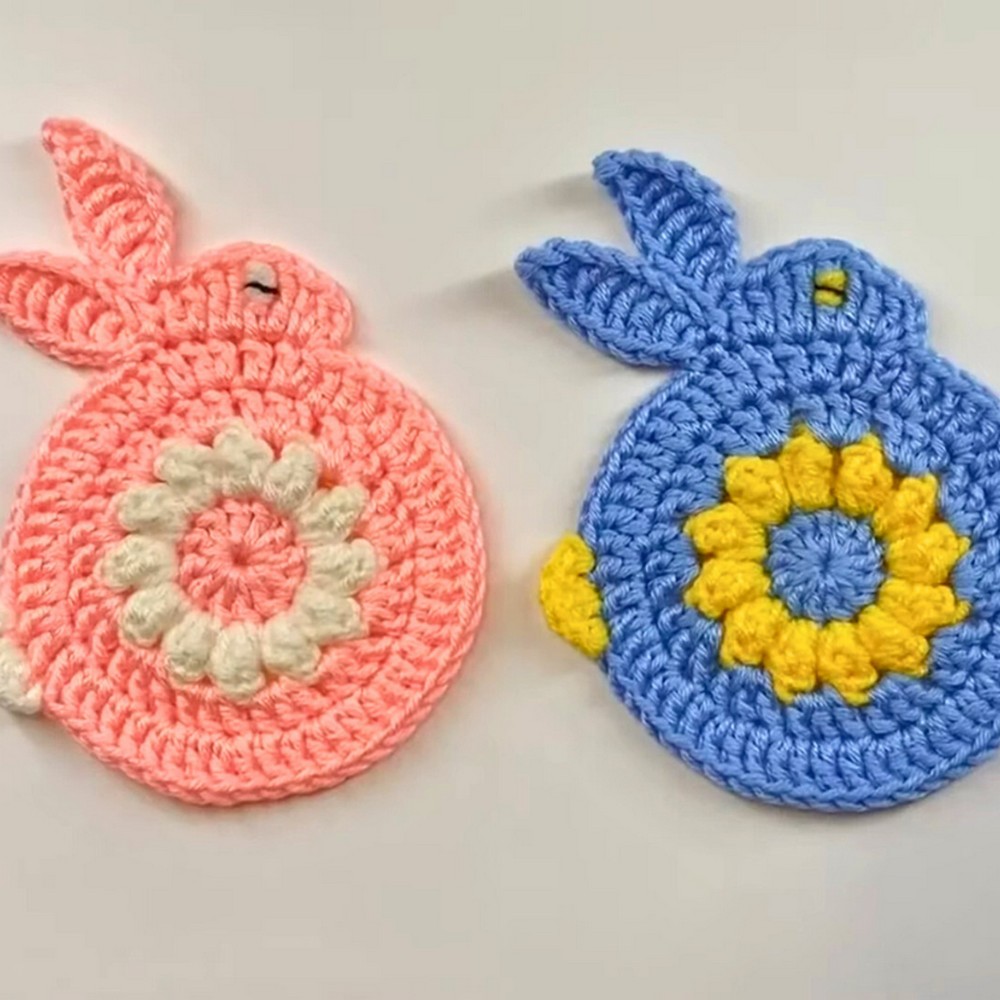
Crochet Bunny Coaster
Crocheting this Bunny Coaster is an enjoyable adventure for both beginners and seasoned crafters. With easy-to-follow steps and plenty of customization options for colors and features, it’s a fantastic way to unleash your creativity and craft something uniquely personal.
Materials and Preparation:
- Yarn Type: Worsted weight yarn in your chosen colors (common choices are white, pink, and black for bunny details).
- Hook Size: 4.0 mm (G-6) crochet hook.
- Additional Tools:
- Yarn needle for weaving in ends
- Scissors
- Stitch marker
- Safety eyes or small black buttons for eyes (optional)
- Small amount of pink yarn or embroidery thread for nose details.
Abbreviations and Notes:
- Abbreviations:
- ch: Chain
- sl st: Slip Stitch
- sc: Single Crochet
- inc: Increase (2 single crochets in one stitch)
- dec: Decrease (single crochet two stitches together)
- hdc: Half Double Crochet
- dc: Double Crochet
- Pattern Notes:
- Crochet in continuous rounds unless otherwise specified.
- Use a stitch marker to keep track of rounds.
- Adjust hook size if needed to obtain the correct gauge.
- It's helpful to have a basic understanding of amigurumi techniques for this project.
Gauge, Approximate Size, and Pattern Notes:
- Gauge: 16 single crochets and 20 rows = 4 inches (10 cm) in single crochet.
- Approximate Size: The finished coaster should measure approximately 4 inches in diameter.
- Special Techniques:
- Magic ring (adjustable loop) to start the coaster.
- Embroidery for facial features.
- No gauge swatch is needed if the finished size is not critical.
Step-by-Step Pattern:
Base of the Coaster:
- Magic Ring: Start with a magic ring.
- Round 1: 6 sc in magic ring. (6)
- Round 2: Inc in each stitch around. (12)
- Round 3: (Sc in next st, inc) around. (18)
- Round 4: (Sc in next 2 sts, inc) around. (24)
- Round 5: (Sc in next 3 sts, inc) around. (30)
- Round 6: (Sc in next 4 sts, inc) around. (36)
- Round 7: (Sc in next 5 sts, inc) around. (42)
- Round 8: (Sc in next 6 sts, inc) around. (48)
- Round 9: (Sc in next 7 sts, inc) around. (54)
Finish off and weave in the ends.

Ears (Make 2):
- Start: Ch 10.
- Row 1: Sc in 2nd ch from hook and in each ch across. (9)
- Row 2-4: Ch 1, turn, sc in each st across. (9)
- Row 5: Ch 1, turn, dec, sc in next 5 sts, dec. (7)
- Row 6: Ch 1, turn, sc in each st across. (7)
- Row 7: Ch 1, turn, dec, sc in next 3 sts, dec. (5)
- Row 8: Ch 1, turn, sc in each st across. (5)
- Row 9: Ch 1, turn, dec, sc in next st, dec. (3)
- Row 10: Ch 1, turn, sc3tog. (1)
Finish off and leave a tail for sewing.

Assembly:
- Attach Ears: Sew the ears to the top of the bunny head using the yarn needle and the tails left on the ears.
- Facial Features:
- Attach safety eyes or sew the buttons where bunny eyes should be.
- Use pink yarn or embroidery thread to create the bunny's nose and mouth.
- Weaving in Ends: Weave in all remaining ends with a yarn needle.

Pattern Question
Question: Can I resize the coaster for larger mugs or plates?
Answer: Absolutely! You can adjust the coaster's size by modifying the number of stitches in each round. Start with a slightly larger base and scale the features accordingly for a proportional look.

Conclusion
The Crochet Bunny Coaster is a delightful blend of charm and functionality. It’s a joy to craft, a lovely addition to any home, and a unique gift idea. Grab your yarn, and let’s hop into this creative project—your cozy cups will thank you!