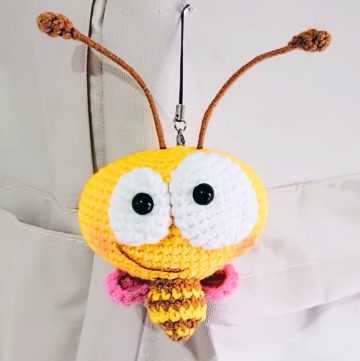
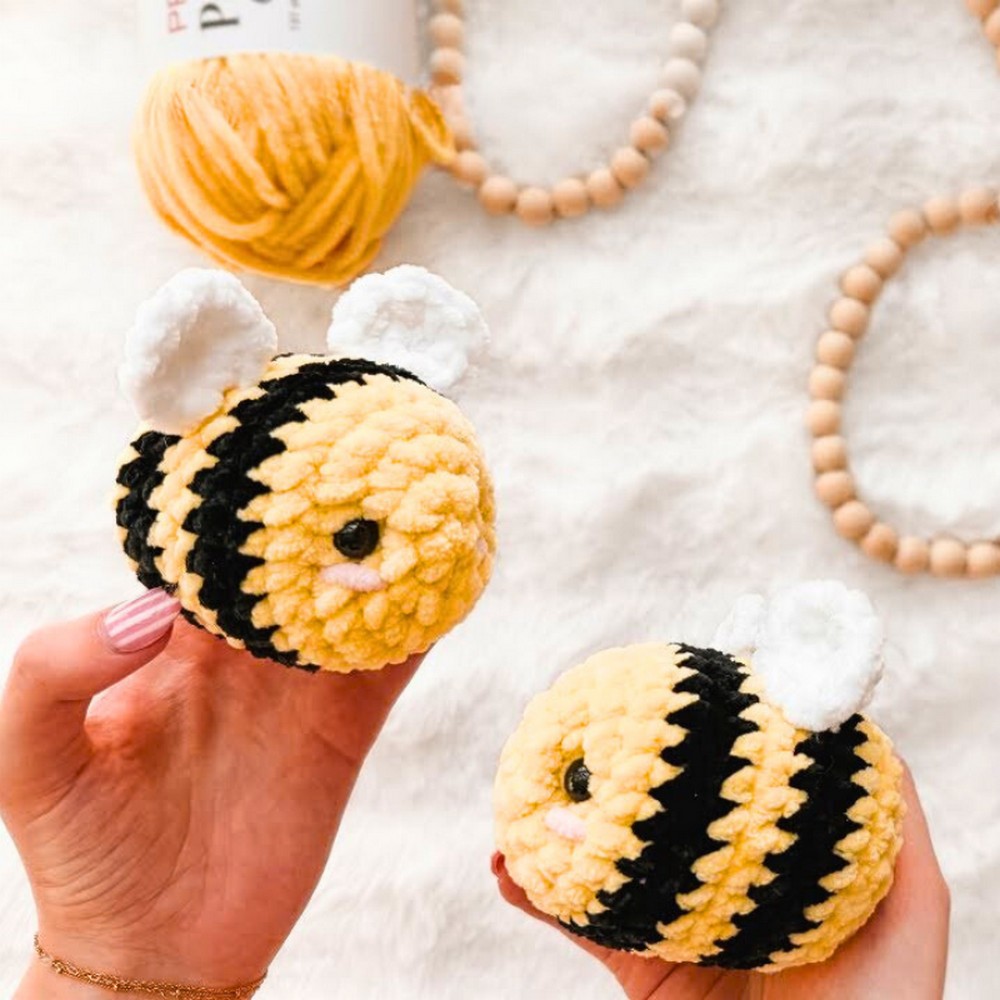
A crochet bee is a small, adorable creation that’s perfect as a toy, a cheerful decoration, or a thoughtful handmade gift. With its plump body, tiny wings, and charming details like soft cheeks and big eyes, this bee is bound to bring joy to anyone who sees or holds it. It’s a beginner-friendly design, so even if you’re new to crochet, this is a great place to start.

To make this bee, you’ll primarily use a few colors of chunky yarn, a crochet hook, and additional items like safety eyes for the bee’s face. The process is simple and fun, involving basic crochet techniques to form the body, head, and wings. You'll also get to add your unique touches, such as gentle facial shaping and bright pink cheeks. Whether you're making one for yourself, a friend, or as a cute piece of home decor, it’s a fun way to bring a touch of happiness into your space!
Credit Crochet with Kyra
Materials & Tools Needed
- Yarn:
- Premier Parfait Chunky Yarn
- Yellow (Body)
- Black (Stripes)
- White (Wings)
- Alternatively, use any similar size 6 super bulky yarn.
- Premier Parfait Chunky Yarn
- Crochet Hook: 5 mm (recommended by the tutorial for a tighter stitch).
- Safety Eyes: 12 mm (optional, but adds a polished look).
- Polyfill Stuffing: For filling the bee.
- Stitch Marker: To mark the beginning of each round.
- Can use items like bobby pins, paper clips, etc. if needed.
- Embroidery Needle: For assembling and weaving in loose ends.
- Scissors: For cutting yarn.
- Optional: Scrap pink yarn for cheeks.
Pattern Abbreviations & Terminology
(All terms follow US crochet standards)
- st = Stitch
- sc = Single Crochet
- inc = Increase (2 sc in one st)
- dec = Decrease (single crochet two stitches together; tutorial describes front loop decreases)
- MR = Magic Ring
- FO = Fasten Off
- YO = Yarn Over
Step-by-Step Crochet Instructions
We’ll break this pattern into three main sections:
- Body
- Wings
- Finishing & Assembly
1. Body
The body is worked in continuous rounds without joining at the end of each round. Use a stitch marker to keep track of the last stitch.
Step 1: Magic Ring & Round 1
- Create a Magic Ring (MR).
- (Refer to tutorial for thorough guidance. Take your time with this technique if you're a beginner.)
- 6 sc into MR.
- [Total: 6 stitches].
Step 2: Round 2
- Inc in each stitch around. (2 sc in each stitch)
- [Total: 12 stitches]
Step 3: Round 3
- (1 sc, inc) repeat around.
- [Total: 18 stitches]

Step 4: Round 4
- (2 sc, inc) repeat around.
- [Total: 24 stitches]
Step 5: Rounds 5-6
- Work 24 sc in each round (no increases).
- [Total: 24 stitches per round].
Step 6: Stripe #1 (Color change to Black)
- Switch to black yarn on the last stitch of Round 6:
- Begin the last stitch (pull up a loop with yellow).
- Complete the stitch with black yarn (pull through the loops on hook).
- Proceed with 24 sc in black for Rounds 7-8.
- [Total: 24 stitches per round].
Step 7: Stripe #2 (Switch back to Yellow)
- Change back to yellow yarn.
- Work 24 sc for Rounds 9-10.
- [Total: 24 stitches per round].
Step 8: Stripe #3 (Second Black Stripe)
- Switch back to black yarn.
- Work 24 sc for Rounds 11-12.
- [Total: 24 stitches per round].
Step 9: Final Yellow Section
- Change to yellow yarn again.
- Work 24 sc for Round 13.
- [Total: 24 stitches].
Step 10: Shape the Body (Begin Decreases)
- Round 14: (2 sc, dec) repeat around.
- [Total: 18 stitches].
- Round 15: (1 sc, dec) repeat around.
- [Total: 12 stitches].
Step 11: Add Stuffing
- Stuff the bee with polyfill stuffing firmly.
- You may add more or less based on your preference.
Step 12: Close the Body
- Round 16: Work 6 decreases around (dec in each stitch).
- [Total: 6 stitches].
- Fasten off, leaving a long tail. Use an embroidery needle to sew the small opening at the top.
- Weave in the tail securely.

2. Wings
Each wing is worked separately, starting with a Magic Ring.
Step 1: Magic Ring & Round 1
- Create a Magic Ring (MR).
- 6 sc into MR.
- [Total: 6 stitches].
Step 2: Round 2
- Work 6 inc (2 sc in each stitch).
- [Total: 12 stitches].
Step 3: Fasten Off
- Leave a long tail for sewing when fastening off.
Repeat
- Create a second wing by repeating the above steps.
3. Finishing & Assembly
Attach the Wings
- Use the long tails on each wing for sewing.
- Thread the tail through the embroidery needle.
- Position each wing symmetrically on either side of the bee on the yellow stripe adjacent to the black stripe.
- Slightly angle them outward for a cute finish.
- Sew the wings securely to the body, using small stitches.
- Hide and weave in any loose ends inside the bee.

Add the Safety Eyes
- Position the safety eyes between Rounds 3 and 4 of the head section (yellow section).
- Leave 3-4 stitches between each eye.
- Snap the backs of the safety eyes in place from the inside.
Add Cheeks (Optional)
- Use a small amount of pink yarn.
- Thread the yarn through an embroidery needle.
- Make small horizontal stitches below each eye for blush cheeks.
Shape the Face (Optional)
- Use a scrap piece of yellow yarn.
- Thread through the inside corners of both eyes, pulling slightly to bring the eyes closer together.
- Tie securely and hide the ends.
Final Touches
- Ensure all ends are secured and hidden.
- Adjust stuffing if necessary to shape the bee perfectly.