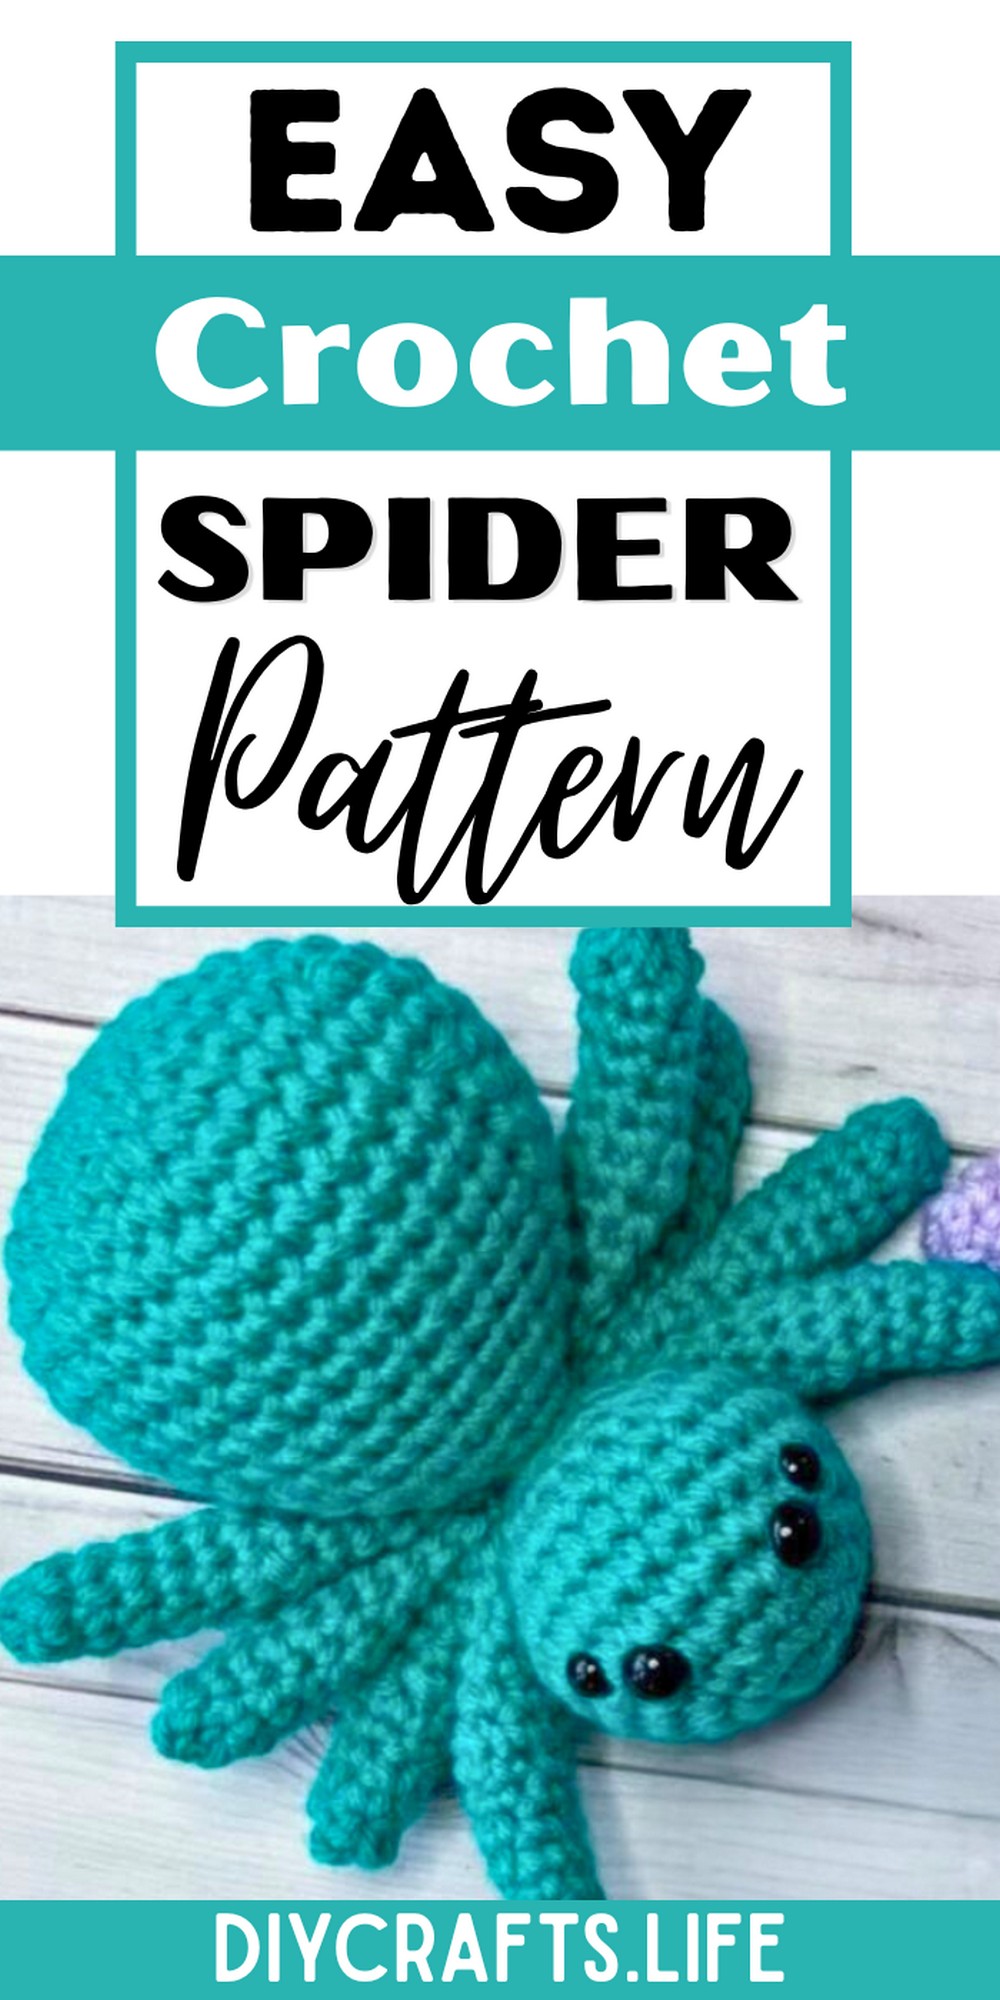
Create an adorable crochet spider that's perfect for playtime, gifts, or seasonal decorations. This quick and easy project features a cute design, small yet impactful size, and endless color possibilities, making it a fun addition to your crochet repertoire.
This crochet spider is sturdy and built to last, thanks to its durable stitching. It is appealing for kids and adults alike, whether as a charming toy or festive Halloween decor. Lightweight and compact, it's easy to display or carry, making it as functional as it is fun.
Crochet a Cute and Simple Spider
The pattern is beginner-friendly and easy to customize in size or color. The minimal sewing required makes it approachable for all skill levels, and its small scale lets you experiment with creative yarn choices. A wonderful chance to crochet something fun and unique!
Materials and Preparation
To create this adorable crochet spider, you’ll need the following materials:
- Yarn: Your choice of yarn and color (e.g., worsted weight for regular-sized spiders or bulky yarn for larger ones). Tutorial uses teal yarn.
- Crochet hook: 5mm crochet hook.
- Eyes: Two sets of safety eyes in different sizes (examples in tutorial: 12mm for large eyes, 10mm for small eyes). Sizes can range from 8mm to 16mm.
- Stuffing: Polyfill or any filling material to stuff the head and body.
- Yarn needle: For sewing the spider parts.
- Scissors
Abbreviations and Notes
Abbreviations:
- MR: Magic Ring
- SC: Single Crochet
- INC: Increase (make 2 single crochets into the same stitch)
- DEC: Decrease (crochet 2 stitches together)
- SL ST: Slip Stitch

Notes:
- This pattern starts with the magic ring technique. If unfamiliar, alternatively use the chain method (chain 2, work in second chain from hook).
- The arms consist of two sizes: shorter arms (middle) and longer arms (outer sides).
- The project requires minimal sewing for assembly, making it beginner-friendly.
- Adjust the size by changing yarn weight or hook size.
Gauge, Approximate Size, and Pattern Notes
Gauge: This tutorial does not include gauge measurements as the spider offers flexibility in size based on yarn weight. No gauge swatch is required.
Approximate Size:
- Size varies by yarn weight and hook size. Using worsted yarn and a 5mm hook, the spider head is slightly smaller than the body, maintaining proportionality.
Pattern Notes:
- Spider arms can be made using two different sizes or kept uniform based on preference.
- Safety eyes placement can vary; tutorial suggests placing large eyes 3 stitches apart, with smaller eyes positioned 1 row below and 1 stitch behind for an angled effect.
Step-by-Step Pattern
Spider Head
- Round 1: Create a magic ring. Work 6 SC into the ring. Tighten and SL ST into the first SC to close the round.
- Round 2: SC INC in every stitch (2 SC in each). You should now have 12 stitches.
- Round 3: [SC INC, SC] repeat around. You should now have 18 stitches.
- Round 4: [SC INC, SC, SC] repeat around. You should now have 24 stitches.
- Round 5: [SC INC, SC, SC, SC] repeat around. You should now have 30 stitches.
- Rounds 6-8: SC in every stitch (30 stitches per round).
- Attach the eyes during this step: The larger safety eyes are placed 4 rows into the stitches, 3 stitches apart. The smaller eyes are set one row below and slightly behind.
- Round 9: [DEC, SC, SC, SC] repeat around. You should now have 24 stitches.
- Round 10: [DEC, SC, SC] repeat around. You should now have 18 stitches.
- Round 11: [DEC, SC] repeat around. You should now have 12 stitches.
- Round 12: DEC around. You should now have 6 stitches.
- Stuff the head with polyfill or fiber filling before closing.
- Fasten off and weave in the tail.

Spider Body
- Round 1: Create a magic ring. Work 6 SC into the ring. Tighten and SL ST into the first SC to close the round.
- Round 2: SC INC in every stitch (2 SC in each). You should now have 12 stitches.
- Round 3: [SC INC, SC] repeat around. You should now have 18 stitches.
- Round 4: [SC INC, SC, SC] repeat around. You should now have 24 stitches.
- Round 5: [SC INC, SC, SC, SC] repeat around. You should now have 30 stitches.
- Round 6: [SC INC, SC, SC, SC, SC] repeat around. You should now have 36 stitches.
- Round 7: [SC INC, SC 5] repeat around. You should now have 42 stitches.
- Rounds 8-9: SC in every stitch (42 stitches per round).
Decreasing:
9. Round 10: [DEC, SC 12] repeat (39 stitches).
- Round 11: [DEC, SC 11] repeat (36 stitches).
- Round 12: [DEC, SC 10] repeat (33 stitches).
- Round 13: [DEC, SC 9] repeat (30 stitches).
- Round 14: [DEC, SC 8] repeat (27 stitches).
- Round 15: [DEC, SC 7] repeat (24 stitches).
- Round 16: [DEC, SC 6] repeat (21 stitches).
- Round 17: [DEC, SC 5] repeat (18 stitches).
- Round 18: [DEC, SC 4] repeat (15 stitches).
Stuff the body and fasten off, leaving a tail for sewing to the head.

Spider Arms (Make 4 Short and 4 Long)
- Round 1: Create a magic ring. Work 6 SC into the ring. Tighten and SL ST into the first SC to close the round.
- Rounds 2-5: SC in every stitch (6 stitches per round). Flip the arm right side out after round 3 to ease completion.
For Short Arms: Continue evenly in pattern.
For Long Arms: Add 1 extra round each before and after the following increase/decrease step.
- Round 6: [SC INC, SC, SC] repeat. You should now have 8 stitches.
- Round 7: [DEC, SC, SC] repeat. You should now have 6 stitches.
- Rounds 8-11: SC in every stitch (6 stitches per round).
Stuff the arms lightly and flatten before moving on to assembly.

Assembly Instructions
-
Attach the Head to the Body:
- Use the tail left from the body to sew the open edge of the body to the base of the head. Ensure the polyfill is fully covered for a seamless finish.
-
Join Arms:
- Group 4 legs (short or long) together. Sew through the bases of all 4 legs, joining them securely to form a cluster.
- Attach each cluster to either side of the spider's body, sewing them near the neck area. Secure tightly by passing through each arm multiple times.

Pattern Question:
Q: Are the spider legs difficult to make?
A: The legs are slim but manageable if you flip them inside-out early. For added ease, you can skip the increase-decrease section to simplify the process.
Conclusion:
This crochet spider combines charm, utility, and adaptability into one delightful project. Whether you’re crocheting for yourself or a loved one, it’s quick, engaging, and rewarding to create. Plus, the step-by-step pattern ensures your spider turns out amazing every time!