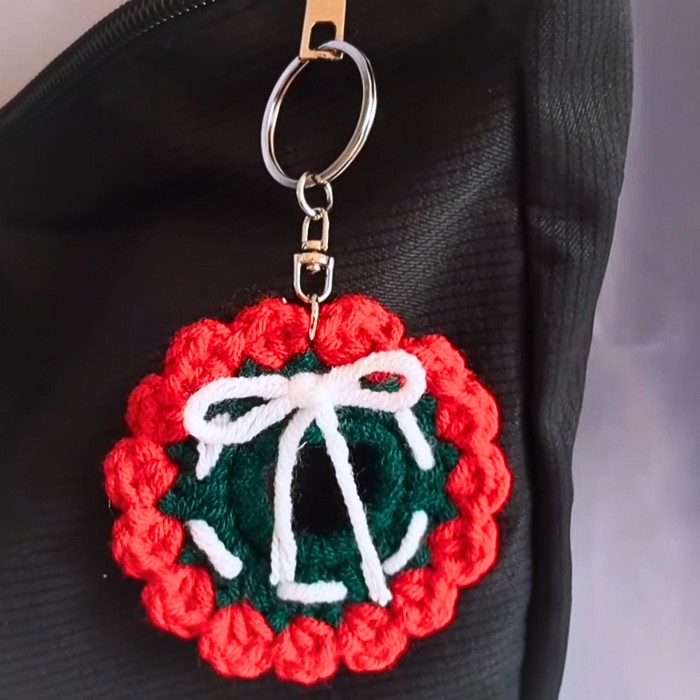
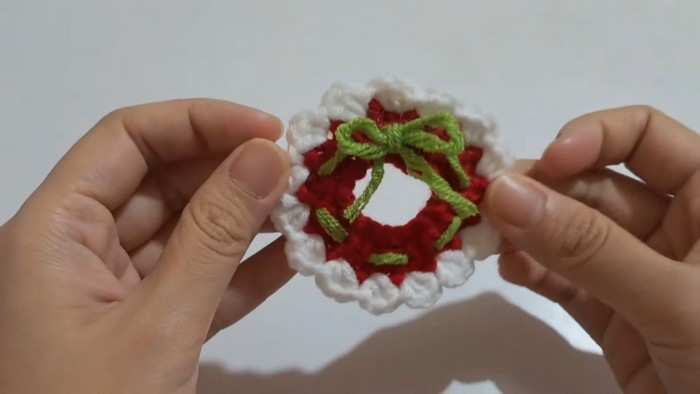
Add a festive touch to your holiday décor with this charming crochet mini Christmas wreath! Beautifully handmade, it’s perfect for decorating your tree, gifting to loved ones, or using as table embellishments. With its timeless design, this small wreath offers both charm and versatility for the season.

This crochet mini Christmas wreath is not only visually appealing but also practical. Use it as an ornament, gift tag, or festive décor piece. Its durable and lightweight structure makes it long-lasting and easy to handle. The timeless appeal of red, green, and white ensures it fits perfectly into any holiday setting.
Crochet A Mini Christmas Wreath
Whether you're a crochet newbie or a pro, this project is for everyone! The step-by-step pattern involves simple stitches like single crochet, half-double crochet, and slip stitches. It’s easy to customize with your favorite colors and accents, making your creative potential endless. Enjoy every stitch as you craft a festive masterpiece!
Credit from littlespot
Materials and Preparation
To make this beautiful mini Christmas wreath, you’ll need:
- Yarn:
- Green yarn for the wreath base
- White yarn for the decorative border
- Red yarn for the bow
- Crochet Hook: 3.5mm (E-4) crochet hook
- Other Tools:
- Scissors
- Yarn needle for sewing in ends
- Stitch marker (optional, to track the beginning of a round)
- Yarn Weight Recommendation: Light worsted weight (category 3) yarn works best for this project.
Optional: Beads or other embellishments for decoration.
Abbreviations and Notes
- Abbreviations Used:
- CH: Chain
- SC: Single Crochet
- HDC: Half Double Crochet
- SL ST: Slip Stitch
- Pattern Notes:
- This pattern is worked in the round.
- Ensure your ring is completely covered in stitches in the first round. Adjust the number of stitches slightly if needed to ensure a symmetrical and even finish.
- Always use an even number of stitches to maintain proper shaping in subsequent rounds.
Gauge, Approximate Size, and Pattern Notes
- Gauge: Gauge isn’t particularly important for this project as the wreath is decorative. However, for reference, the project typically works up with a snug stitch structure when using a 3.5mm crochet hook and light worsted weight yarn.
- Approximate Size: The finished wreath will measure approximately 3.5 inches (9 cm) in diameter.
- Special Techniques:
- Slip stitch joining
- Working into a ring rather than individual chains for certain rounds
- Since this is a small project, a gauge swatch isn’t necessary.
Step-by-Step Pattern
Foundation: Create the Center of the Wreath (Green Yarn)
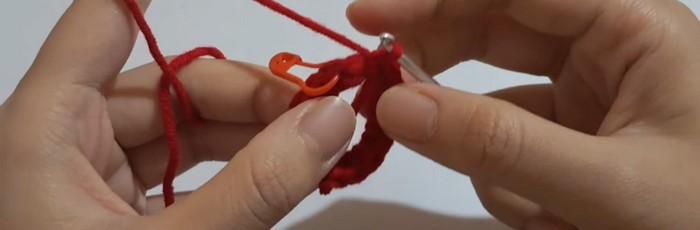
- Start with a slip knot. To create a slip knot, wrap the yarn around your fingers, form two loops, hook under the first loop, and pull through the second loop. Tighten gently.
- CH 15.
- Connect the chain into a ring using a SL ST into the very first chain.
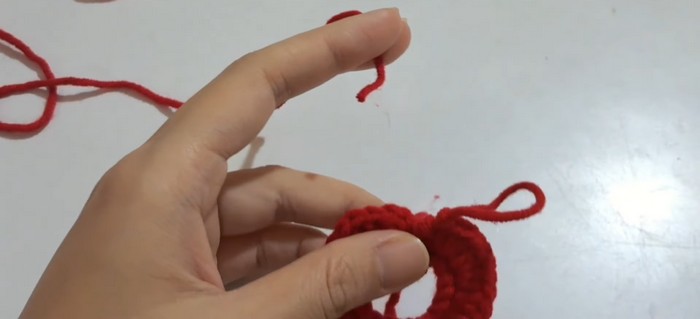
Round 1: Cover the Ring
- Work on the inside of the chain’s ring (not the individual chains):
- Make 16 SCs into the ring.
- Use a stitch marker to keep track of the first stitch in the round.
- If your ring isn’t completely filled, you can add more stitches as needed (just ensure the total number is even for the next rounds).
Round 2: Adding Depth to the Wreath with Half Double Crochets
- Begin with a SL ST into the next stitch.
- CH 2 (counts as the first HDC).
- Make an increase of 2 HDC in each stitch around. Follow these steps for each increase:
- Yarn over, insert your hook in the next stitch, yarn over, and pull through. You’ll have 3 loops on your hook.
- Yarn over again and pull through all 3 loops.
- Repeat this to make the second HDC in the same stitch.
- Continue increasing until the round is complete.
- Finish the round by joining with a SL ST to the top of the first stitch.
- Cut the yarn, pull it through, and secure the end with a yarn needle.
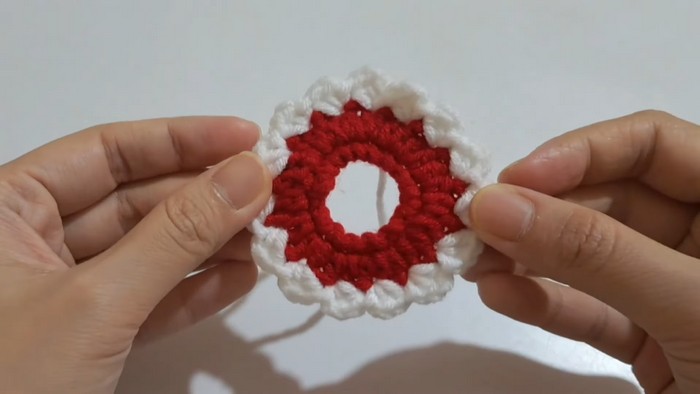
Round 3: Add the White Border
- Switch to white yarn. Begin with a slip knot.
- Attach the yarn to any stitch from the previous round using a SL ST.
- CH 2, then make 2 HDC into the same stitch.
- Skip the next stitch and make a SL ST in the following stitch. This creates a decorative scalloped border.
- Repeat the pattern:
- CH 1, make 2 HDC into the same stitch, skip the next stitch, and SL ST into the next stitch.
- Continue this pattern until you reach the end of the round.
- Finish with a SL ST into the first stitch. Cut the yarn and weave in the ends.
Final Touches
Step 4: Add the Red Bow
- Using red yarn, create a chain that will act as the bow’s stripe: Make a short chain about 10-12 stitches long.
- Tie the ends of the chain around the center of the wreath, forming a decorative stripe.
- Use the remaining red yarn to tie a bow at the top of the wreath.
Finishing
- Weave in any loose yarn ends using a yarn needle.
- Adjust the bow and fluff it up for a polished, festive look.
- You now have a beautiful miniature Christmas wreath ready for decoration!
Pattern Question
Q: Can I adjust the size of the wreath?
A: Yes! To make the wreath bigger, increase the number of chain stitches in the base ring. Adding more crochet rounds or experimenting with thicker yarns will also help.
Conclusion
Crocheting this mini Christmas wreath is a delightful way to celebrate the holidays. Its simple pattern, festive charm, and customizability make it a fun and rewarding project. Whether for gifting or decorating, this craft is sure to bring holiday cheer!