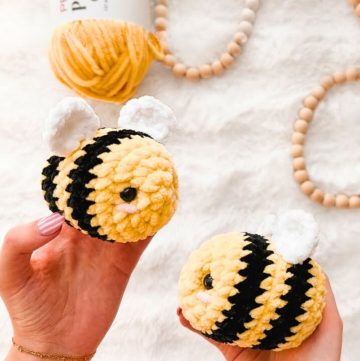
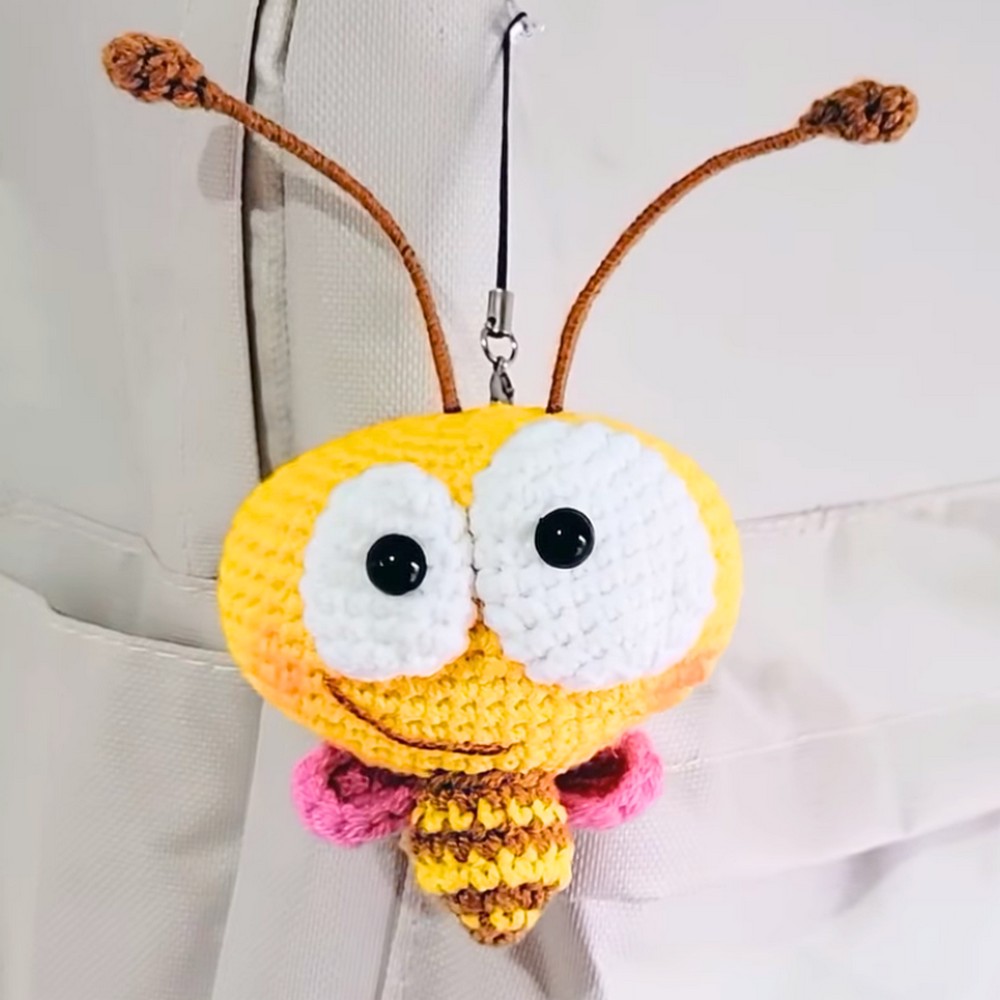
This Crochet bee keychain is perfect for adding a touch of cuteness to your keys, backpack, or purse. Its big head, small body, and tiny antennae make it irresistibly charming, while the combination of one big and one small eye gives it a playful personality. It's a fantastic accessory or thoughtful gift that's sure to put a smile on anyone's face.

Crocheting this little bee is simpler than it looks, and even beginners can create it step by step! It’s made using soft milk cotton yarn with precise details like a rounded head, delicate wings, and springy antennae. Each step brings the bee to life, and once you’re done, you can attach a lobster clasp to make it a functional and adorable accessory. This vibrant and creative pattern is a fun way to brighten your day or someone else’s.
Credit Crochet By Hui
Materials & Tools Needed
- Yarn: 4 strands of milk cotton yarn (or similar)
- Crochet Hook: 2.0 mm crochet hook
- Eyes: 2 safety eyes (8 mm; one big, one small)
- Stuffing: Fiberfill for stuffing
- Wire: 9.5 cm for the antennae
- Keychain Clip: Lobster clasp
- Scissors
- Waste Thread: For marking
- Sewing Needle: For sewing pieces together
Finished Size & Customization Ideas
- Finished Size: The size will depend on the tension and specific yarn used but is generally small enough for a keychain.
- Customization Ideas:
- Use different colors for stripes (e.g., golden yellow, pastel pink).
- Add felt cheeks or embroidered features for extra character.
- Substitute crocheted eyes with googly eyes for a playful appearance.
Pattern Abbreviations & Terminology
This pattern uses US crochet terminology:
- ch: Chain
- sc: Single crochet
- inc: Increase (2 single crochets in the same stitch)
- dec: Decrease (single crochet two stitches together)
- sl st: Slip stitch
Step-by-Step Detailed Crochet Instructions
Part 1: Head
- Round 1: Start with a slipknot, then ch 10. Twist the fabric to access the back loops of the chain.
- Work 1 sc, 1 sc inc, 7 sc, and 1 sc inc.
- Turn to the other side and work 7 sc. Add 1 sc inc.
- Total stitches: 22 sc.
- Use waste thread as a stitch marker.
- Round 2: Follow the pattern:
- 1 sc, 1 inc, then 10 sc, then 1 sc, 1 inc, repeat twice.
- Total stitches: 24 sc.
- Round 3: Repeat the pattern:
- 2 sc, 1 inc, then 10 sc; repeat twice.
- Total stitches: 28 sc.
- Round 4: Follow the formula:
- 4 sc, 1 inc, then 10 sc; repeat twice.
- Total stitches: 36 sc.
- Round 5: Build the head:
- 8 sc, 1 inc, then 10 sc; repeat twice.
- Total stitches: 52 sc.
- Rounds 6-13: Do 54 sc in each round to maintain the circular shape. Stuff as you go.
- From Round 14 onward, decrease the head as follows:
- Round 14: 7 sc, 1 dec; repeat. Total stitches: 48 sc.
- Round 15: 6 sc, 1 dec; repeat. Total stitches: 42 sc.
- Round 16: 5 sc, 1 dec; repeat. Total stitches: 36 sc.
- Round 17: 4 sc, 1 dec; repeat. Total stitches: 30 sc.
- Round 18: 3 sc, 1 dec; repeat. Total stitches: 24 sc.
- Round 19: 2 sc, 1 dec; repeat. Total stitches: 18 sc.
- Round 20: 1 sc, 1 dec; repeat. Total stitches: 12 sc.
- Tighten the final loop, cut the thread, and close the end neatly.

Part 2: Big Eye (Make 1)
- Round 1: Make a magic ring, ch 1, and work 6 sc into the loop. Pull tight. Total stitches: 6 sc.
- Round 2: Work 6 inc (2 sc in each stitch). Total stitches: 12 sc.
- Round 3: Follow the pattern: 1 sc, 1 inc x6. Total stitches: 18 sc.
- Rounds 4-9: Work 18 sc each round.
- Round 10: 1 sc, 1 dec x6. Total stitches: 12 sc.
- Cut thread, close the circle, and sew.
Part 3: Small Eye (Make 1)
Follow the same steps as the big eye but stop at Round 3 with 12 stitches instead.

Part 4: Body
- Work following the basic amigurumi ball techniques as detailed for the head—adjusting size as per the decreases and increases shared in the tutorial. Use yellow and black for stripes.
- Stuff the body lightly.

Part 5: Wings (Make 2)
- Row 1: Ch 7. Work 5 sl st along the chain, 2 sl st in the final ch. Turn.
- Row 2: Work 1 sl st in the inner loops across the 5 sl st. Total stitches: 12 sl st.
- Finish with decorative scallops:
- Work 3 half double crochet, 1 inc hdc pattern across edges.

Part 6: Antennae (Make 2)
- Round 1: Create a magic ring and ch 1.
- Work 4 sc into the loop.
- Bind off, insert a 9.5cm wire into the piece, and wrap yarn tightly around it.
Assembly Instructions
- Use pins to position the head, body, wings, eyes (big and small), and antennae.
- Stitch each part securely. Adjust placement to ensure symmetry.
- Add the keyring or lobster clasp to the head.

Finishing Tips
- Use embroidery floss to add a smile or extra details (optional).
- Avoid overstuffing to maintain a clean shape.
- Adjust the size of the eyes and body for personalization.
Your Cute Little Bee Keychain is now complete! 🐝