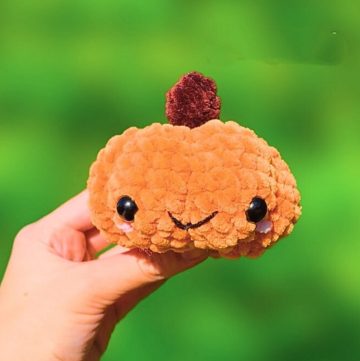
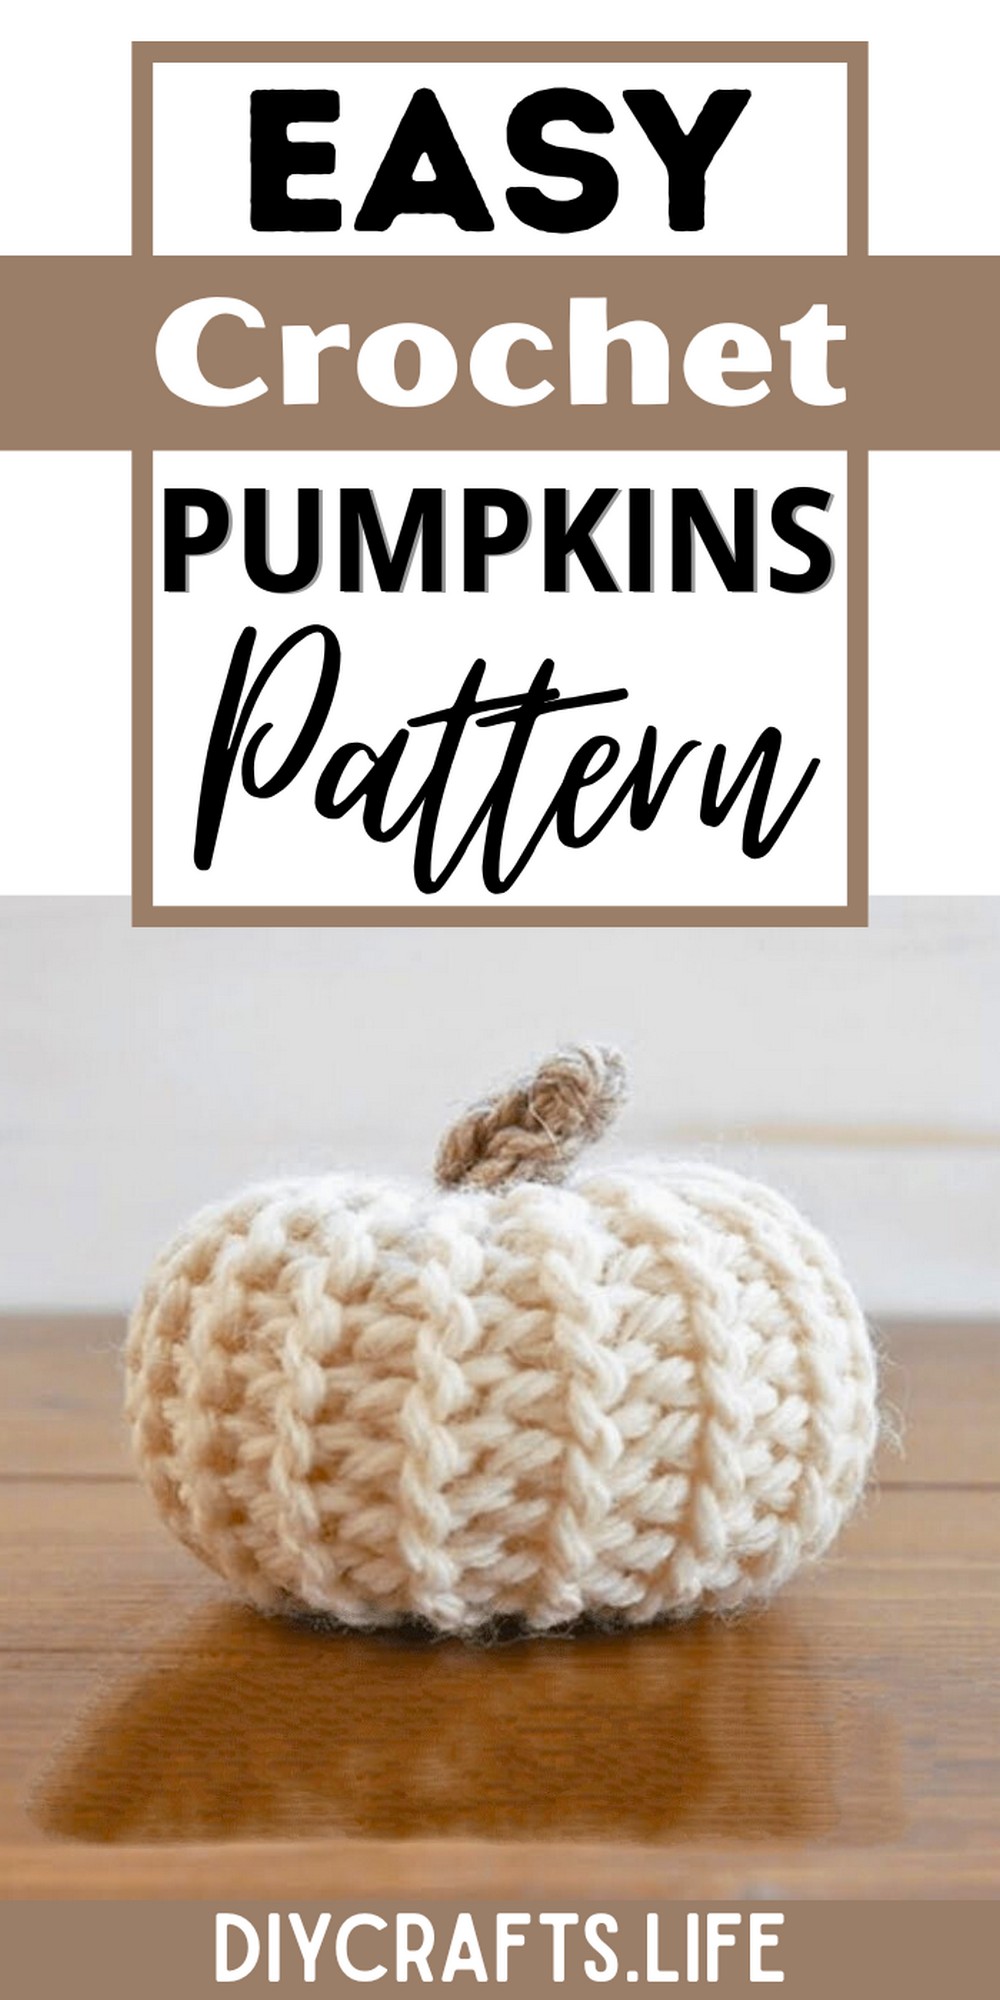
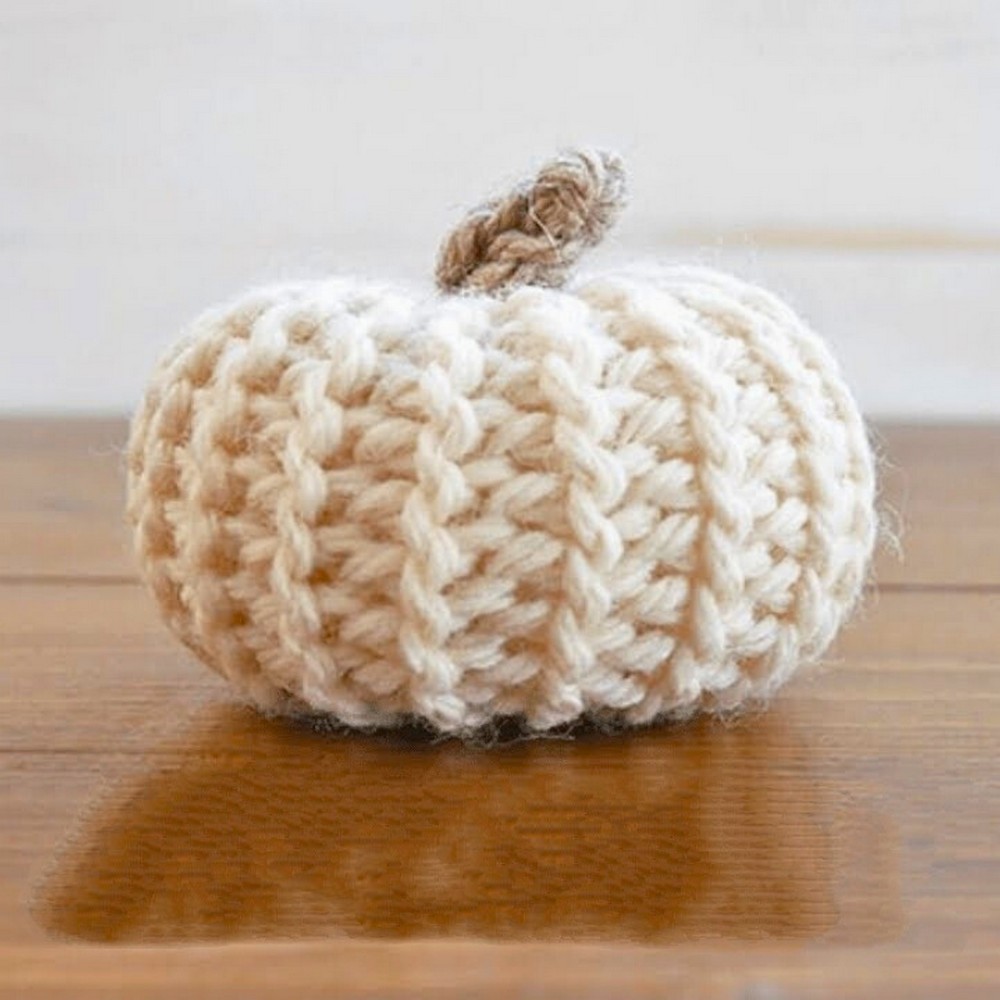
Crochet your way into fall with this easy pumpkin project! It's perfect for adding seasonal flair to your home decor and makes an adorable handmade centerpiece or gift. Simple yet versatile, this pattern lets you craft charming pumpkins that are a joy to display and use year-round.
These crochet pumpkins are great as table decor, fun gifts, or stylish additions to your cozy spaces. Their sturdy design ensures they last for seasons to come, while the soft texture and vibrant colors make them stand out beautifully in any setting.
Crochet Easy Pumpkins
This simple crochet project is perfect for beginners and pros alike! You can easily adjust the size, colors, and design to match your style. With creative options, you'll enjoy crafting pumpkins that are as unique as you are, resulting in a fun and rewarding experience.
Materials and Preparation
To crochet your pumpkin, you will need the following materials:
- Yarn: Worsted weight yarn or chunky yarn in orange (pumpkin body) and green or brown (stem).
- Hook Size: 4.5mm (for medium yarn) or 5.5mm (for chunky yarn).
- Additional Tools:
- Yarn needle (for sewing and weaving ends).
- Fiber filling (poly-fil) for stuffing.
- Scissors.
- Optional: Stitch marker to track rows.
Abbreviations and Notes
Here are common abbreviations used in this pattern:
- CH: Chain
- SC: Single Crochet
- HDC: Half Double Crochet
- DC: Double Crochet
- INC: Increase (2 SC in one stitch)
- DEC: Decrease (SC two stitches together)
- SLST: Slip Stitch
Pattern Notes:
- This pattern is worked in rounds, requiring you to join each round with a SLST unless otherwise stated.
- Gauge is not crucial, but if following exact measurements, keep consistent tension.
Gauge, Approximate Size, and Pattern Notes
Gauge: Not critical for this pattern. For worsted yarn, aim for approximately 14 stitches x 16 rows to measure 4 inches in SC.
Approximate Size: The finished pumpkin will be 4-6 inches wide, depending on yarn and tension.
Techniques:
- Magic Circle (for starting in rounds).
- Basic shaping through increasing and decreasing stitches.
- Simple sewing to close gaps while attaching the stem.
Step-by-Step Pattern
Pumpkin Body
Step 1: Begin with a Magic Circle
- CH 1 and work 6 SC into the magic circle. Pull tight to close. SLST to the first SC. (6 stitches)
Step 2: Round 2
- CH 1. Work 2 SC into each stitch around. SLST to join. (12 stitches)
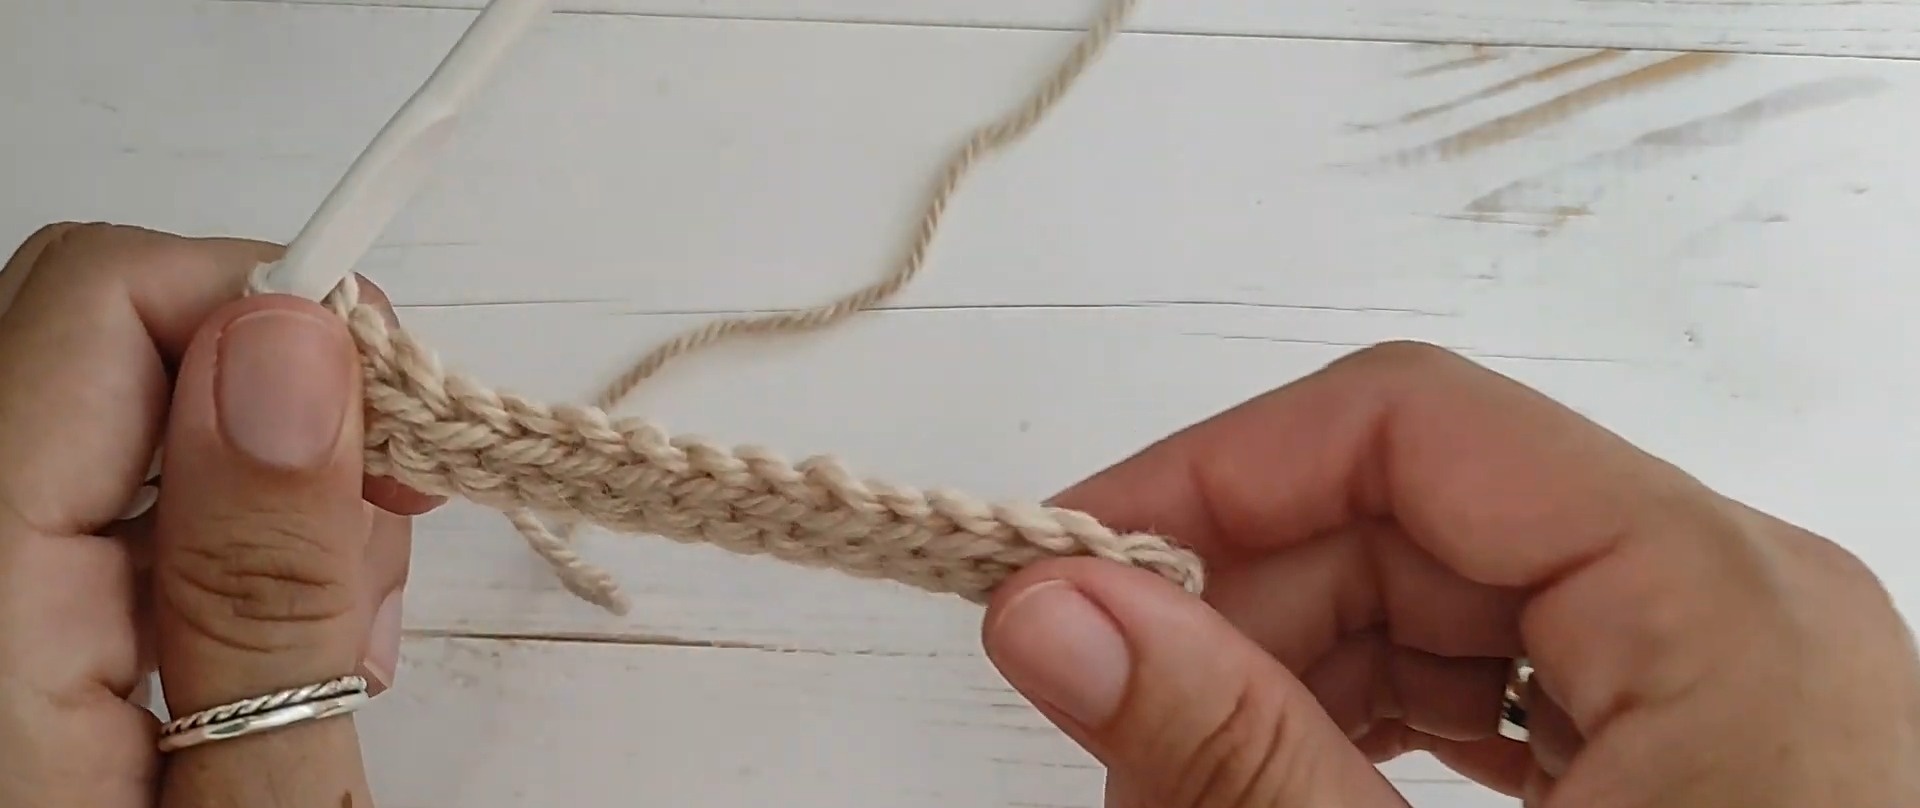
Step 3: Round 3
- CH 1. (SC 1, INC) Repeat from * to * around. SLST to join. (18 stitches)
Step 4: Round 4
- CH 1. (SC 2, INC) Repeat from * to * around. SLST to join. (24 stitches)
Step 5: Rounds 5-8
- CH 1. SC in each stitch around. SLST to join at the end of each round. (24 stitches)
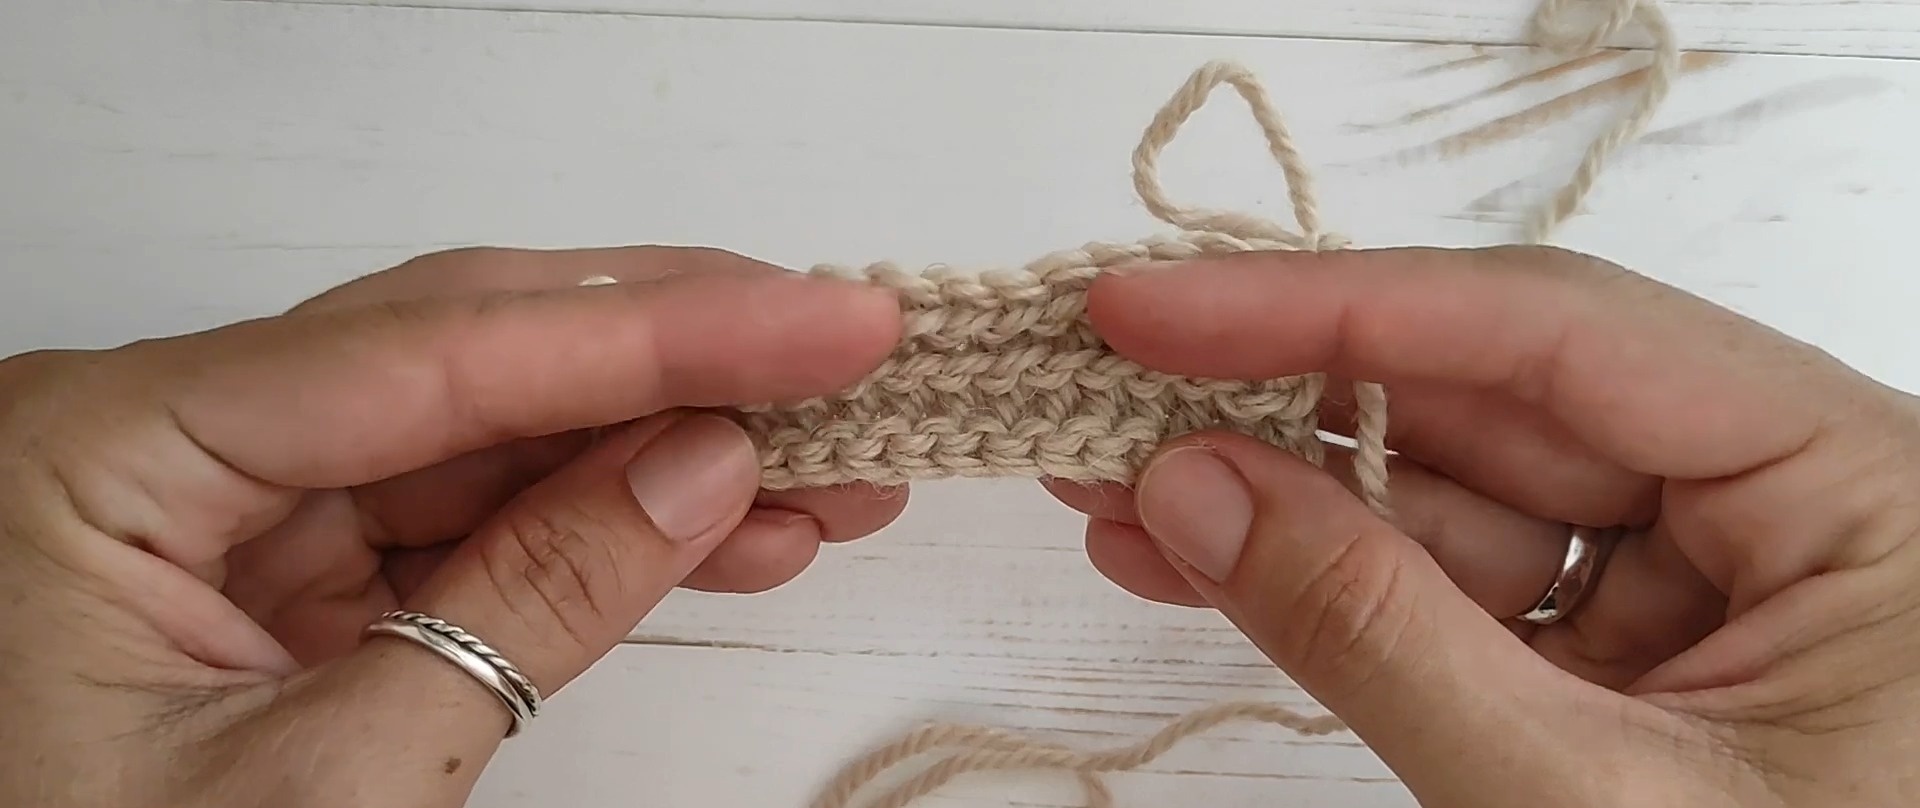
Step 6: Start Decreasing
- CH 1. (SC 2, DEC) Repeat from * to * around. SLST to join. (18 stitches)
Step 7: Continue Decreasing
- CH 1. (SC 1, DEC) Repeat from * to * around. SLST to join. (12 stitches)
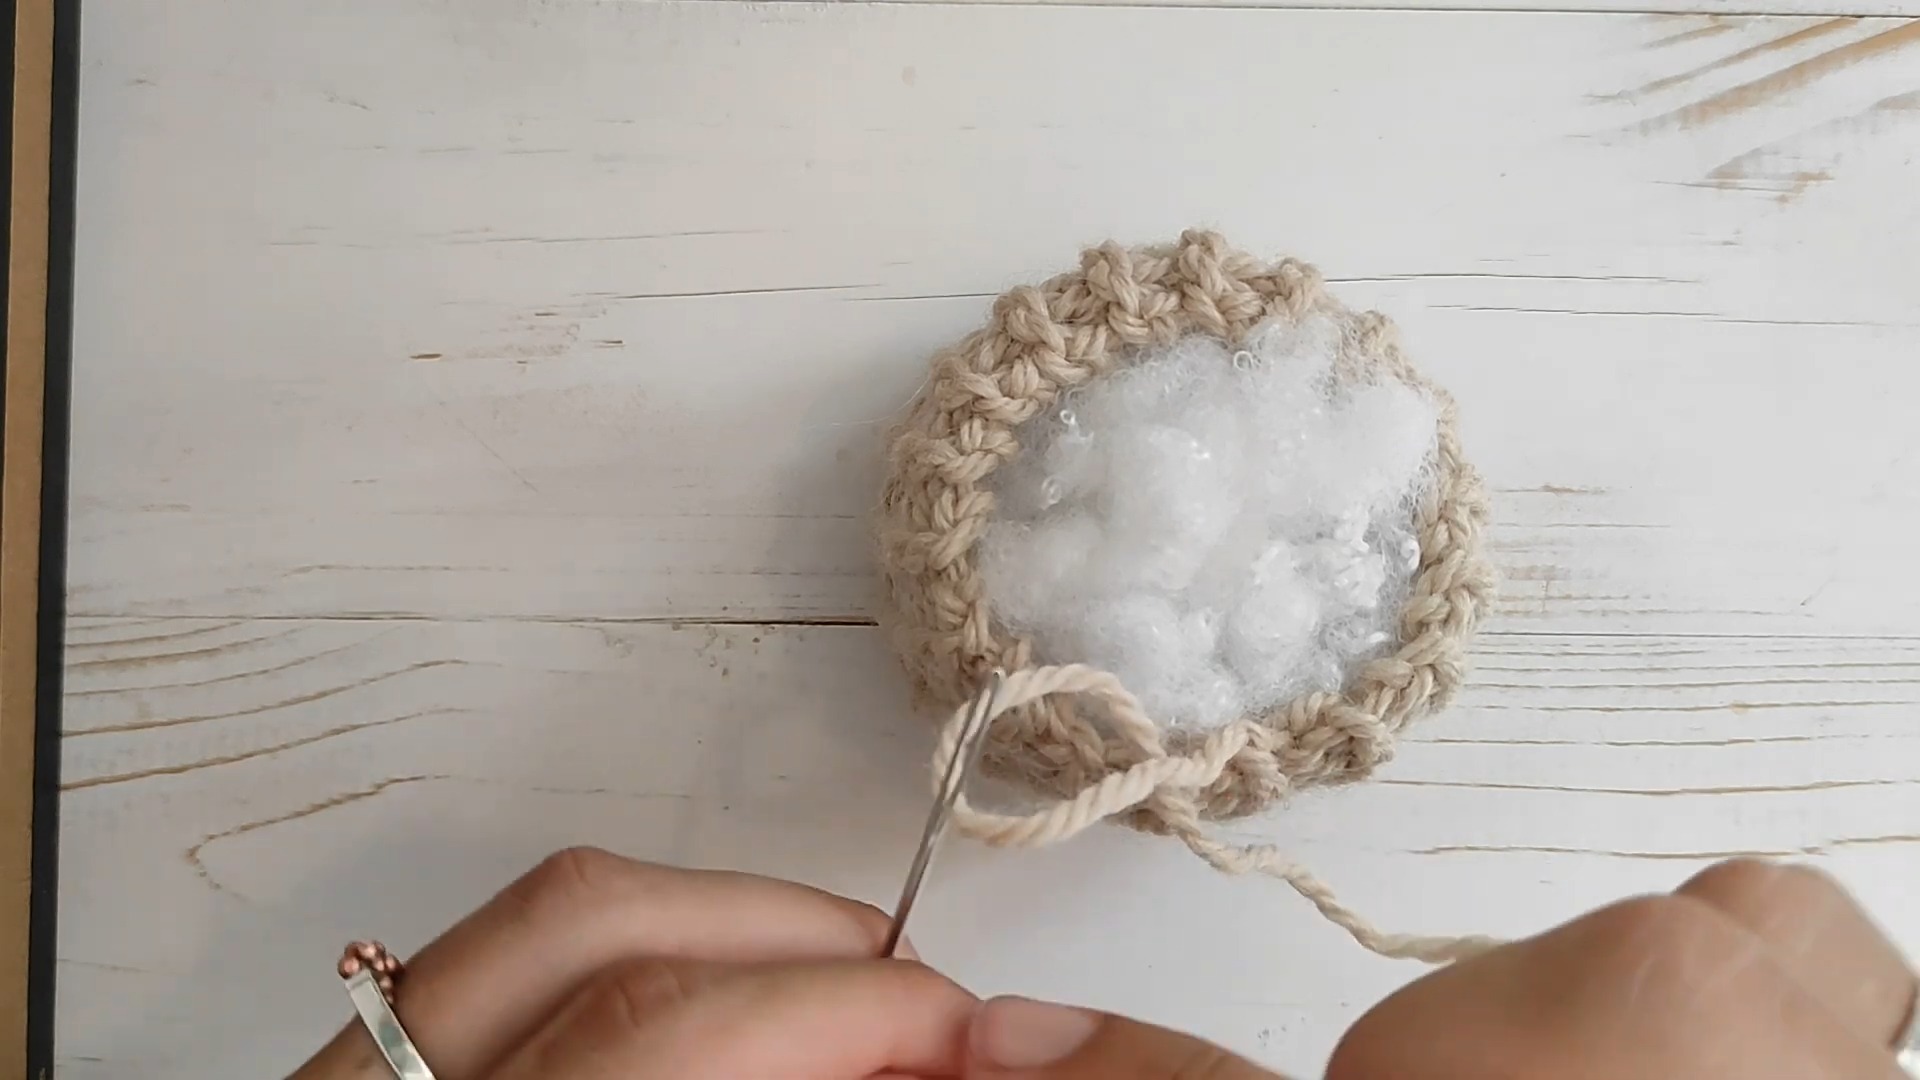
Step 8: Stuff the Pumpkin
- Fill the pumpkin with fiber stuffing, shaping it evenly.
Step 9: Close the Pumpkin
- CH 1. (DEC) Repeat around until the top closes completely. Use your yarn needle to sew closed if needed.
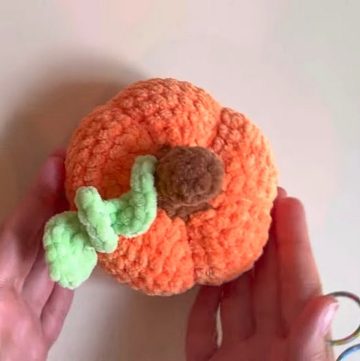
Pumpkin Stem
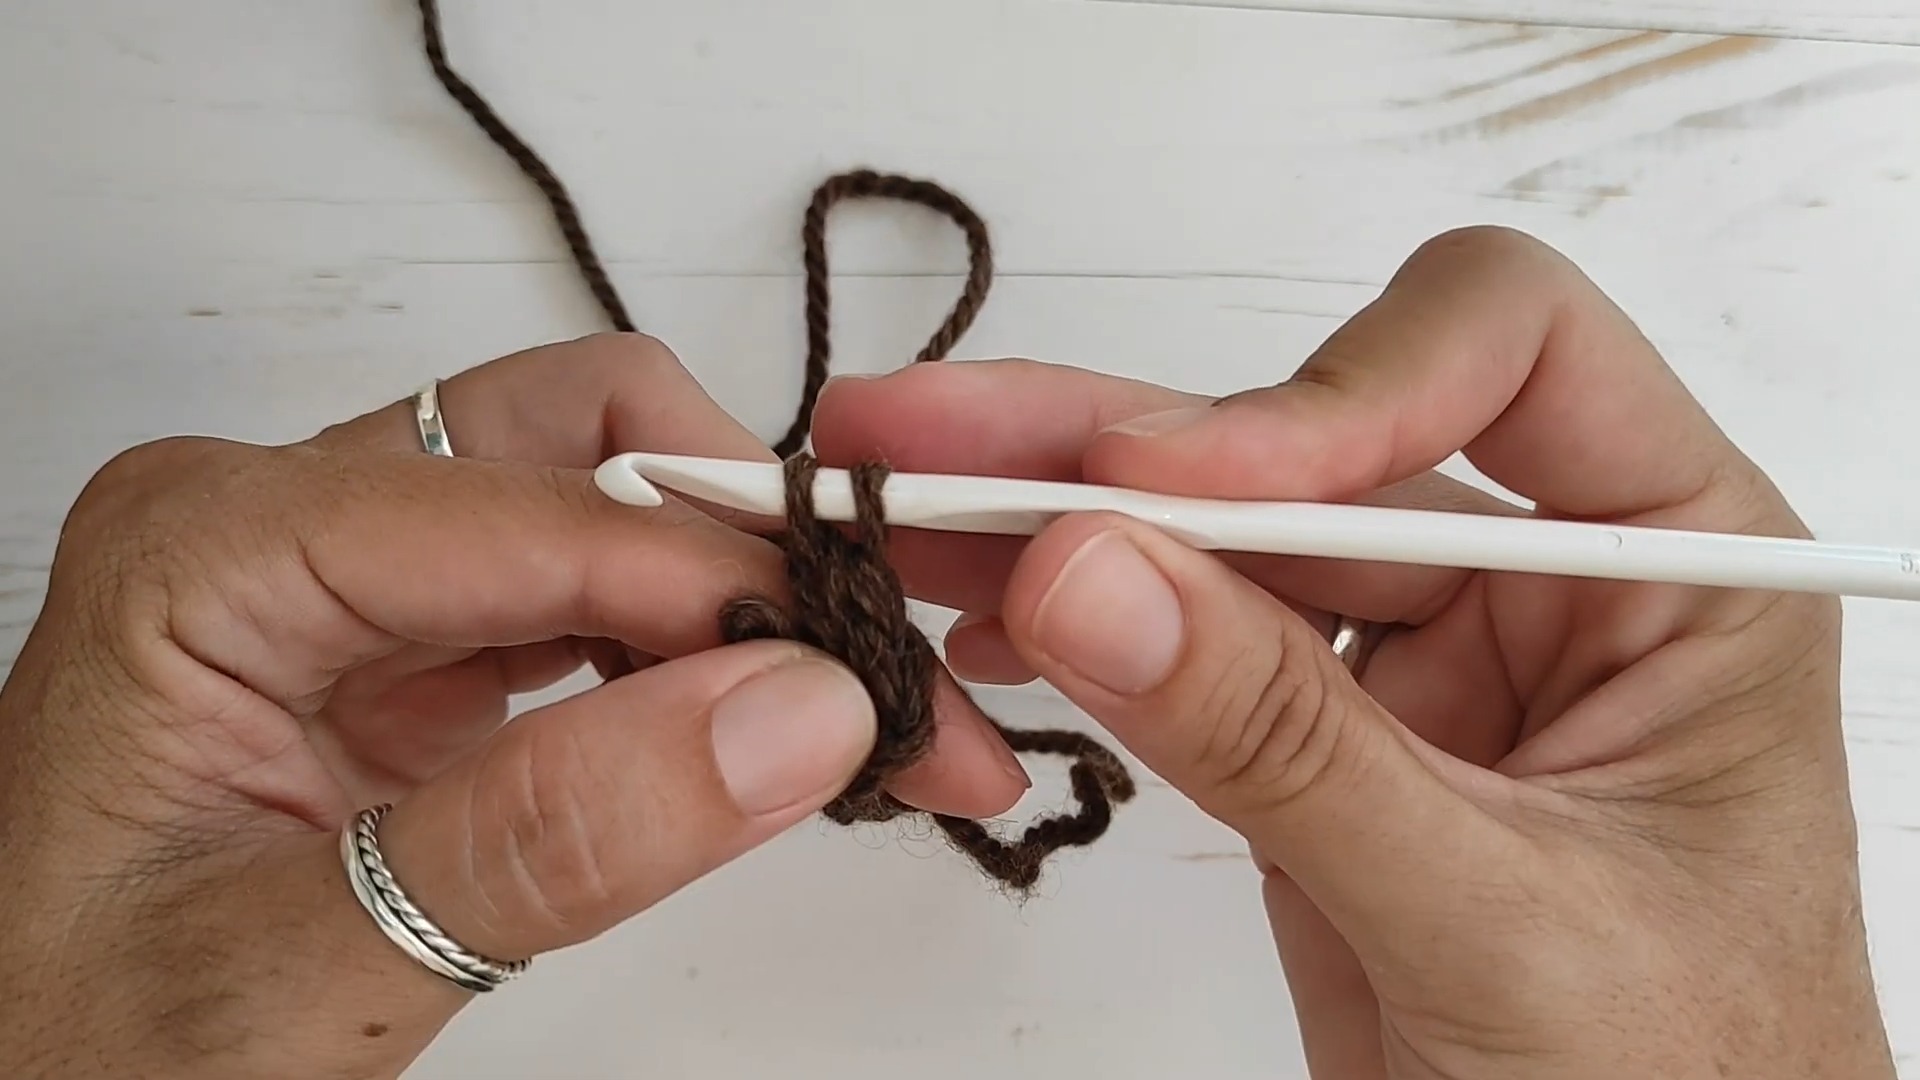
Step 1: Create a Magic Circle
- CH 1. Work 6 SC into the circle.
Step 2: Build the Stem
- SC in each stitch for 4-5 rounds to create height. SLST to finish.
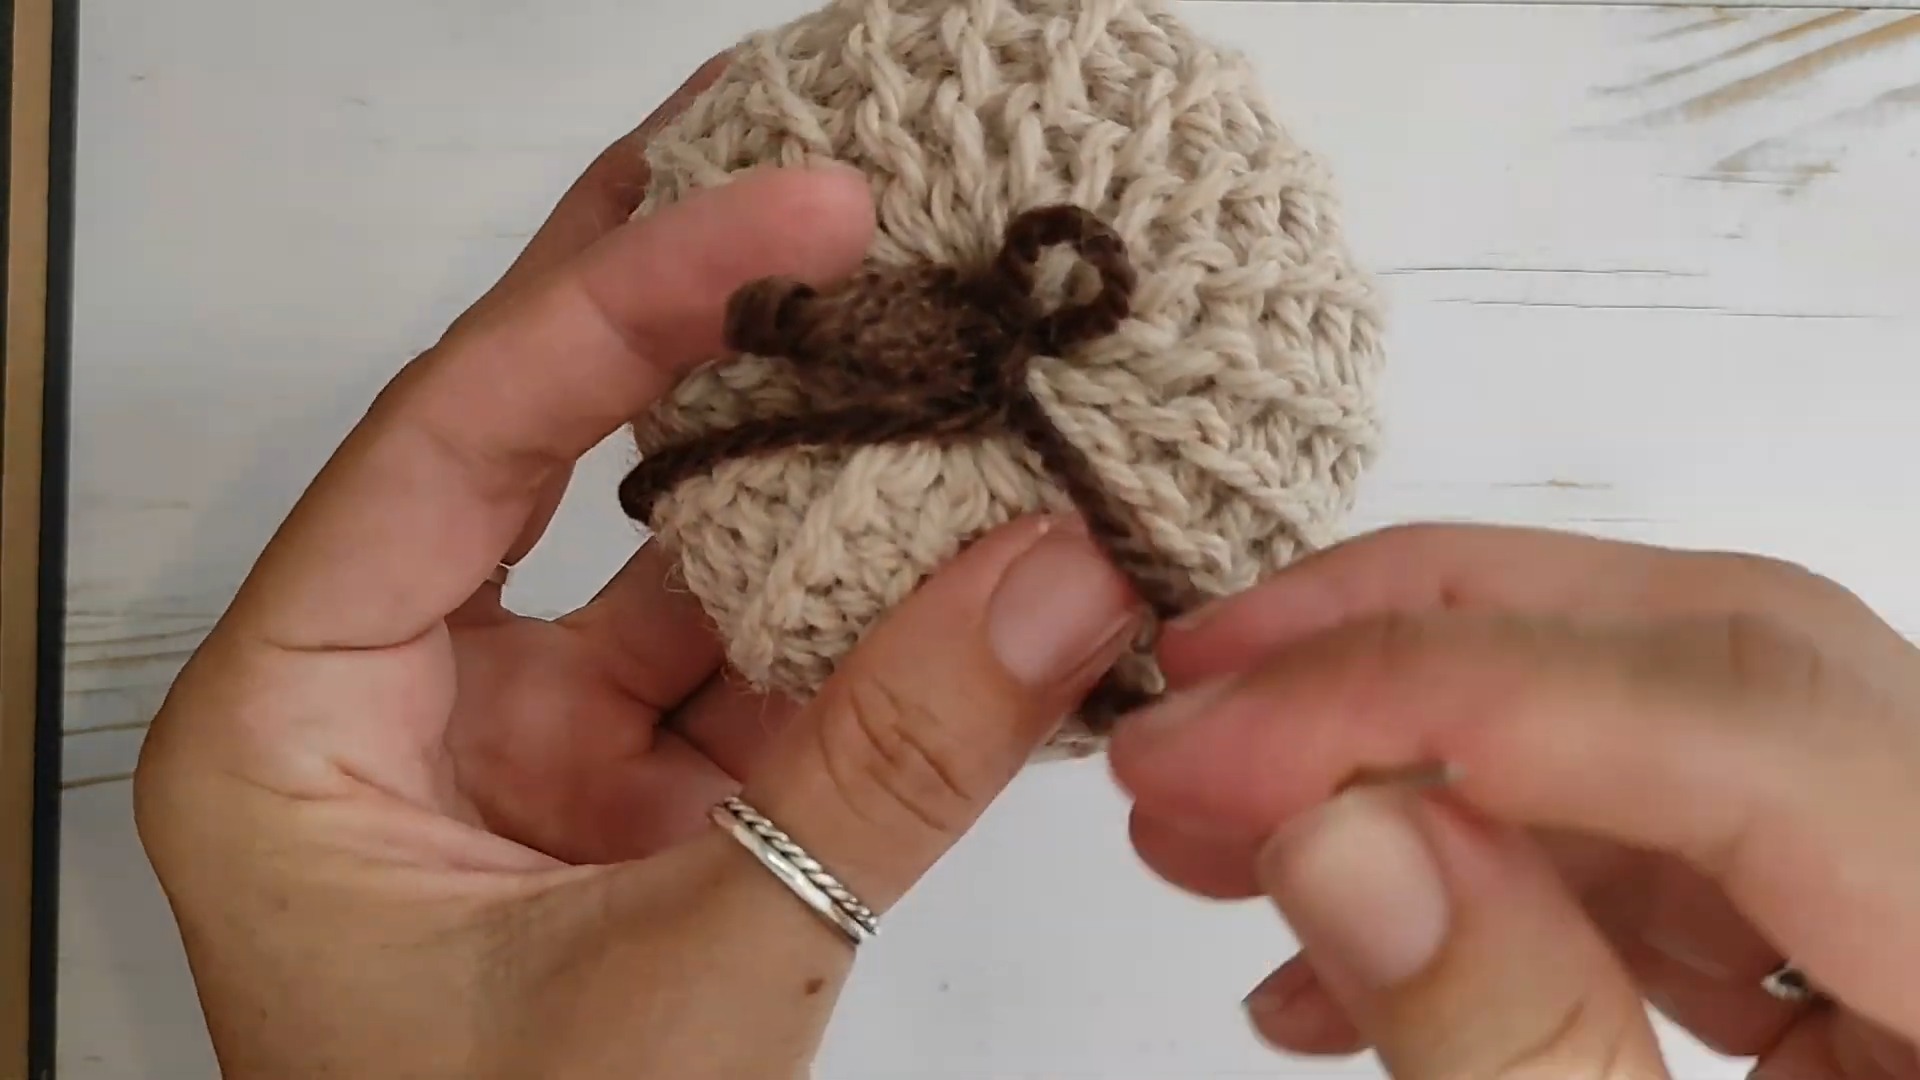
Step 3: Attach the Stem
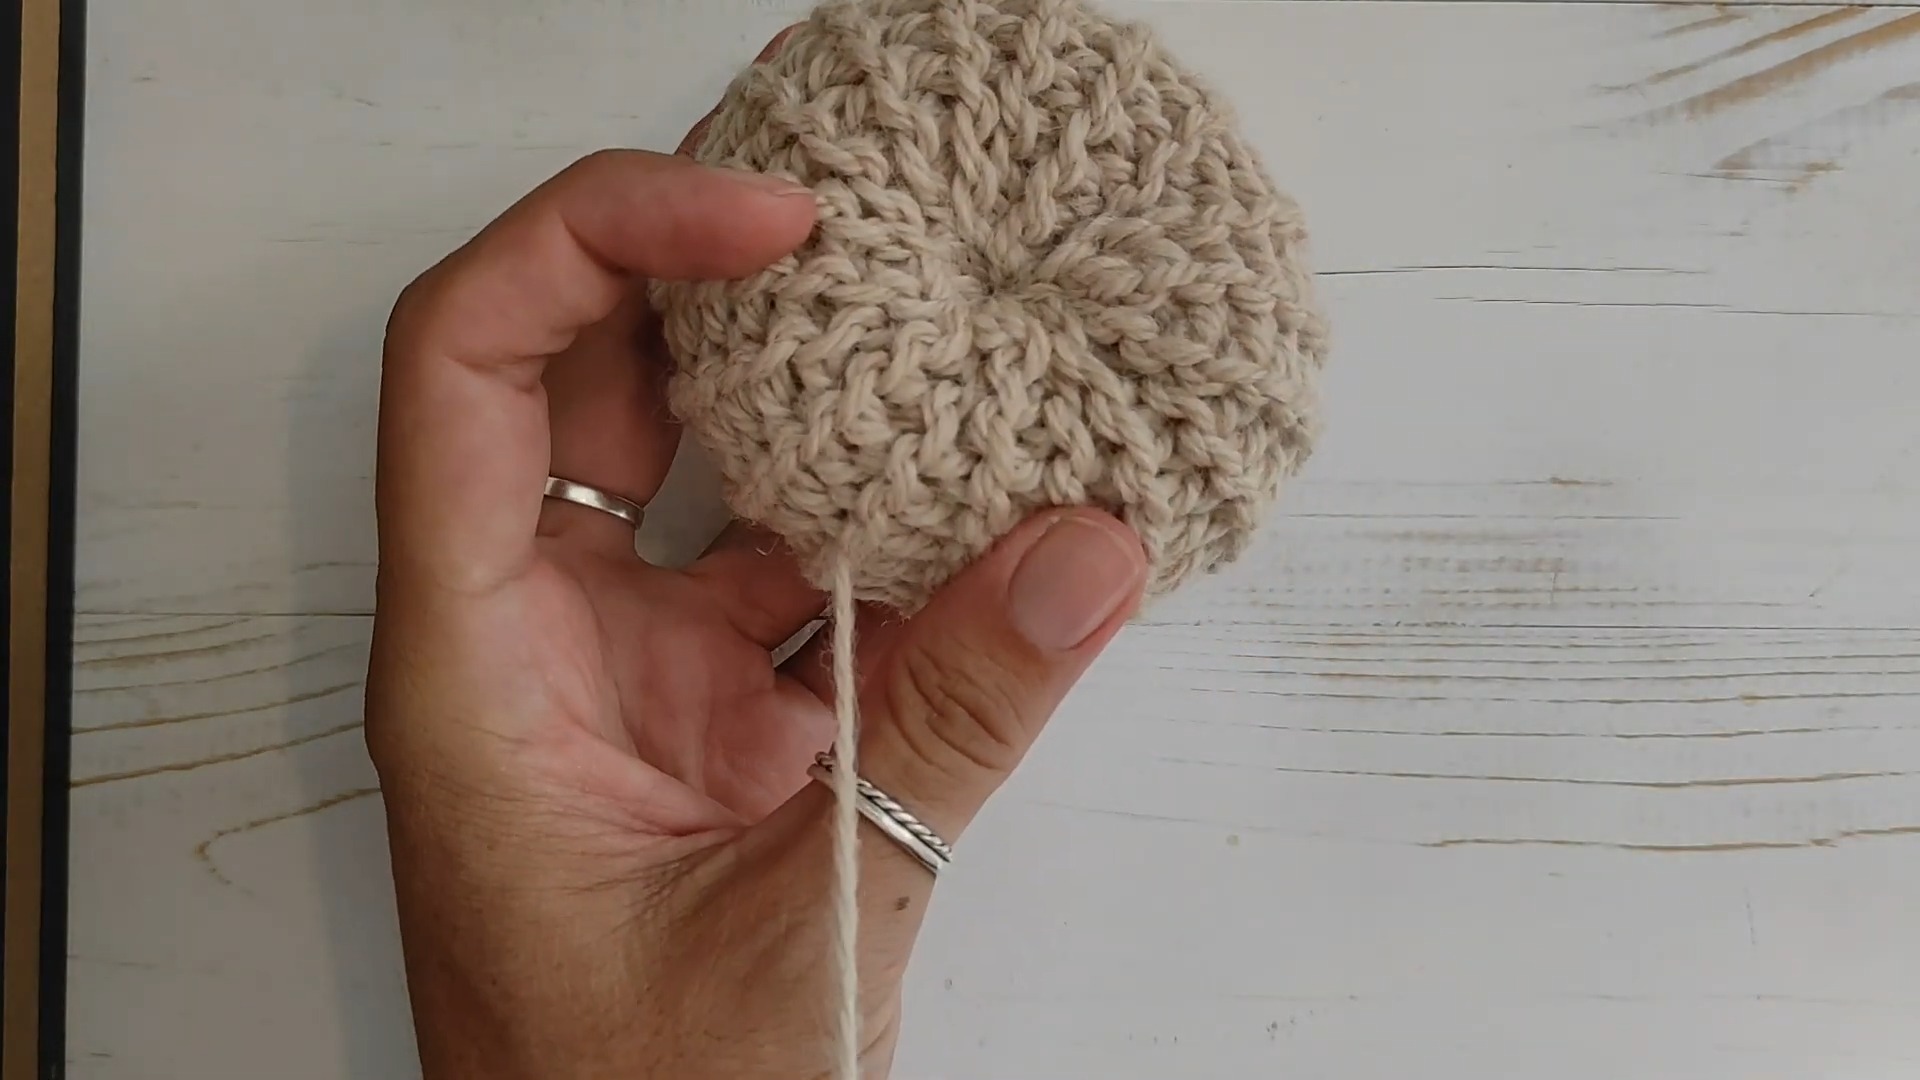
- Use your yarn needle to sew the stem onto the top of the pumpkin securely.
Finishing Touches
- Weave in any remaining yarn ends using the yarn needle.
- Shape your pumpkin by tugging gently in areas that need adjustment.
- Optional: Use green yarn to crochet leaves or create vines for extra decoration.

Pattern Question:
Question: How can I adjust the pattern for larger or smaller pumpkins?
Answer: Simply use thicker or thinner yarn and adjust the number of rounds as needed. Thicker yarn creates larger pumpkins, while thinner yarn makes smaller ones. You can also modify the stuffing amount to shape them just right.
Conclusion:
Creating a crochet pumpkin is soothing and fun, offering both decorative charm and functionality. Whether you're crafting for fall or adding whimsy to your home year-round, this project is easy to follow, endlessly creative, and truly rewarding. You’ll love making these little treasures!