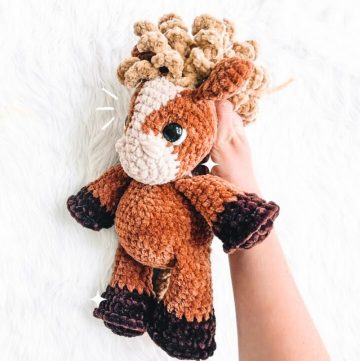
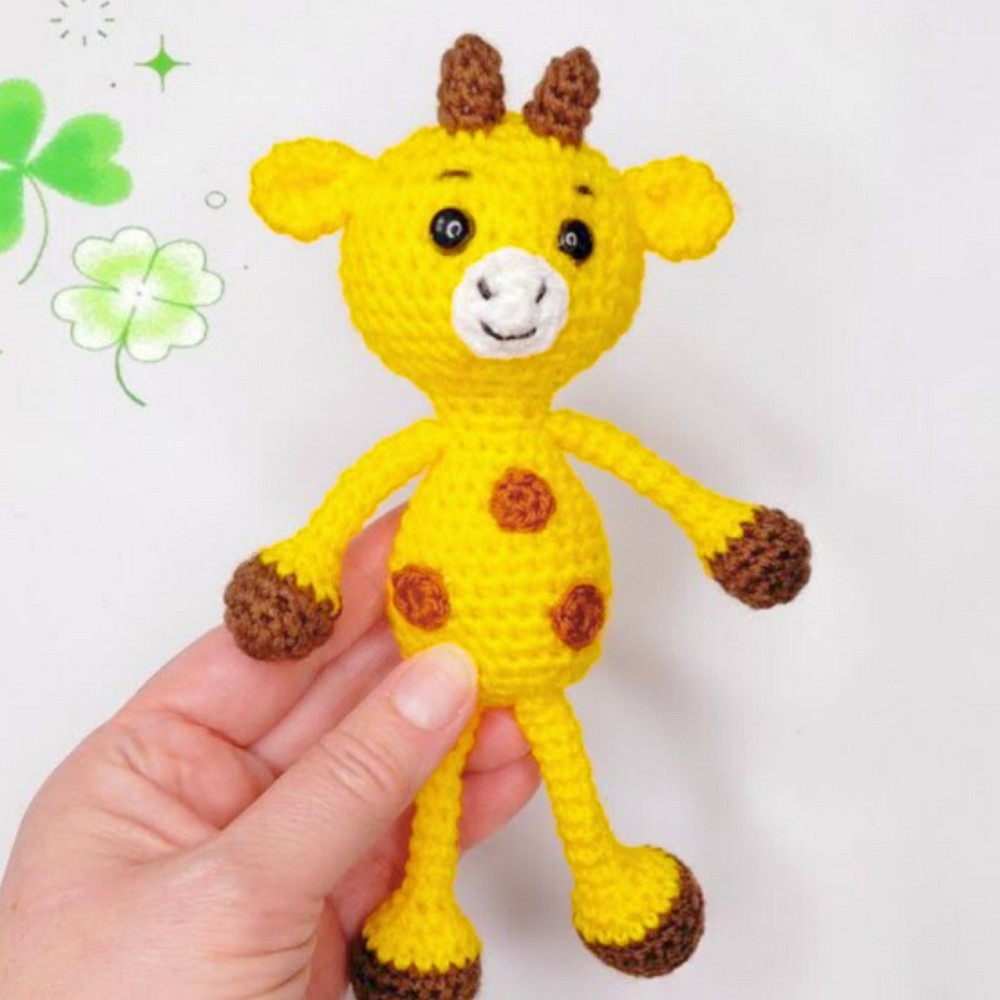
This adorable crochet giraffe is perfect as a cuddly toy, cheerful gift, or even a cute decoration for your room. With its tiny details like floppy ears, colorful spots, and playful horns, it’s sure to bring a smile to anyone’s face. Its compact size (about 18–19 cm) makes it easy to hold in little hands or display on a shelf.

To make this giraffe, you’ll need some colorful yarn—yellow, white, and brown—along with small touches of black thread, a crochet hook (1.75 mm), stuffing, buttons for the eyes, and some glue. You’ll crochet each piece separately (like legs, body, ears, and muzzle) and then put it all together to create your charming giraffe. Whether you want to sew or glue the details, the process is flexible and fun!
Credit Olga Garkusha
Materials & Tools Needed
To crochet this toy, you’ll need:
- Yarn: Yellow, white, and brown yarn (for the body and accents) and a little black yarn (for embroidery) and thin black thread (for finer details).
- Crochet hook: A 1.75mm hook.
- Stuffing: Holofiber (polyfill).
- Safety eyes or buttons: Two buttons (8-9 mm diameter).
- Glue: Hot glue (if you prefer gluing spots instead of sewing).
Optional tools:
- Needle for sewing pieces together
- Scissors
Finished Size & Customization Ideas
The giraffe measures approximately 18-19 cm in height after completion. You can customize:
- Yarn thickness: Use bulkier yarn and a larger hook for a bigger giraffe.
- Colors: Use pastel tones or customize the giraffe’s colors for unique combinations.
- Details: Add accessories like a bow or scarf for a playful touch.
Pattern Abbreviations & Terminology
Standard US crochet terms:
- sc: Single crochet
- /: Increase (2 single crochets in one stitch)
- **/**: Decrease (single crochet two stitches together)
Step-by-Step Detailed Crochet Instructions
1. Upper Legs
Make two upper legs:
- Row 1: Start with 6 sc in a magic ring.
- Row 2: 6 increases (/) → total 12 sc.
- Rows 3-4: 12 sc (work evenly).
- Change thread: Add the second color for the lower part.
- Row 5: 12 sc.
- Fill with holofiber stuffing.
- Row 6: 6 decreases (/) → total 6 sc.
- Rows 7-14: 6 sc.
2. Lower Legs
Make two lower legs:
- Row 1: Start with 6 sc in a magic ring.
- Row 2: 6 increases (/) → total 12 sc.
- Row 3: 1 sc, / repeated 6 times → total 18 sc.
- Rows 4-5: 18 sc (work evenly).
- Row 6: 18 sc.
- Row 7: 1 sc, /\ repeated 6 times → total 12 sc.
- Fill with holofiber stuffing.
- Row 8: 6 decreases (/) → total 6 sc.
- Rows 9-18: 6 sc.

3. Ears
Make two ears:
- Row 1: Start with 6 sc in a magic ring.
- Row 2: 6 increases (/) → total 12 sc.
- Rows 3-4: 12 sc.
- Row 5: 2 sc, /\ repeated 3 times → total 9 sc.
- Form: Sew corners together and make a couple of stitches to shape the ear.

4. Muzzle
- Row 1: 6 sc in a magic ring.
- Row 2: 6 increases (/) → total 12 sc.
5. Horns
Make two horns:
- Rows 1-4: 6 sc.
- Fill: Stuff the horns lightly with holofiber.
6. Spots
Make 7 spots (or more):
- Row 1: 6 sc in a magic ring.
If sewing on the spots, leave a long thread for sewing; otherwise, prepare to glue them.
7. Body
- Row 1: 6 sc in a magic ring.
- Row 2: 6 increases (/) → total 12 sc.
- Row 3: 1 sc, / repeated 6 times → total 18 sc.
- Row 4: 2 sc, / repeated 6 times → total 24 sc.
- Row 5: 3 sc, / repeated 6 times → total 30 sc.
- Row 6: 4 sc, / repeated 6 times → total 36 sc.
- Rows 7-11: 36 sc.
- Row 12: 4 sc, /\ repeated 6 times → total 30 sc.
- Row 13: 3 sc, /\ repeated 6 times → total 24 sc.
- Row 14: 12 decreases (/) → total 12 sc.
- Rows 15-16: 12 sc.
Add upper legs:
- Row 17: Crochet 3 sc along the body, fold the upper leg in half, and crochet 3 sc through the body and folded leg (repeat for both legs). Total: 12 sc in this row.
Continue the body:
- Row 18: 1 sc, / repeated 6 times → total 18 sc.
- Rows 19-20: 18 sc.
- Row 21: 2 sc, / repeated 6 times → total 24 sc.
- Rows 22-29: 24 sc.
- Row 30: 2 sc, /\ repeated 6 times → total 18 sc.
- Row 31: 1 sc, /\ repeated 6 times → total 12 sc.
- Row 32: 5 decreases (/) → total 7 sc.

Assembly
1. Position and Sew Pieces
- Muzzle: Sew between rows 8 and 9 of the body.
- Eyes: Prepare safety eyes or sew buttons approximately 6 sc apart, and secure tightly by sewing again.
- Legs: Attach all legs securely.
- Horns: Sew horns between rows 6 and 7 of the head.
- Ears: Sew ears down to the head by 1 sc.
2. Details
- Spots: Glue or sew scattered spots across the body and legs.
- Embroider the mouth and eyebrows with black thread.

3. Finishing Touches
Apply glue to the safety eyes/buttons to ensure stability, and adjust the stuffing as needed to create an even shape.