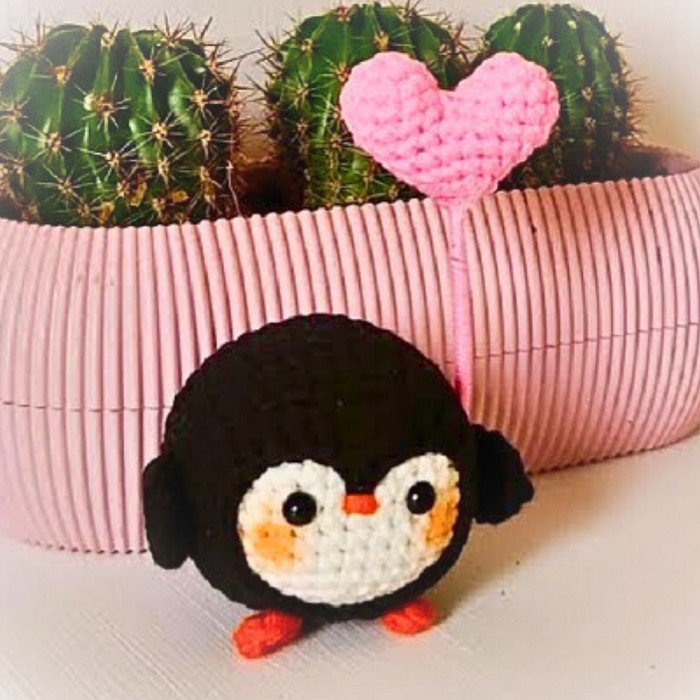
Create your own adorable crochet amigurumi penguin – a charming Antarctic companion that brings a joyful touch to any space. This cute penguin is not just delightful to look at, but it also works as a perfect handmade gift for loved ones, making it a versatile and meaningful project for crochet enthusiasts.
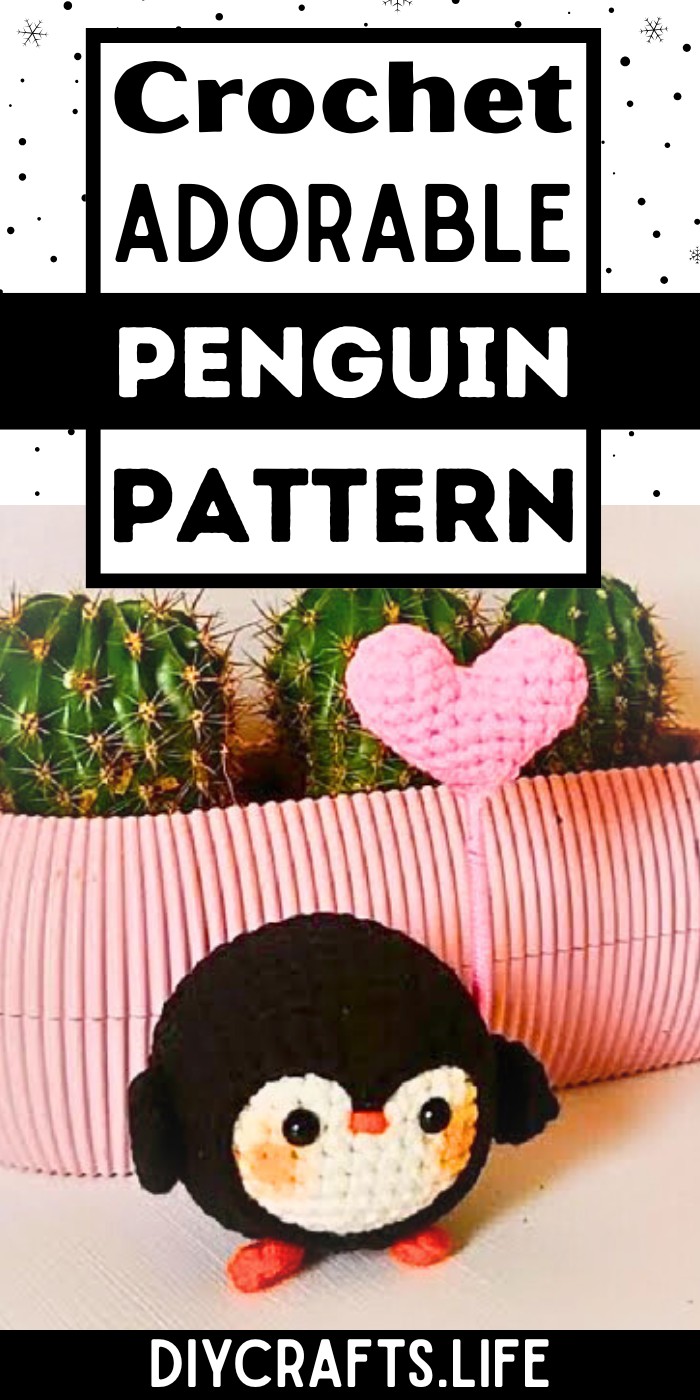
This crochet penguin makes an ideal gift or decoration, adding whimsical charm wherever it’s placed. With its snugly soft body and vivid features, it’s durable enough for play and sweet enough to be a keepsake. The project’s versatility allows for personalization with colors and details for all occasions.
Crochet an Adorable Amigurumi Penguin
Crocheting this penguin is a fun journey that all skill levels can enjoy. The easy-to-follow pattern encourages creativity and customization, so you can add your own unique touches. From crafting its cute body to assembling little details, making this penguin is accessible and deeply rewarding.
Credit The Kindness Company
Materials and Preparation
Materials Needed:
- Yarn:
- Worst Weight 4 (medium) yarn in the following colors:
- Black (outer body, wings, head)
- White (inner body)
- Orange (feet and beak)
- Pink (optional for blush)
- Worst Weight 4 (medium) yarn in the following colors:
- Crochet Hook: 4 mm
- Safety Eyes: 6 mm or 8 mm (depending on your preference)
- Stuffing: Polyester fiberfill or similar
- Tapestry Needle: For sewing pieces together and weaving in loose ends
- Stitch Marker: To mark the beginning of rounds
- Scissors: For trimming yarn
- Optional:
- Blush, colored pencils, or acrylic paint for detailing (cheeks)
- Floral wire for reinforcing the heart balloon
- Greeting card for gifting
Abbreviations and Notes
Abbreviations:
- MR: Magic Ring
- Ch: Chain
- SC: Single Crochet
- Inc: Increase (2 SC in the same stitch)
- Dec: Decrease (Single Crochet 2 stitches together)
- HDC: Half Double Crochet
- DC: Double Crochet
- TC: Treble Crochet
- DTC: Double Treble Crochet
- Sl St: Slip Stitch
- BLO: Back Loop Only
Notes:
- Amigurumi projects are worked in continuous rounds unless otherwise stated. Use a stitch marker to mark the first stitch of each round.
- When working over a magic ring, always work around the tail of the starting yarn to secure the stitches.
- Ensure tight tension to prevent stuffing from showing.
- Right-side stitches resemble “neat X’s” while the wrong side has a bumpier texture. Ensure the right side faces out while working the body and outer pieces.
- To ensure safety for small children or pets, embroider eyes instead of using safety eyes.
Gauge, Approximate Size, and Pattern Notes
- Gauge: Not critical for this project, but a tight tension is recommended.
For reference: 6 SC x 6 rows = 1 inch using a 4 mm hook and worsted weight yarn. - Finished Size: Approximately 6-8 inches tall, depending on yarn and stuffing fullness.
- No gauge swatch is necessary. The pattern's increases naturally shape the pieces.
- Special Techniques:
- Magic Ring: Used to start a closed circle for amigurumi.
- Front and Back Loops: Sections of the figures use BLO to leave raised loops that improve shaping or preparation for sewing.
Step-by-Step Pattern
Step 1: Inner Body (White)
- Round 1: Start with a Magic Ring. SC 6 into the ring. (6 stitches)
- Round 2: Inc in each stitch. (12)
- Round 3: SC 1, Inc around. (18)
- Round 4: SC 2, Inc around. (24)
- Round 5: SC 3, Inc around. (30)
- Round 6: SC 4, Inc around. (36)
- Rounds 7-13: SC around in each stitch. (36)
Note: Ensure the right side is facing out. Flip your work if needed.
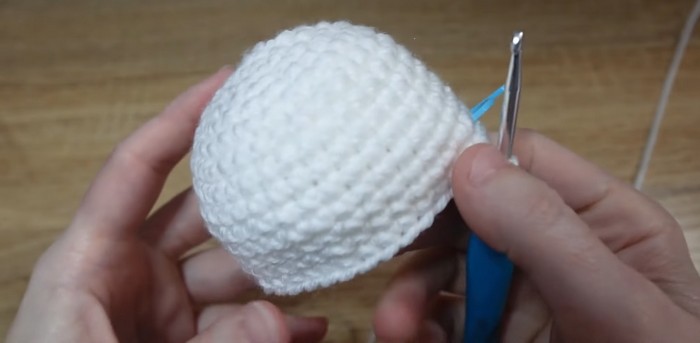
- Insert safety eyes between Rounds 9-10, spacing them 3 stitches apart.
- Stuff the body with fiberfill.
- Round 14: SC 4, Dec around. (30)
- Round 15: SC 3, Dec around. (24)
- Round 16: SC 2, Dec around. (18)
- Round 17: SC 1, Dec around. (12)
- Round 18: Dec all around. (6)
Fasten off. Weave in the tail using tapestry needle.

Step 2: Outer Body (Black)
- Follow Rounds 1–6 from the body. (36 stitches by Round 6)
- Rounds 7–10: SC around. (36)
- Round 11: SC 6, BLO for the next 4 stitches, SC 16, BLO for the next 4, SC 6. (36)
- Round 12: SC around. (36)
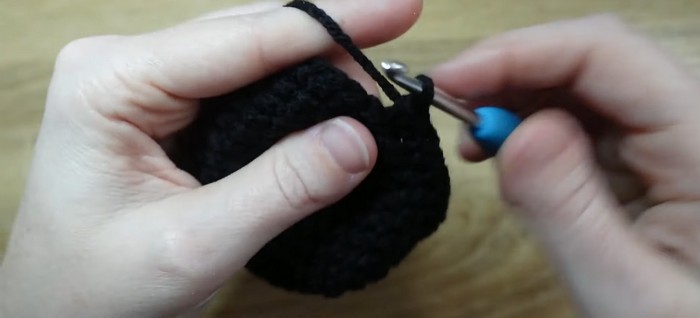
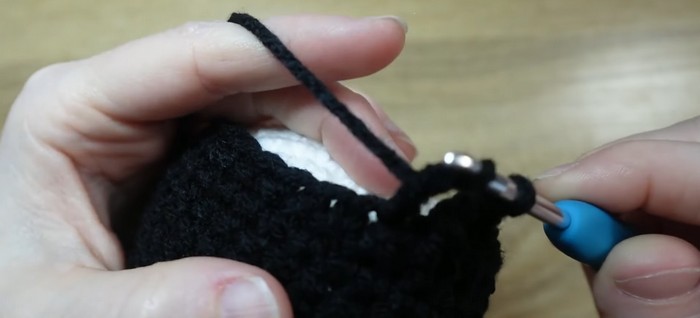
Joining Black Body to White
- Insert the white body into the black shell. Line up the BLO loops from Round 11 with the white body, centering the black around its face and eyes.
- Round 13-14: SC around, maintaining alignment. Stuff as needed.
- Decrease rounds (Rounds 15–18) the same as the inner body. Fasten off and weave in the tail.
Step 3: Wings (Make 2)
- Round 1: Magic Ring, SC 6. (6)
- Round 2: SC 1, Inc around. (9)
- Rounds 3-4: SC around. (9)
- Leave a small tail for sewing. Slip stitch to BLO loops of the black body at the sides.
Step 4: Feet (Make 2 in Orange)
- Insert hook into Round 15 of the black body along the bottom (align with eyes). Pull up a loop of orange. Chain 2.
- Place 5 SC into the first chain.
- Slip stitch into the first SC.
- Fasten off and weave in ends. Repeat for the second foot.
Step 5: Beak (Orange)
- Thread a small piece of orange yarn into your needle.
- Sew 2 stitches wide between the safety eyes. Add a second stitch overlaid for dimension.
- Knot and weave the ends behind the black outer shell.
Step 6: Heart Balloon (Optional)
- Make 2 Heart Halves:
- Round 1: Magic Ring, SC 6.
- Round 2: Inc around. (12)
- Round 3: SC around. (12)
- Joining Halves: Align two halves. SC around one half’s edge and continue onto the second half’s edge. SC around each half. (24)
- Add fiberfill and a wire (optional) for shaping the stem.
- Decrease evenly to close. Fasten off.
Step 7: Add Blush
- Lightly apply blush with a brush or cotton swab to either side of the beak near the eyes for a cute rosy effect.
Pattern Question:
Question: What if I don't have the exact yarn weight mentioned in the tutorial?
Answer: You can use a similar weight yarn (e.g., sport, DK, or plush yarn). Adjust your hook size accordingly to match the desired firmness of your stitches.
Conclusion:
This crochet penguin project is the perfect blend of creativity and functionality. Whether as a heartfelt gift or a decorative piece, its charm is undeniable. Easy to follow, fun to personalize, and full of character, it's a crochet project you'll treasure and enjoy making.