Looking for a fun and adorable crochet idea? Meet the no-sew crochet stingray! This delightful design is not only easy to make but also perfect for anyone who loves stuffed animals or unique handmade gifts. Whether you’re thinking of it as a cute toy, room decoration, or even just a keepsake, this stingray is sure to brighten anyone's day.

What makes this stingray special is its simplicity—you crochet two panels, stitch them together, add some stuffing, and you're done! You can play around with colors to make it your own. Even beginners will enjoy making it, thanks to straightforward instructions. A pair of safety eyes and some simple detailing for its fins give it a charming and lifelike look. Perfectly soft and squishy, it's great for hugs, play, or just sitting as a cheerful companion.
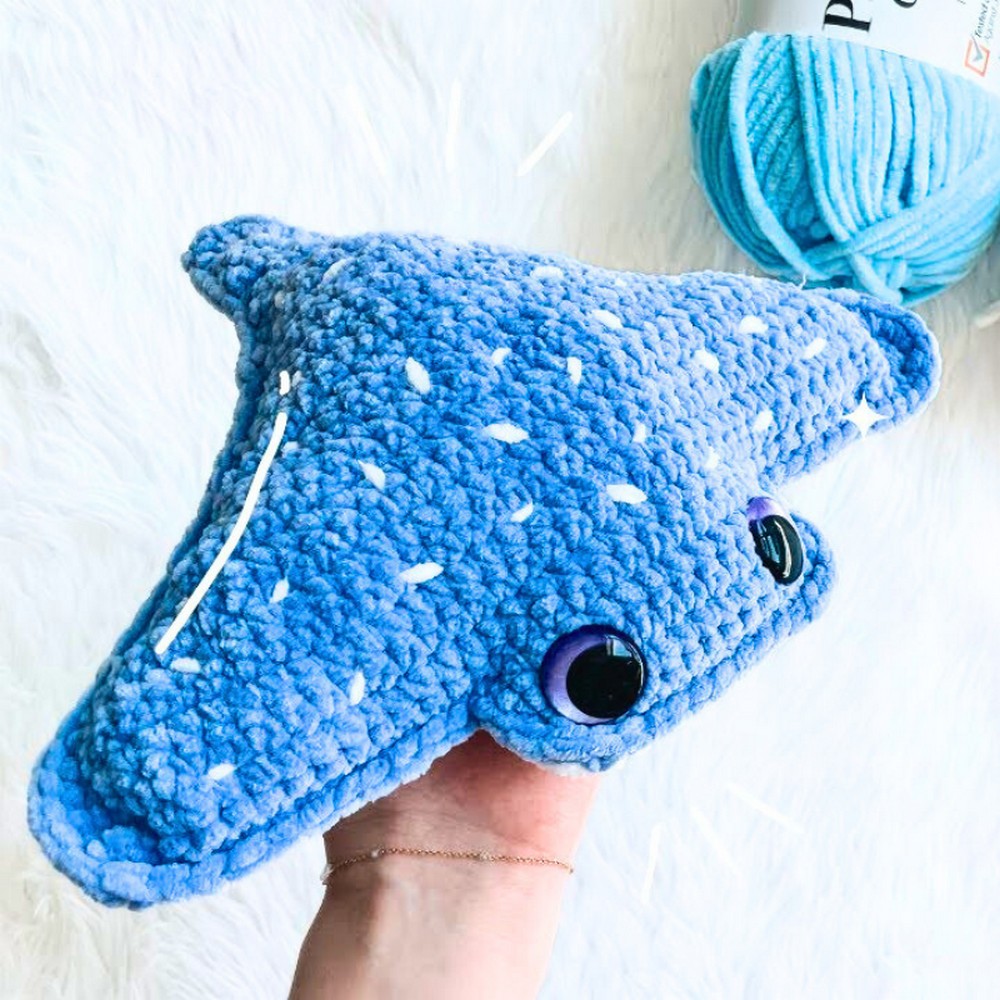
Credit Crochet with Kyra
Materials and Tools Needed
- Yarn:
- Big Twist Baby Bear (or any worsted (#4) weight yarn preferred):
- Color 1: Blue (used for the stingray's top)
- Color 2: White/Vanilla (used for the belly)
- Big Twist Baby Bear (or any worsted (#4) weight yarn preferred):
- Crochet Hook: 5mm
- Safety Eyes: 20mm
- Stuffing: Polyfill stuffing
- Scissors
- Embroidery Needle (for sewing details)
- Stitch Marker (optional, to mark the first/last stitch in rows)
Finished Size & Customization Ideas
- Finished Size: Approximately 5–7 inches wide when using the stated materials and hook.
- Customizations:
- Use different colors for the stingray's top and bottom panels.
- Embroider additional white dots or patterns on the back.
- Add a smile to the front "face" of the stingray with black thread or yarn.
Pattern Abbreviations & Terminology
(Note: Pattern uses US Crochet Terms)
- CH: Chain
- SC: Single Crochet
- ST/STs: Stitch/Stitches
- SL ST: Slip Stitch
- DEC: Decrease (skip a stitch to reduce stitch count per row)
Step-by-Step Crochet Instructions
The stingray is made in two separate panels (top and bottom) that are crocheted together to form the stingray body. Follow the steps below.
1. Bottom Panel (White or Color 2)
This will form the belly of the stingray.
- Foundation Chain + Initial Rows
- Make a slip knot and chain 15.
- Row 1: Starting from the 2nd chain from your hook, make 14 SC across the chain. (14 STs)
- Rows 2–5: Chain 1, turn, and make 14 SC across. (14 STs per row)
After Row 5, you'll have a rectangular shape measuring 5 rows tall.
- First Wing Formation
- Step A: Chain 15 after finishing Row 5.
- Step B: In the 2nd chain from your hook, work 14 SC across the chain, then continue into the 14 SC of the rectangle.
- Now, the row consists of 28 SC (14 from the chain and 14 from the rectangle).
- Step C: Chain 15 again, turn, and work 42 SC across (14 from Panel + 14 from previous wing + 14 from chains just added).
- Step D: Repeat for 2 more rows of 42 SC.
- At this point, the wing section is fully expanded.
- Decreasing Rows
- For each row, do NOT chain 1 at the end. Simply turn and skip the first and last STs of each row.
- Repeat this decreasing pattern until 4 STs remain at the center.
- Fasten off the yarn.
- Tail Formation
- Attach yarn at the 4 central stitches.
- Rows 1–5: Work 3 SC across the row for 5 rows.
- Rows 6–7: Decrease to 2 SC and maintain 2 SC for 2 rows.
- Final Row: Decrease to 1 SC.
- Fasten off and weave in ends.

2. Top Panel (Blue or Color 1)
- Follow the exact same steps as the bottom panel but use a different color for the top.
- Do NOT fasten off the yarn when you finish the top panel, as you’ll use this to crochet the two panels together.
3. Joining the Panels
- Assemble the Panels:
- Place the bottom panel beneath the top panel. Align the edges carefully.
- Make sure the blue (top) panel is facing outward, and the white belly is on the inside.
- Crochet Around:
- Begin at the tail end. Insert your hook through the STs of both pieces and crochet SCs all the way around the edge.
- Be consistent with your stitch placement to avoid uneven edges.
- Stuff While Closing:
- Stop crocheting once you reach the front part near the wing tips.
- Add the polyfill stuffing evenly into the body. Pay special attention to filling the edges of the wings.
- Adding Safety Eyes:
- Once stuffing is partially done, insert safety eyes between rows 3–5 on the face section. Adjust the spacing to your liking. Snap on the safety eye backings securely.
- Continue stuffing to ensure a rounded and firm shape.
- Close Completely:
- Finish crocheting around the edges. Slip stitch into the first SC to secure the connection. Fasten off and weave in the ends.

4. Final Customization
- White Dots on the Back:
- Thread some of the white yarn through the embroidery needle.
- Create small dots on the blue portion by stitching over single points. Space them out randomly or in a preferred pattern.
- Tie off the ends inside the body to secure.

- Optional Smile:
- Add a small smile with black yarn or thread along the face for extra character.