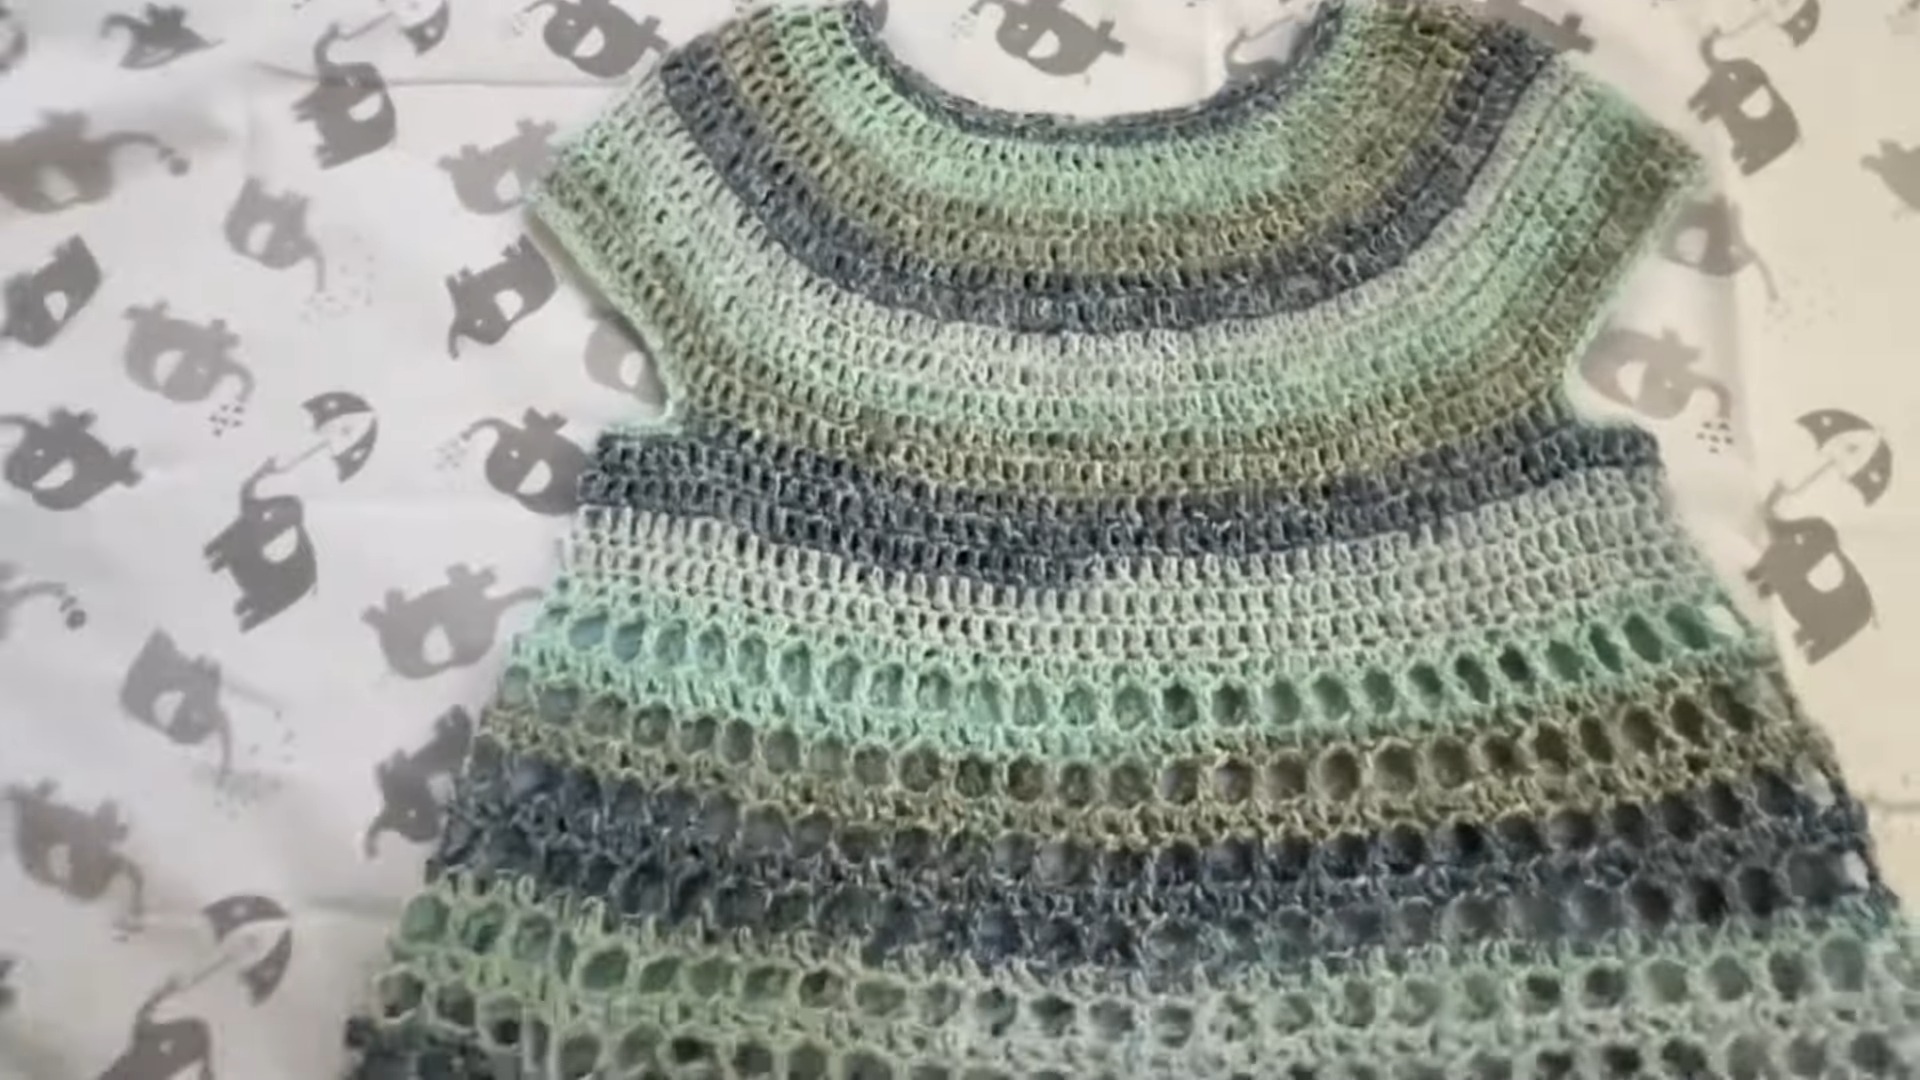
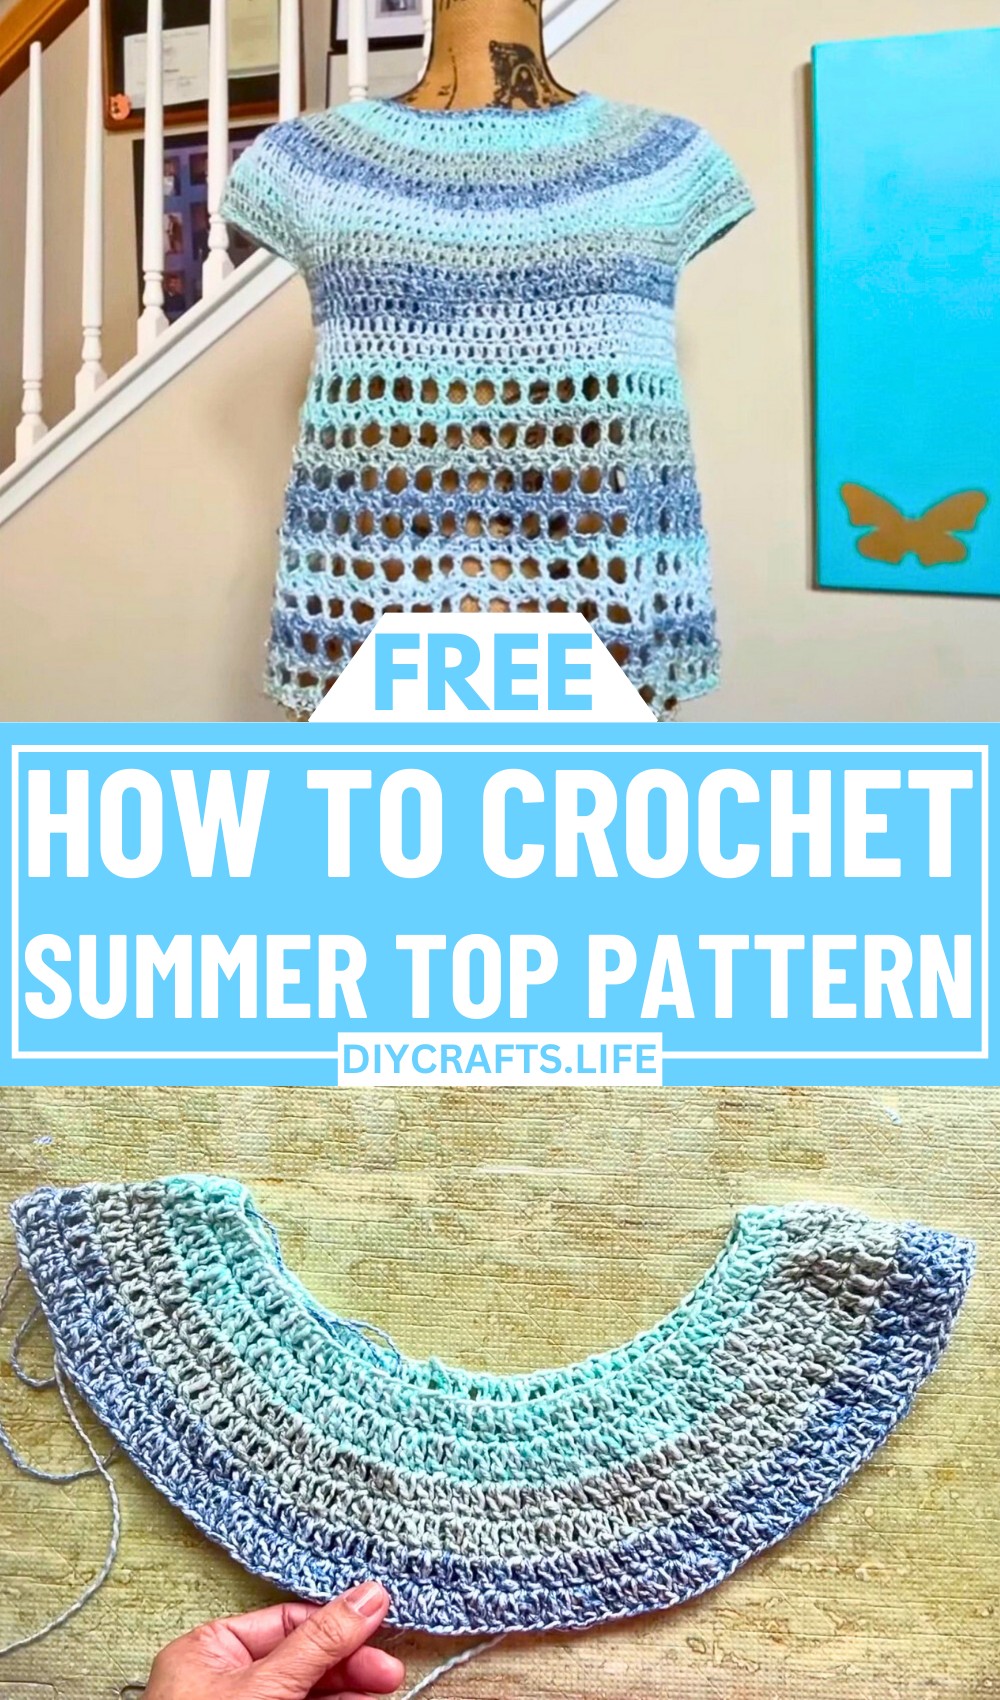
Create a breezy, stylish babydoll summer top with this fun crochet pattern! This cute, lightweight piece is perfect for sunny days and can be customized to suit your fit and style. Whether you're a beginner or experienced crafter, you'll love this easy, timeless design.
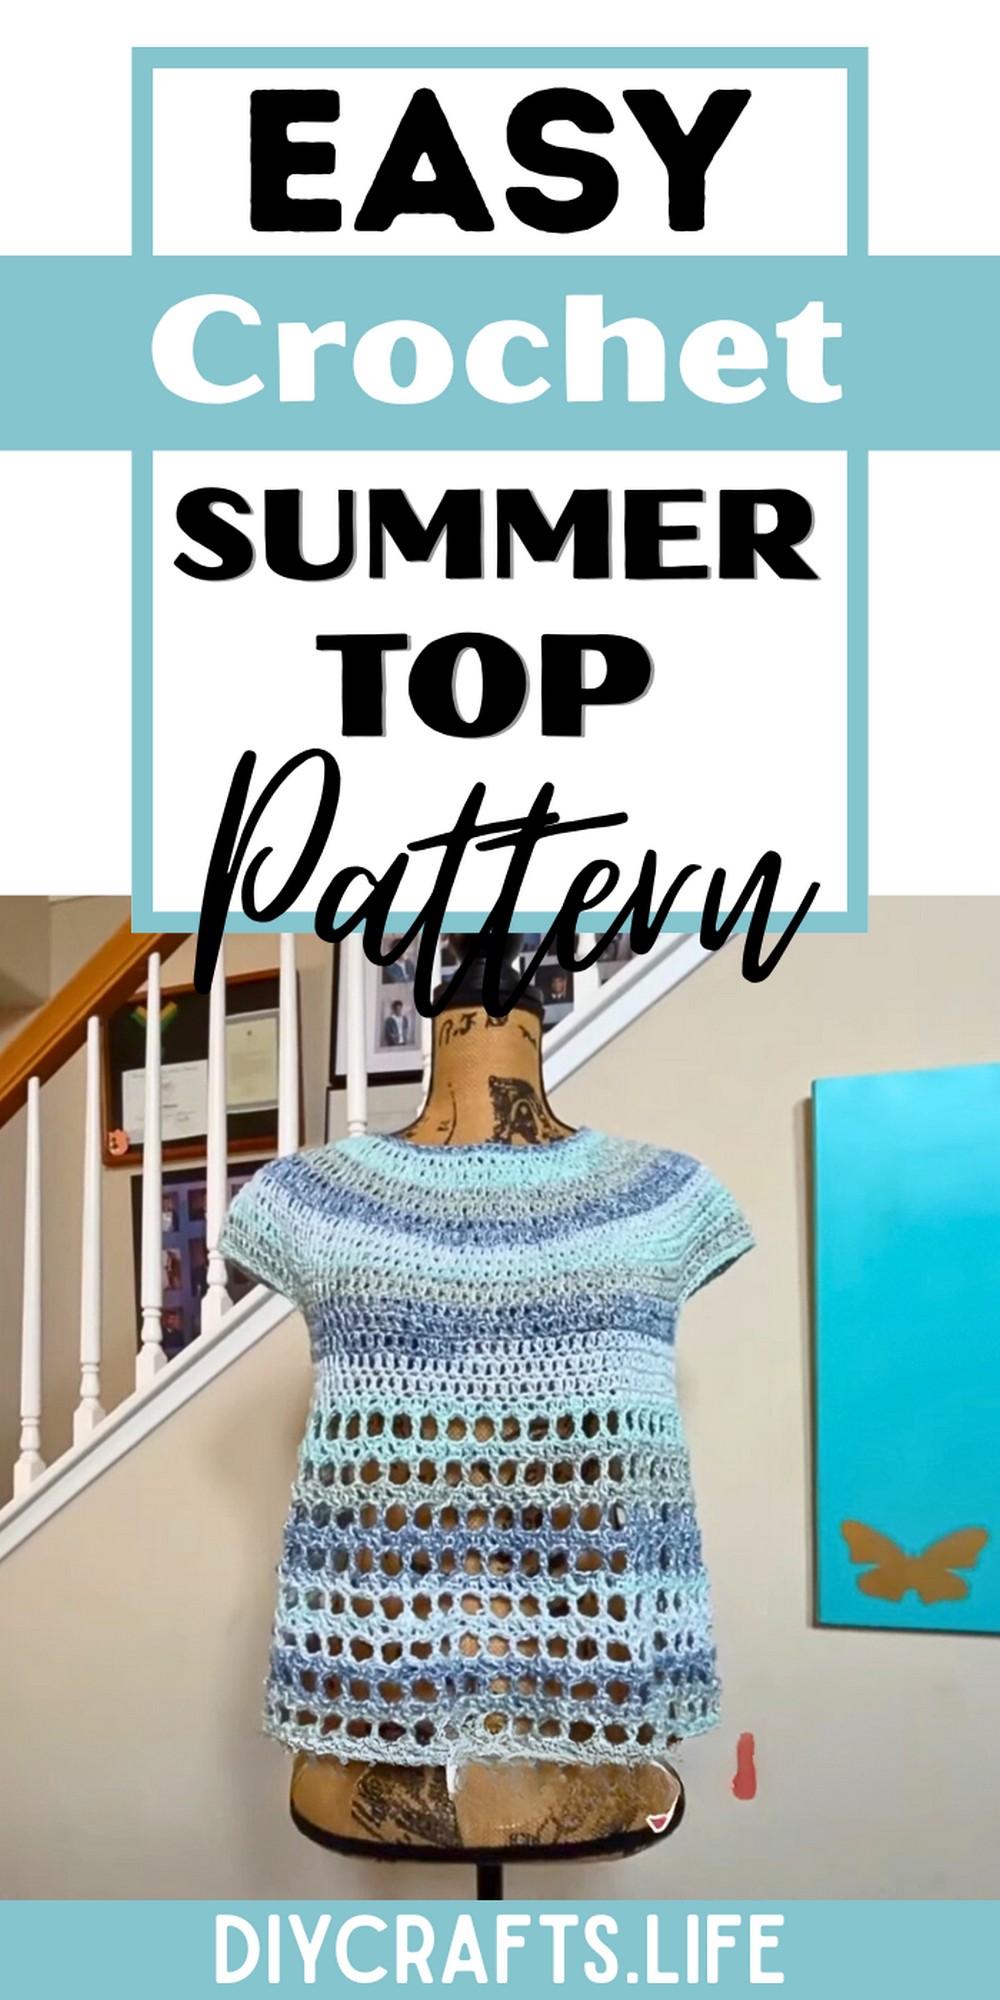
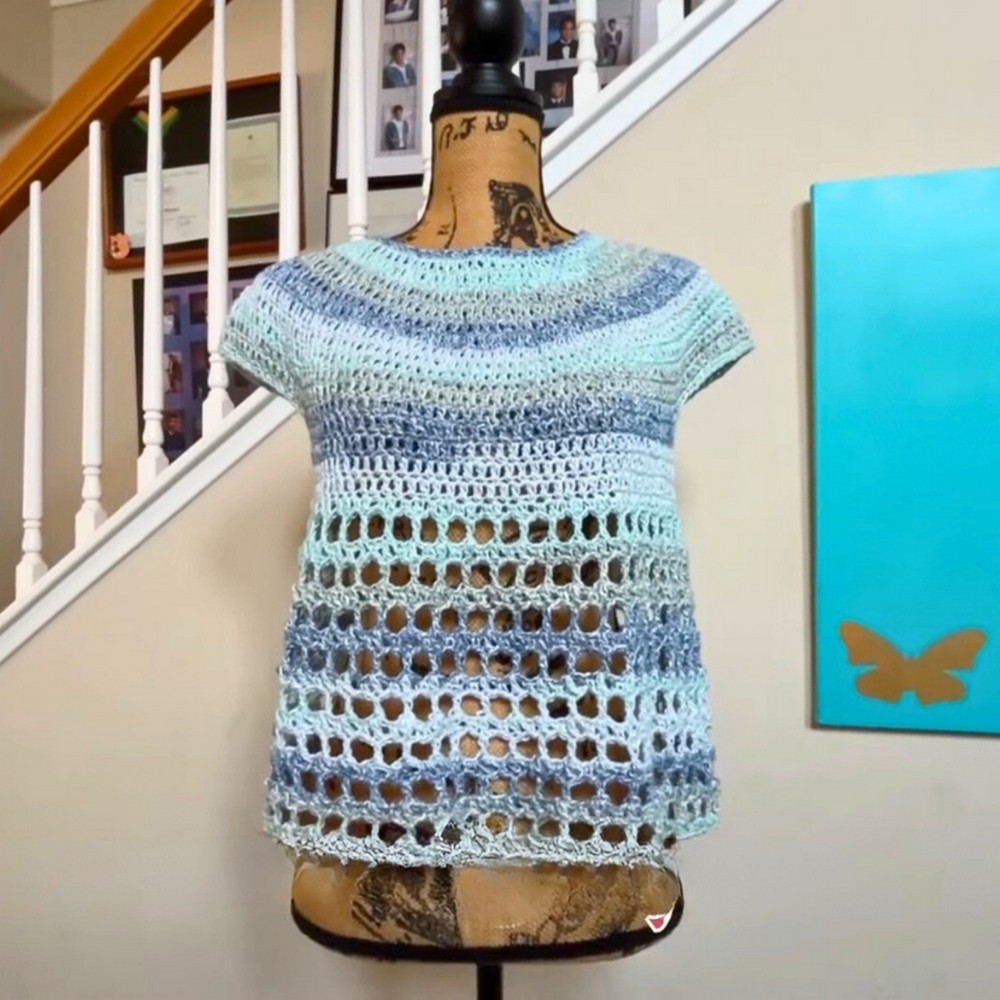
This babydoll summer top stands out for its versatility and charming design. The lightweight cotton yarn makes it ideal for warm weather, and the open work adds breathability and elegance. Durable for everyday wear, its adjustable size ensures a comfortable fit for various body types.
Crochet Lightweight Summer Top
With simple stitches and a round yoke design, this tutorial makes crafting the babydoll top easy and enjoyable. Perfect for crocheters of any skill level, the pattern allows room for creativity and customization so you can make it uniquely yours. A great project to expand your skill set!
Materials and Preparation
To create this beautiful babydoll summer top, you will need the following materials:
- Yarn:
- Type: Caron Cotton Ripple Cakes Yarn (Lightweight size 3)
- Amount: 1 skein (approx. 491 yards)
- Color: Summer Rain (or your preferred color—ideal for summer projects)
- Hook: Size H (5 mm crochet hook)
- Additional Supplies:
- Pair of scissors
- Blunt needle
- Stitch markers
- Measuring tape
This project is suited for medium sizes but includes adjustment tips for larger or smaller measurements.
Abbreviations and Notes
Here are the crochet abbreviations used and some important notes for clarity:
Abbreviations:
- CH: Chain
- DC: Double Crochet
- SC: Single Crochet
- SL ST: Slip Stitch
Notes:
- Pattern Multiples: There are no specific multiples for this design—just follow the chain counts provided for each section.
- Adjustments: If larger or smaller sizing is required, you can adjust the yoke width or length. Add more rounds using Round 6 (for yoke increases) or adjust armhole chain counts for a tailored fit.
- Special Techniques: Basic increases occur by crocheting 2 DC in the same stitch.
Gauge, Approximate Size, and Pattern Notes
Gauge:
Gauge is not crucial for this pattern, but you can complete a swatch using DC stitches to match the approximate measurements.
Finished Dimensions:
- Upper Body Width: ~18 inches
- Lower Body Width: ~23 inches
- Length: ~18 inches (measured from neck down)
- Neck Opening: ~8 inches
- Depth: ~2 inches
Pattern Notes:
- This top is worked from the neckline down, transitioning from yoke to body, and ends with an openwork design.
- Feel free to extend the bottom rounds to create a dress or longer tunic.
Step-by-Step Pattern
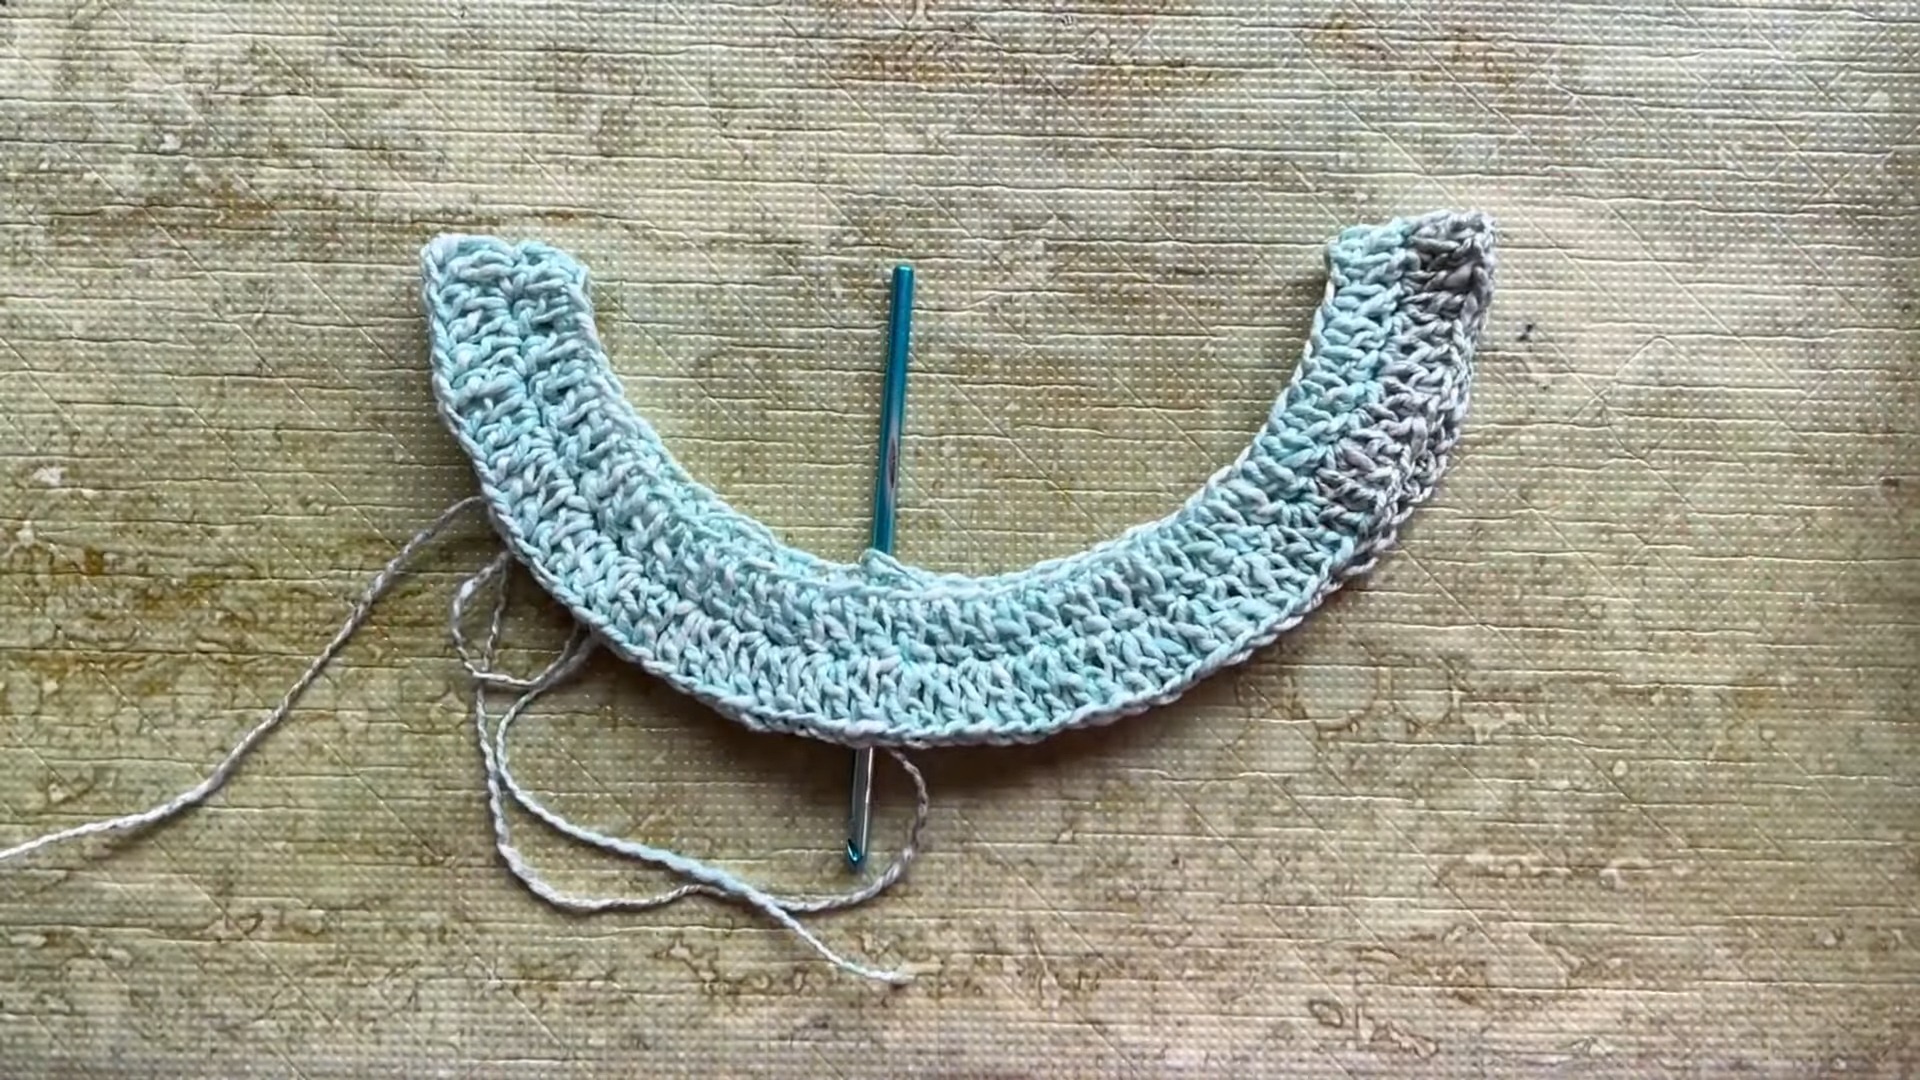
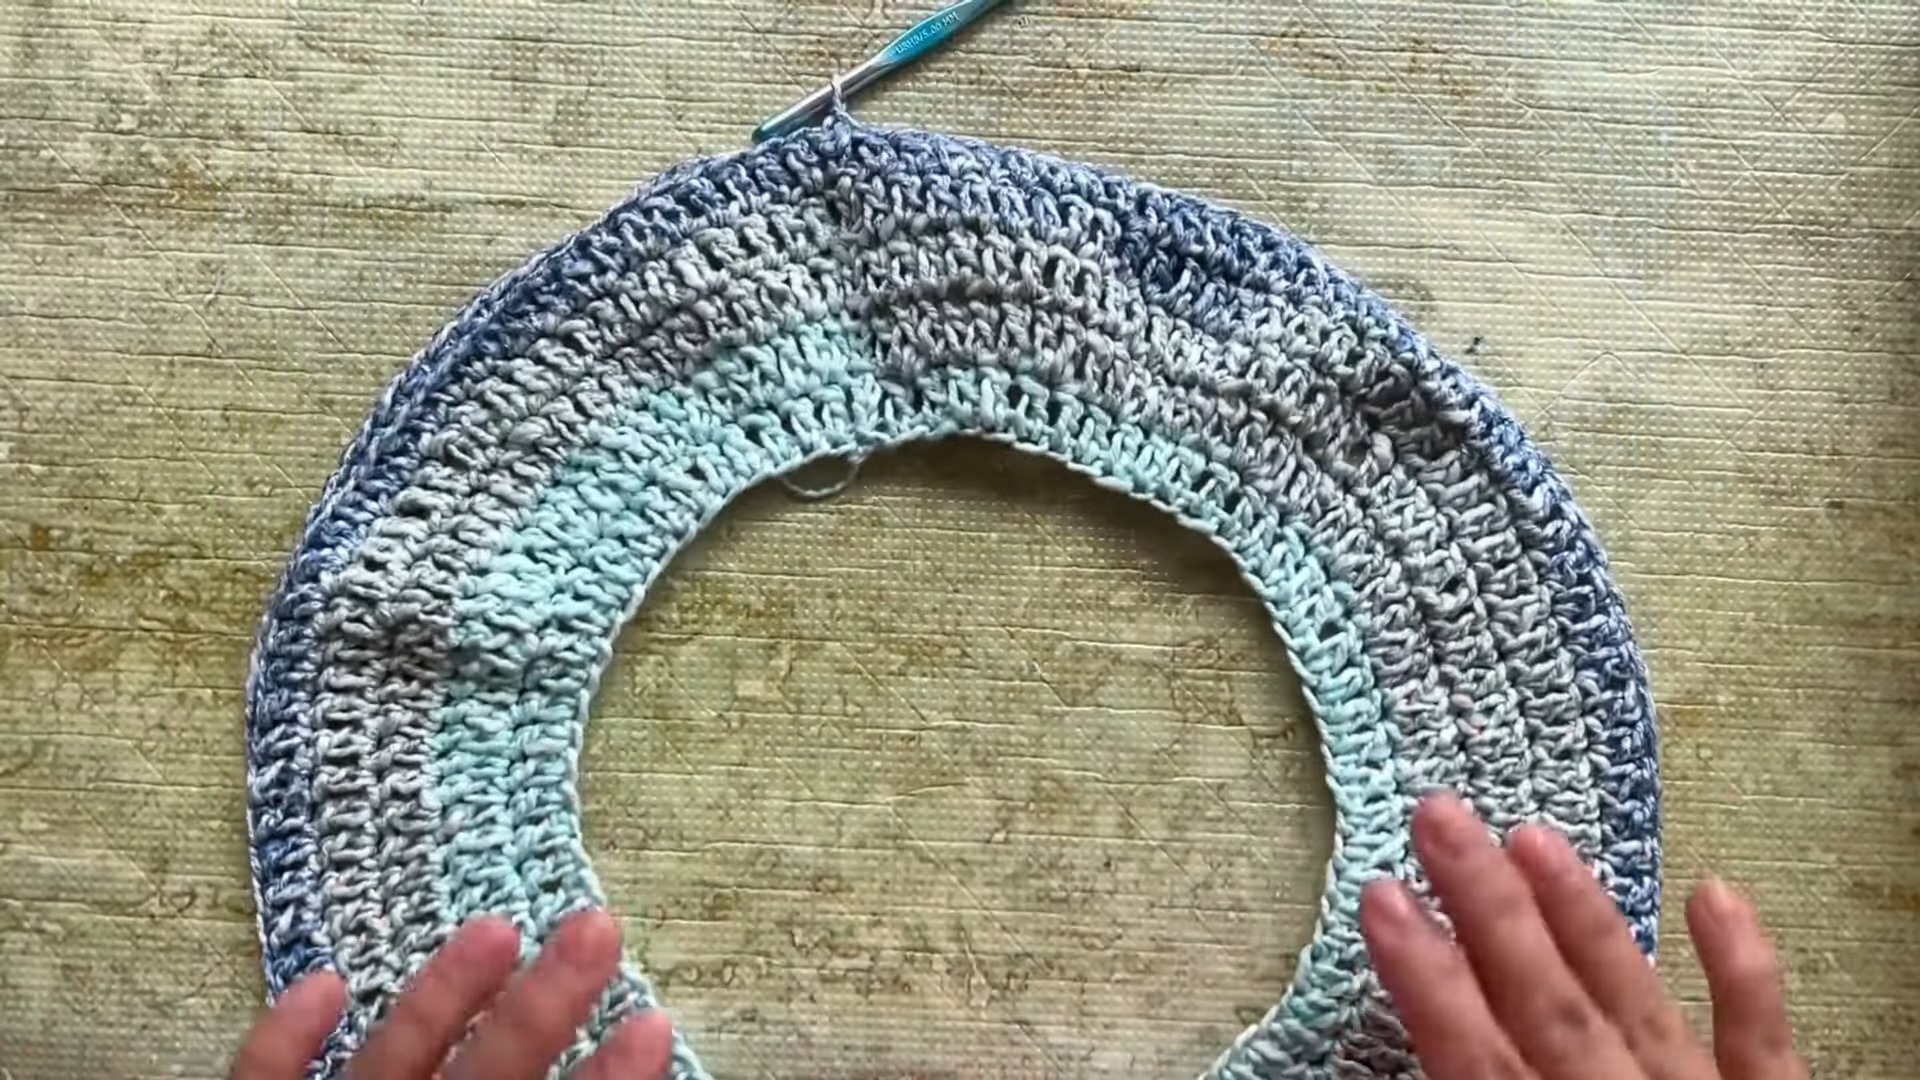
Yoke Section (Rounds 1–11)
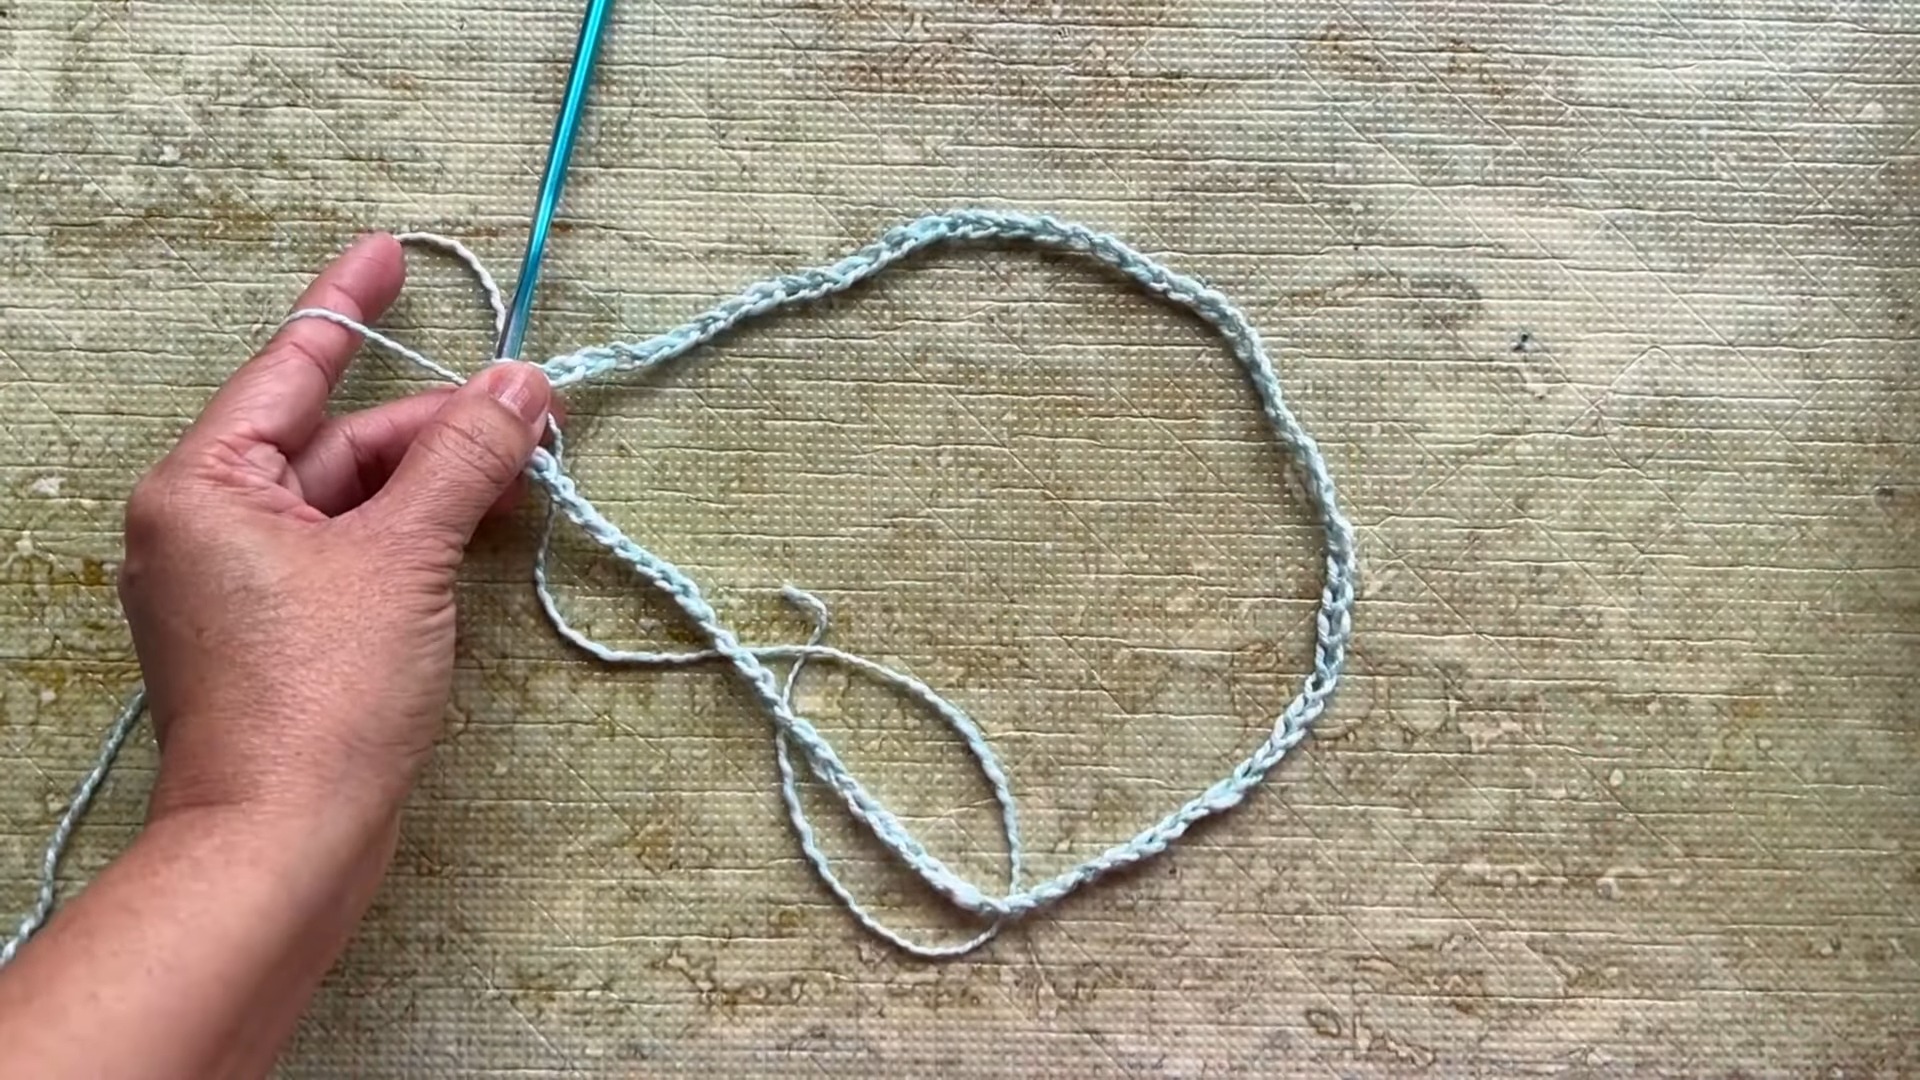
- Foundation Row:
- Start with a slip knot and make CH 76.
- Join in the first chain with a SL ST to form a ring. Ensure that the chain isn’t twisted.
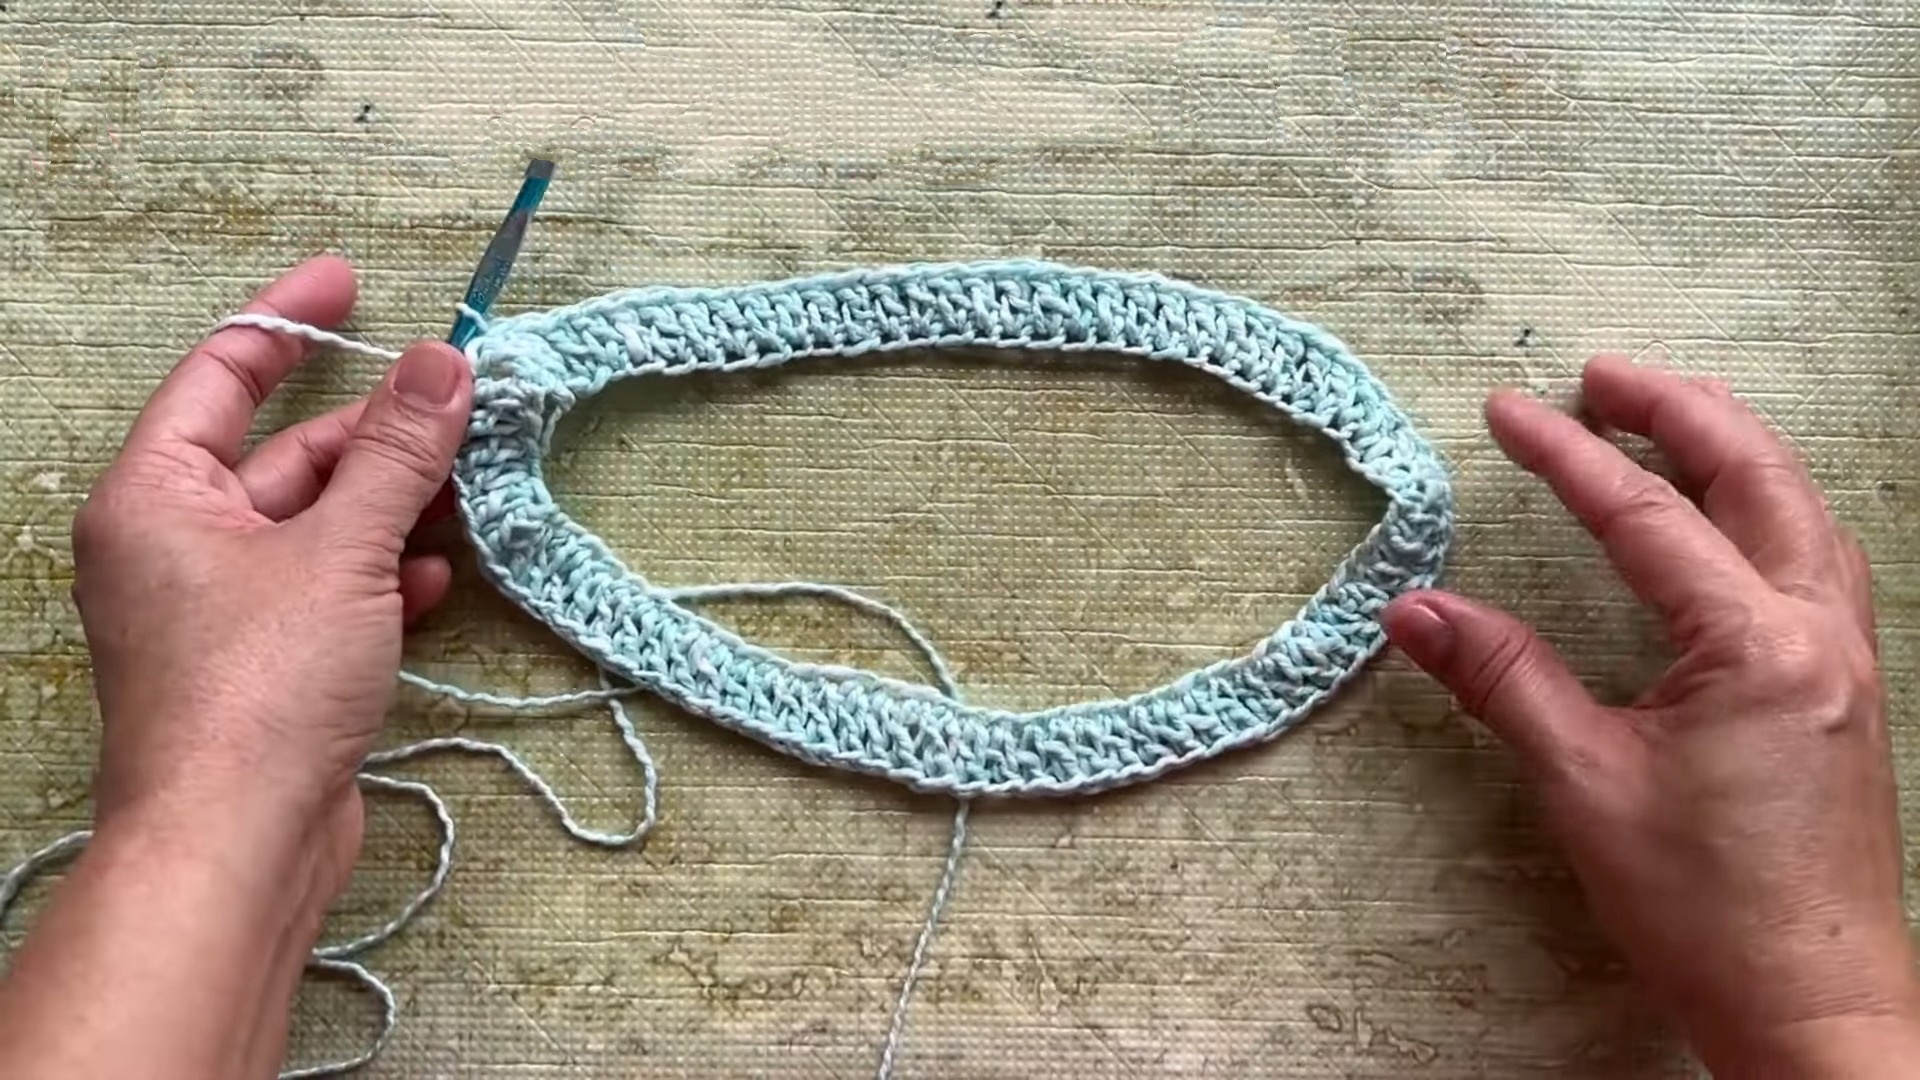
- Round 1:
- CH 3 (counts as DC).
- DC in each chain around.
- Join with SL ST into the 3rd chain of the starting CH-3.
- Round 2: (Increase Round)
- CH 3.
- 2 DC in next stitch.
- 1 DC in next stitch.
- Repeat: 2 DC in next stitch, 1 DC in next stitch.
- Join with SL ST to the 3rd chain of the starting CH-3.
- Rounds 3–5:
- CH 3.
- DC in each stitch around (no increases).
- Join with SL ST to the 3rd chain of the starting CH-3.
- Round 6: (Increase Round)
- CH 3.
- 1 DC in next stitch, 2 DC in next stitch (increase pattern).
- Repeat: 1 DC in each of next 2 stitches, 2 DC in next stitch.
- Join with SL ST at the end of the round.
- Rounds 7–11:
- CH 3.
- Crochet 1 DC in each stitch (no increases) for all 5 rounds.
Tip: Try the yoke on after Round 11 to check the fitting. Place stitch markers under your armpits to mark transitions to the body section.
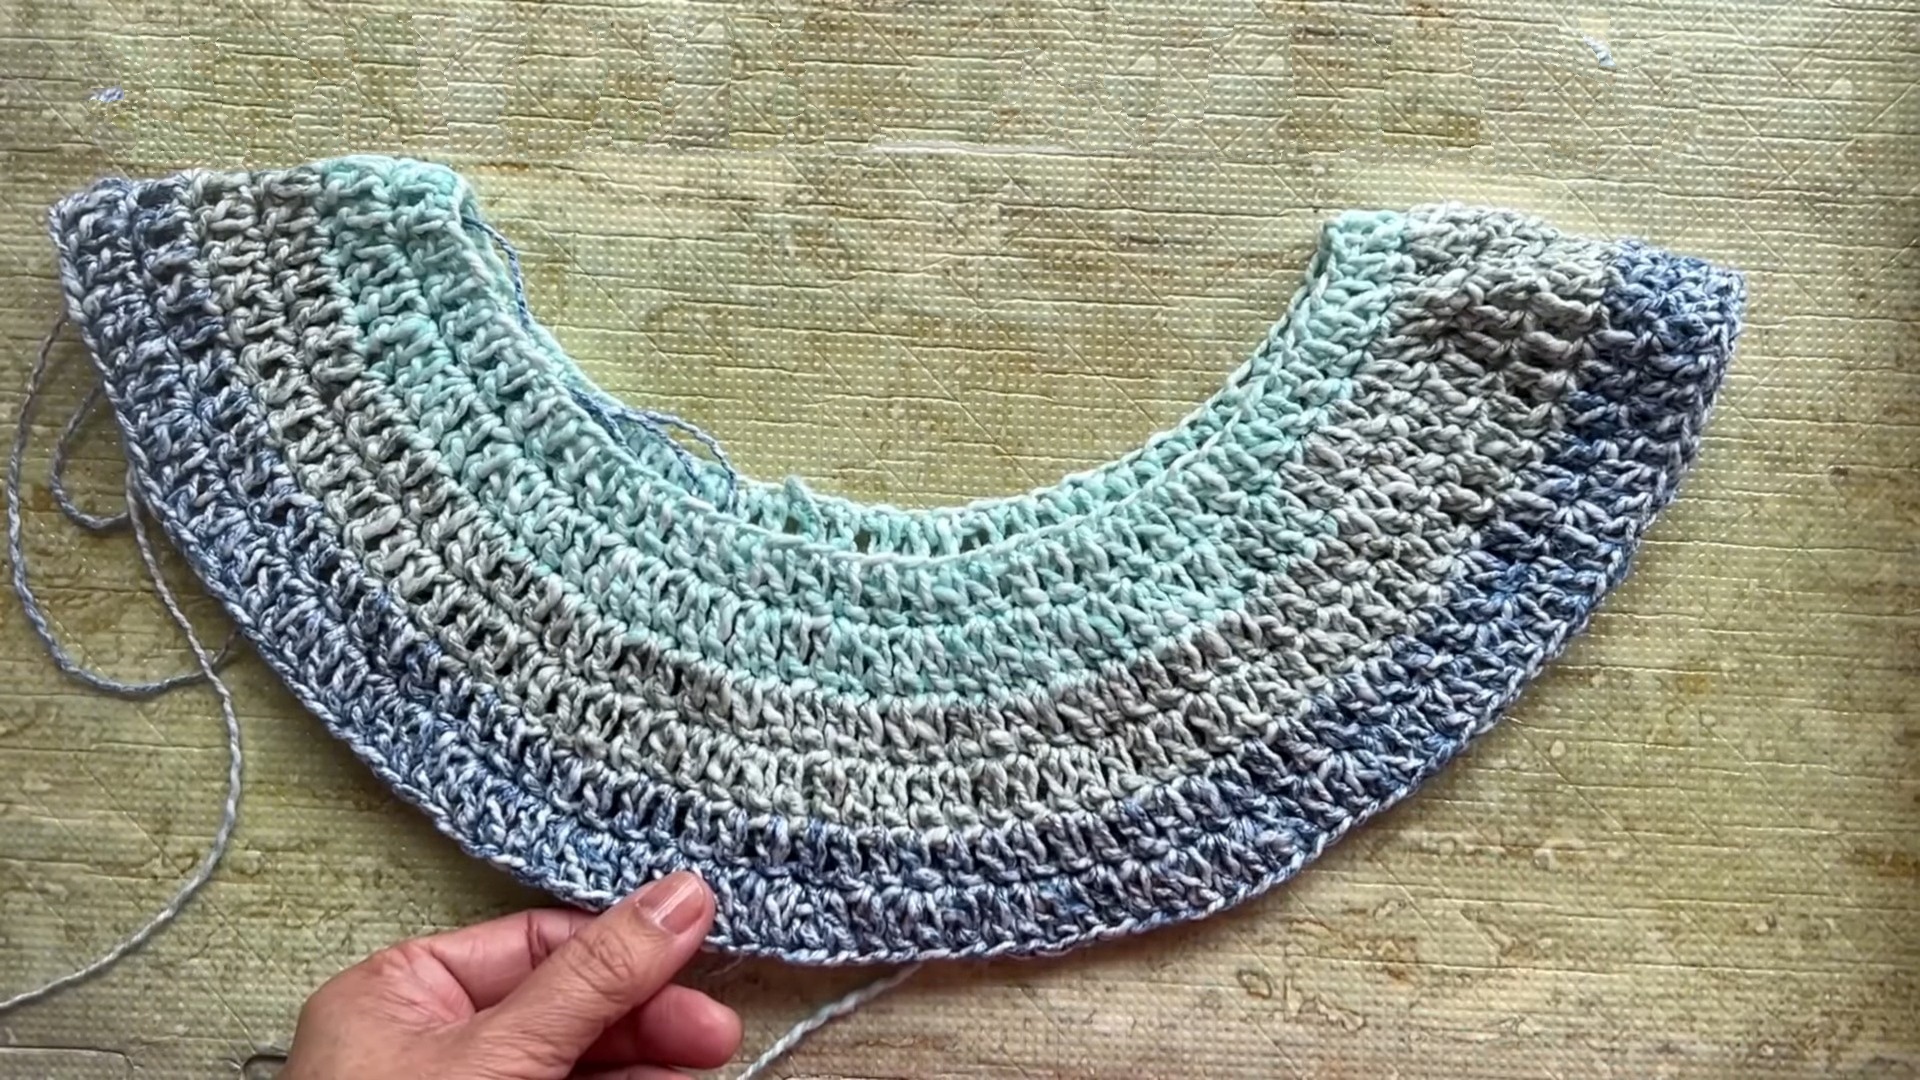
Creating the Armholes (Round 1 of Body)
- Continue from where you left off.
- CH 3, 1 DC in each stitch until you reach the first marker.
- CH 10 (or adjust the number of chains as needed for larger/smaller armholes).
- Skip stitches within the stitch marker range.
- Repeat for the other armhole:
- DC in each stitch until the next marker.
- CH 10 (repeat for the second armhole).
- Skip stitches within the marker range and complete the round, joining with SL ST.
Body Section (Rounds 2–5)
- Rounds 2–5:
- CH 3, then DC in each stitch including the armhole chains.
- Continue working until just below the chest, then switch to openwork design.
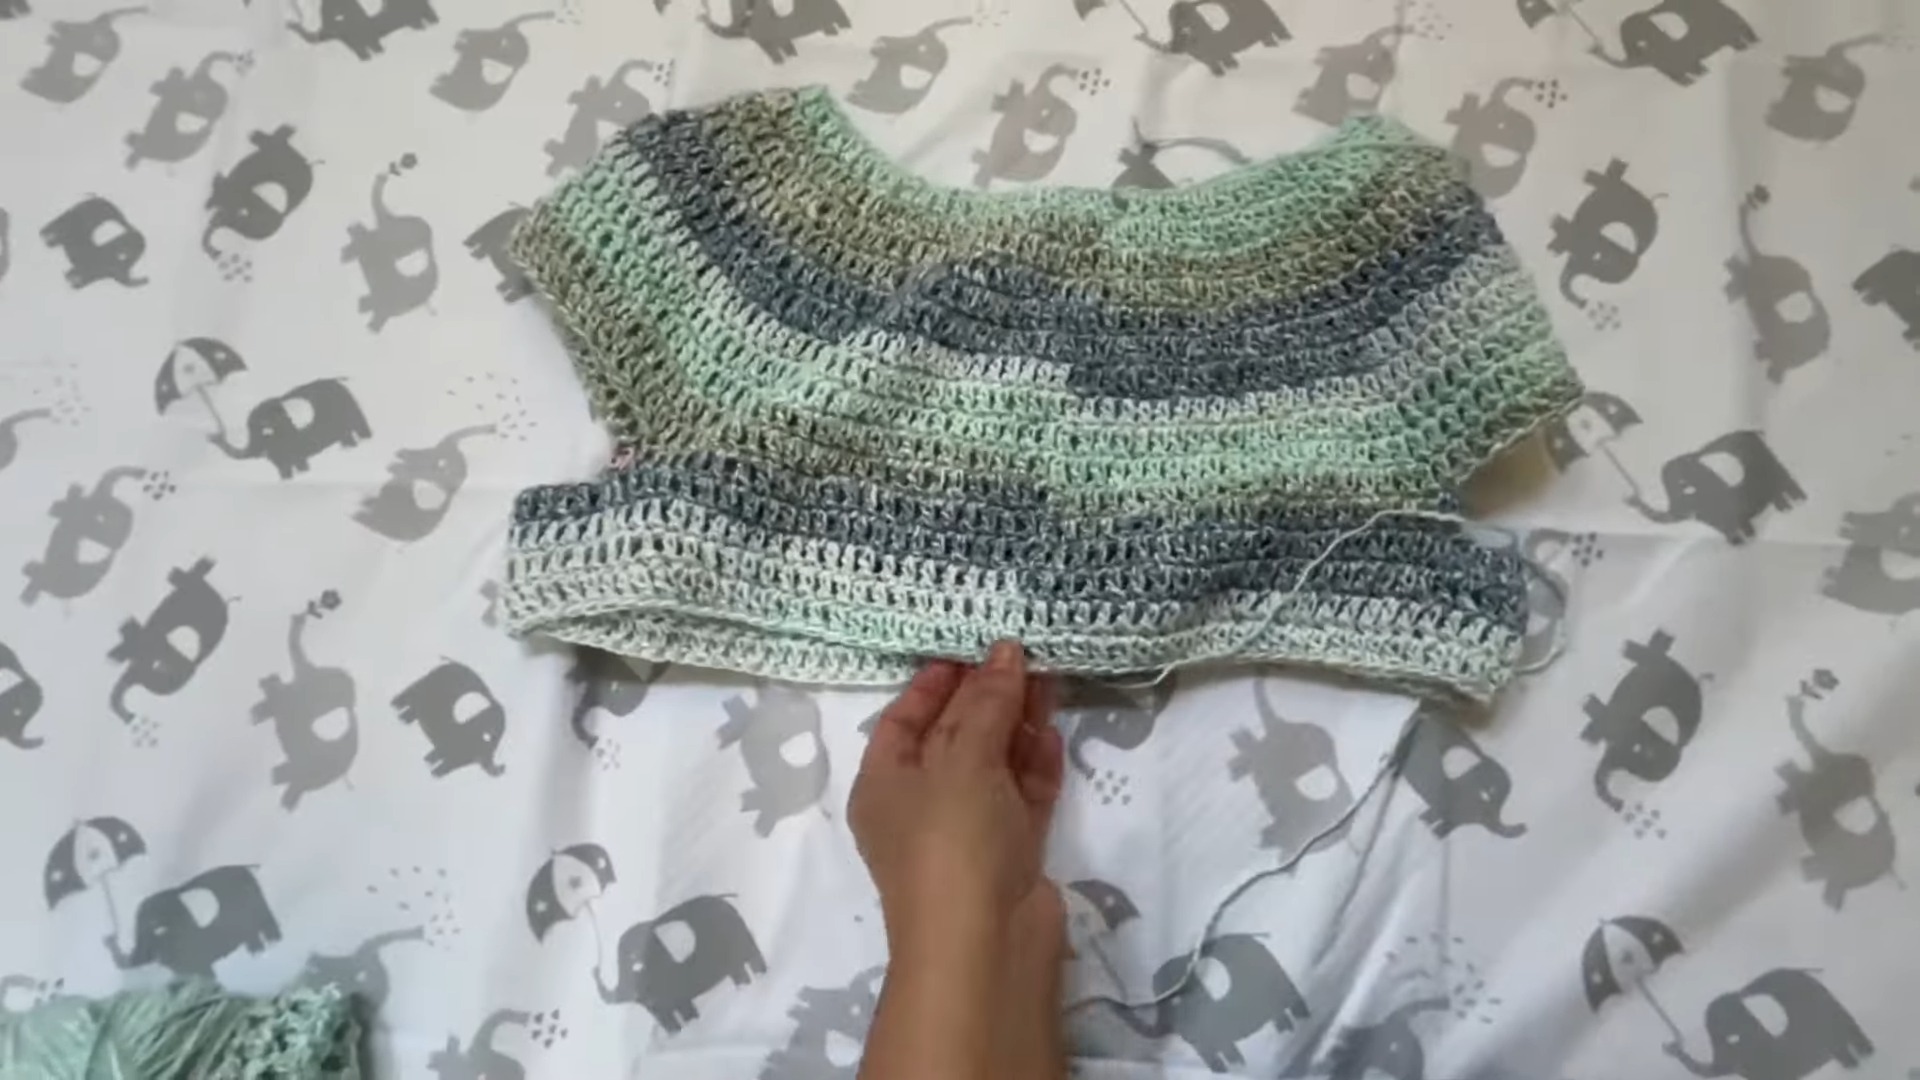
Openwork Design (Rounds 6–22)
- Round 6 (Start Openwork Design):
- CH 4, SC in next stitch, CH 1, DC in next stitch.
- Repeat: CH 1, SC, CH 1, DC.
- End with SC, CH 1, and join with SL ST.
- Round 7: (Increase Pattern)
- CH 6, skip next 2 chain spaces, DC in next DC.
- CH 3, skip next 2 chain spaces, DC in next DC.
- Repeat until end of round, joining with SL ST.
- Round 8: (Alternate Openwork)
- CH 4, SC in center of chain space, CH 1, DC in next DC.
- Repeat for the entire round, ending with SL ST.
- Rounds 9–22:
- Alternate Round 7 and Round 8 until achieving your desired length.
Finishing Touches
- Neckline:
- Crochet 1 round of Half Double Crochet to give a clean finish.
- Armholes:
- Crochet 1 round of Single Crochet around each armhole opening.
Measurements Recap:
- Upper body width: 18 inches
- Lower body width: 23 inches
- Neck opening: 8 inches
- Total length: 18 inches
Q: How do I adjust the size if I want a loose or more fitted look?
A: To increase width, add more rounds to the yoke using the round-six increase pattern. For a less fitted look, try adding more chains for the arm openings or modifying the lower-body rounds to your preference.
Conclusion
Crocheting this babydoll summer top is an enjoyable and rewarding project that combines simplicity, style, and practicality. Perfect for sunny days, this customizable pattern lets you express your creativity while making a functional and fashionable garment. Give it a try!