Make cozy and stylish crochet socks with ease! This project combines beauty and practicality, featuring colorful patterns that are perfect for any season. Whether you're looking to create an elegant accessory or keep your feet snug and warm, these socks offer versatility and charm.

Crochet socks are both functional and appealing. Their durability makes them perfect for daily use, while the customizable design allows for a unique personal touch in colors and textures. Ideal for gifting or personal use, these socks stand out as comfortable, stylish, and easy to care for.
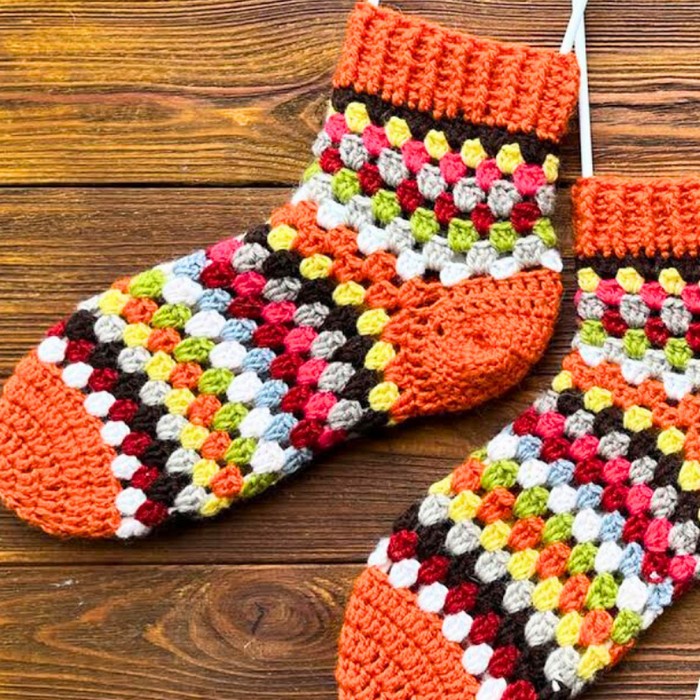
Crochet Socks
This crochet sock project is beginner-friendly while offering room for creativity. From choosing vibrant yarn remnants to adding custom cuff details, it's adaptable for all skill levels. You can enjoy crafting a unique piece that’s practical, fun, and an exciting use of your crochet skills.
Credit Irina Tsokalo
Materials and Preparation
To crochet socks, you’ll need the following:
- Yarn: Remnants of yarn from previous works (choose medium-weight or comfortable sock yarn).
- Hook Size: 3mm crochet hook
- Additional Tools: Yarn needle (for sewing), scissors
- Yarn Weight: Opt for lightweight yarn suitable for socks.
Abbreviations and Notes
Common crochet abbreviations used in this pattern:
- Magic ring: Used to start projects circularly.
- DC: Double crochet
- SL ST: Slip stitch
- CH: Chain
- FP DC: Front post double crochet
- BP DC: Back post double crochet
Important Notes:
- Make sure you are comfortable with working in a magic ring, increasing stitches, and working front/back post double crochet for cuff details.
- This pattern does not specify a particular gauge—adjust tension as needed for comfortable sizing.
Gauge, Approximate Size, and Pattern Notes
- Gauge: Not mentioned explicitly. Try making a small swatch and adjust hook size or tension if required.
- Finished Dimensions: Approximate sock size will depend on the number of rounds and adjustments during crocheting. Customize the length and cuff height accordingly.
- Special Techniques: Includes sewing for the heel and folded edges; proficiency in slip-stitching or sewing with a needle is helpful.
Step-by-Step Pattern
1. Starting the Sock Base
- Begin with a magic ring.
- Work 12 double crochets (DC) into the ring. Close the round with a slip stitch (SL ST) into the 3rd chain. (Total: 12 DC)
2. Building Size with Increases
- Round 2: Increase in every 2nd stitch (2 DC into the same stitch followed by 1 DC), resulting in 18 DC in total. Close with SL ST.
- Round 3: Repeat the increase pattern (increase every 2nd stitch) to create 27 DC.
- Round 4: Continue increasing every 2nd stitch but stop short to create 39 DC, skipping the last increase. Close with SL ST.
3. Stitch Progression for Sole
- Work 1 DC into each stitch around (no increases), maintaining 39 stitches.
- Add decorative elements by working 3 DC into every 3rd stitch followed by standard single DCs between these groups.
- Customize the sole length by adding as many rounds as needed. The demonstrated sock uses 14 colored rounds.
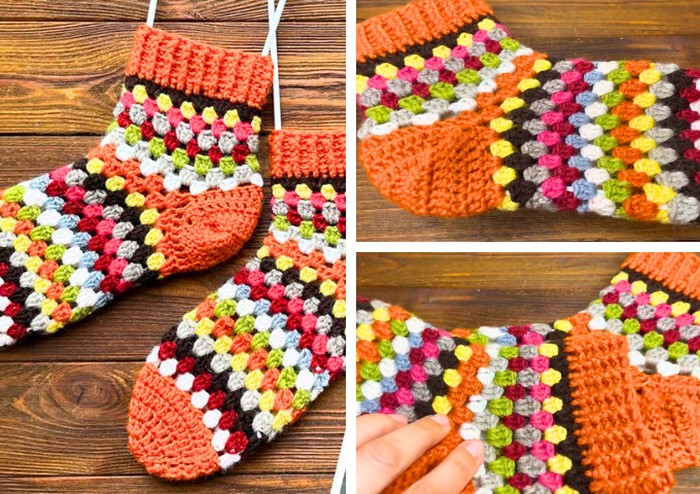
4. Shaping the Heel
- Locate the middle of the foot, referenced as the beginning of the rounds. Fold the sole to measure the 6 sets for the heel (6 stitch groups = 18 DC).
- Crochet the 1st set of heel stitches.
- Continue working 18 DC into opposite directions, making a total of 9 rows for the heel section.
5. Joining the Heel
- Fold the heel inward like shown in the video and sew or slip stitch both sides to secure them.
6. Connecting the Sole
- Resume crocheting around the whole sole (8 sets) and attach stitches to the heel using SL ST. There will be 13 sets in total around the sole.
7. Ankle and Cuff Construction
- Begin shaping the ankle by working smaller sets: 12 evenly placed sets around the ankle. Distribute 5 sets on the heel area evenly—repeat this alignment pattern and proceed.
- Crochet small DC stitches for rounding out the pre-cuff area.
8. Cuff Design
- Switch to front post double crochet (FP DC) and back post double crochet (BP DC) techniques to create decorative ribbing for the sock cuff. Alternate FP DC and BP DC stitches in 5 rounds for a clean finish.
9. Finishing Touches
- Cut and weave your yarn ends securely using a yarn needle. You now have a complete crocheted sock!
Pattern Question:
Question: How do you adjust the sock size for smaller or larger feet?
Answer: Simply alter the number of rounds or stitches in the sole and ankle sections to fit the size. You can also tweak the heel rows to ensure a snug, comfortable fit.
Conclusion
Crocheting socks is a rewarding project that blends functionality and creativity. With endless customization options and straightforward instructions, it's a project worth trying to add both warmth and style to your wardrobe or gifts.


