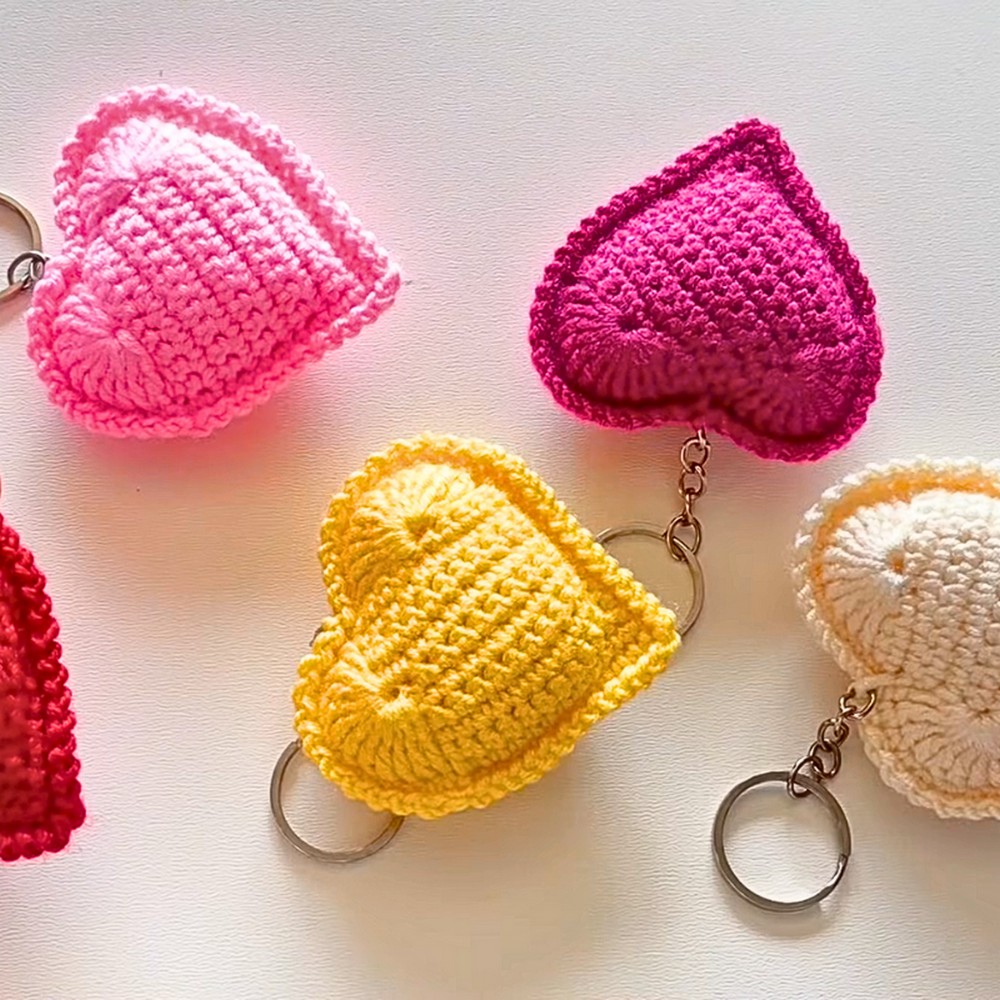
This crochet heart keychain is a delightful blend of charm and functionality. Its adorable heart shape makes it a stylish accessory, while its usability as a keyholder or bag charm adds practicality. Perfect for gifting or personal use, it's a quick, compact project for any crochet enthusiast!

Designed to last, this crochet heart keychain is made with sturdy yarn, ensuring durability and style. Its eye-catching design makes it an ideal keepsake, bag charm, or cute addition to your keys. Lightweight and customizable in color, it's perfect for expressing your personality and creativity.
Crochet A Heart-shaped Keychain
With easy-to-follow instructions, creating this crochet heart keychain is a joyful experience for beginners and seasoned crafters alike. By mastering simple crochet rounds and shaping techniques, you'll bring this heart-shaped beauty to life in no time, adding your personal flair to the finished piece.
Credit elisi sevdası
Materials and Preparation
To create your Crochet Heart Keychain, here’s what you’ll need:
Materials:
- Yarn: Medium weight yarn (acrylic is ideal). You can use colors of your choice for a colorful effect.
- Hook Size: 2.2 mm crochet hook (or any size suitable for your yarn weight).
- Additional Tools:
- Tapestry needle for weaving ends.
- Scissors.
- Keychain attachment (ring or clasp).
- Internal stuffing/padding for shaping the heart.

Abbreviations and Notes
| Abbreviation | Meaning |
|---|---|
| CH | Chain |
| SC | Single Crochet |
| SLST | Slip Stitch |
| DC | Double Crochet |
Notes:
- This pattern is beginner-friendly and incorporates basic stitches such as SC, CH, and DC.
- Work carefully when combining the two heart-shaped pieces to ensure a clean finish.
- Tight stitches are essential to prevent stuffing from showing through.
- If necessary, rewatch the video tutorial in slow motion for parts you find challenging.
Gauge, Approximate Size, and Pattern Notes
- Gauge: Not required for this project; ensure your stitches are uniform and tight for consistent results.
- Finished Dimensions: Once completed, the heart will measure approximately 2–3 inches across, depending on yarn and hook size.
- Special Techniques: Includes continuous single crochet rows, double crochet stitches for shaping the heart curves, and combining pieces using single crochet. A decorative border completes the pattern for a polished look.
Step-by-Step Pattern
Part 1: Creating the Heart Base
Step 1: Foundation Chain
- Begin with a slip knot on your hook.
- CH 14 to create the foundation chain.
Step 2: First Row
- Make 11 SC starting from the second chain from the hook and work across the chain (skip the last 3 chains for shaping later).
- CH 1, turn your work.
Step 3: Repeat Single Crochet Rows
- Work 10 rows of SC:
- Make 11 SC across each row.
- CH 1 and turn at the end of each row.

Part 2: Shaping the Heart
- After completing 10 rows of SC, you will shape the heart curves using DC (handrails):
- Count 6 spaces from the starting edge.
- Wrap the yarn around your hook twice.
- Insert the hook into the same space and make a DC stitch; repeat for a total of 11 DC evenly spaced across the space.
- Repeat this process for the opposite curve of the heart (on the other edge), ensuring symmetry.
- Once both curves are completed, make a SLST to close off any gaps at the edges, creating a clean heart shape.
Part 3: Creating a Second Heart Piece
- Repeat Part 1 and Part 2 to create a second heart piece in the same way.
Part 4: Joining the Two Hearts
- Place the wrong sides of both heart pieces together.
- Using SC, combine the two pieces by working around the edges as follows:
- Make SC along each space around the heart to neatly join them together.
- Leave a small opening on one side of the heart.

Part 5: Adding Stuffing
- Insert fiberfill stuffing into the heart through the opening.
- Adjust the stuffing to ensure the heart shape is nicely padded without overstuffing.
- Continue using SC to securely close the remaining opening.
Part 6: Adding a Decorative Border
- Work a decorative border around the heart edges:
- Begin with a CH 1, then SC in each space, alternating with a SLST for texture.
- Continue this pattern around the edges for a neat, larger finish.
Part 7: Attaching the Keychain Ring
- Insert the keychain attachment at the top of the heart.
- Use leftover yarn to secure the attachment with SLST or sew it into place with a tapestry needle.

Final Steps and Optional Customizations
- Add embellishments, such as beads, rhinestones, or small decorative stitches for a personalized effect.
- Use colorful yarns for a multitone design or create themed hearts (e.g., pink for Valentine's Day, red for love).
Wrap-Up
Your Crochet Heart Keychain is now complete! This adorable, beginner-friendly project makes a wonderful gift or an accessory for your own keys.

Pattern Question:
Question: How do I ensure my heart shape turns out symmetrical?
Answer: Be sure to evenly count stitches in each round as instructed in the video. Using a stitch marker can also help you track your progress.
Conclusion:
The crochet heart keychain is a beautiful, heartfelt project that’s quick to create yet looks stunning. Following the steps in the tutorial, you’ll have a handmade treasure that’s both functional and perfect for gifting or personalizing your accessories.


