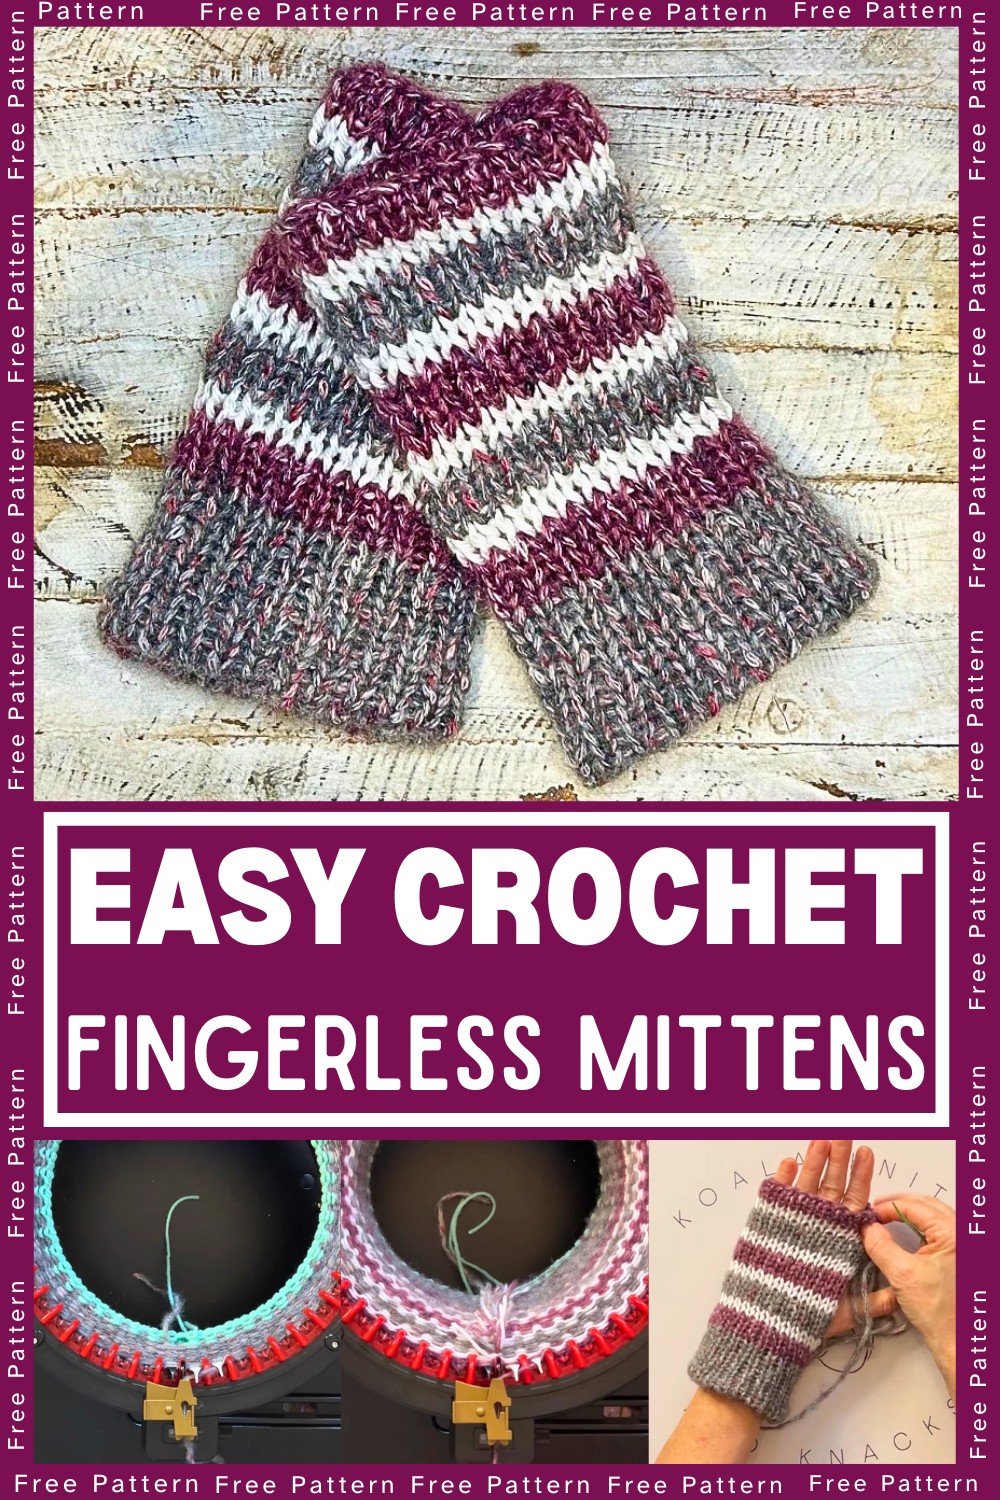
Learn how to crochet beautiful and functional fingerless mittens! With their stylish appeal and practicality, these mittens will keep your hands warm while offering enough freedom to tackle daily tasks. Perfect for gifting or personal use, they’re a joy to make and wear!
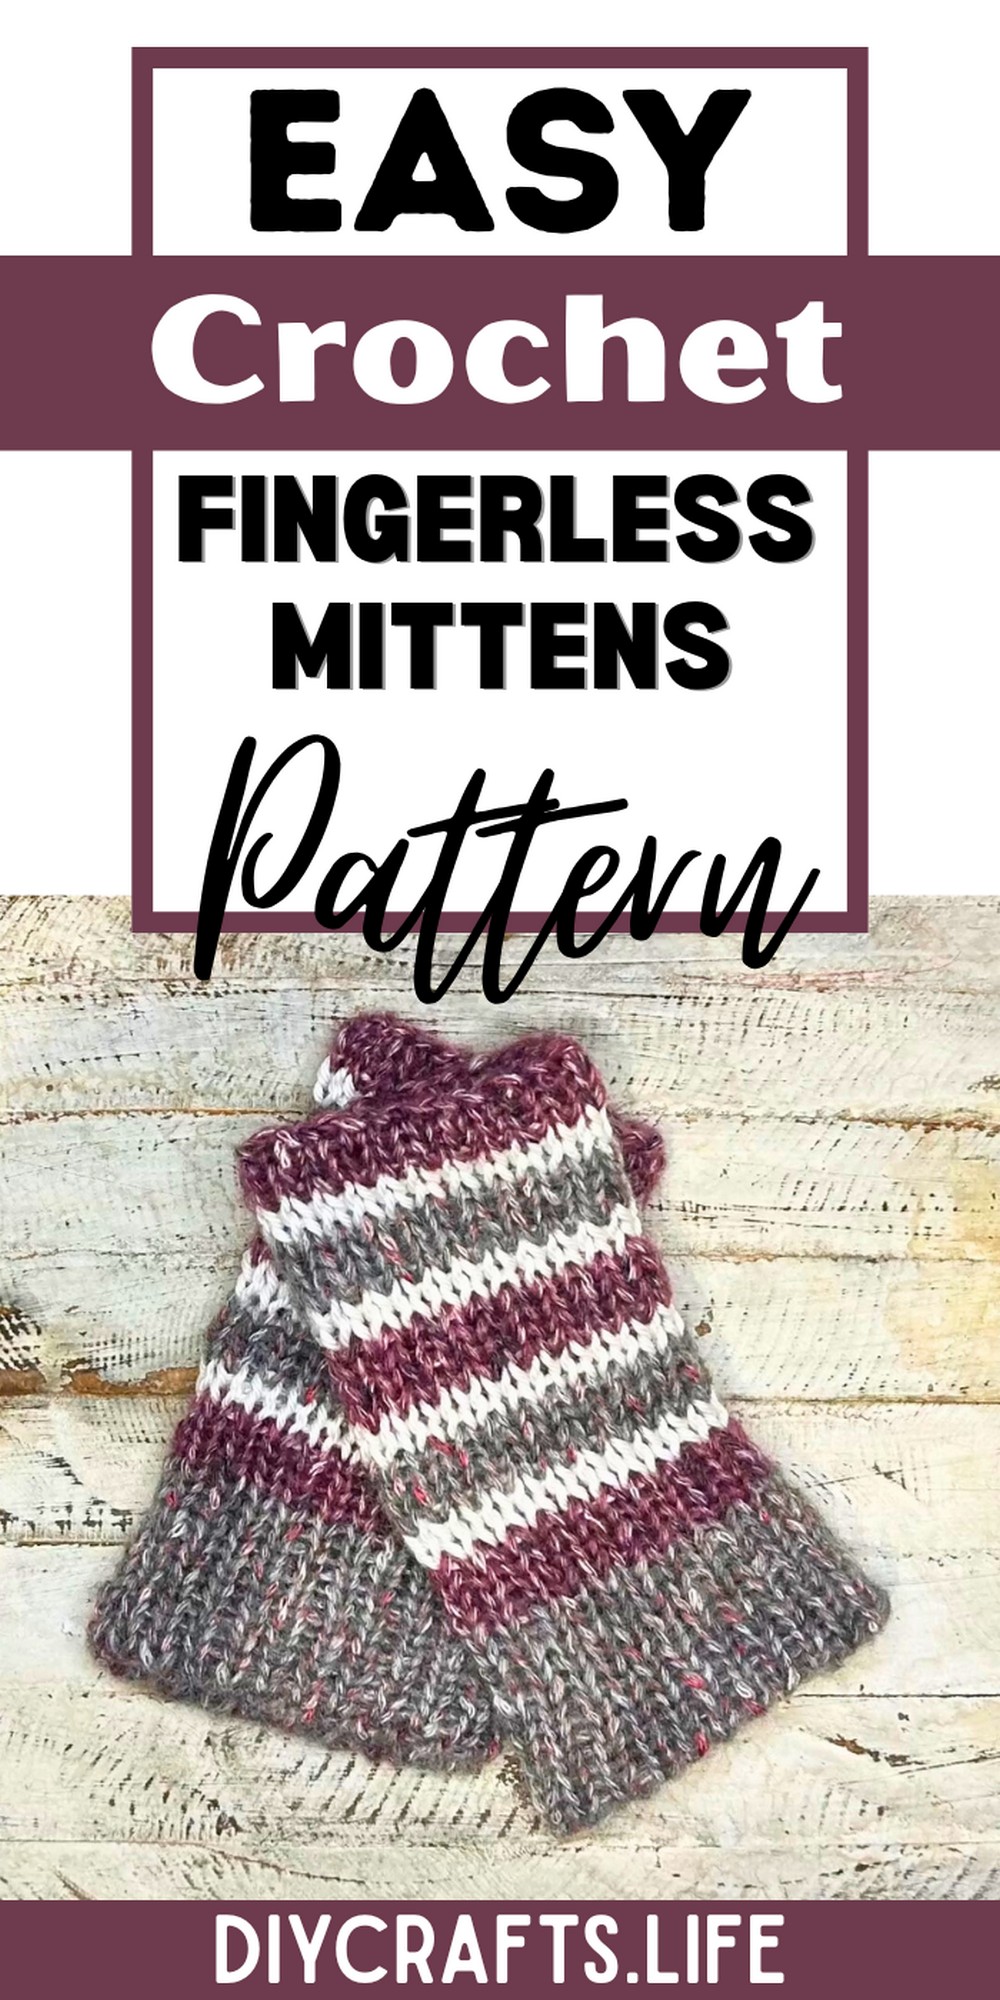
These fingerless mittens are perfect for chilly days, keeping your hands cozy while allowing for unrestricted movement. Crafted with durable textured yarn and featuring customizable colors, they’re as practical as they are fashionable—ideal for everyday wear or thoughtful handmade gifts.
Crochet Fingerless Mittens Tutorial
Creating these fingerless mittens is fun and beginner-friendly! Using a circular knitting machine, this project allows for easy color changes and a snug fit. Tailor the mittens to suit your personal style by experimenting with colors or adjusting the sizing for a delightful crafting experience.
Materials and Preparation
Materials Required:
- Yarn:
- Loops & Threads Heathered Tweed in "Gray Blush" and "Mero".
- Caron Simply Soft in "White."
- Knitting Machine:
- 46-needle Addi Knitting Machine (or 48-needle Sentro).
- Additional Tools:
- Crochet hook (5 mm preferred, but a 4.5 mm is also fine).
- Stitch markers (2).
- Metal wool needles for sewing seams.
- Scissors.
Recommended Yarn Weight:
Choose medium-weight yarn (category 4) to ensure proper texture and stretchability.
Abbreviations and Notes
Abbreviations:
While most of the work is instruction-based for knitting machines, here are relevant terms used in the tutorial:
- SC: Single crochet.
- CH: Chain.
- SLST: Slip stitch.
Pattern Notes:
- Use a drawstring cast-on for starting rows.
- Knit the first row with loose tension to prevent tight stitches and ensure smooth progression.
- Switch colors manually between rows by tying yarn tails together – no intricate yarn joins needed.
- If using stitch markers, carefully mark the final loops of each working yarn section to prevent unraveling during assembly.
- Practice using waist yarn for initial rows and finishing edges. Waist yarn makes it easier to identify stitches during seaming.
Gauge, Approximate Size, and Pattern Notes
Gauge:
The gauge for this project is automatically set by your knitting machine.
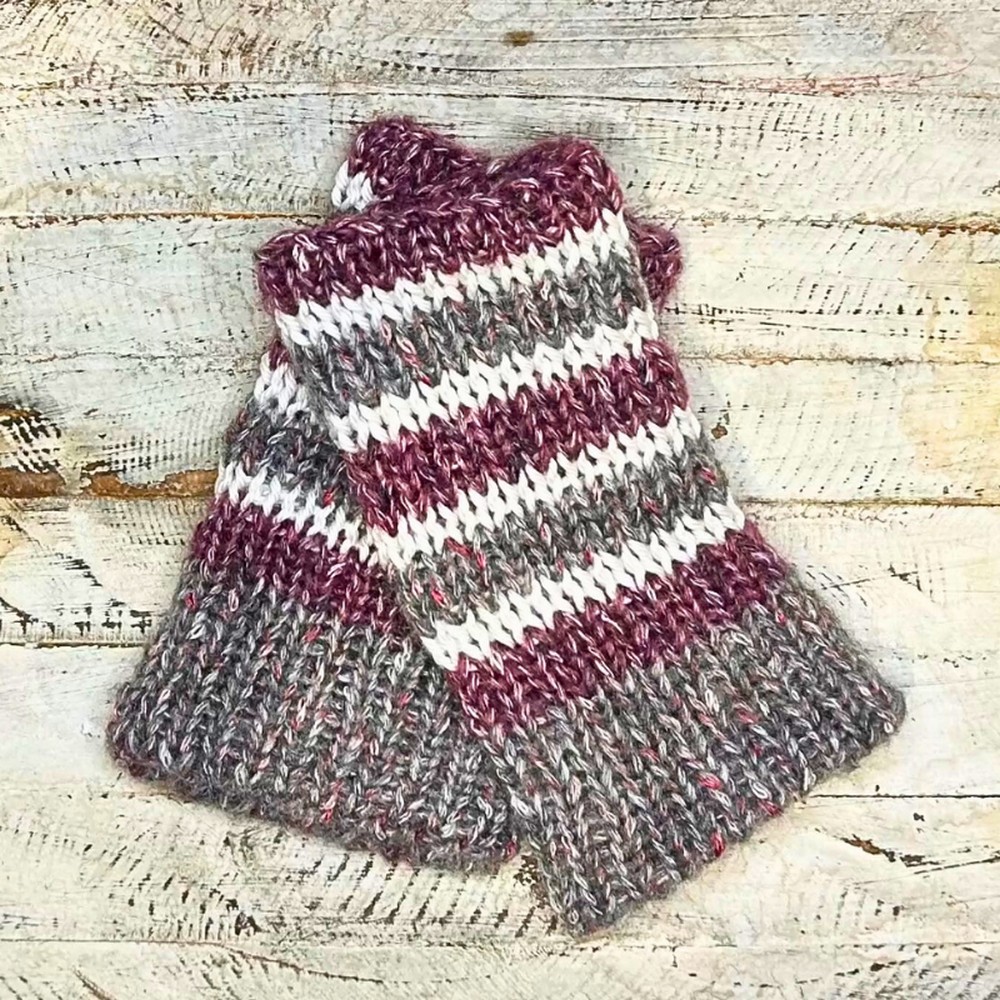
Approximate Size:
The finished mittens are one size fits most:
- Cuff Height: 12 rows or approximately 2 inches.
- Palm Length: Adjust as needed for personal preference, generally around 36–40 rows total.
Special Techniques:
- Invisible Join: Used for sewing the seams invisibly and aligning rows cleanly.
- Braided Join: Provides firmness and slight elasticity for certain edges.
- Kitchener Stitch: Used to give the edge a stretchy seam that fits snugly over hands.
Step-by-Step Pattern
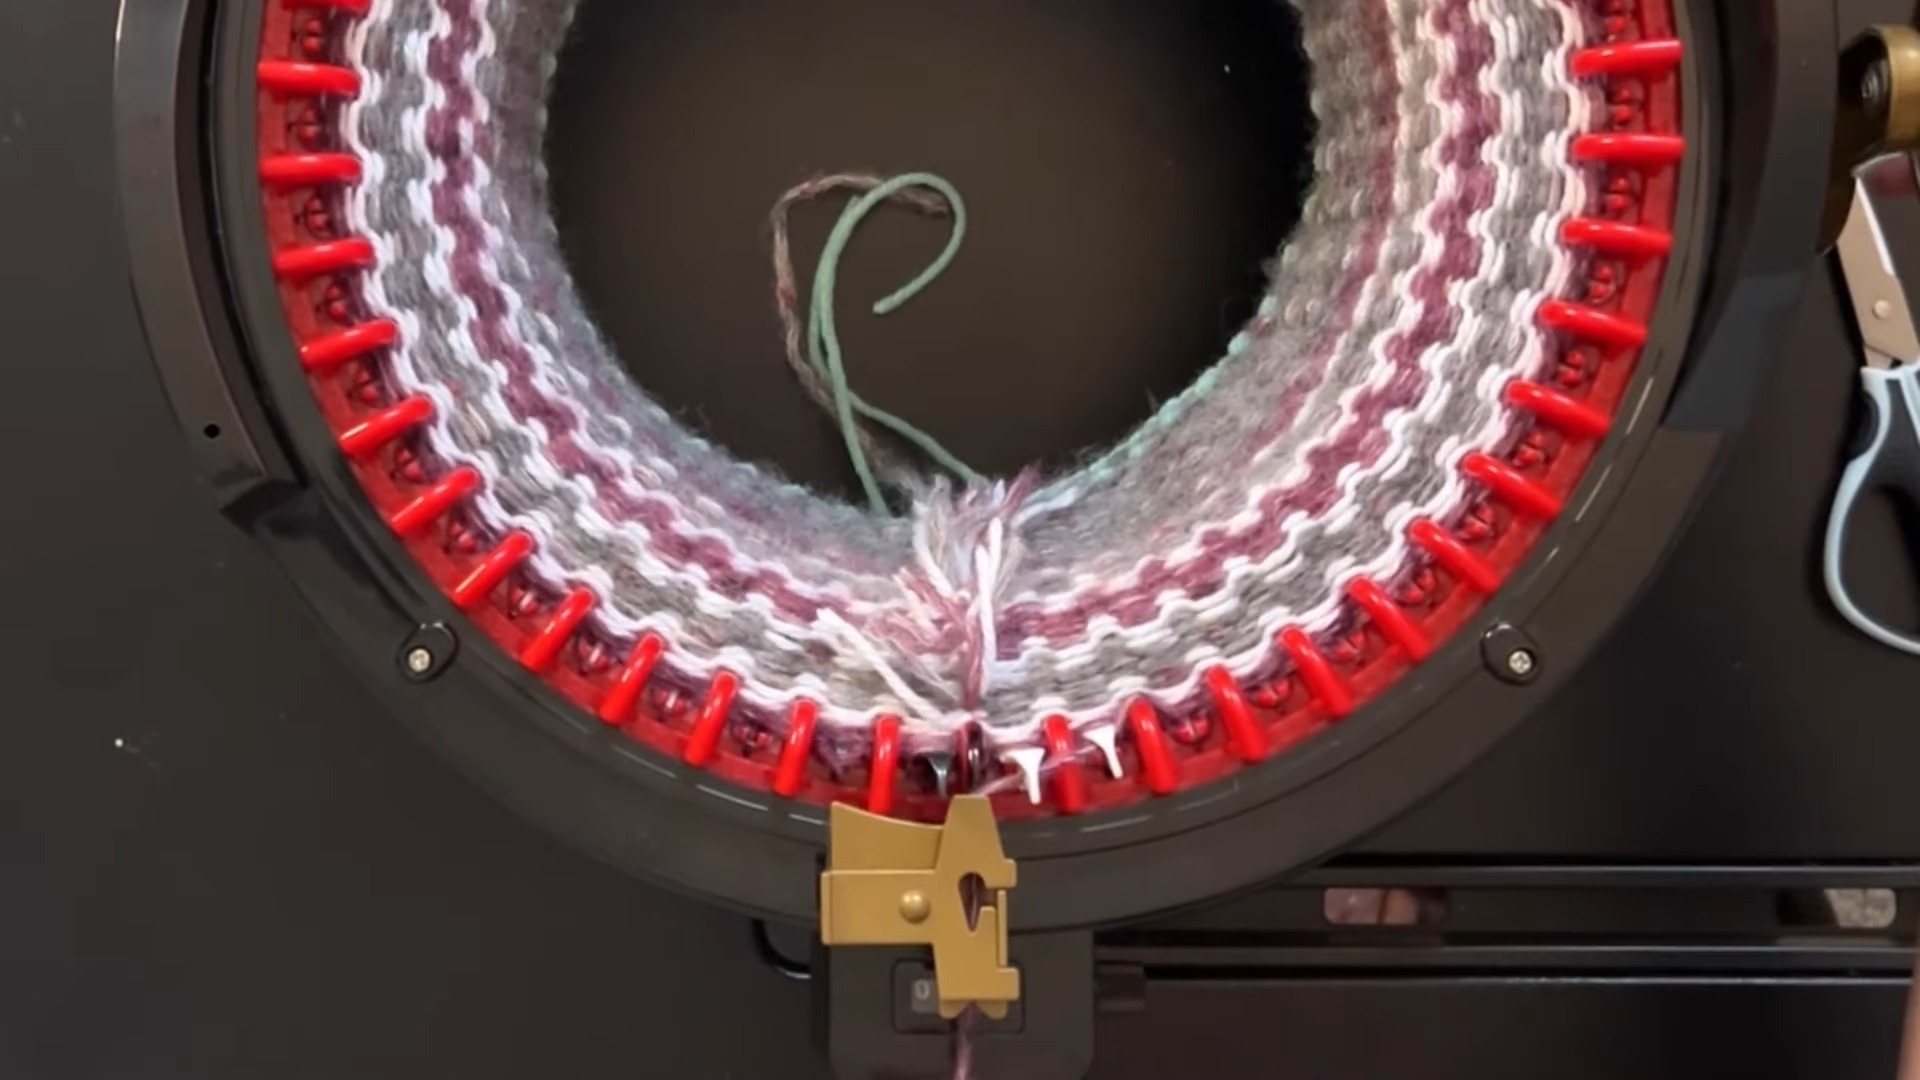
Step 1: Set Up Your Knitting Machine
- Prepare your 46-needle Addi Knitting Machine (or 48-needle Sentro).
- Align the last white needle and first black needle with the yarn feeder.
Step 2: Cast On Waist Yarn
- Choose a waist yarn in a contrasting color for easier visibility.
- Perform a drawstring cast-on (alternating "in front" and "behind" between needles).
- Knit 7 rows of waist yarn with loose tension.
Step 3: Begin the Main Cuff
- Attach the gray yarn ("Gray Blush").
- Knit 12 rows to form the solid cuff.
Step 4: Transition to Patterning the Mittens
- Tie off gray yarn and switch to burgundy-colored yarn ("Mero").
- Knit 4 rows of Mero, ensuring proper tension is maintained.
- Cut Mero and add white yarn.
- Knit 2 rows of white, then switch back to gray blush. Repeat sections:
- 4 rows of gray blush.
- 2 rows of white.
- Follow this stripe sequence for a total of 36 rows.
Step 5: Create the Final Rows
- End the mitten patterning by adding 4 final rows of Mero (burgundy).
- Knit 8 rows of waist yarn as a finishing edge.
Step 6: Remove the Knitted Project from the Machine
- Rotate the handle until all stitches fall off.
- Carefully stretch the work in both directions to set the stitches evenly.
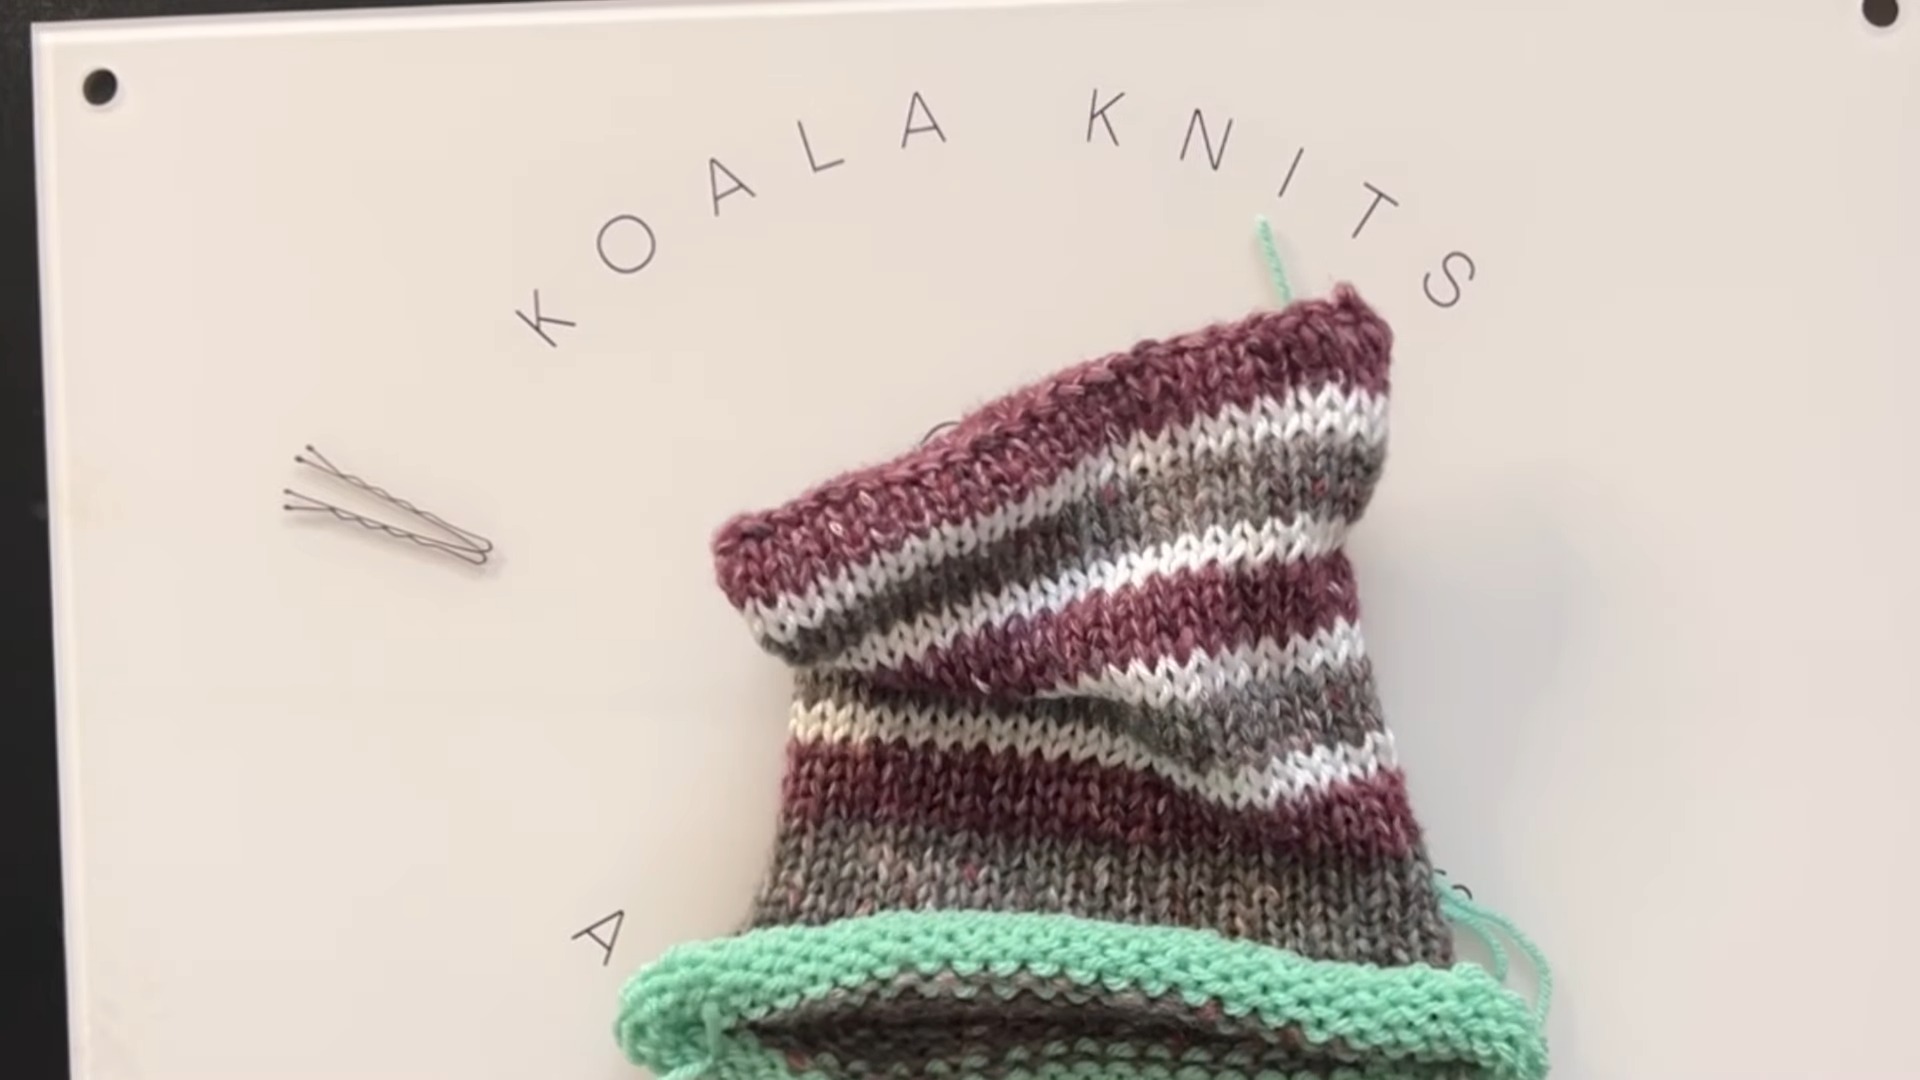
Step 7: Seam Using the Braided Join
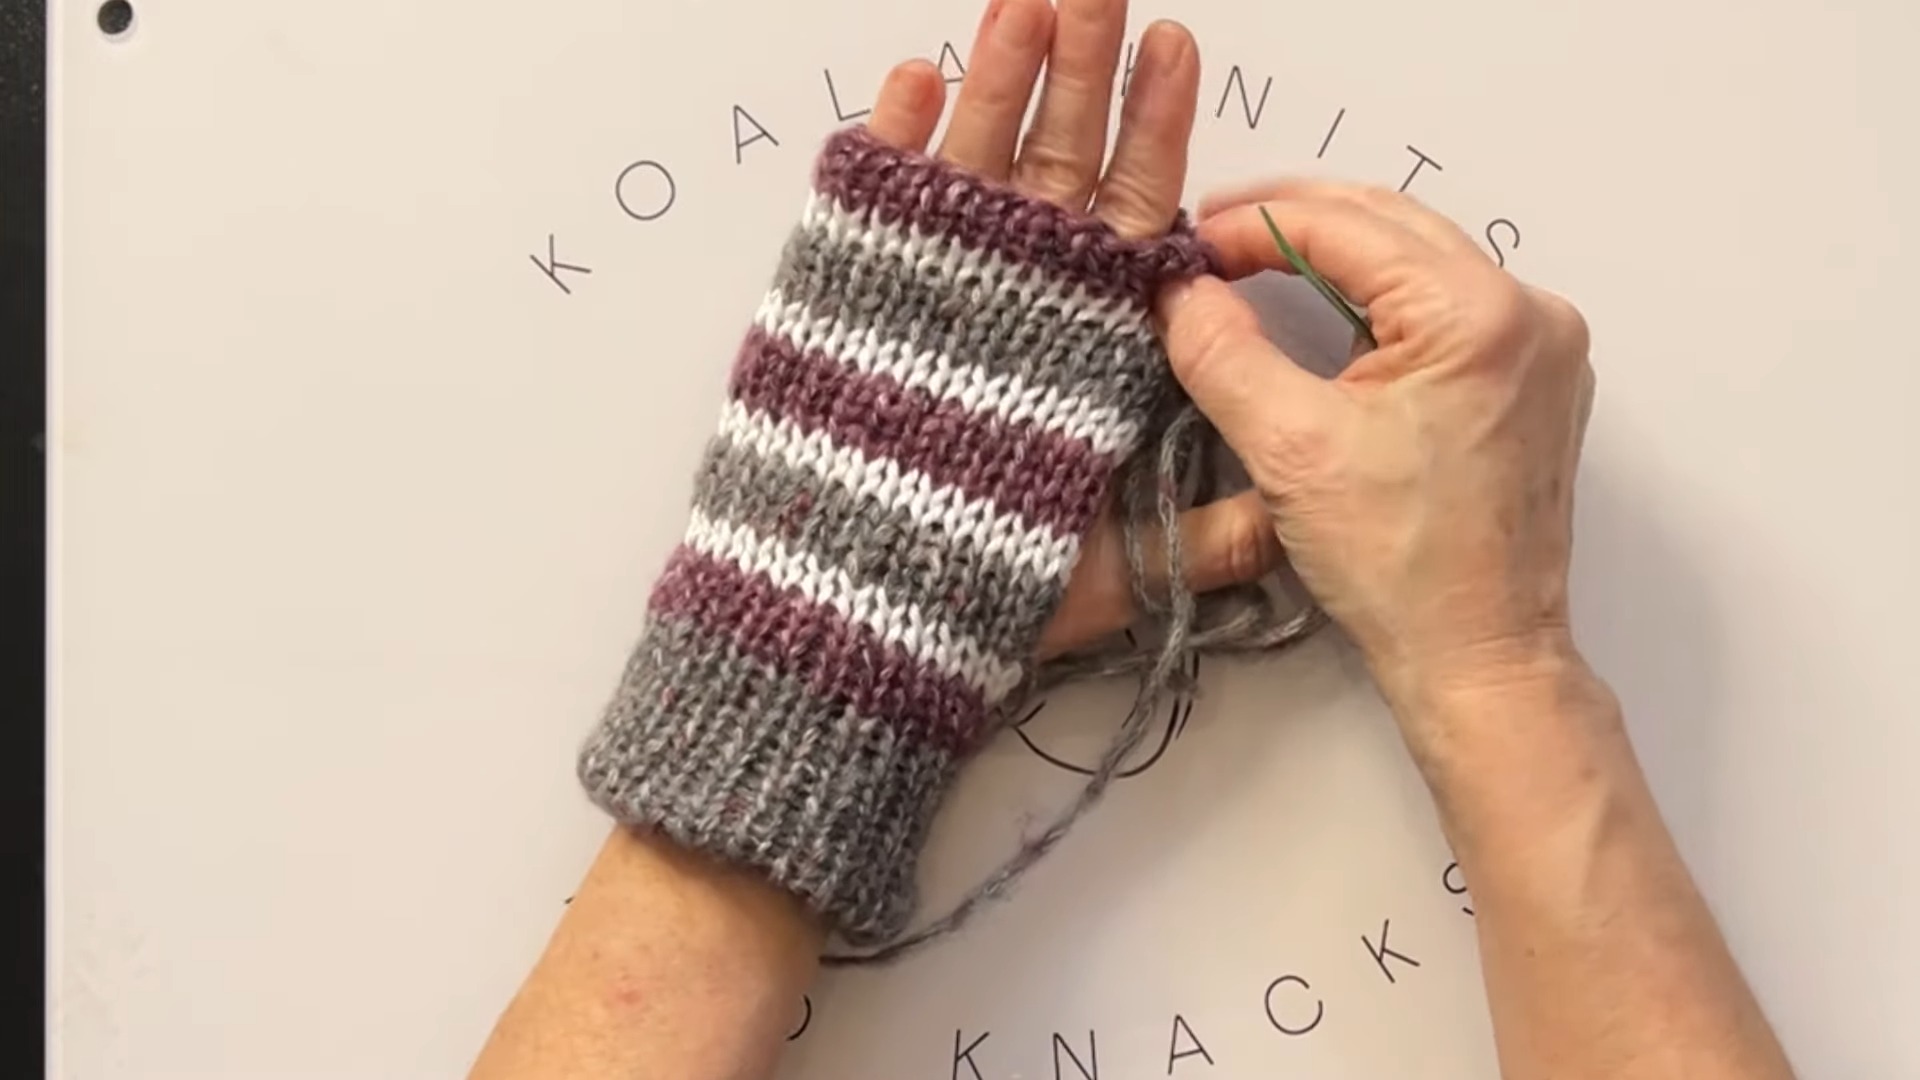
- Begin on one edge where the waist yarn is visible.
- Using a crochet hook, pick up the final stitches and close the finger end using the braided join technique.
Step 8: Seam Using the Kitchener Stitch
- For the cuff edge (which stretches over the wrist), use the Kitchener Stitch for a stretchier join.
Step 9: Create the Thumb Opening
- Fold the mitten in half lengthwise and identify the correct position for the thumb opening.
- Measure 22 stitches down from the finger edge to allow for proper thumb placement.
- Leave 6 stitches open for the thumb opening (adjust as needed based on hand size).
- Seam the sides below the thumb opening using the invisible join.
Step 10: Finishing Touches
- Carefully weave in all loose yarn tails using a wool needle.
- Remove all waist yarn by pulling gently to avoid tangling.
- Stretch the finished project to align rows and tighten seams evenly.
Final Notes
- This project is perfect for gifting or pairing with a matching ear warmer!
- Explore slight variations on the cuff design to personalize the look of your mittens.
Enjoy making your cozy fingerless mittens for cold weather!
Pattern Question
Question: How do I size the fingerless mittens to fit different hand sizes?
Answer: You can adjust the length by increasing or decreasing the number of rows, especially near the thumb hole or cuff areas. Customizing row counts ensures a comfortable fit for all hand sizes.
Conclusion
These fingerless mittens are a versatile, stylish, and practical addition to your wardrobe or gift-giving options. With easy-to-follow steps and clever design elements, crafting these mittens provides a rewarding experience that highlights the joy of handmade creations!


