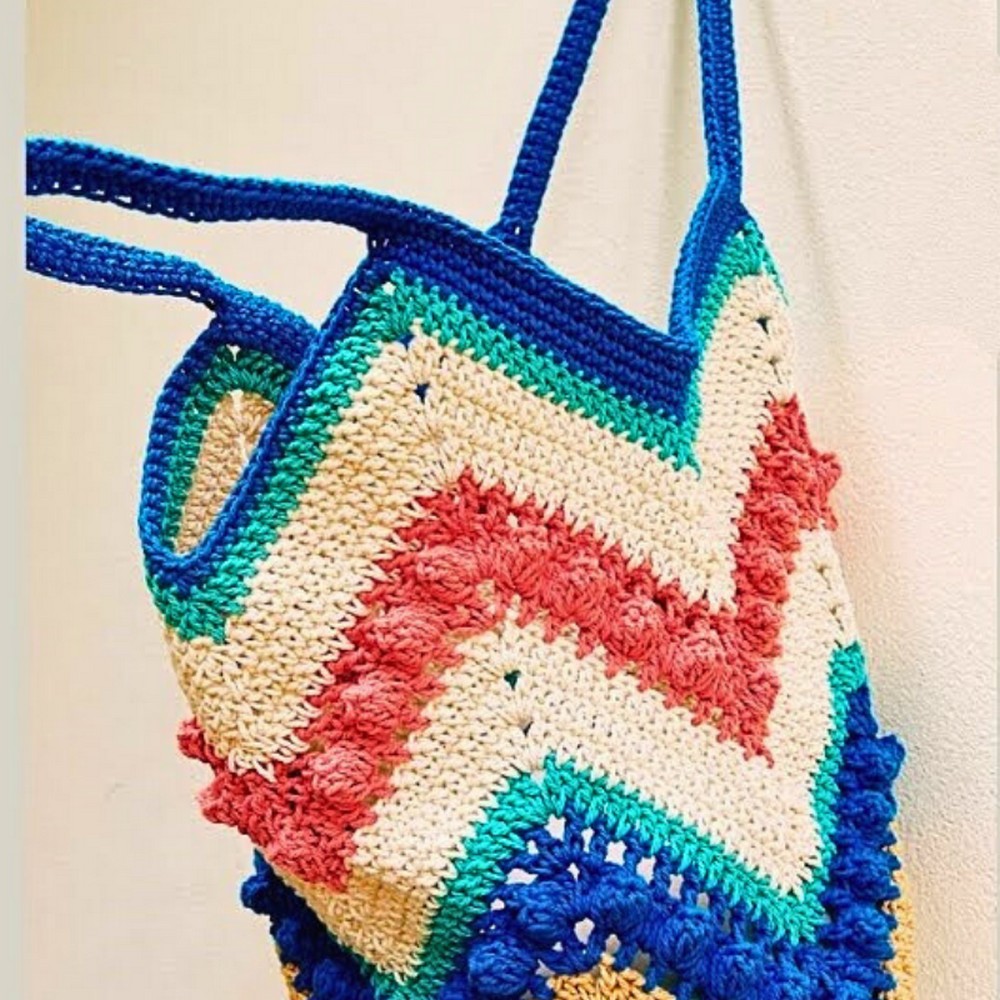
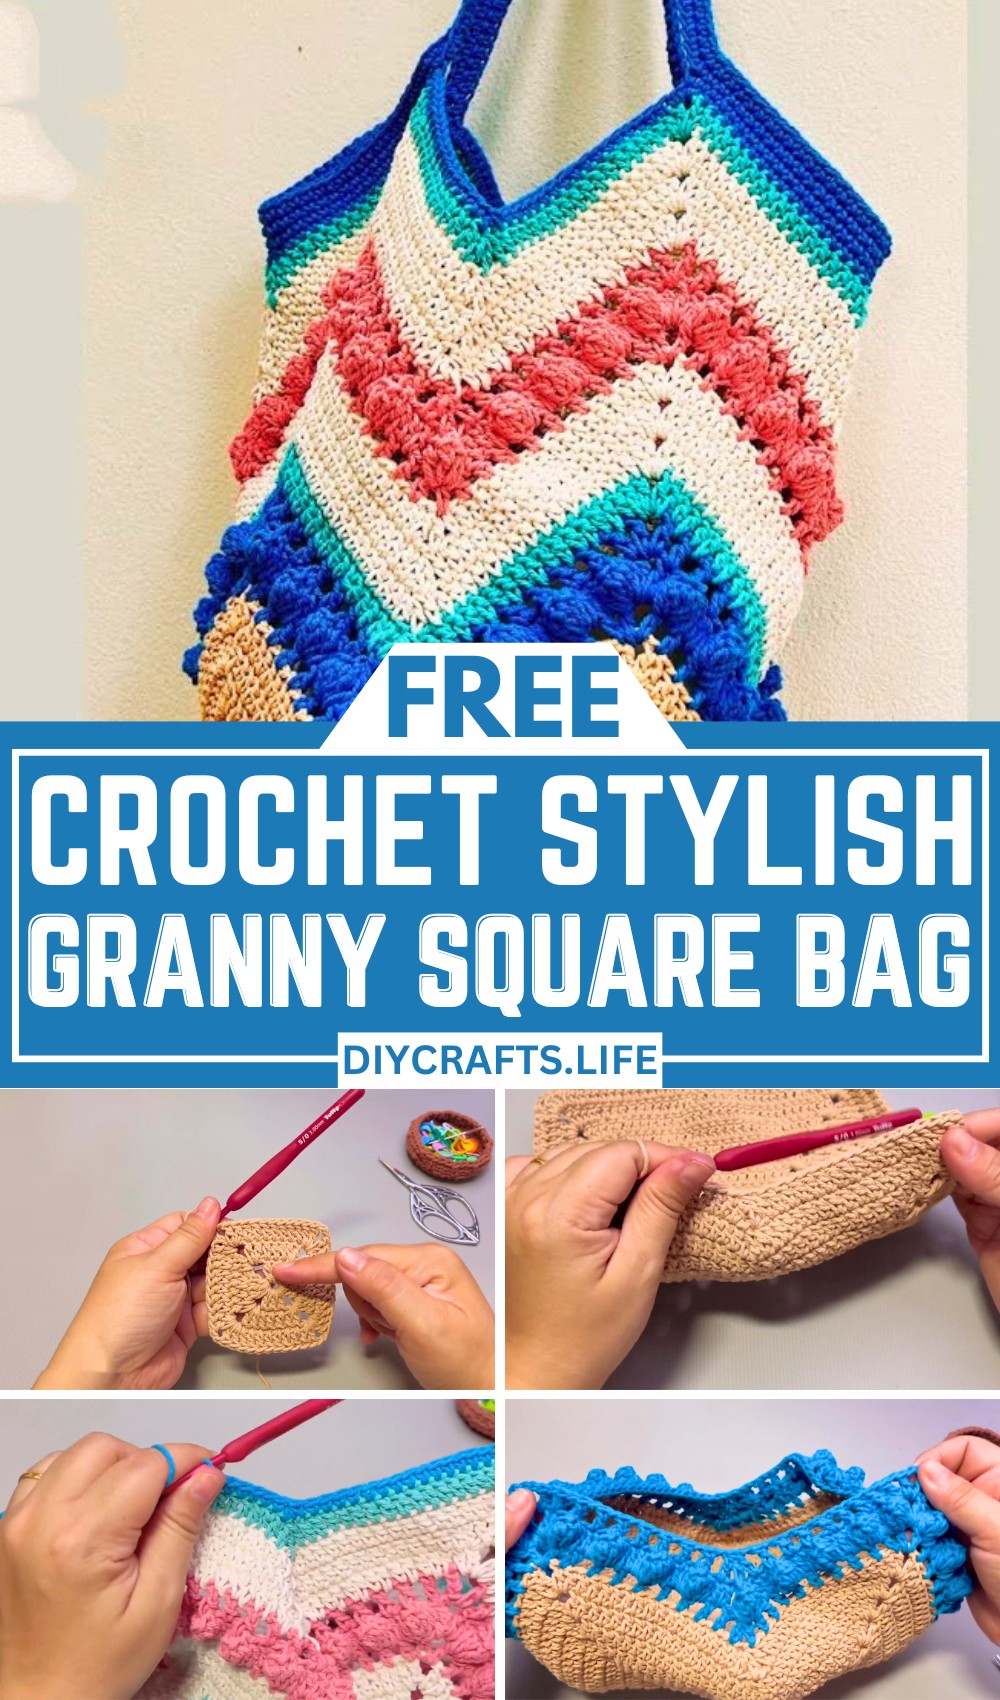
This Crochet Granny Square Base Bag is a perfect blend of craftsmanship and utility. With its timeless design and vibrant appeal, it’s an eye-catching accessory that’s practical for everyday use. Whether you prefer bold colors or subtle tones, this versatile project suits every style.
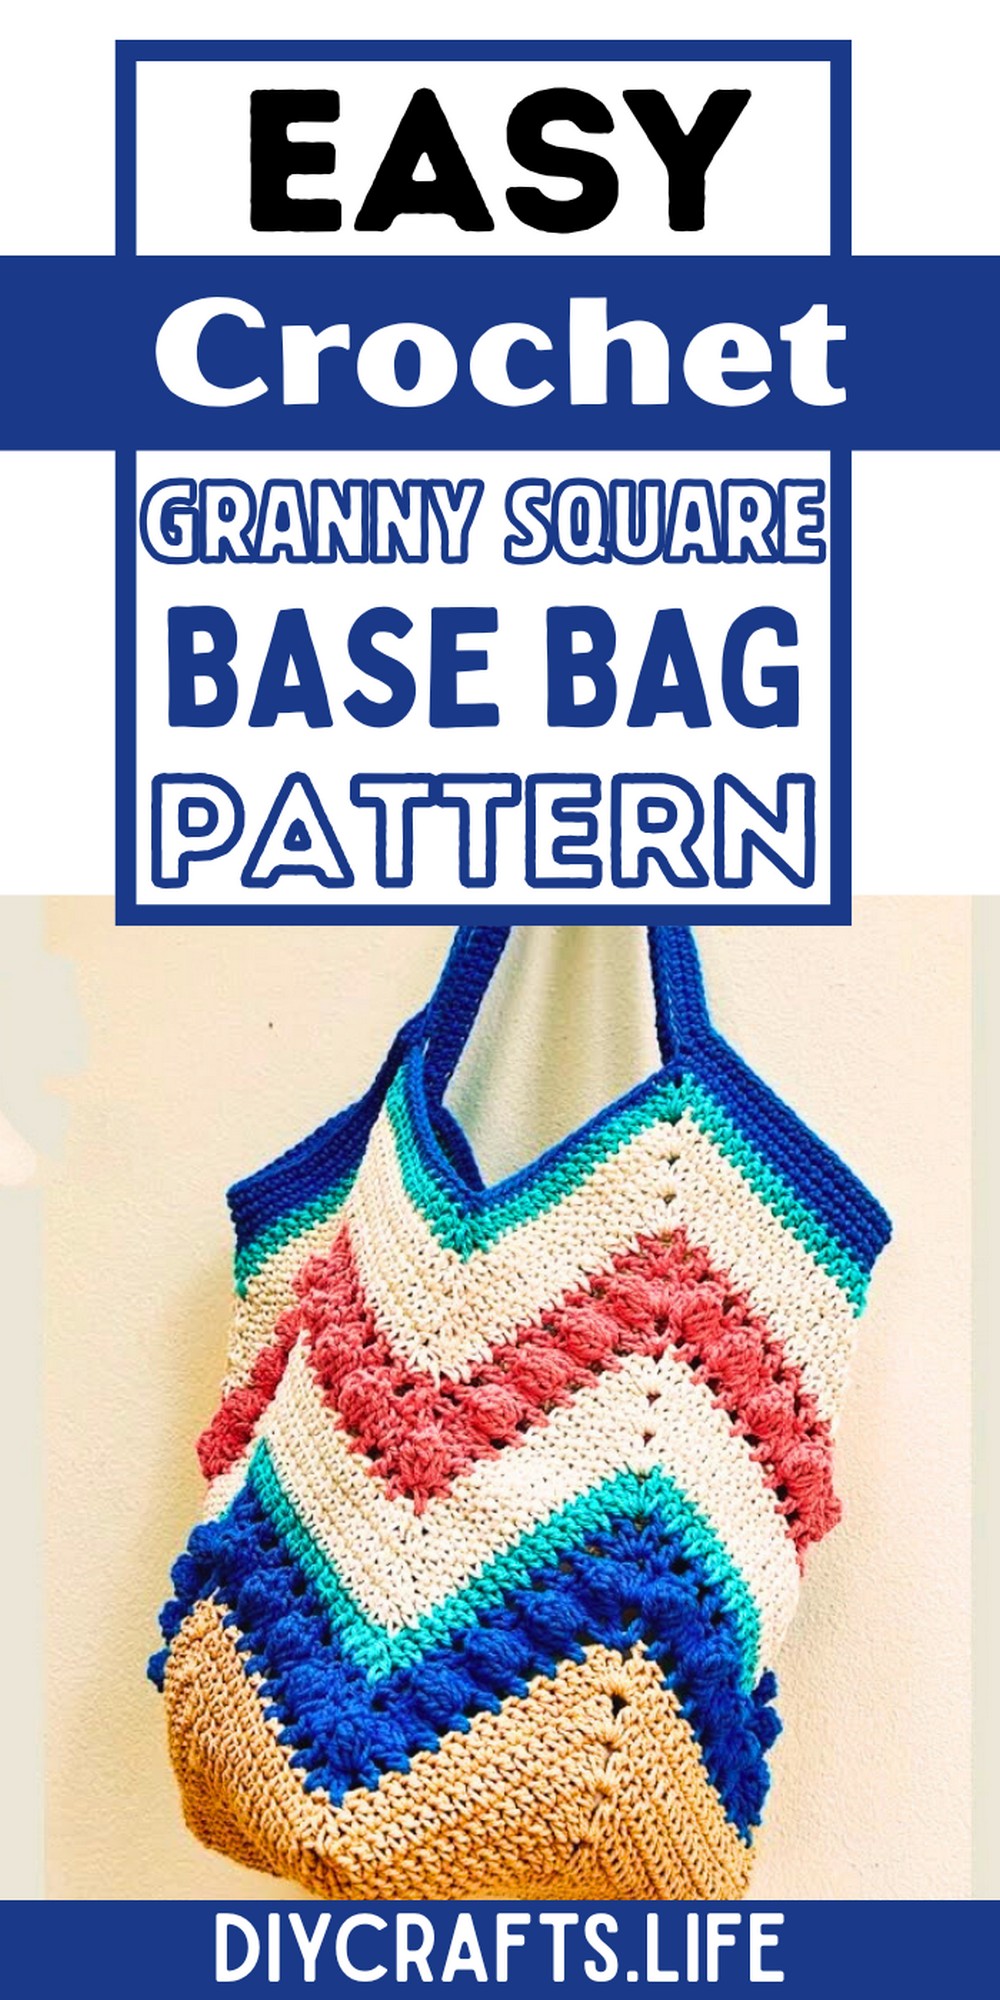
The Granny Square Bag stands out for its durability and unique charm. Use it as a casual tote, shopping bag, or stylish carry-all. Crafted with a solid base, it can comfortably hold essentials while giving off a handmade, trendy vibe. Perfect for both practicality and fashion-forward looks.
Crochet Granny Square Base Bag
Creating this bag is fun and suitable for all skill levels—from beginners to experienced crafters. Adjust the size, colors, or patterns for a personalized touch. This project opens creative possibilities while offering an achievable way to build your crochet skills with style.
Materials and Preparation
To crochet your Granny Square Base Bag, you’ll need:
- Yarn type: Worsted-weight yarn (medium weight, 4) — choose multiple colours for the granny square design, such as Color A (Main Body), Color B (Granny Accent), and optional Color C (Straps).
- Hook size: Use a 4.0 mm or 4.5 mm crochet hook (check yarn label for best compatibility).
- Additional tools:
- Yarn needle (for sewing ends and assembling squares).
- Scissors.
- Stitch markers (optional, to keep track of corners or rounds).
- Yarn requirements: Use enough yarn to make four granny squares as the bag’s base, plus extra for adding sides and straps.
Abbreviations and Notes
Common Crochet Abbreviations:
- CH: Chain
- SC: Single Crochet
- DC: Double Crochet
- SL ST: Slip Stitch
- HDC: Half Double Crochet
- SP: Space
Notes:
- Granny squares are worked in rounds starting from the center.
- Colour changes can be done seamlessly by pulling the new colour through the final loop of the previous round.
- Crocheting evenly is key to ensuring uniform squares.
Tips for beginners:
- Practice making a basic granny square first before starting your actual bag project.
- If you’re new to colour changes, take it slow and weave in ends with care.
Gauge, Approximate Size, and Pattern Notes
Gauge:
- Gauge isn’t essential for granny squares, but ensure the edges of the squares all match.
- For reference: Each granny square should measure approximately 5–6 inches across. Adjust hook size to meet this measurement.
Finished Dimensions:
- Final bag size after assembly: Approximately 10 inches wide x 8 inches high (excluding straps).
Pattern Notes and Techniques:
- Use a Join-as-you-go (JAYG) method or sew together granny squares with a yarn needle for ease of assembly.
- This project can be completed in parts (base granny squares, sides, straps).
- Blocking the finished granny squares before assembly ensures alignment and clean edges.
Step-by-Step Pattern
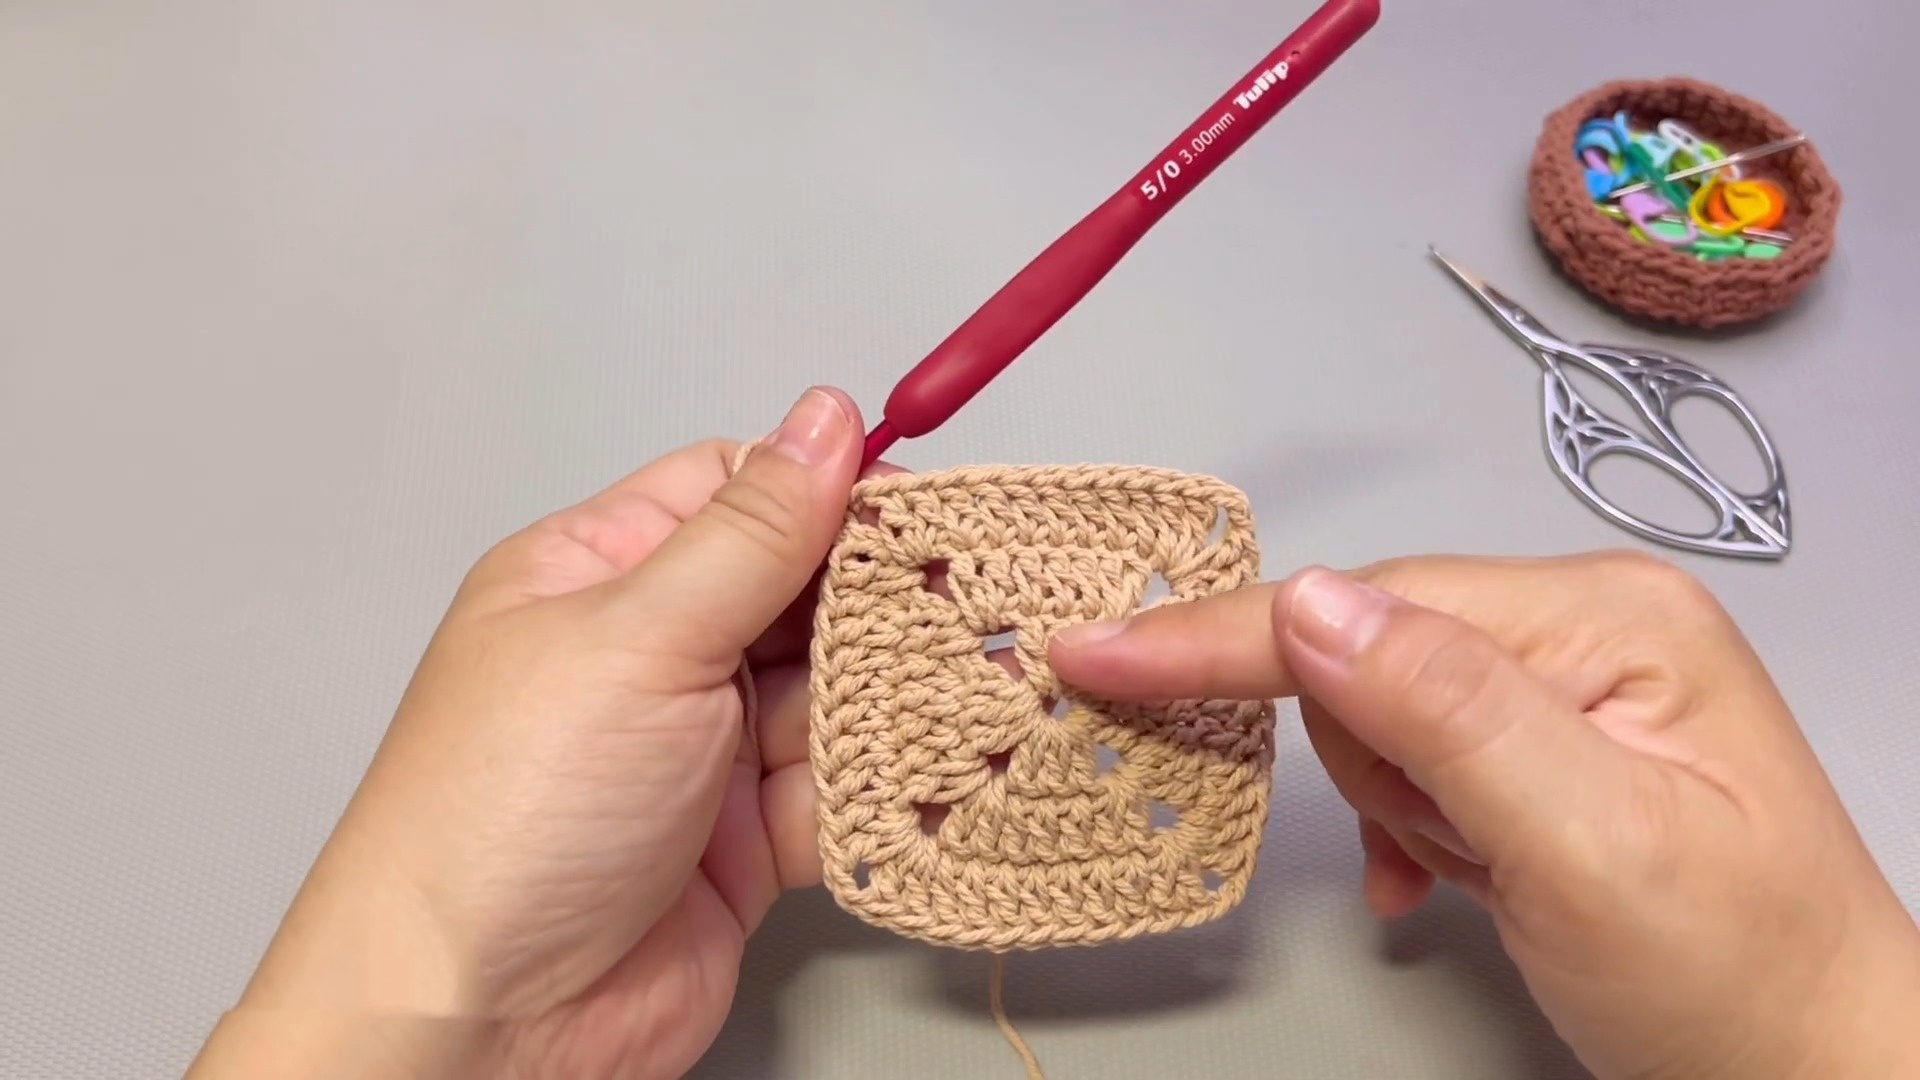
1. Create the Foundation Granny Squares:
- Round 1: With Color A, make a magic ring, CH 3 (counts as 1 DC), then work 2 DC into the ring. CH 2 and work 3 DC. Repeat this sequence two more times until you have 4 clusters of 3 DC, separated by CH 2 spaces. Join with SL ST to the top of the starting CH 3.
- Round 2: CH 3 (counts as 1 DC), work 2 DC into the same SP. CH 1, then into the next CH-2 corner, work 3 DC, CH 2, 3 DC. Continue working this sequence around the square, placing CH 1 between corner clusters. Join with SL ST.
- Round 3+: Continue the granny square pattern, working DC clusters into spaces and increasing corners with 3 DC, CH 2, 3 DC. Complete each square to size (approximately 5–6 inches).
Repeat this process to make 4 squares for the base of the bag.
2. Assemble the Base:
- Arrange the 4 squares into a larger square (2x2 grid).
- Use the JAYG method or sew together with a yarn needle and matching yarn, joining along the edges of the squares.
3. Build Up the Sides of the Bag:
- Attach yarn to one corner of the assembled base.
- Row 1: CH 1, SC evenly around the perimeter of the base, working 2 SC into each corner seam. Join with SL ST.
- Rows 2–5: Work HDC in the round for 3–4 rows to build height. You can use Color B for accent or continue with Color A.
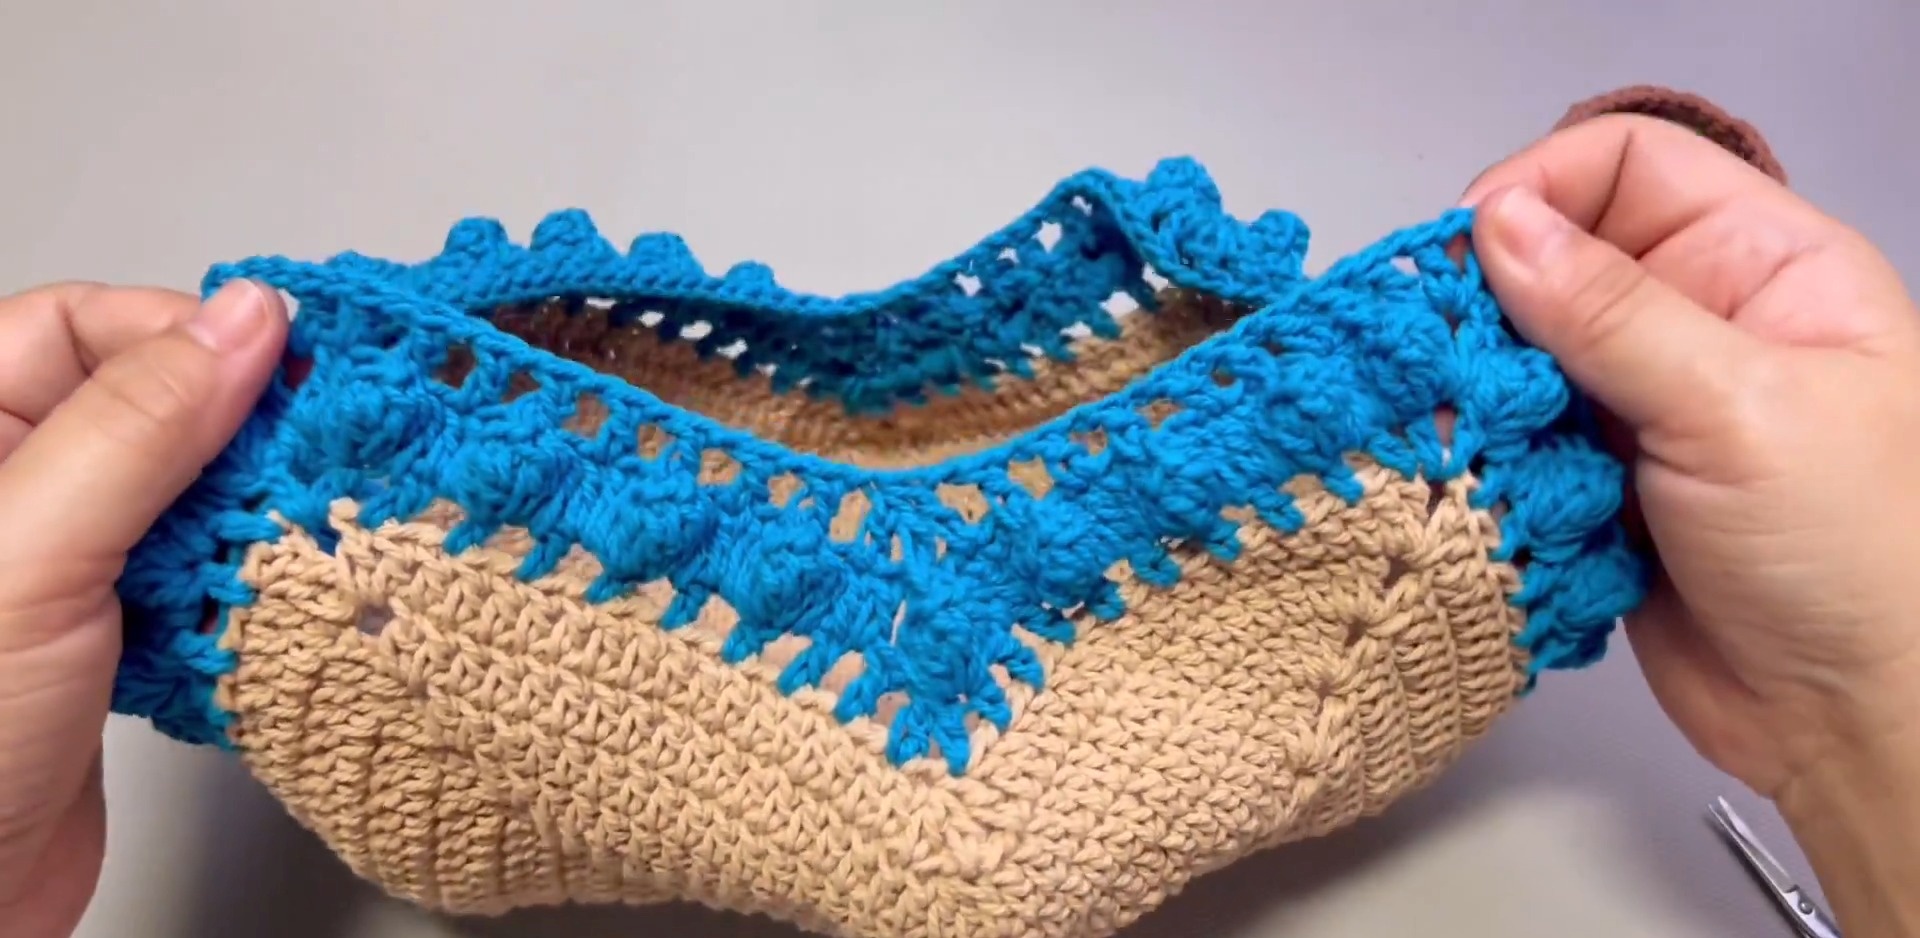
4. Create the Bag Opening:
- On the final row, work SC stitches instead of HDC to tighten the edge.
- Optionally add a decorative border (e.g., crab stitch or picot edge).
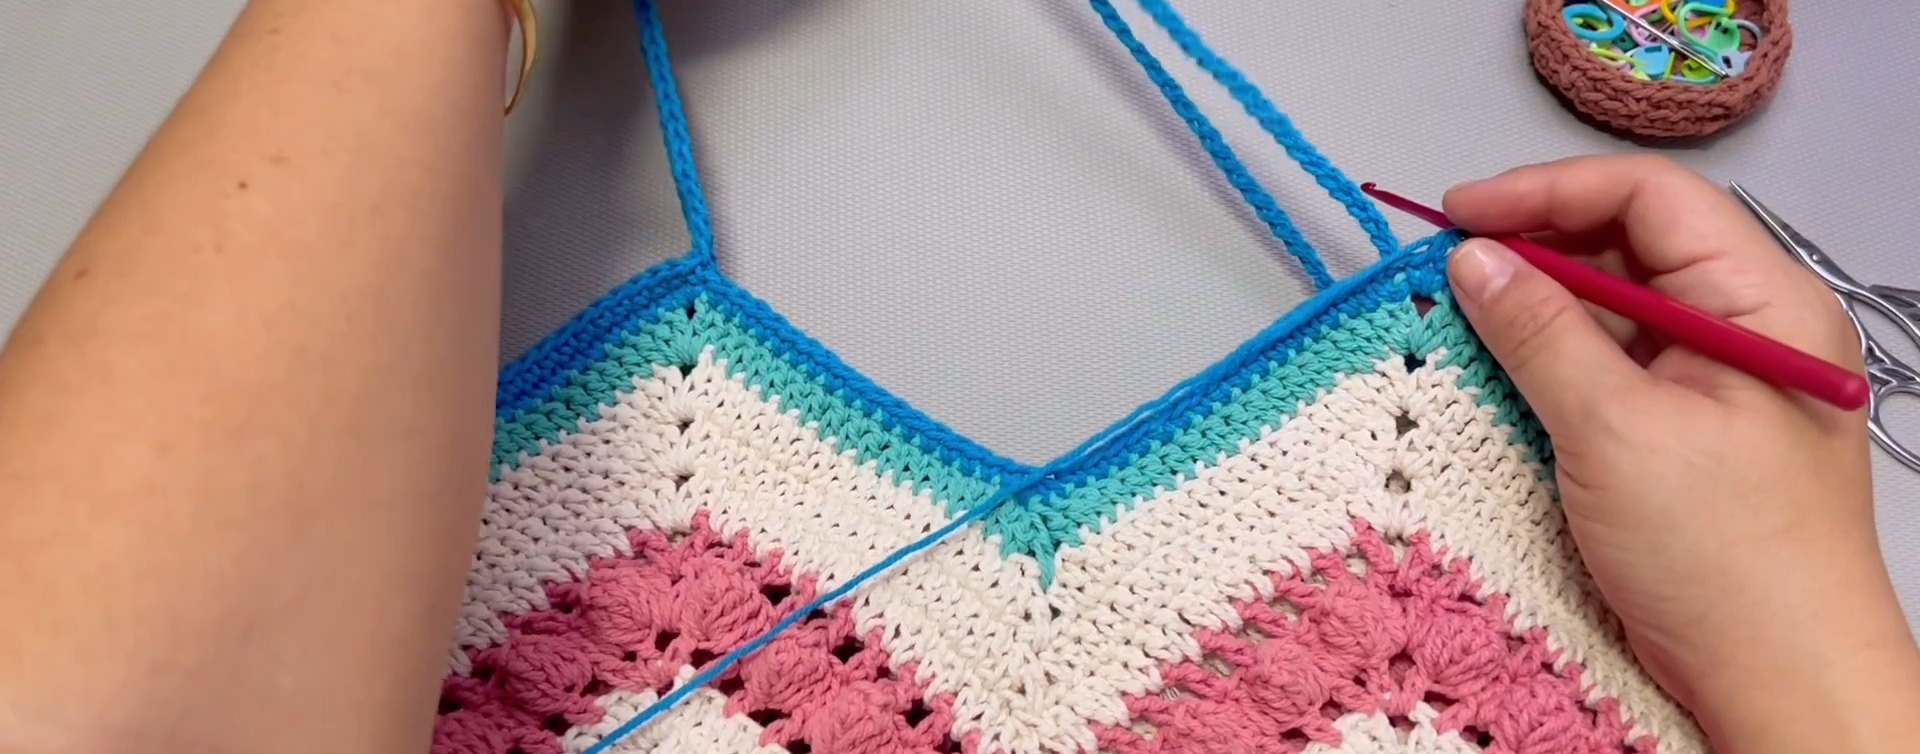
5. Add the Straps:
- Decide the placement for the straps — typically attach them along opposite edges of the bag opening.
- Create a chain strap: CH 60 (or desired length), SL ST back into each chain for sturdiness.
- Sew the ends of the chain to the bag securely.
- Alternatively, crochet a wider strap using rows of HDC (e.g., CH 10, work rows of HDC).
Finishing Touches
- Weave in all loose ends with the yarn needle.
- Block your finished bag lightly to set the shape.
- Test the straps for strength and adjust the placement if needed.
- Your Granny Square Base Bag is ready to use!
Pattern Question
Question: How do I ensure my granny square bag stays sturdy for heavier items?
Answer: Use a tightly woven stitch for the base and consider using a stronger yarn type for added durability. Adding a lining can help enhance its sturdiness.
Conclusion
The Crochet Granny Square Base Bag combines beauty, practicality, and simple crafting techniques. It’s a rewarding project that’s great for personal use or gifting. Dive into your creativity and enjoy making an accessory that’s handmade, stylish, and functional.


