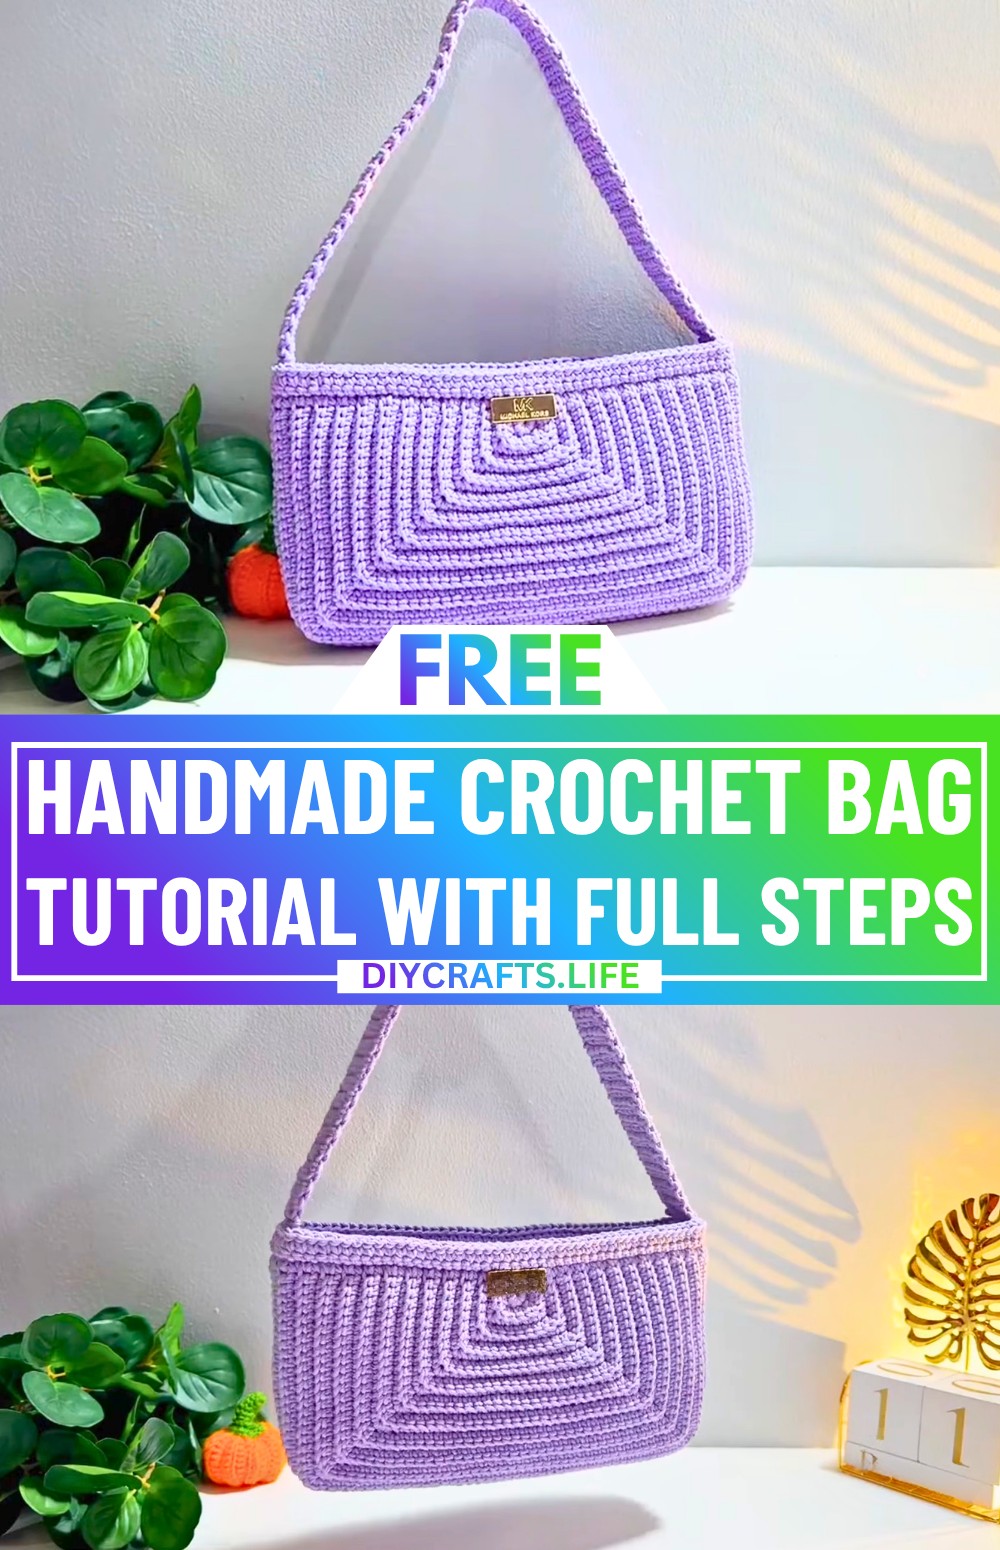
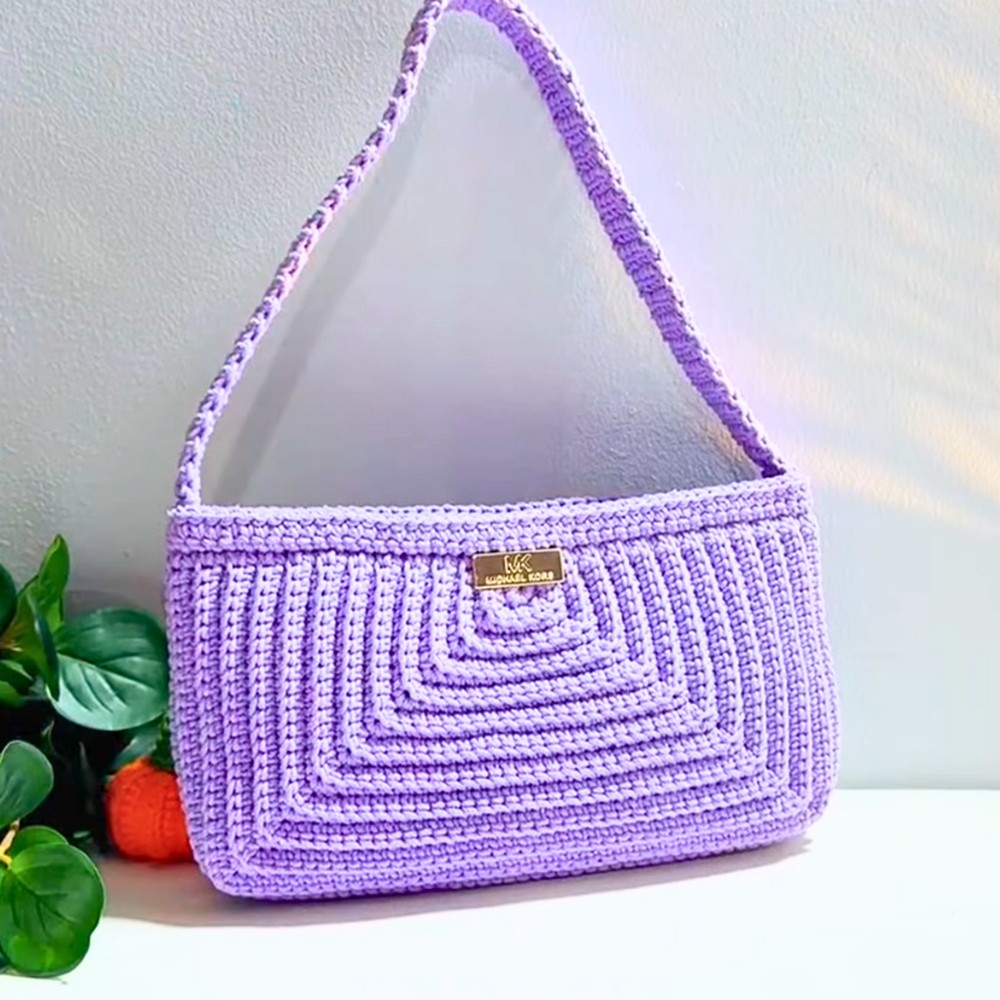
This crochet bag is a wonderful combination of creativity and practicality. It’s perfect for carrying your essentials while showcasing a unique, handmade touch. Whether you need a compact bag for everyday errands or an elegant accessory for casual outings, this crochet masterpiece is both functional and stylish. Its soft cotton design combined with thoughtful details adds charm to any outfit.
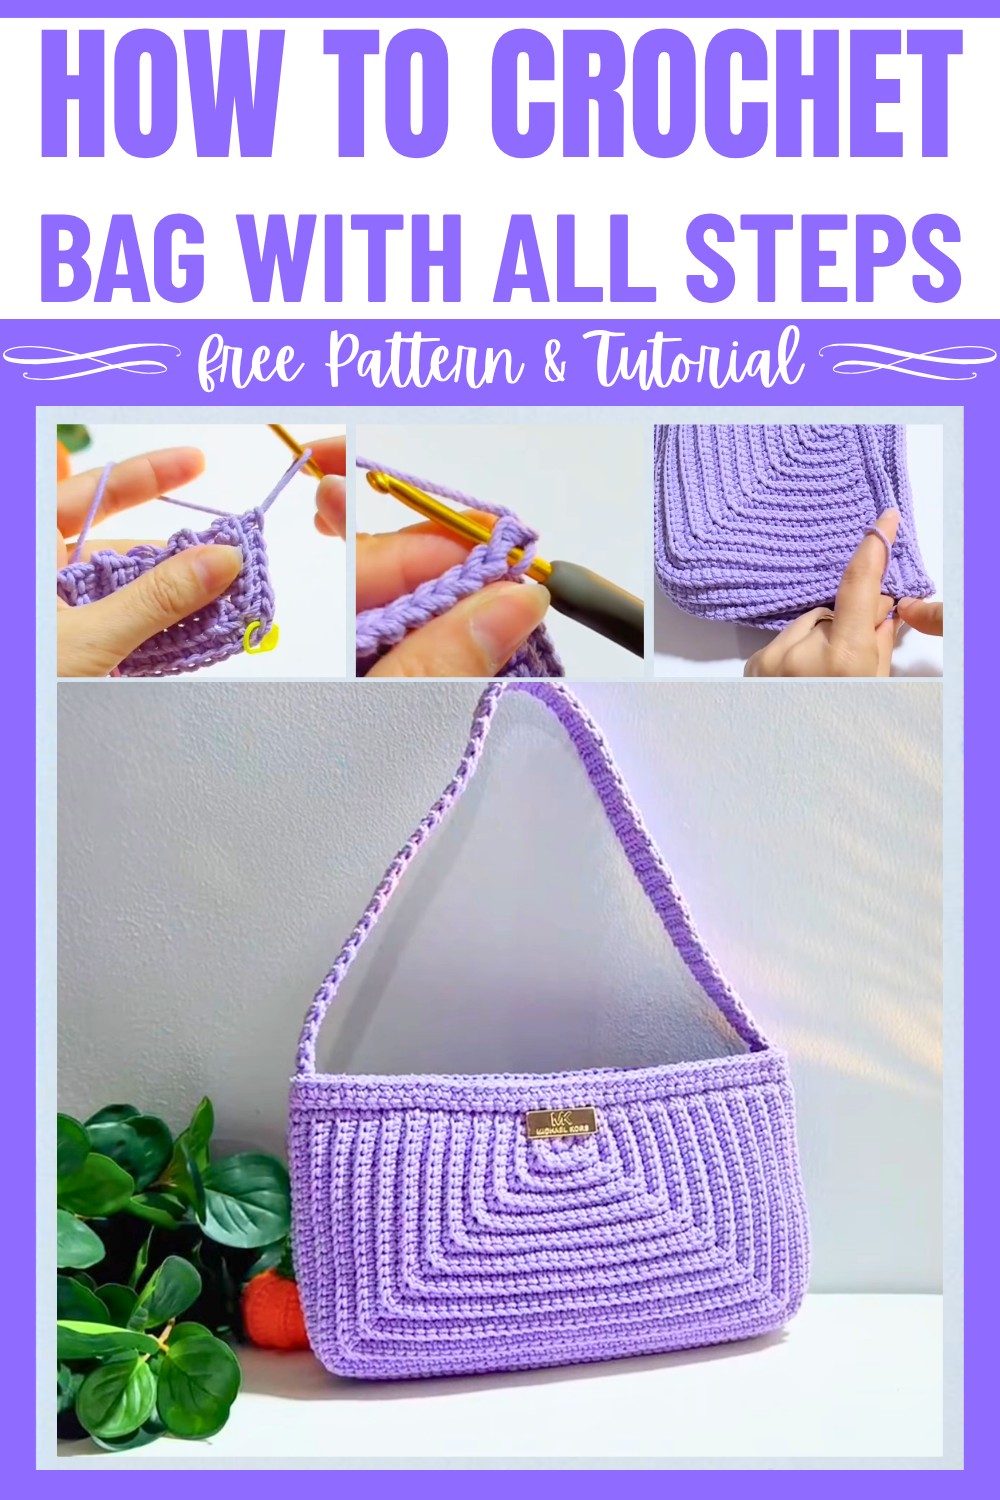
Crocheting this bag is simpler than it may seem, even for beginners. The process starts with forming a beautiful base and gradually shaping it into a sturdy, eye-catching bag. You’ll also learn how to add a zipper for neat closure or sew handles to make it versatile for carrying. It even leaves room for personal touches, such as adjusting the size or adding embellishments like logos to make it uniquely yours.
Credit Tayla Handmade Crochet
Materials & Tools Needed
- Thread: 2 mm cotton macra thread
- Hook: 3.5 mm crochet hook
- Stitch markers
- Scissors
- Zipper (optional)
- Needle and thread (for zipper or logo attachment)
Finished Size & Customization Ideas
- Finished Size: The tutorial outlines the bag creation process with instructions for a base diameter and subsequent bag depth based on 22 rounds for the base. The handle length is customizable and demonstrated as 51 cm (89 rows).
- Customization Ideas:
- Adjust the base size by adding or reducing rows following the same pattern of increases.
- Alter the handle length to suit your preferred bag style (crossbody, shoulder, etc.).
- Add embellishments like logos, stitching patterns, or decorations.
Pattern Abbreviations & Terminology
- SC: Single Crochet
- Ch: Chain
- St: Stitch
- Sl St: Slip Stitch
- Rnd: Round
- Back Loop: Crochet only into the back strand of the stitch (leaving the front strand unworked).
- Triple Increase: Three Single Crochet stitches worked in the same stitch.
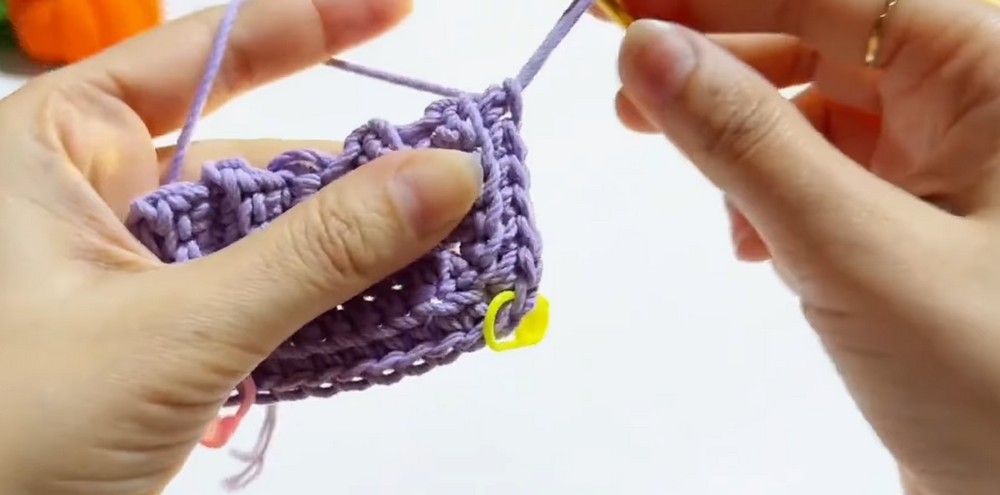
Step-by-Step Crochet Instructions
This step-by-step guide captures the exact instructions from the tutorial.
Part 1: Creating the Base (Rounds 1-22)
Round 1:
- Start with a magic circle.
- Work 8 SC into the magic circle.
- Pull the circle tight and join with a Sl St to the first SC.
- Ch 1 to begin the next round.
Round 2:
- Work SC in the back loop only of each stitch in this round.
- In the third stitch, create a triple increase (3 SC into the same stitch).
- Place a marker in the second SC of the triple increase.
- Continue alternating between single crochet stitches and triple increases.
Rounds 3-22:
- Begin each round with Ch 1.
- Turn your work.
- Follow the established pattern:
- Continue working SC in each stitch.
- Place a triple increase in every marked stitch.
- Move the marker to the second stitch of each triple increase in every row.
- As the rows progress, follow this same pattern until the base reaches its desired size (22 rows).
Part 2: Shaping the Bag Sides (Rounds 23-28)
Round 23:
- Work 92 SC in the back loop around the entire base.
- Place a marker to note the start of Round 23.
Rounds 24-28:
- Repeat working SC in the back loop in each stitch for a total of 6 solid rounds.
- This creates the main structure of the bag.
Part 3: Preparing the Body (Rounds 29+)
- For each subsequent round, split the stitches into sections.
- Example: Work 28 SC, skip stitches, then work another series of SC stitches as instructed.
- Prepare 56 SC in the back loop in some rounds, creating shaping details as demonstrated in the tutorial.
- Repeat these rounds until satisfied with the bag height.
Part 4: Final Rounds & Finishing Options
Final Round:
- Work 56 slip stitches to give a clean edge.
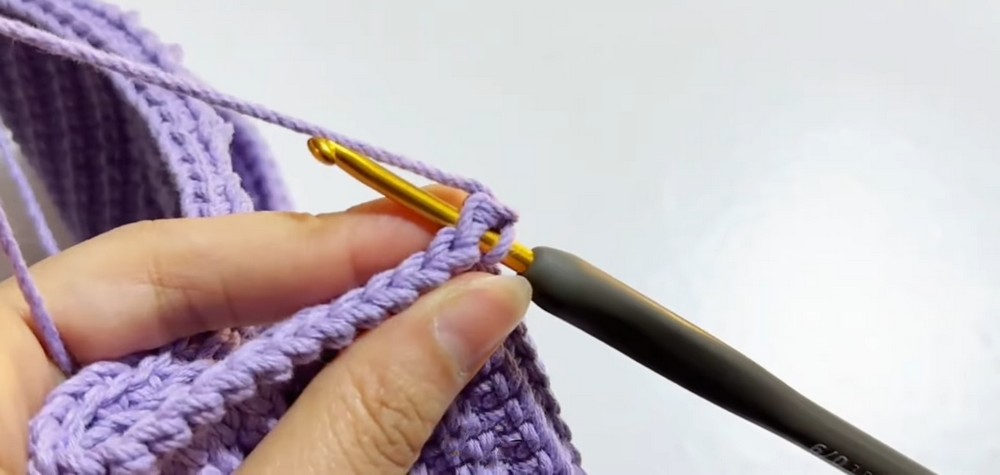
Zipper Attachment:
- Divide stitches into sections, skipping 5 stitches at the start and end.
- Attach the zipper with a needle and thread.
- The zipper installation can occur at this step or after both bag parts are connected.
Bag Assembly:
- Create a second bag panel using the same pattern.
- Connect both panels by working from the inside with stitches to close all edges.
- Turn the bag inside out to reveal the finished product.
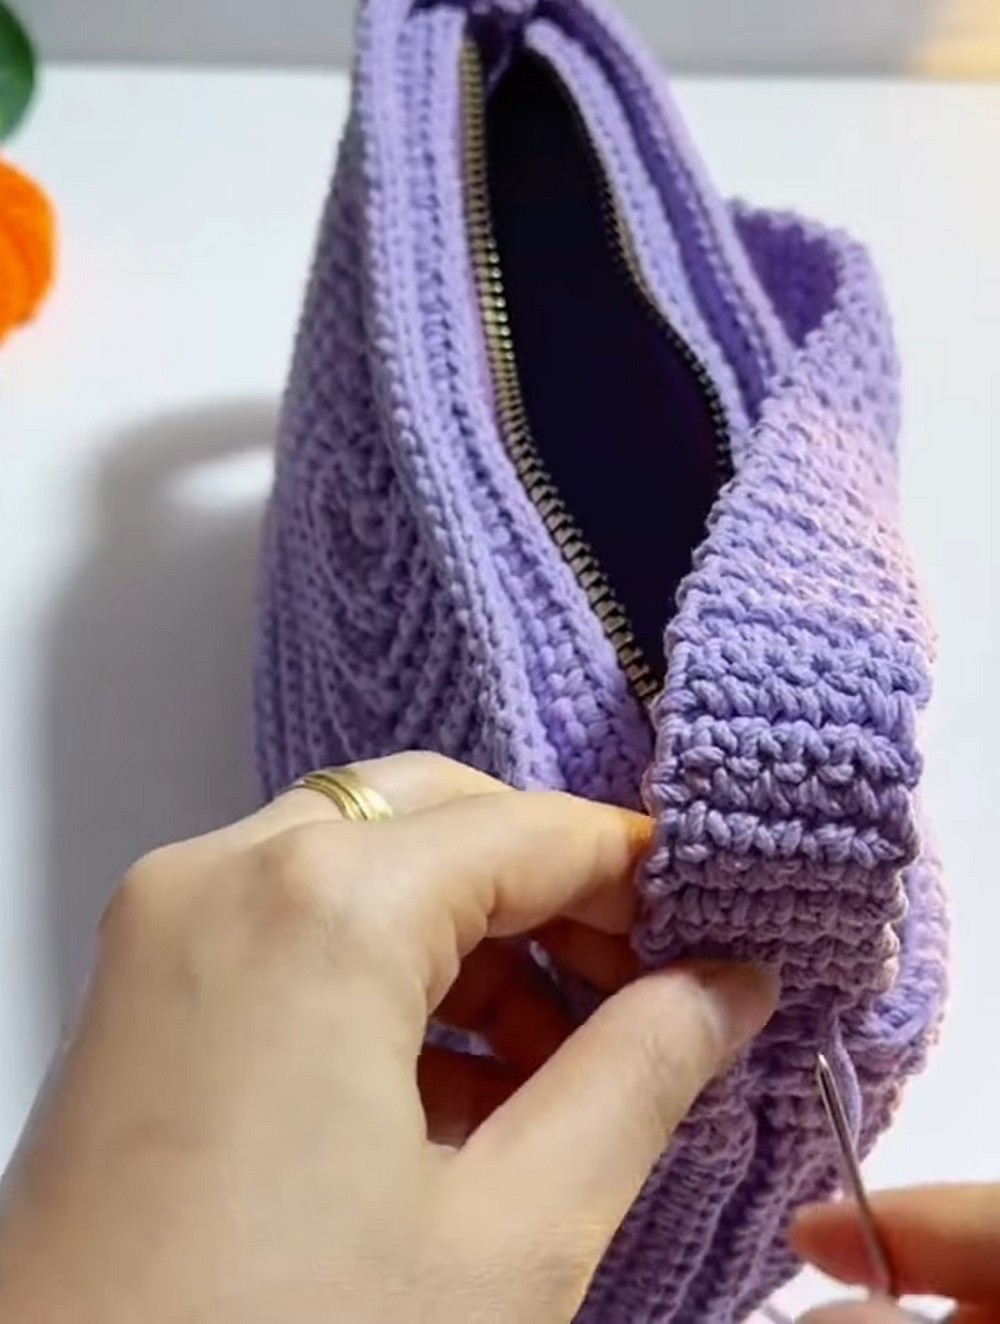
Part 5: Adding the Handle
- Start by chaining for the required handle length.
- Option A: Begin with 6 SC, skip a stitch, and continue chaining for the handle structure.
- Option B: Work 6 SC stitches directly without skipping stitches.
- Repeat the pattern until you reach 51 cm in length (or your desired handle length).
Finishing Touches
- Add embellishments such as a logo or decorations.
- Ensure all ends are tied off and hidden.
- Press/block the bag carefully to improve its texture and overall finish.