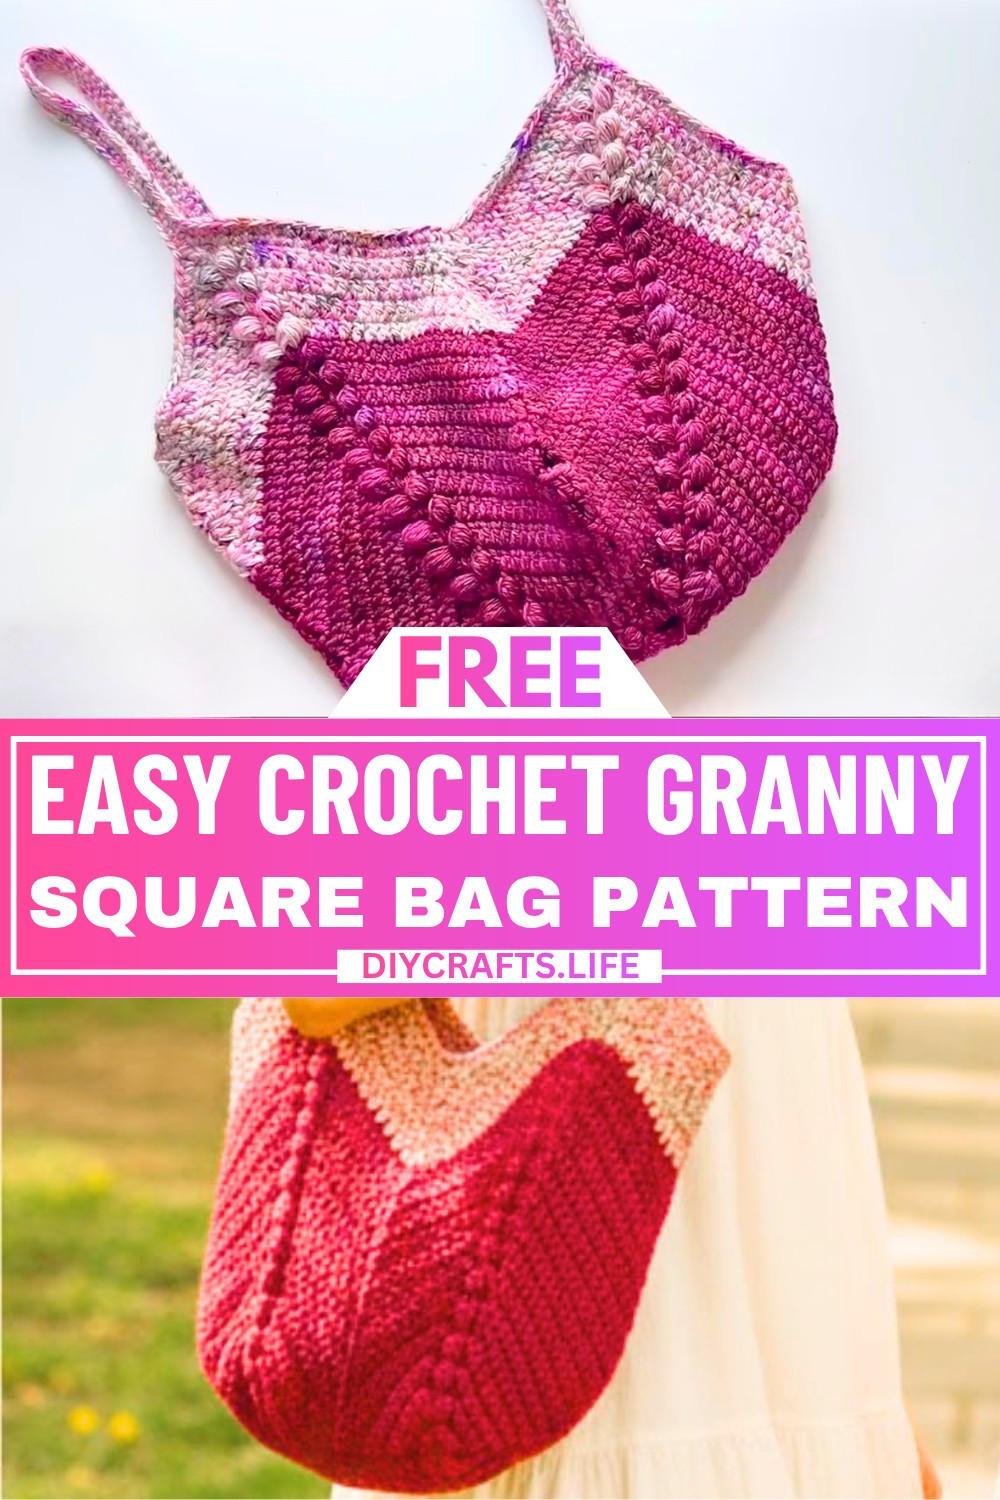
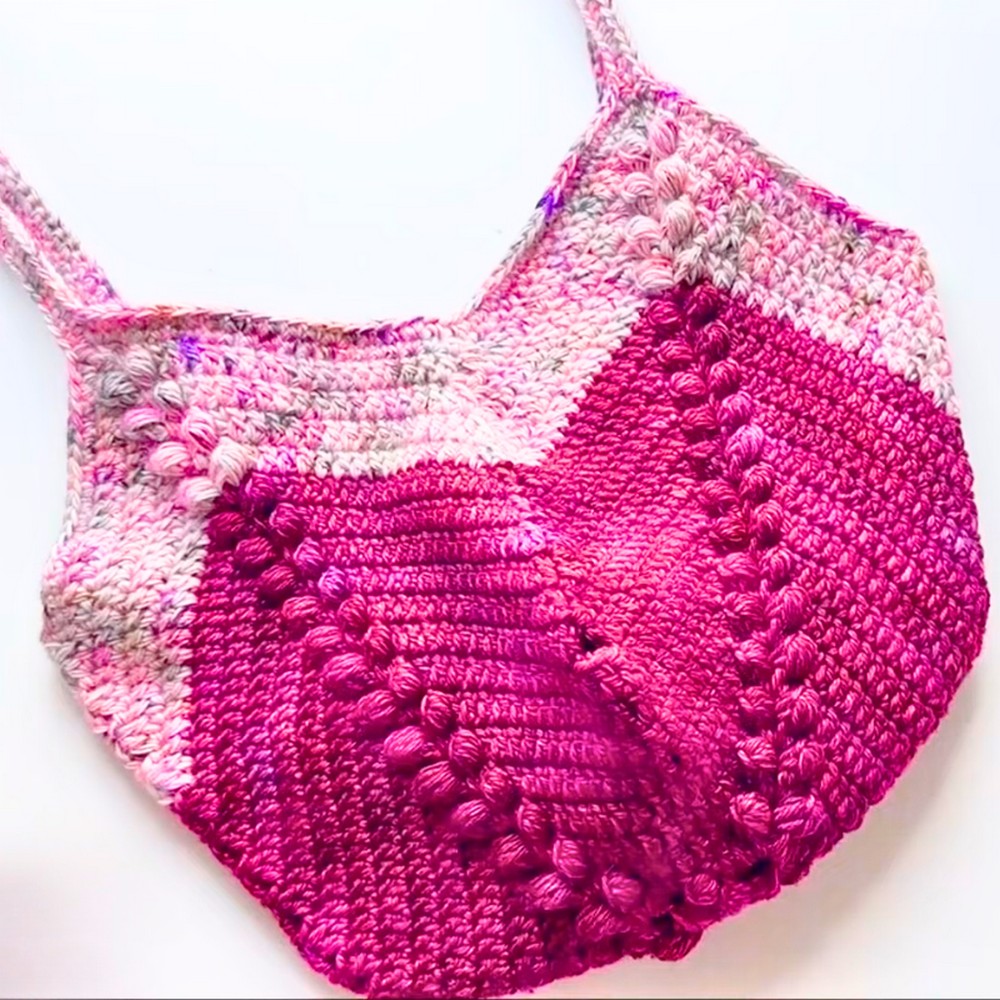
A granny square bag is a simple, stylish, and practical accessory that you can make with your own hands. It features a square design with beautiful bobble stitches that add a fun textured look. This bag is not only cute but also perfect for carrying small items like your phone, wallet, or keys. Whether you're running errands, going to the park, or heading to the mall, this bag will surely make your outfit pop!
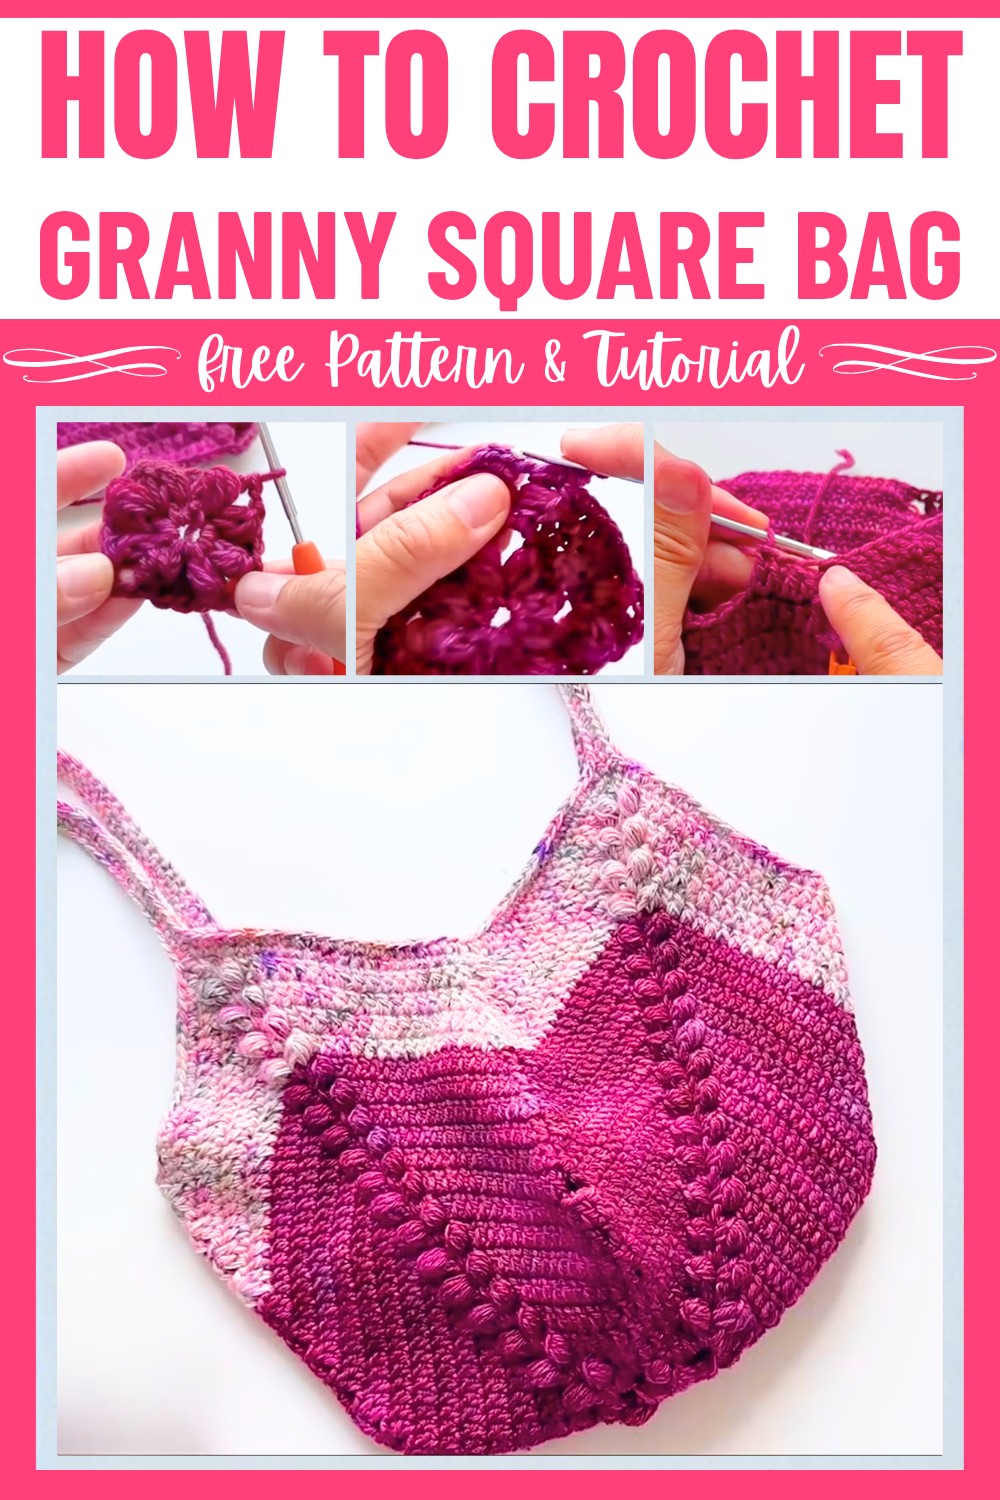
The making process combines the classic granny square with unique elements like soft puffy petals and bobble stitches, which create an eye-catching texture. The design includes sturdy straps and a well-structured body, ensuring it’s both functional and durable. Beginners will enjoy learning the step-by-step process, with simple animations and clear explanations to help you stay on track. You’ll also learn tips, such as using a smaller hook for a firmer base. By the end, you’ll have a beautiful handmade bag customized with your favorite colors.
Credit Tasty Dumpling Living
Materials & Tools Needed
- Yarn: Malabrigo worsted-weight yarn (or any worsted-weight yarn). The tutorial uses this specific yarn but adjusts the hook size to make the bag sturdier.
- Crochet Hook: 3mm hook (smaller than the recommendation to create a firm bag base).
- Tapestry Needle: For the invisible join and weaving in ends.
- Scissors
- Stitch Markers: Optional, for marking centers when shaping the bag.
Finished Size & Customization Ideas
- Base Size: Roughly 7 ¾ inches (19.7 cm) wide. The base consists of 7 additional rounds after the foundation rounds. Adjust the width by repeating the last round until you achieve your desired size.
- Bag Height: The sides are built up using decreasing rounds, which you can repeat until your desired height is achieved.
- Straps: Sized for small handles (about 10 ½ inches or 26 cm long). You can customize the strap length for a larger bag or crossbody design.
Customization Ideas:
- Use contrasting yarn colors for the base and body.
- Alternate color combinations for straps.
- Add embellishments like tassels, buttons, or embroidery.
Pattern Abbreviations and Terminology
(Note: U.S. crochet terms are used here.)
- ch: Chain
- sl st: Slip Stitch
- sc: Single Crochet
- dc: Double Crochet
- hdc: Half Double Crochet
- bobble: Bobble Stitch (described below)
- magic ring: Adjustable loop to start in the center.
- rep: Repeat
- sk: Skip
- st(s): Stitch(es)
Step-by-Step Detailed Crochet Instructions
This project starts with a flower-like granny square base featuring bobble stitches, followed by widening the bag and adding structured sides and straps. Read through each round carefully to replicate the tutorial.
Base Formation (Round Breakdown)
Round 1: Center Circle
- Create a magic ring:
- Wrap yarn twice around your fingers to form an X.
- Insert hook into the loop, pull yarn through, and chain 1 to secure.
- Chain 3 (counts as the first dc).
- Work 11 dc into the magic ring (including the chain-3, you should have 12 stitches total).
- Tighten the magic ring and connect the round with a sl st into the top of the chain-3.
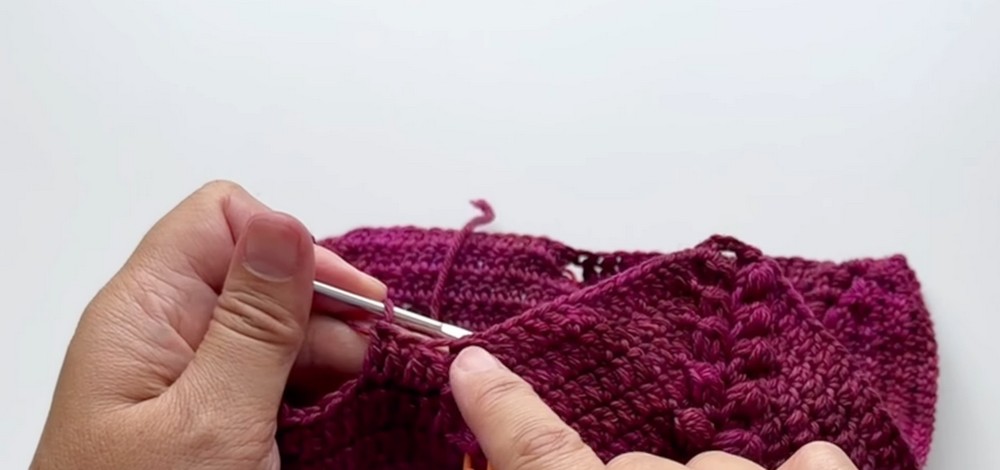
Round 2: Bobbles and Corners
- Begin by creating a bobble stitch in the chain-3 space:
- Yarn over, insert hook into space, pull up a loop (you have 3 loops on your hook).
- Yarn over, pull up another loop (5 loops total).
- Repeat this process until you have 9 loops.
- Yarn over, pull through all loops except 1, and then yarn over, pull through 2 loops.
- Locate the next dc and make 3 dc into it.
- Alternate the following pattern:
- Work a bobble into the next dc.
- Work 3 dc into the next stitch.
- After every second bobble, make ch 3 to create your corner.
- Repeat this sequence around:
- Bobble, 3 dc, bobble, chain 3.
- Slip stitch into the first bobble to complete the round.
Round 3+: Widening the Square with More Layers
Repeat the following steps for each subsequent round, modifying stitch counts as needed:
- In corners, always work:
- 2 dc, ch 3, 2 dc.
- In sides, work a bobble stitch on top of previous bobbles, and place a dc into each previous dc.
- Each round increases stitch counts by 4 dc per side (due to the corner increases).
Continue working in this pattern until the base reaches your desired width or approximately 7 ¾ inches.
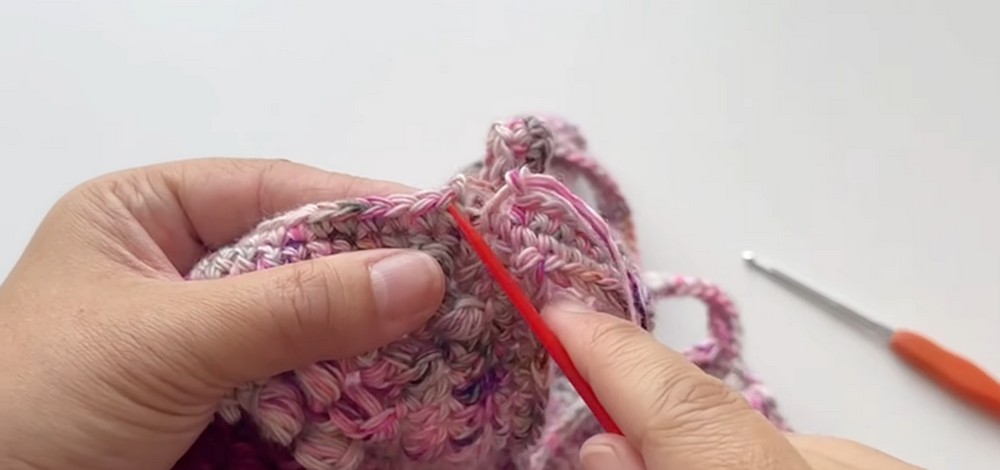
Shaping the Bag: Decreasing Rounds
Step 1: Mark the Centers
- Use stitch markers to find the middle of each side:
- Count stitches between two corners to locate the exact center.
- Divide evenly so both halves of the bag decrease symmetrically.
Step 2: Decrease Rows
Repeat the following process on each round:
- Begin with the corner:
- Chain 3 (first dc) and make a bobble stitch below the first dc.
- Double crochet until 3 sts before the center marker.
- Decrease stitches using dc2tog:
- Yarn over, pull up a loop in the first stitch, yarn over, pull through 2 loops (keep 2 loops on the hook).
- Yarn over, start the next dc, and yarn over, pull through all 3 loops on your hook.
- Skip 2 sts and make another dc2tog over the next two stitches.
- Complete the side with dc until the next corner.
- Repeat this for all sides.
Each round removes 4 stitches total (1 on each side in the center).
Continue decreasing rounds until the bag reaches your desired height.
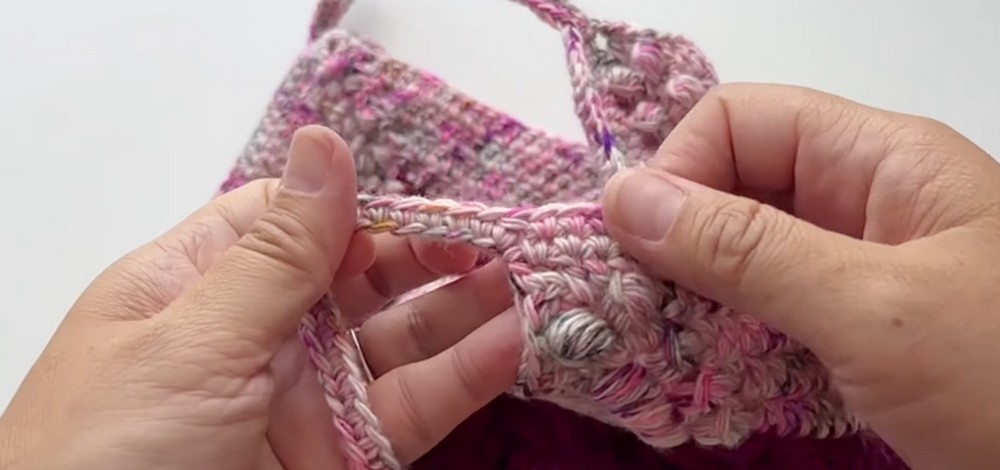
Straps
Step 1: Chain Straps
- Starting at a corner, ch 50 (or more for longer straps).
- Skip to the opposite corner and connect with a sl st in the corner space.
Step 2: Reinforce the Straps
- Single crochet along the chain strap:
- Insert hook into each chain and work sc to make the strap thicker.
- Join with sl st at the opposite corner.
- Repeat for the second strap.
Finishing Touches
Row of Reinforcement
- Work sc along the inner edge of the straps and bag top.
- In the valley between bag sides, work sc2tog to tighten the shape.
Invisible Join
- Cut yarn, leaving a long tail.
- Use a tapestry needle:
- Skip the standing sc at the start and insert the needle into the next stitch (under both loops).
- Pull yarn through and then insert needle into the last stitch (back loop only).
- Securely weave in ends.
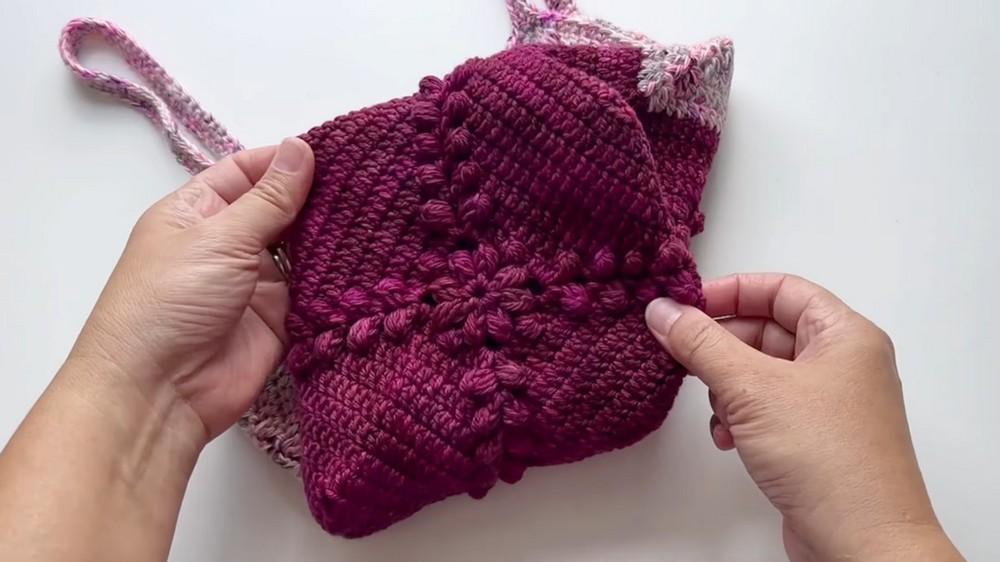
Final Notes
Your granny square bag is complete! Admire the sturdy base, playful bobble accents, and clean lines from the invisible join. Adjust colors, dimensions, or straps for customization.