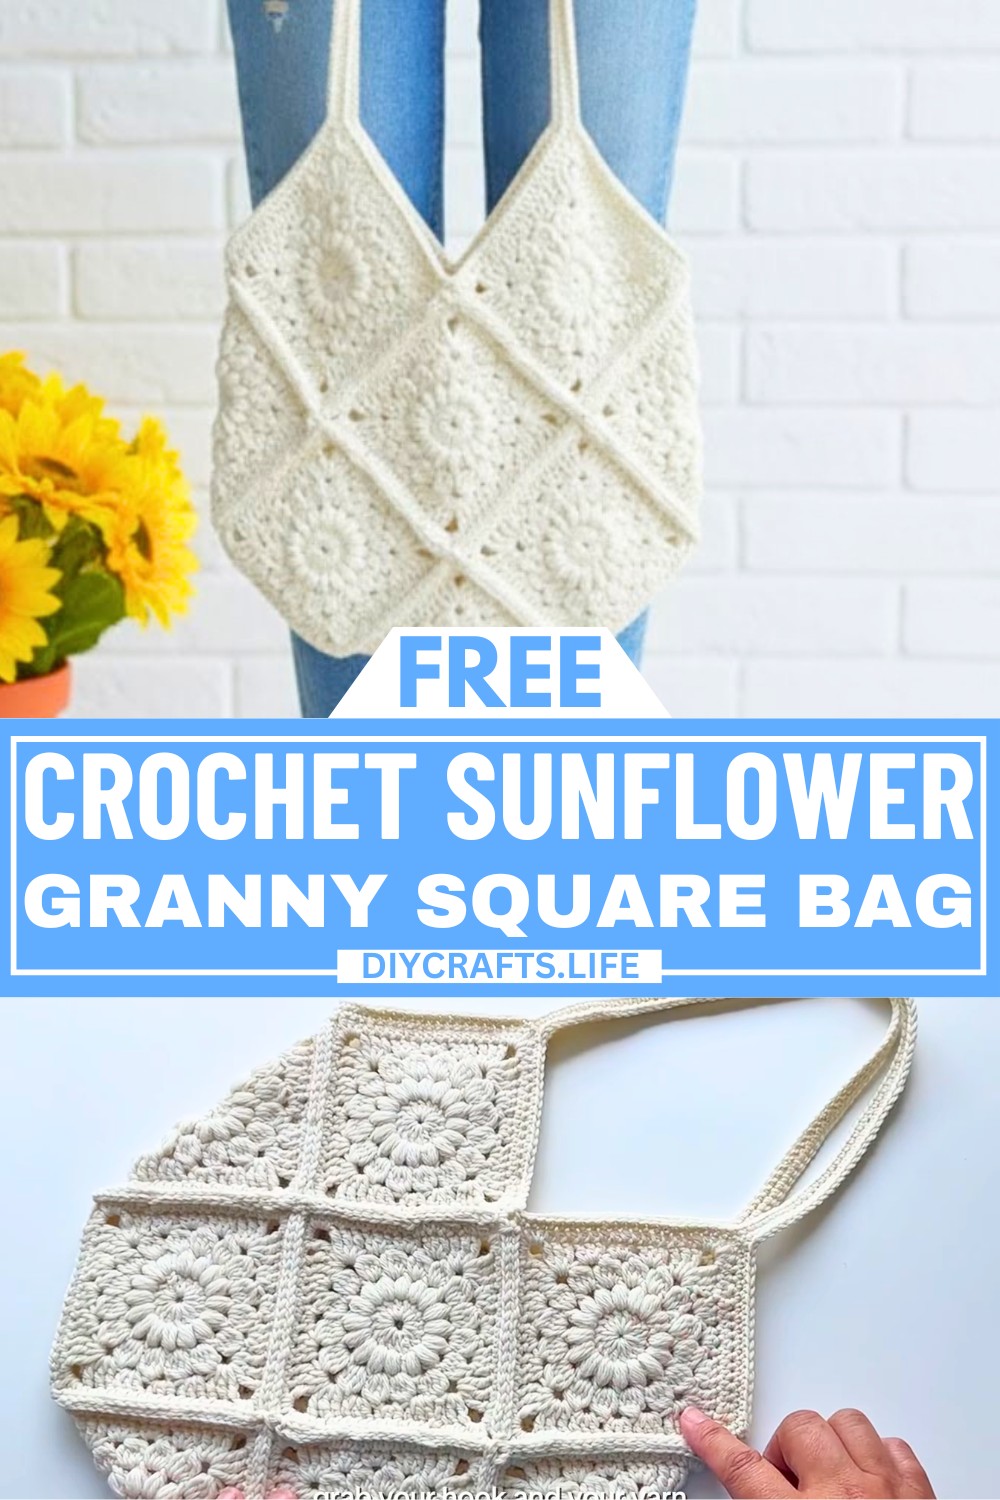
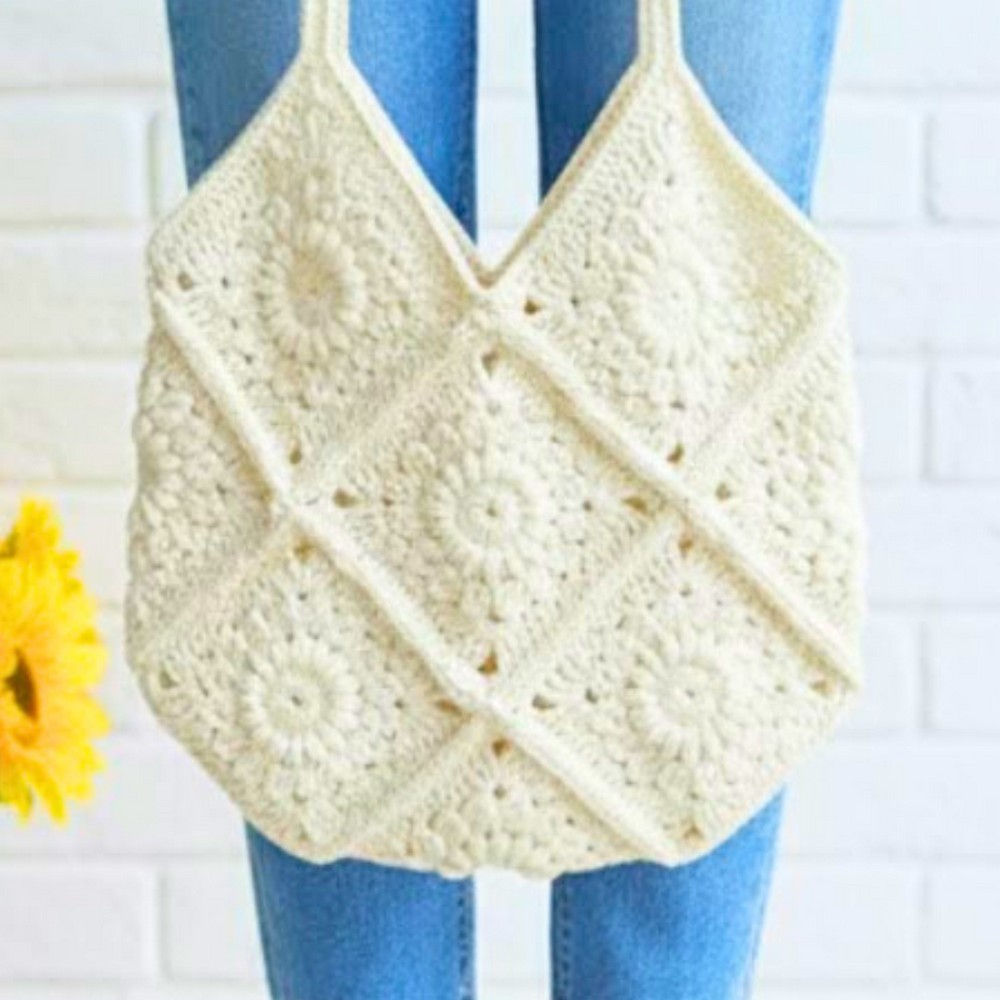
A sunflower granny square bag is the perfect blend of beauty and practicality! With its warm, sunflower-inspired design, this Crochet bag stands out as a wonderful accessory for everyday use. It’s light, cheerful, and roomy enough to carry books, groceries, or even yarn for your next crochet session. Plus, it’s simple to make one yourself, even if you’re new to crocheting.
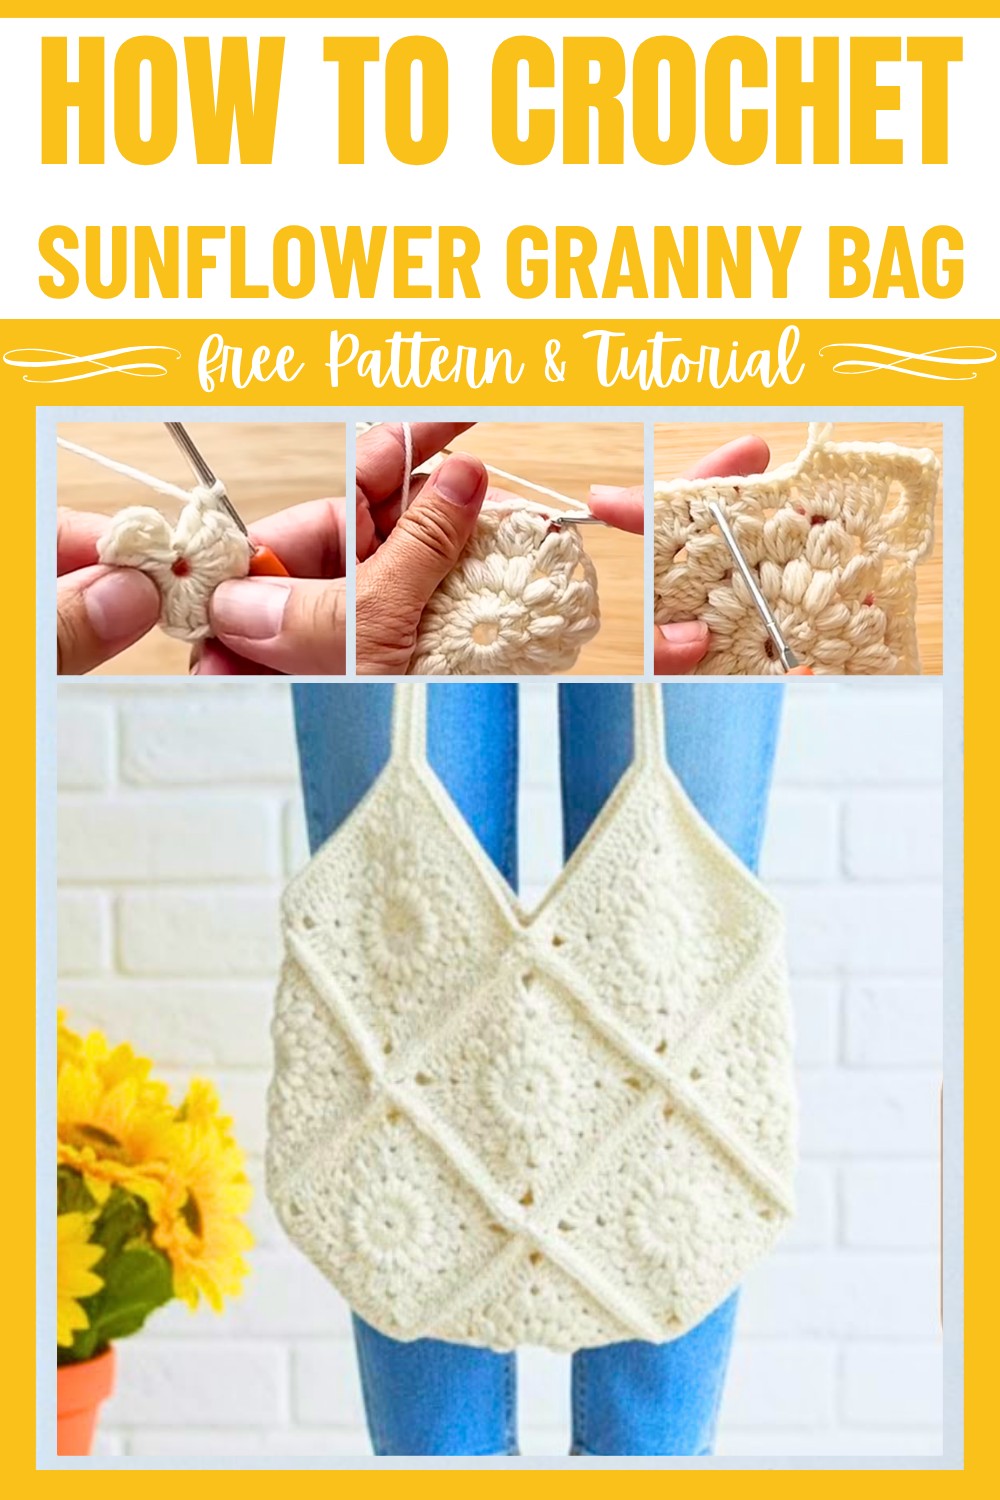
To make this bag, you first create small sunflower granny squares using basic crochet stitches. Once the squares are ready, they’re joined together to form the bag’s unique shape. The added straps are sturdy but stylish, making the bag comfortable to carry. The pattern is forgiving, so you can choose your favorite colors and yarn textures to make it your own.
Credit Tasty Dumpling Living
Materials & Tools Needed
- Yarn: Extra-fine American Merino wool (or any yarn of your preference, ideally soft-textured).
- Hook Size: 3 mm crochet hook.
- Tapestry Needle: For weaving in ends and seam finishing.
- Scissors: For cutting the yarn.
- Stitch Markers: Optional, to identify starting/ending points.
Finished Size
Measurements:
- Width: ~11 inches (28 cm).
- Height (without straps): ~8 inches (20 cm) from short side to the bottom.
- Height (with tall parts): ~10.5 inches (26.5 cm).
Customization Ideas:
- Experiment with different yarn colors for the sunflowers and background.
- Adjust the strap length to suit your style (tutorial straps are ~14 inches or 35 cm long).
- Add a fabric lining to the inside of the bag for extra durability.
Pattern Abbreviations & Terminology
- ch: Chain.
- sl st: Slip Stitch.
- sc: Single Crochet.
- dc: Double Crochet.
- tr: Treble Crochet.
- hdc: Half Double Crochet.
- mr: Magic Ring.
- ps: Puff Stitch or Pineapple Stitch.
- rep: Repeat.
Step-By-Step Detailed Instructions
Sunflower Granny Square Pattern
You’ll need 13 granny squares in total for this bag. Here’s how to create one square:
Round 1: Double Crochet Center
- Start with a magic ring (mr). Wrap the yarn around your index finger, forming an "X". Insert the hook under the "X", pull up a loop, and create ch 1 to secure.
- Ch 3 (counts as 1st dc), then work 15 more dc into the magic ring (total = 16 dc, including ch 3).
- Tighten the magic ring.
- Join to the top of the ch 3 with a sl st to close the round.
Round 2: Puff Stitch Round
- Ch 1. Make 1 puff stitch (ps) in the same stitch as the sl-st join:
- Pull up the loop slightly to make it taller.
- Yarn over, insert hook into the stitch, pull up a loop (do this 3 times). You’ll have a puff with 7 loops on the hook.
- Yarn over, pull through all 7 loops, then ch 1 to lock.
- Ch 1 (space between puffs).
- Make 16 ps, one in each of the previous round’s dc stitches, with ch 1 between each ps.
- Sl st to the top of the first ps to close the round.
Round 3: Pineapple Stitch Round
- Slip stitch to the space between puff stitches. Ch 1.
- Work the pineapple stitch (ps) as follows:
- Pull up a loop, yarn over, pull through 2 loops (repeat 4 times).
- When you have 5 loops on the hook, yarn over, pull through all loops, and ch 2.
- Repeat this pineapple stitch (1 ps + ch 2) into each space between puff stitches (16 total).
- Sl st to the first ps of the round to close.
Round 4: Squaring Up the Sunflower
- Slip stitch to the next space (center between pineapples). Ch 3 (counts as 1st tr).
- Work 2 tr + ch 3 + 3 tr into the same space (this forms your first corner).
- Into the next space:
- Work 3 dc (side section).
- Into the next space: Work 3 hdc (side section).
- Into the next space: Work 3 dc again (side section).
- For the next space (corner space): Work 3 tr + ch 3 + 3 tr.
- Repeat the corner and side pattern 3 more times. You’ll end up with a square shape.
- Sl st to the top of the initial ch 3 to close this round.
Round 5: Final Edging
- Ch 1, then work 1 hdc in each stitch along the sides.
- In the corner spaces, work 3 hdc + ch 3 + 3 hdc.
- Continue all the way around, ensuring the edges are even.
- Finish with an invisible join using a tapestry needle.
Assembly of the Bag
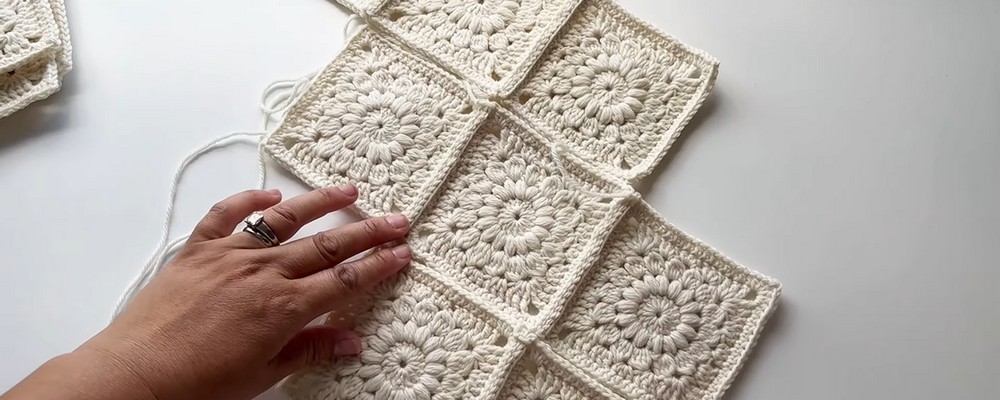
- Create 13 granny squares in total.
- Lay out the squares in the required arrangement:
- Select 3 for the front, 3 for the back, and the rest distributed for the sides and bottom.
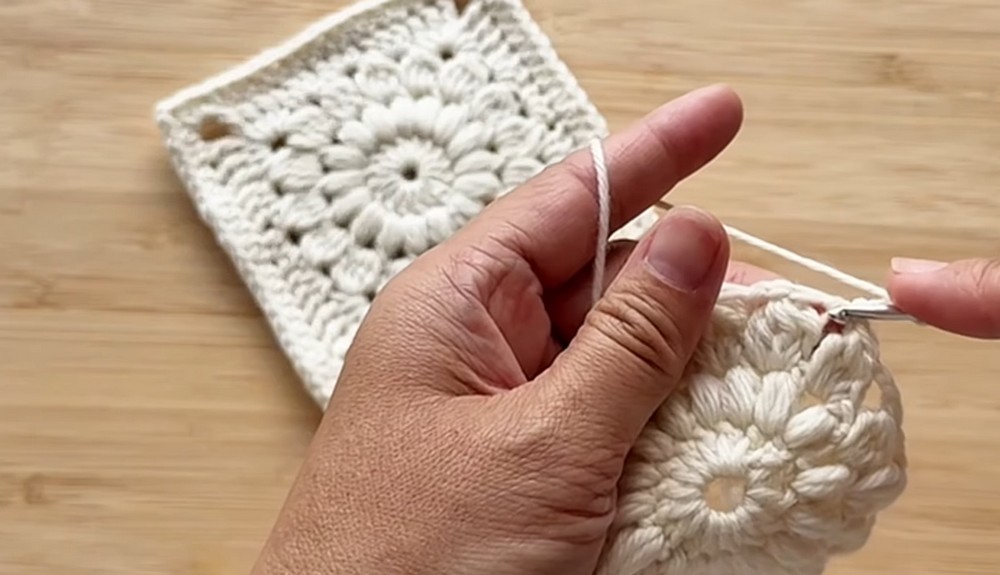
- Joining the Squares:
- Hold 2 squares wrong side together. Using a slip knot and your hook, start slip stitching through both squares along their edges. Ensure both loops from each square are aligned and crocheted evenly.
- Repeat until all squares are joined into panels of 3x3 pieces, then assemble them into the shape of the bag.
- Leave long tails during assembly for extra seaming security.
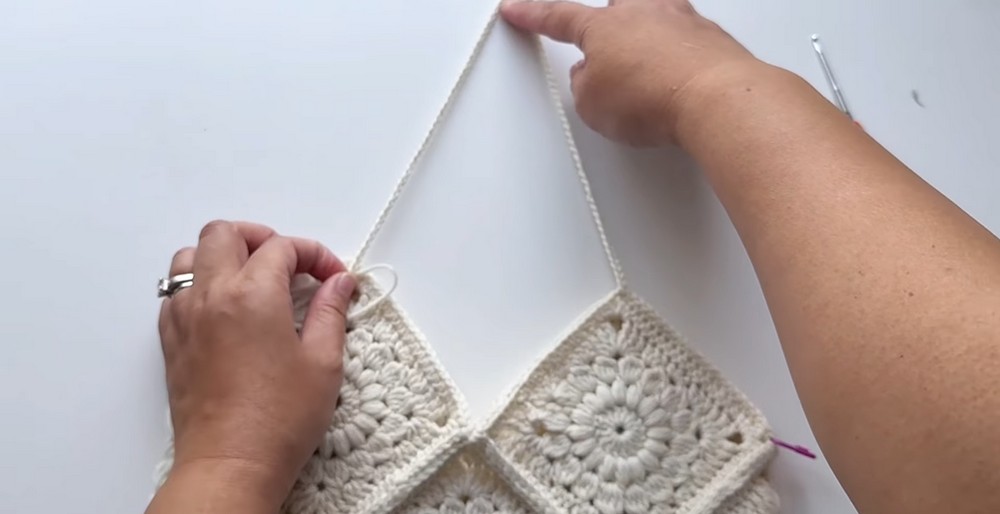
Creating the Straps
- Attach yarn to the corner of the bag and work sc evenly along the top edges. When you reach the first corner, make a chain:
- Ch 80 (adjust length as needed for straps).
- Attach this chain to the corresponding corner on the opposite side of the bag with a sl st.
- Continue sc along the opposite edge, then repeat the steps to create the second strap.
- Work 2-3 rows of sc around the straps for added sturdiness.
- Finish with an invisible join. Weave in all loose ends.
Finishing Touches
- Fasten Off: Secure all yarn tails and weave them neatly with a tapestry needle.
- Optional: Add a button, zipper, or lining for extra functionality.
- Block the bag if needed to set the shape.