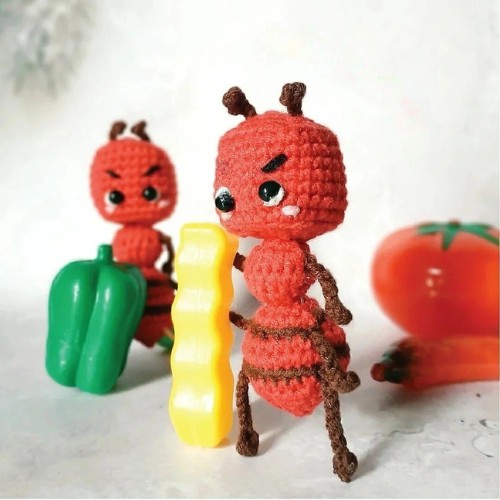
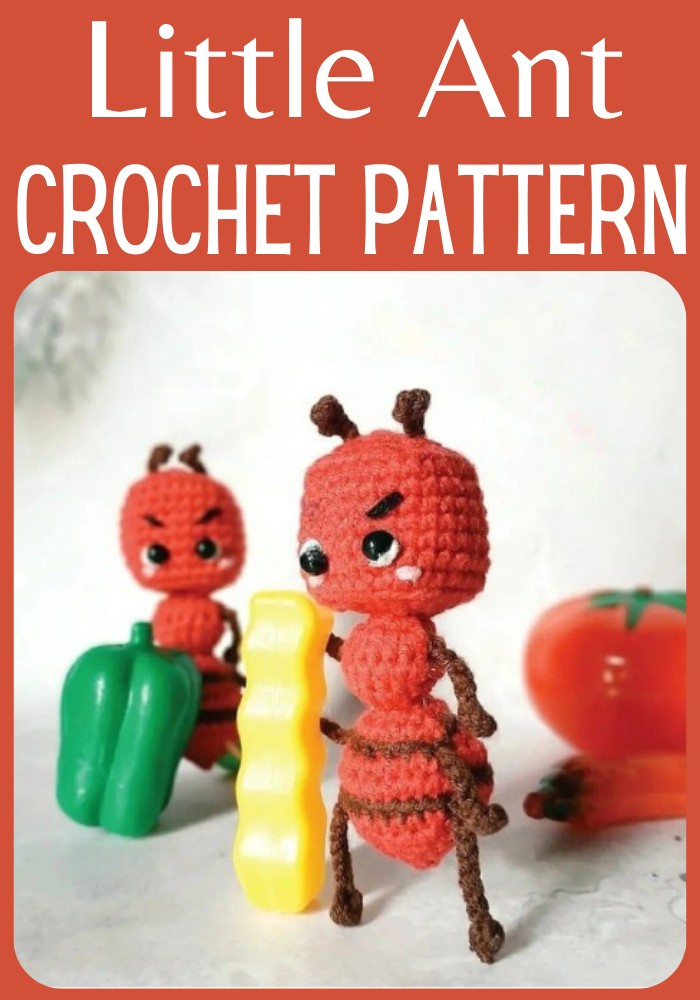
Step into the miniature world with this beautiful Crochet Little Ant Amigurumi Pattern. Celebrated for its detailed segmentation, expressive eyes, and tiny, meticulous antennas, this pattern offers a unique take on the classic ant form. The design's richness in earthy tones paired with precise crochet stitches bring these tiny creatures to life in an almost magical manner. Its appeal not only lies in its lifelike representation but also in the warmth and charm it adds to any space, making it perfect for nature enthusiasts, collectors, and anyone who delights in crafting whimsical, miniature worlds.
Materials And Tools:
- 2.0 mm hook or size suitable for yarn used.
- Tapestry needle
- 2 safety eyes size 4 mm
- Fiberfill for stuffing
- Yarn in the same size (I used 4 ply, cotton blend yarn) for the following colors: red, black, dark brown, white, pink
Abbreviations:
- R = Row/Round
- MR =Magic ring
- st = stitch/stitches
- sc = single crochet
- inc = sc increase
- dec = sc decrease
- hdc = half double crochet
- hdc inc = hdc increase
- ch = chain
- ss = slip stitch
- BLO = Back loops only
- FLO = Front loops only
- inc3 = 3 sc in the same st
- dec3 = crochet 3 st together
Step By Step Pattern
Head To Abdomen:
Start with red yarn to make the head.
- R1: 4sc in MR (4)
- R2: [inc3]x4 (12)
- R3 sc, inc3, [2sc, inc3]x3, sc (20)
- R4: 2sc, inc3, [4sc, inc3]x3, 2sc (28)
- R5: BLO 28sc (28)
- R6-11 (6 rounds): 28 sc (28)
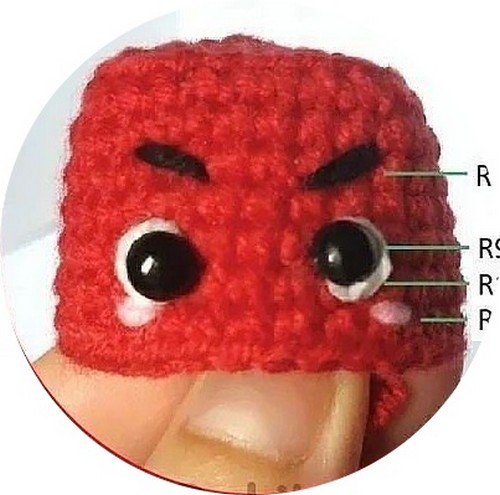
After working R11, place the safety eyes between R9-10 at the front side (the opposite side of the stitc marker), 4 st apart.
Then embroider:
the white of the eyes (white)
eyebrow at R7 (black)
blushing (pink) between R10-11
- R12 : BLO 2sc, dec3, [4sc, dec3]x3, 2sc (20)
- R13 : sc, dec3, [2sc, dec3]x3, sc (12)
Start stuffing the head with fiberfill.
- R14 : 6dec (6)
Continue to make the thorax.
- R15 : FLO 6inc (12)
- R16 : [sc, inc]x2, [hdc, hdc inc]x3, sc, inc (18)
R17 : 6sc, 9hdc, 3sc (18) - R18 : [sc, dec]x6 (12)
Start stuffing the thorax with fiberfill.
- R19 : 6dec (6)
Continue to make the abdomen.
- R20 : FLO 6inc (12)
- R21 : [sc, inc]x6 (18)
- R22 : Change to dark brown: 18ss (18)
- R23 : Change to red: BLO [2sc, inc]x6 (24)
- R24 : [5sc, inc]x4 (28)
- R25 : Change to dark brown: 28ss (28)
- R26 : Change to red: BLO [7sc, dec]x3, sc (25)
- R27 : [3sc, dec]x5 (20)
- R28 : [2sc, dec]x5 (15)
Start stuffing the abdomen with fiberfill.
- R29 : [sc, dec]x5 (10)
- R30 : 5dec (5)
FO and leave a long tail to complete. Using a tapestry needle, pass the tail through all FL of the last round, and pull. Make a knot and hide the yarn inside the doll.
Antennas:
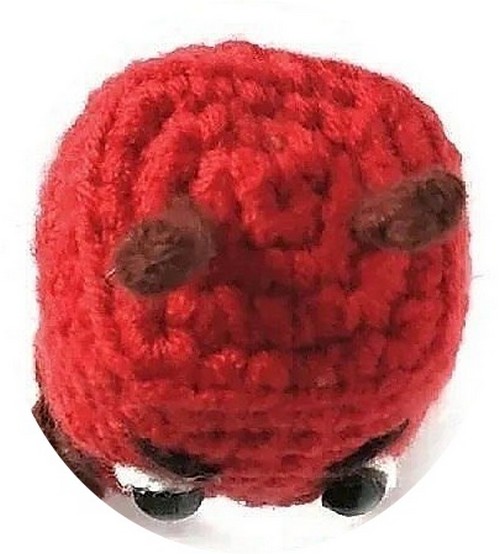
- Start with dark brown yarn to make the antennas on the upper side of the head.
- Between R2-3, make a loop (see picture), then make 5ch, 1sc at second ch from hook, 1ss. Hide and secure the tails. Make 2 antennas side by side.
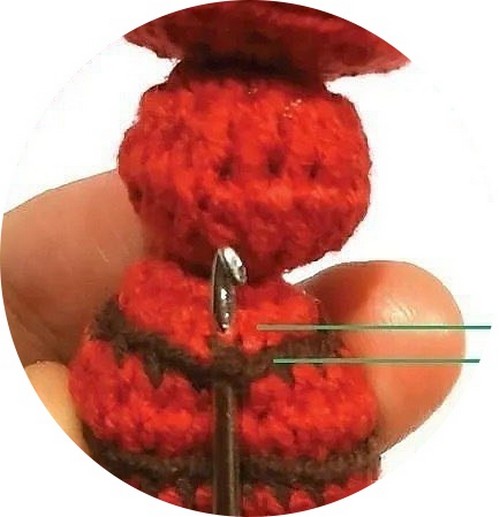
Legs:

- Start with dark brown yarn to make the legs which are located at the left and right side of the abdomen.
- Between R24-25, make a loop (see picture), then make 10ch, 1sc at second ch from hook, 1ss. Hide and secure the tails. Make 2 legs.
Arms:
- Start with dark brown yarn to make the arms. We will make 4 arms, at the left and right side of the body. 2 arms are located at the thorax, between R16-17. The other 2 are located at the abdomen, between R21-22 (see pictures).
- Make a loop, then make 8ch, 1sc at second ch from hook, 1ss. Hide and secure the tails.
Here, Ant amigurumi is ready.
Designer: Chibiscraft On Instagram


