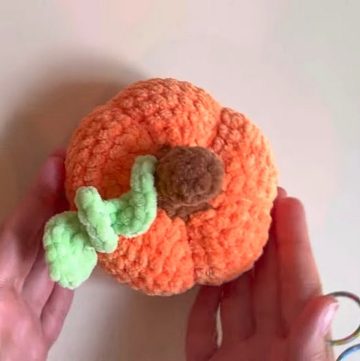
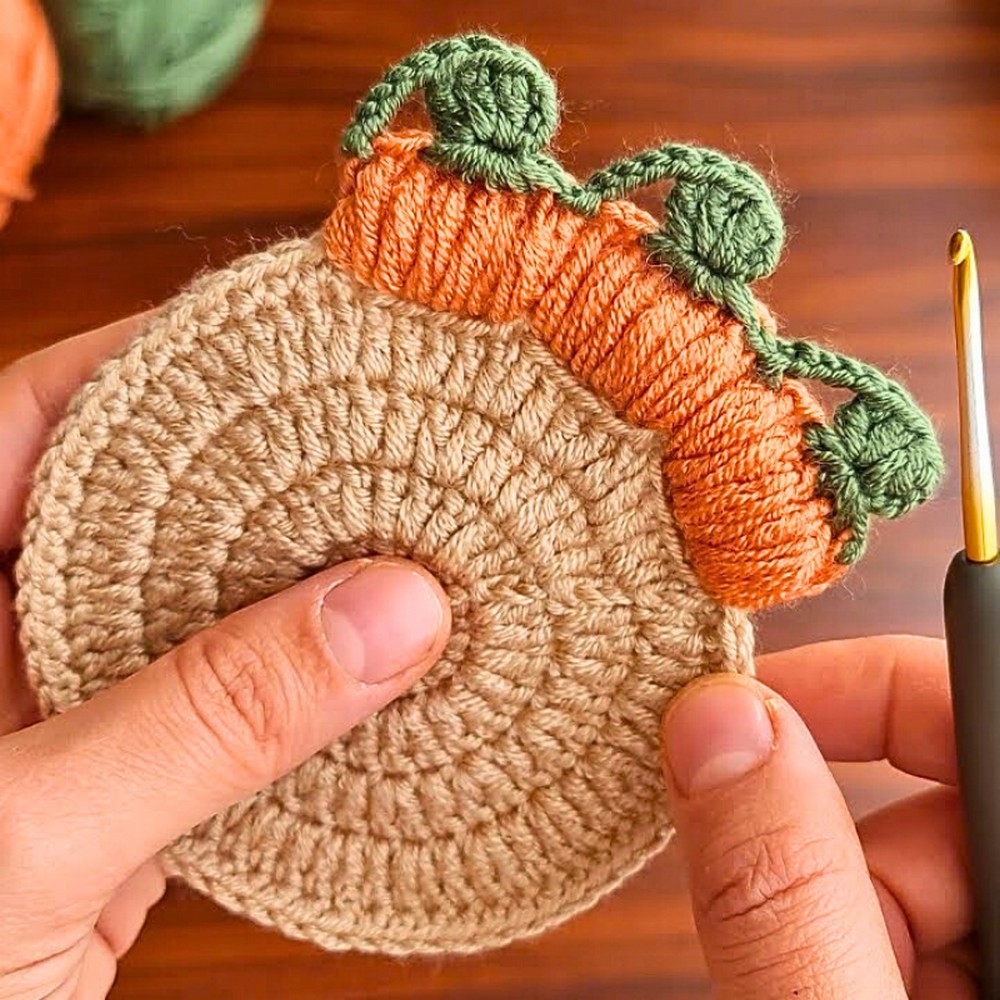
Create adorable crochet pumpkin coasters that bring charm to your decor. These vibrant creations are both stylish and functional, perfect for fall-inspired themes or everyday use. Their versatility shines through as they brighten up your table while keeping surfaces protected.
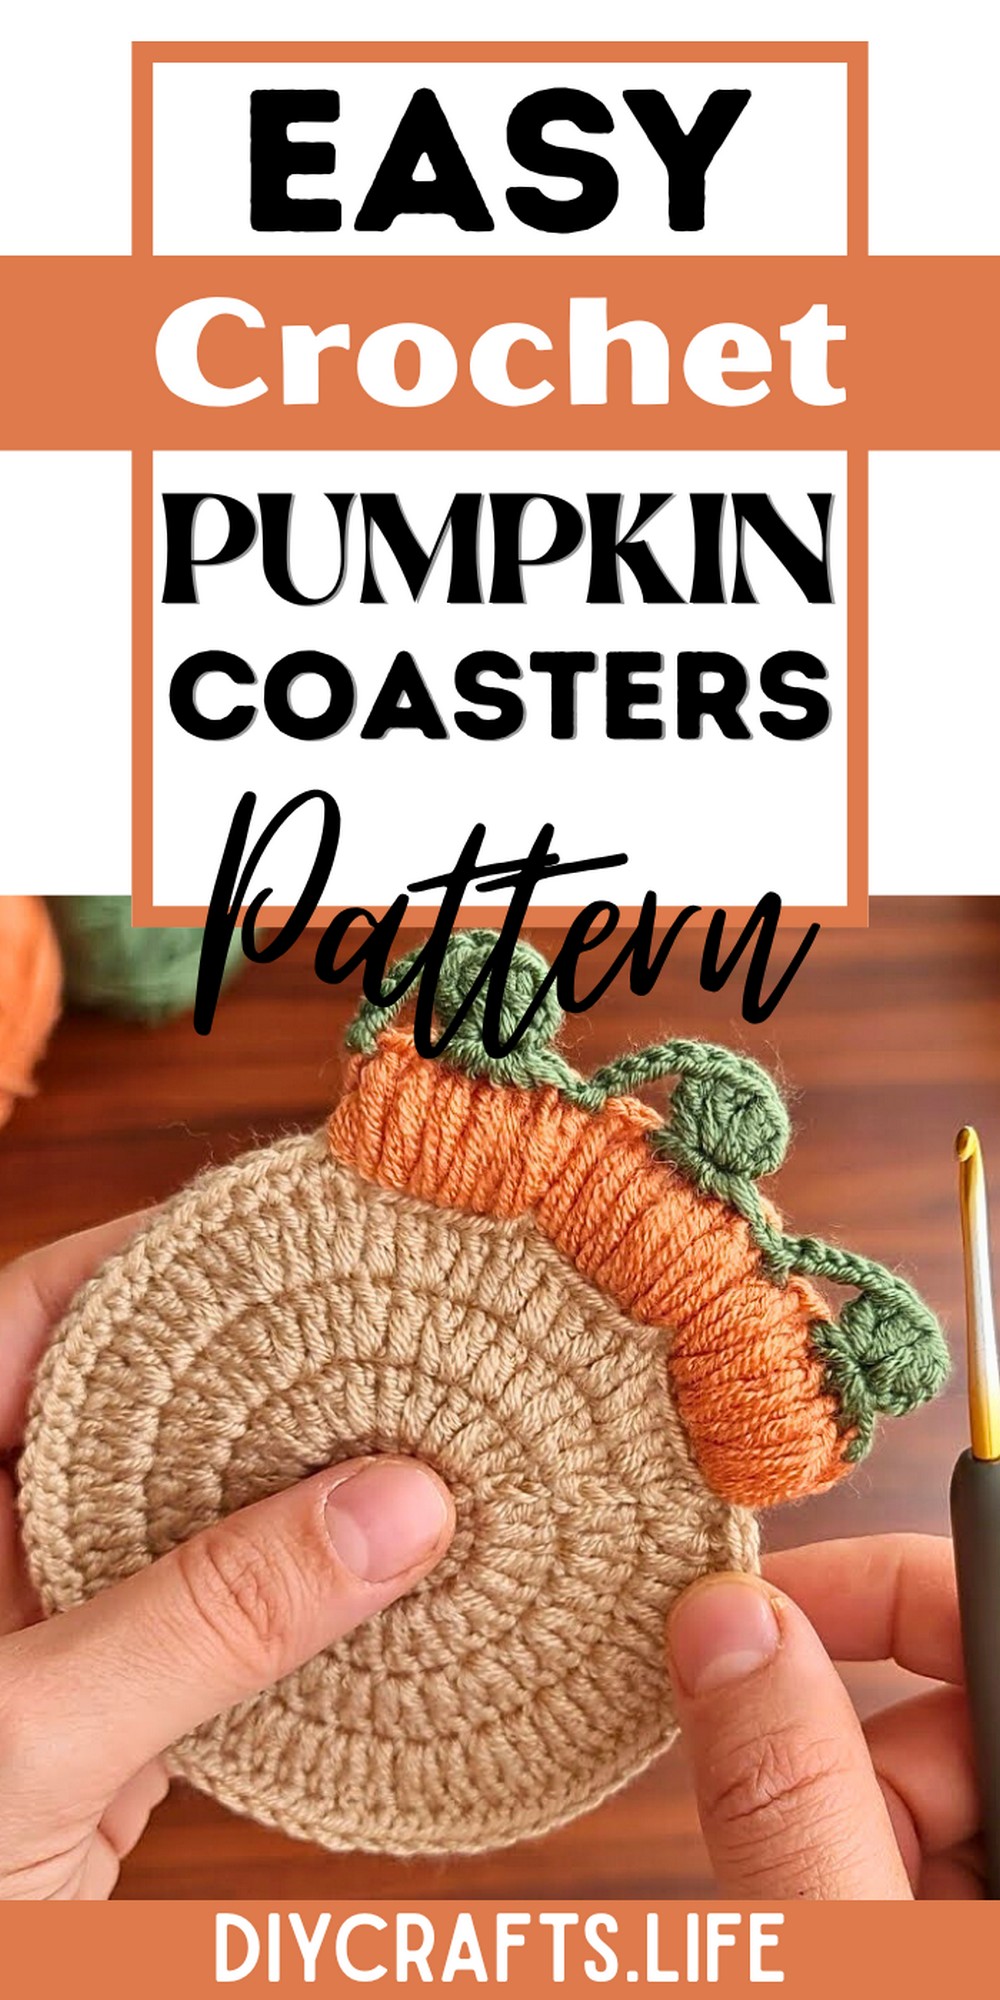
These pumpkin coasters are durable, washable, and crafted to last. They're perfect for hosting hot drinks or cold beverages, offering functionality with an aesthetic touch. Their intricate design makes them attractive as seasonal decorations or practical accessories for everyday use at home or gifts for loved ones.
Crochet Pumpkin Coasters
Whether you're a beginner or experienced in crochet, this project is perfect for all skill levels. You can personalize the colors and tweak the size for unique results. With simple steps, this is a fun, creative way to craft and enjoy something functional while expressing your artistic style.
Materials and Preparation
To make your Cozy Crochet Pumpkin Coaster, you will need the following materials:
- Yarn: Medium-weight (4) yarn in orange (for the pumpkin), green (for the stem), and brown (optional for detailing). Cotton yarn is recommended for durability.
- Crochet Hook: Size H/5.0 mm.
- Additional Tools: Scissors, tapestry needle for weaving in ends, and a stitch marker (optional).
- Yarn Weight: This project works best with medium-weight yarn, but you can substitute as preferred. Adjust the hook size accordingly.
Abbreviations and Notes
Here is a list of abbreviations used in this pattern:
- CH: Chain
- SC: Single Crochet
- HDC: Half Double Crochet
- DC: Double Crochet
- SL ST: Slip Stitch
- ST: Stitch(es)
- INC: Increase (2 SC in the same stitch)
- BLO: Back Loop Only
Notes:
- This pattern is worked in the round. Use a stitch marker to mark the first stitch of each round if needed.
- Adjust your tension to achieve consistent stitches.
- The pumpkin design is customizable. You can play with stem lengths and shape details.
Gauge, Approximate Size, and Pattern Notes
- Gauge: Approximately 14 SC by 16 rows = 4 inches (10 cm), worked flat.
- Finished Dimensions: The coaster should measure about 4.5 inches in diameter when complete.
- Special Techniques: If you’re a beginner, this project is great for practicing increases and crocheting in the round. No swatch is needed for this project.
Step-by-Step Pattern
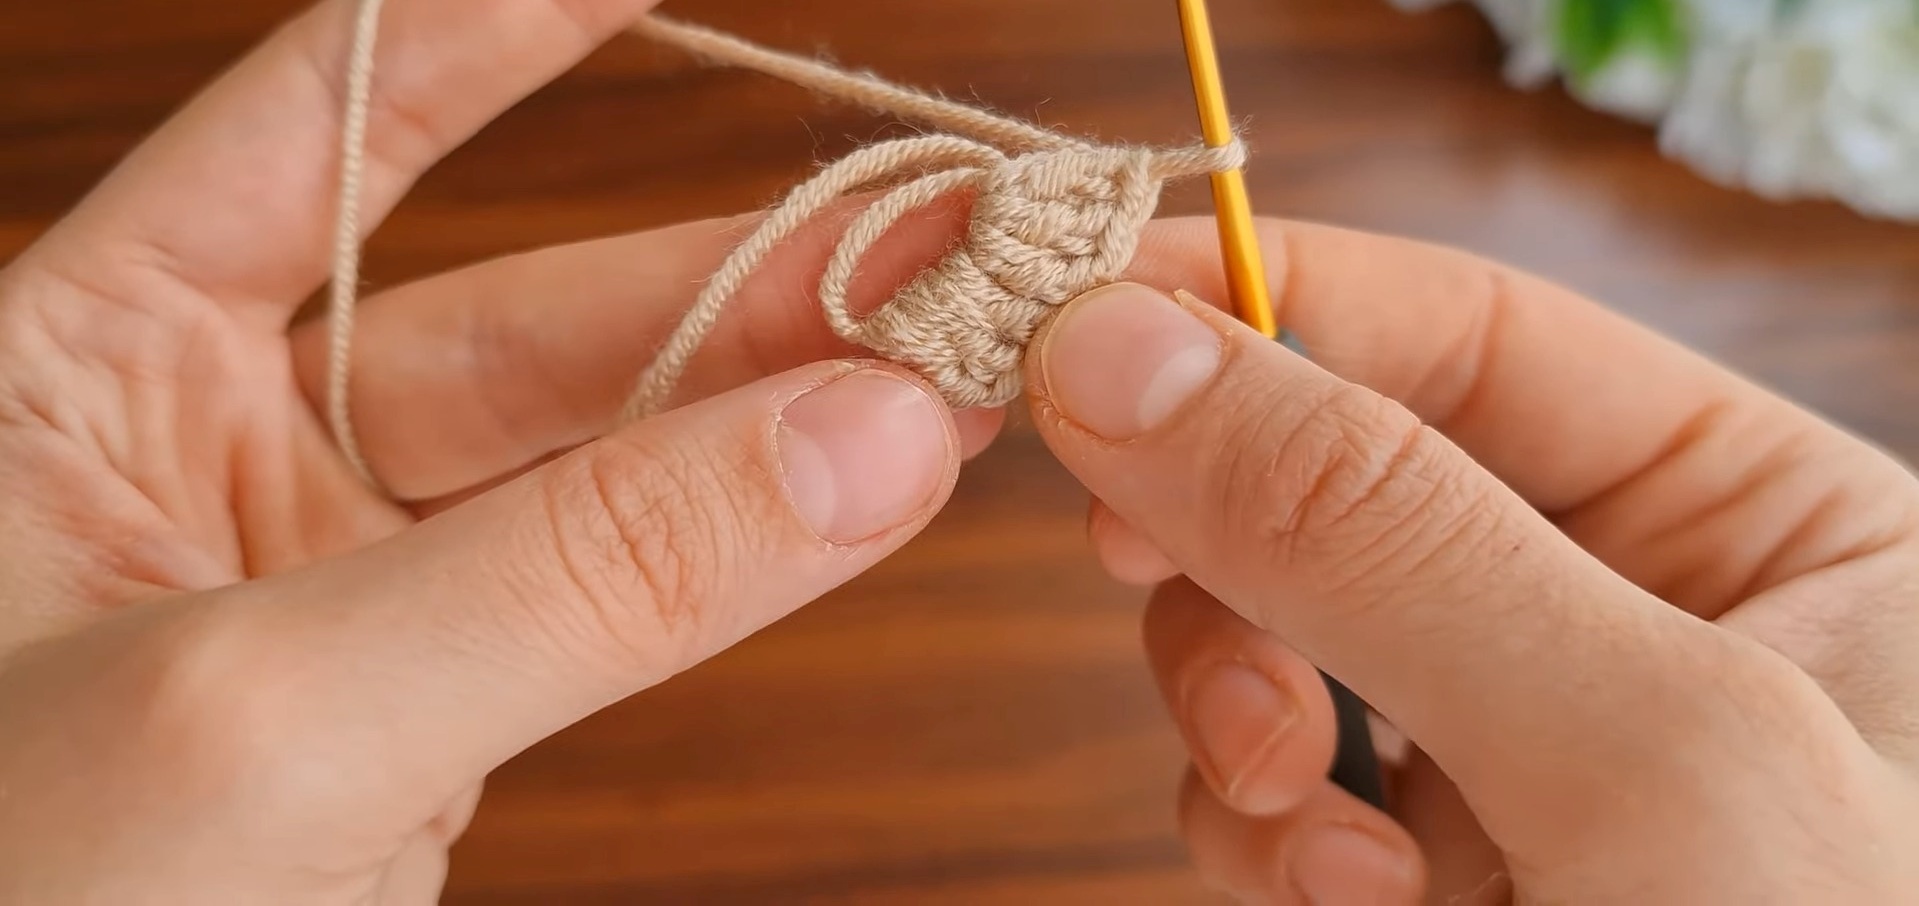
Step 1: Create the Pumpkin Base
- Start with a Magic Circle:
- Make a magic circle using the orange yarn. If unfamiliar, you can begin by chaining 4 and joining with a slip stitch to form a ring.
- Round 1:
- Work 8 SC into the magic circle (or chain space). Pull tight to close. SL ST into the first SC to join the round. (8 ST)
- Round 2:
- INC in every stitch (2 SC in each ST). SL ST to join. (16 ST)
- Round 3:
- INC in the first stitch, SC in the next stitch, repeat around. SL ST to join. (24 ST)
- Round 4:
- SC in the first 2 stitches, INC in the third stitch, repeat around. SL ST to join. (32 ST)
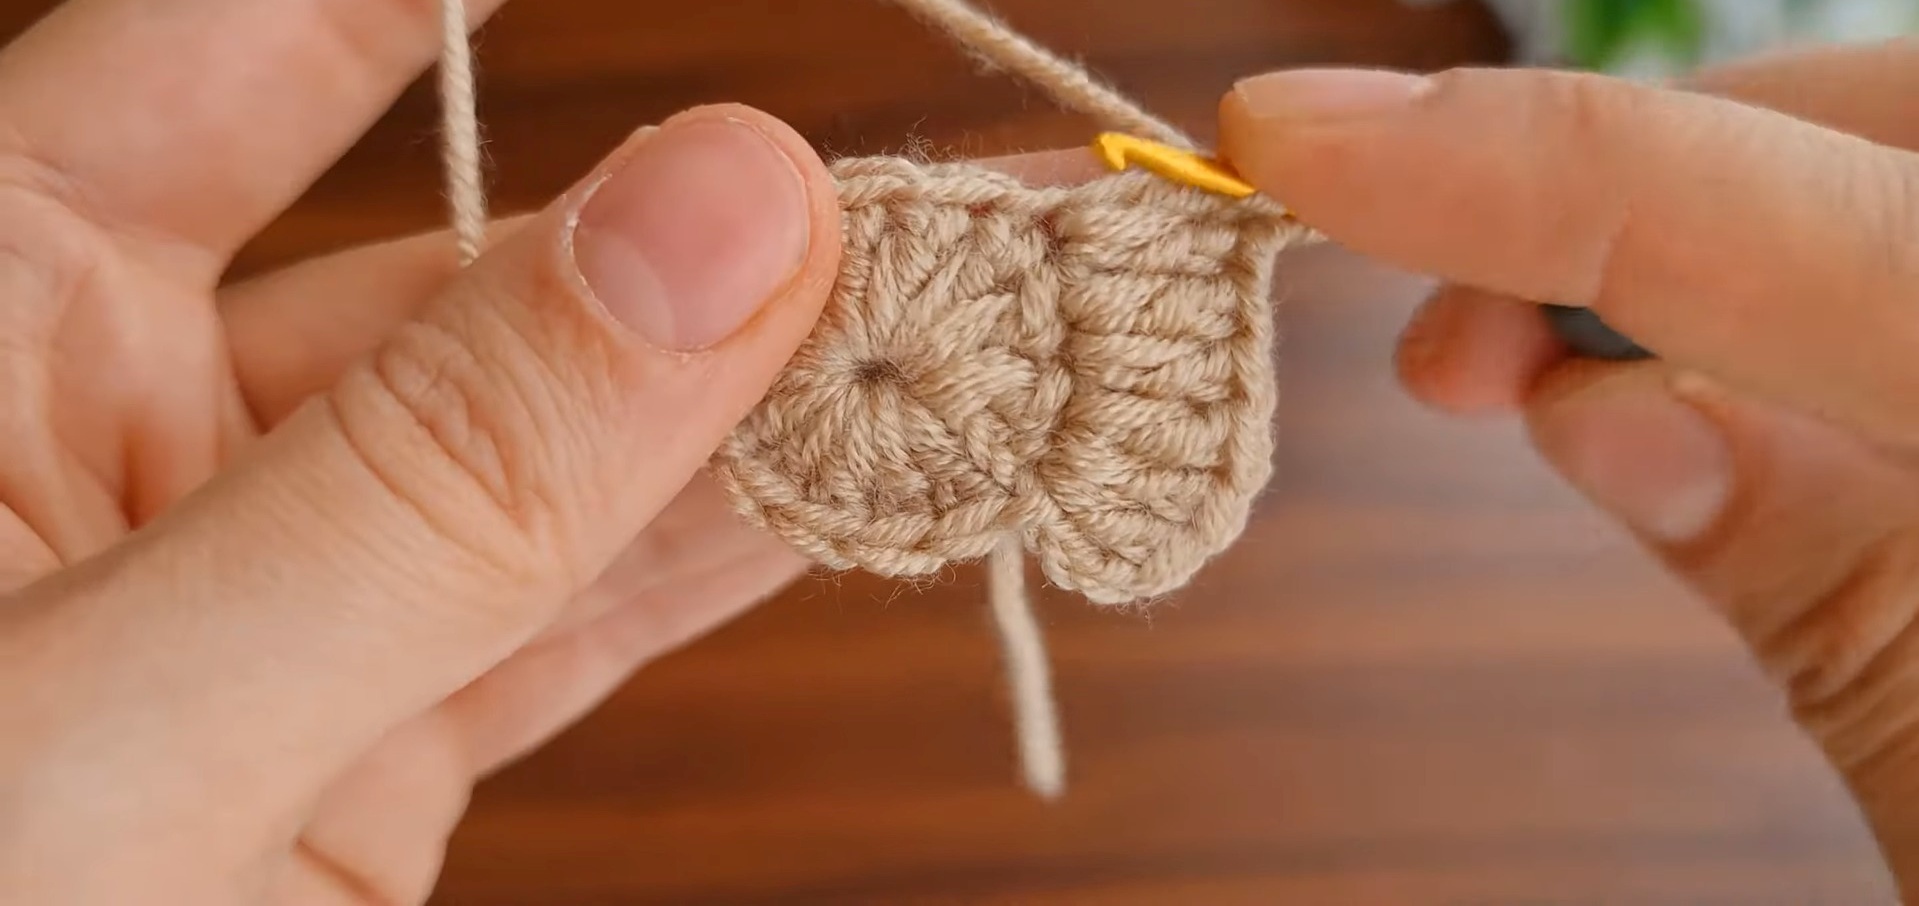
- Round 5:
- INC in the first stitch, SC in the next 3 stitches, repeat around. SL ST to join. (40 ST)
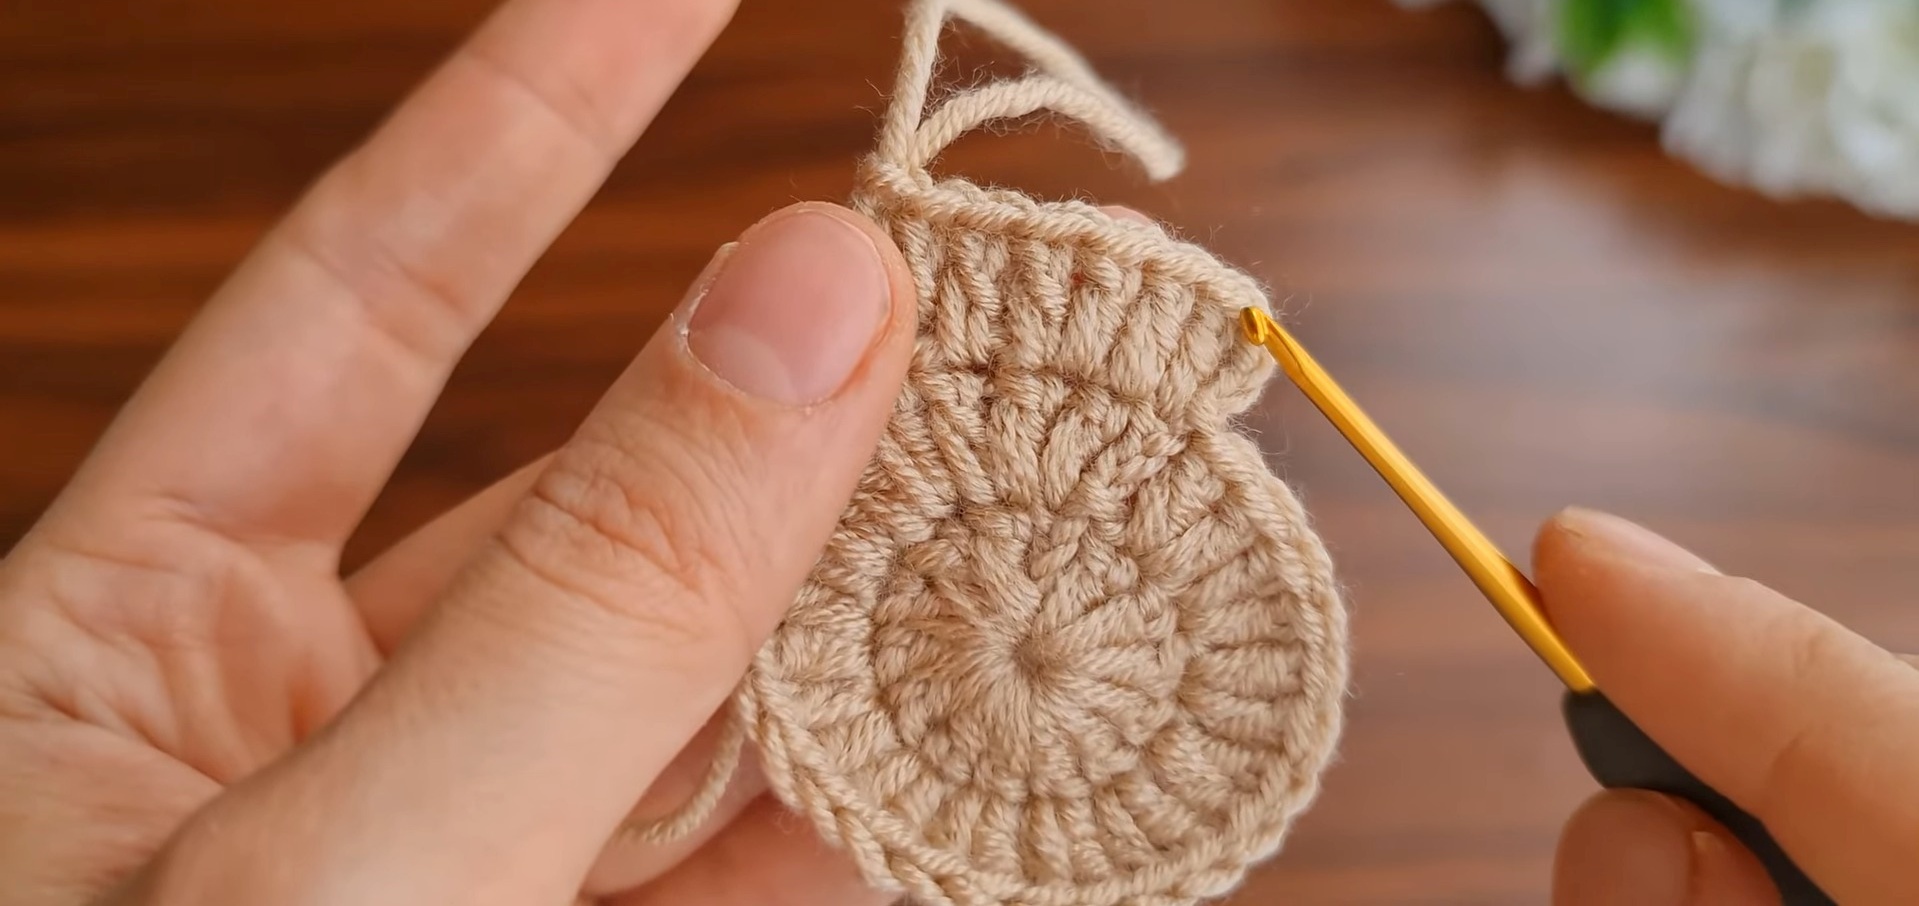
Step 2: Shape the Pumpkin
- With the yarn still attached, create "bumps" by working irregular stitches to mimic the grooves of a real pumpkin:
- SC in BLO (Back Loop Only) for the entire row to create a subtle indentation.
- For dimension, you can add bobble stitches or use yarn scraps to outline the grooves later.

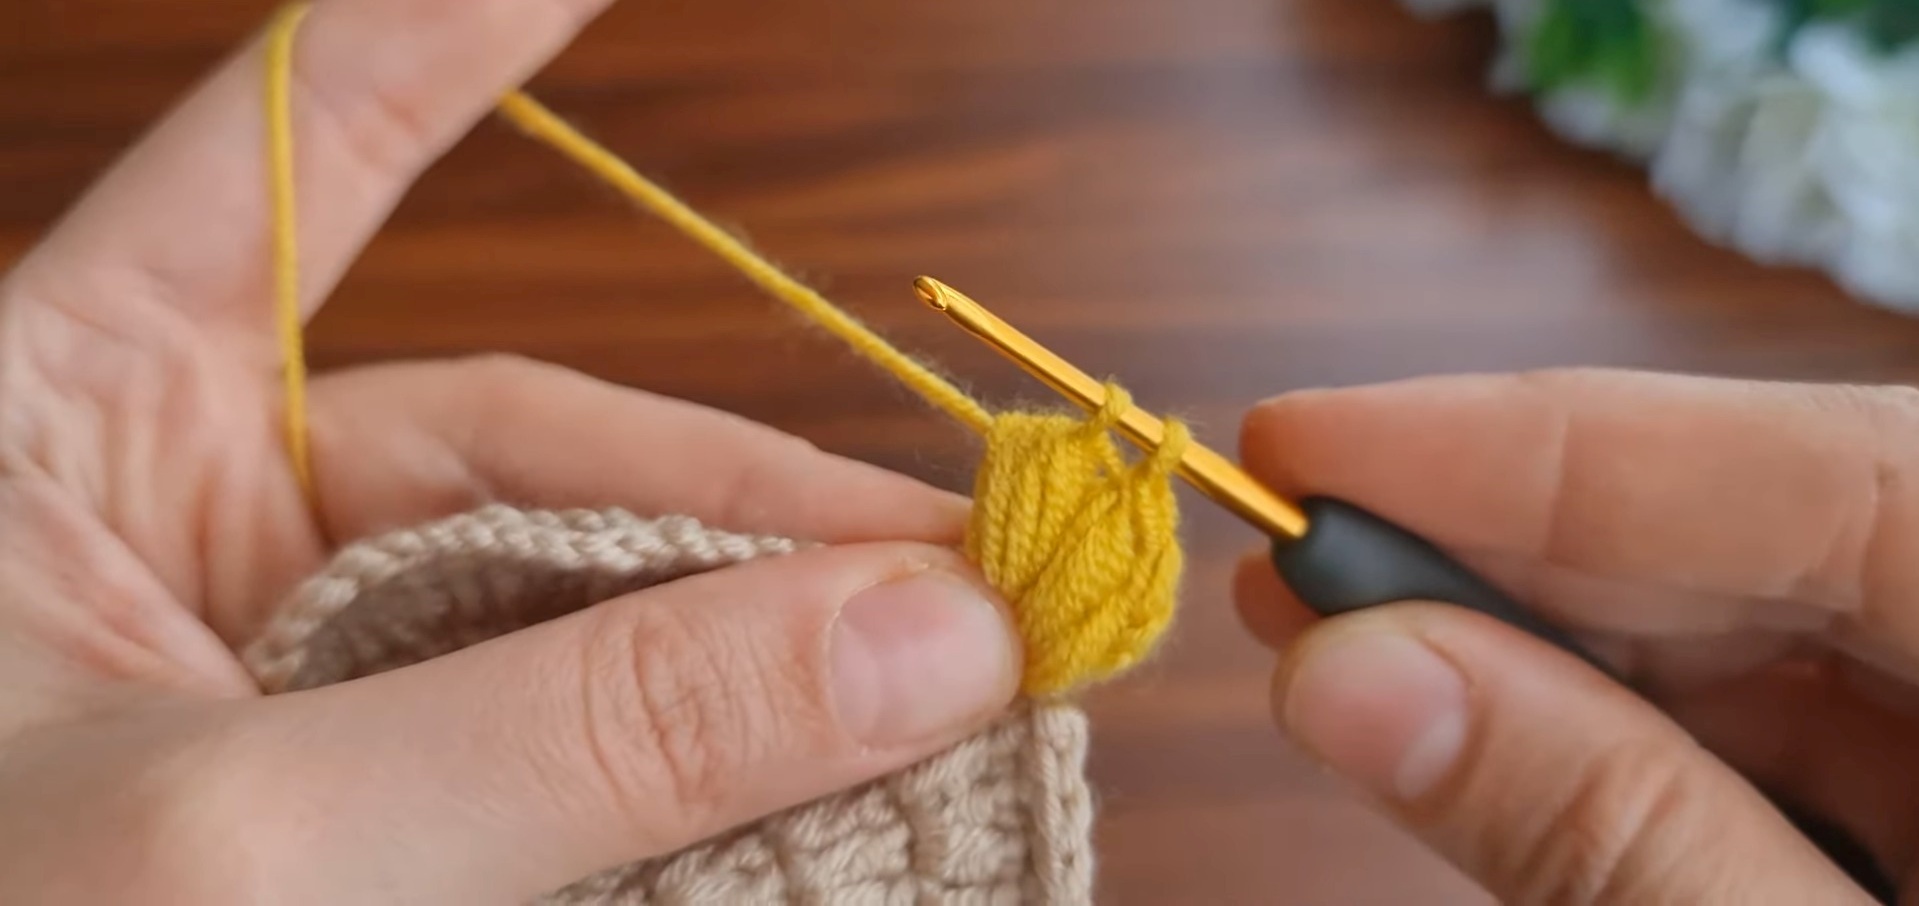
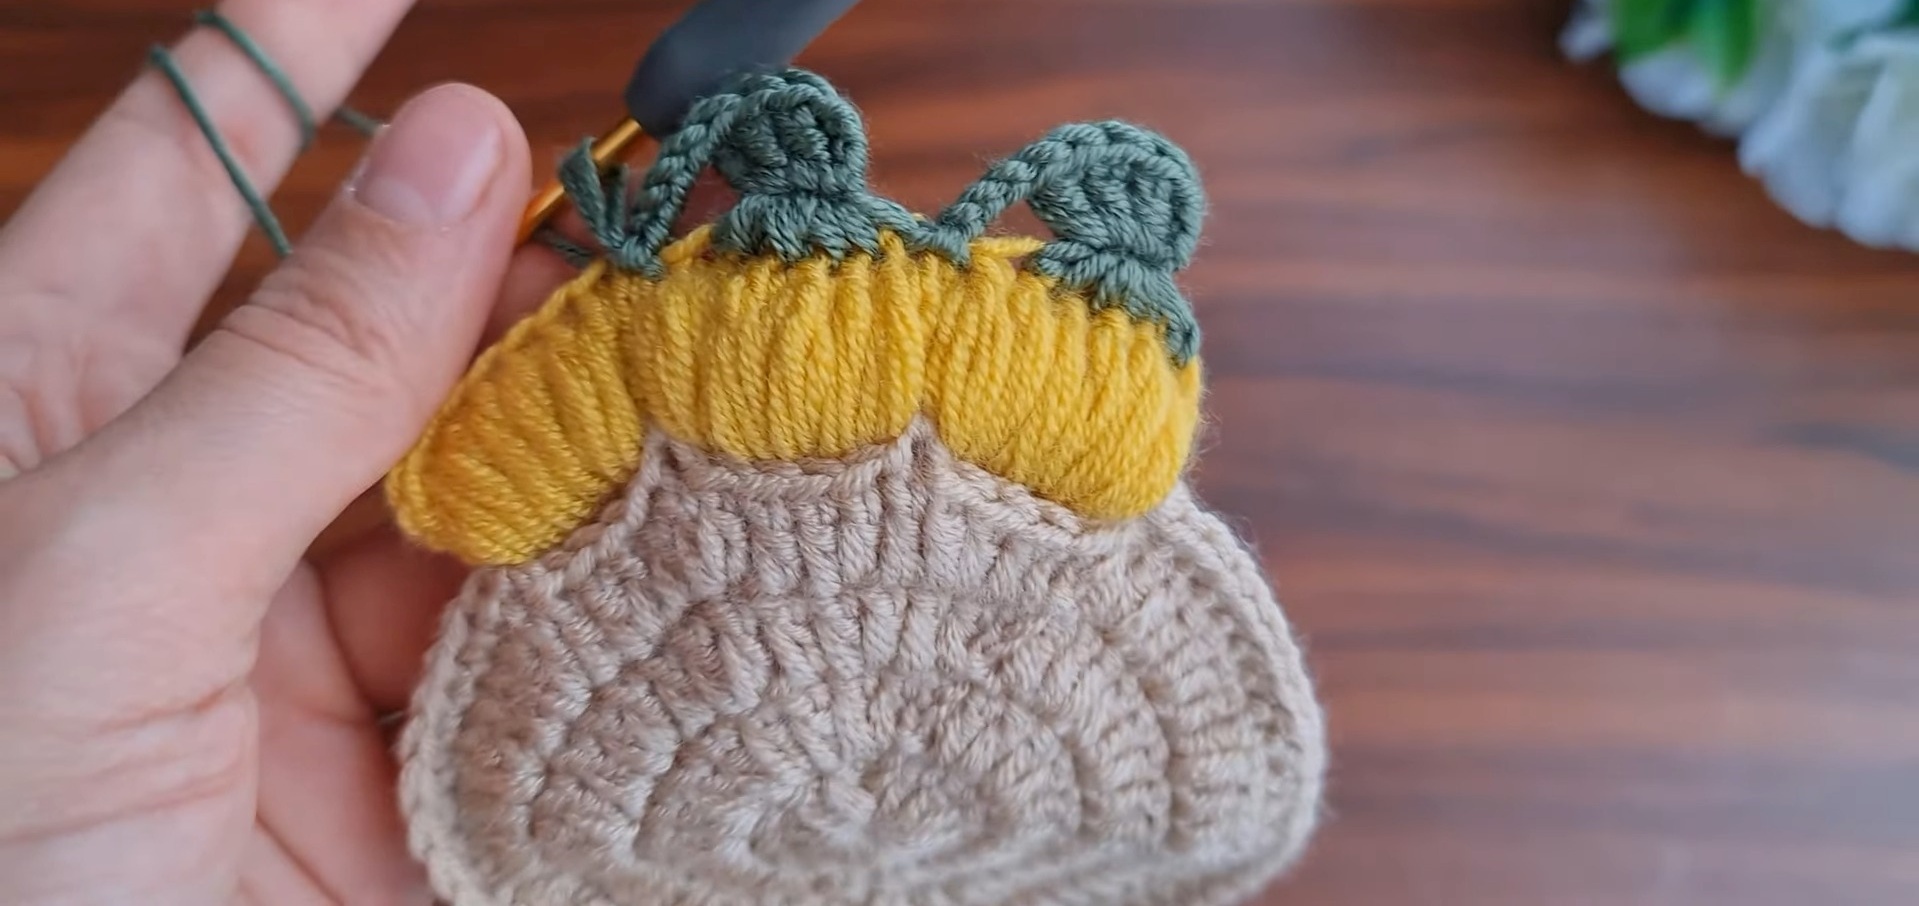
Step 3: Create the Stem
- Switch to green yarn.
- Attach green yarn with a SL ST into the top edge of the pumpkin. Work 5-6 SC in adjacent stitches to outline where the stem will go.
- Work CH 4, then SC back along the chain to create a "stem." You can make your stem wider or taller as needed.
Step 4: Add Final Details (Optional)
- If desired, use brown yarn to embroider stripes or add decorative detailing.
- Use the tapestry needle to weave in any loose ends.
Finishing Touches
- Block your coaster lightly by dampening it and shaping it with your fingers; leave it to air dry. This ensures flatness and even stitches.
- Pair your pumpkin coaster(s) with fall decor or use them as a whimsical hostess gift!
Pattern Question:
Question: Can the pattern be resized for larger or smaller coasters?
Answer: Yes! Simply adjust the number of stitches and rows in the pattern for a larger or smaller coaster. Beginners can follow basic steps to modify easily.
Conclusion:
Crochet pumpkin coasters are fun to make, practical, and eye-catching additions to your home. Their unique design and usability ensure they’re enjoyable to create and perfect for gifts or seasonal decor. Try this project and bring cozy charm to your space!