Create a spooky yet cute crochet Zombie Bee, a perfect addition to your Halloween decor or gift collection! Its unique green-and-black design, tiny wings, and stitched details bring personality to life, making it a versatile and eye-catching project for crochet lovers of all skill levels.
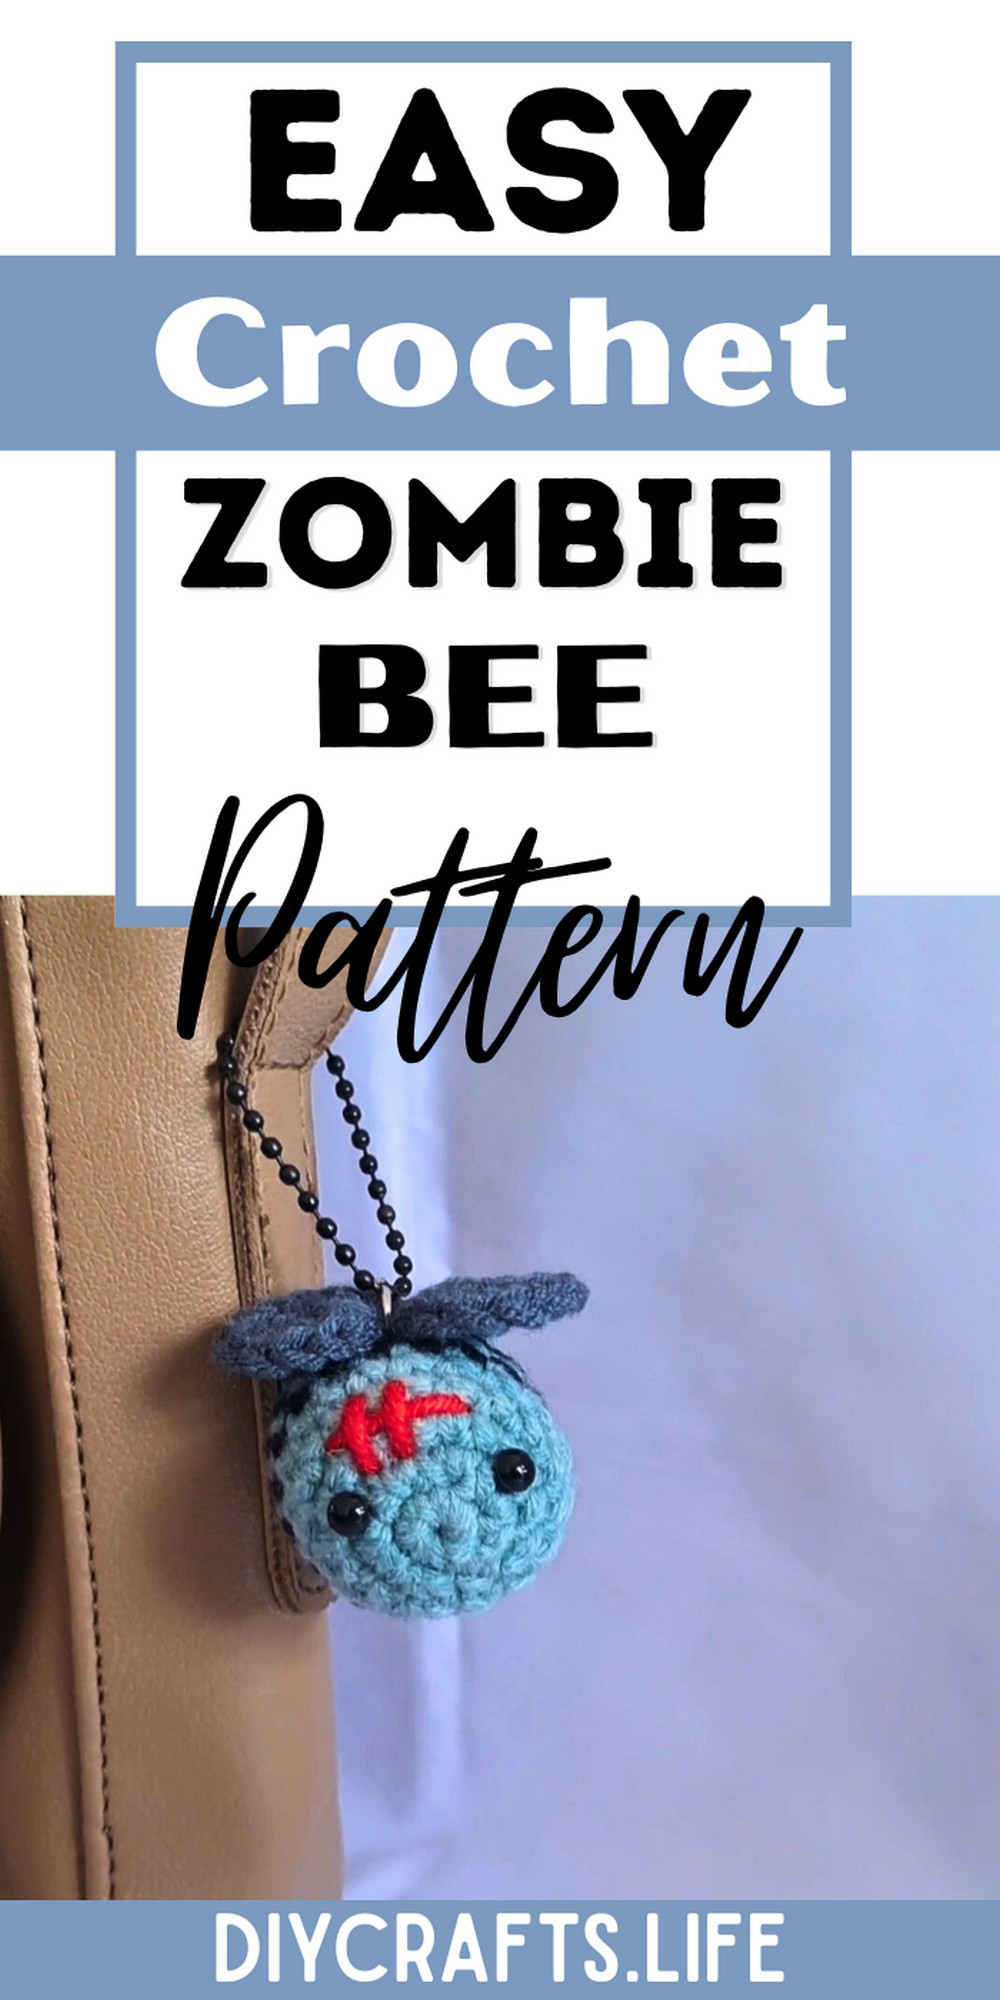
The crochet Zombie Bee is a decorative, soft, and durable hand-stitched project that can serve as a Halloween decoration, keychain charm, or imaginative gift. Its bold color contrasts, playful design, and textured wings ensure it’s a quirky and versatile keepsake for all occasions!
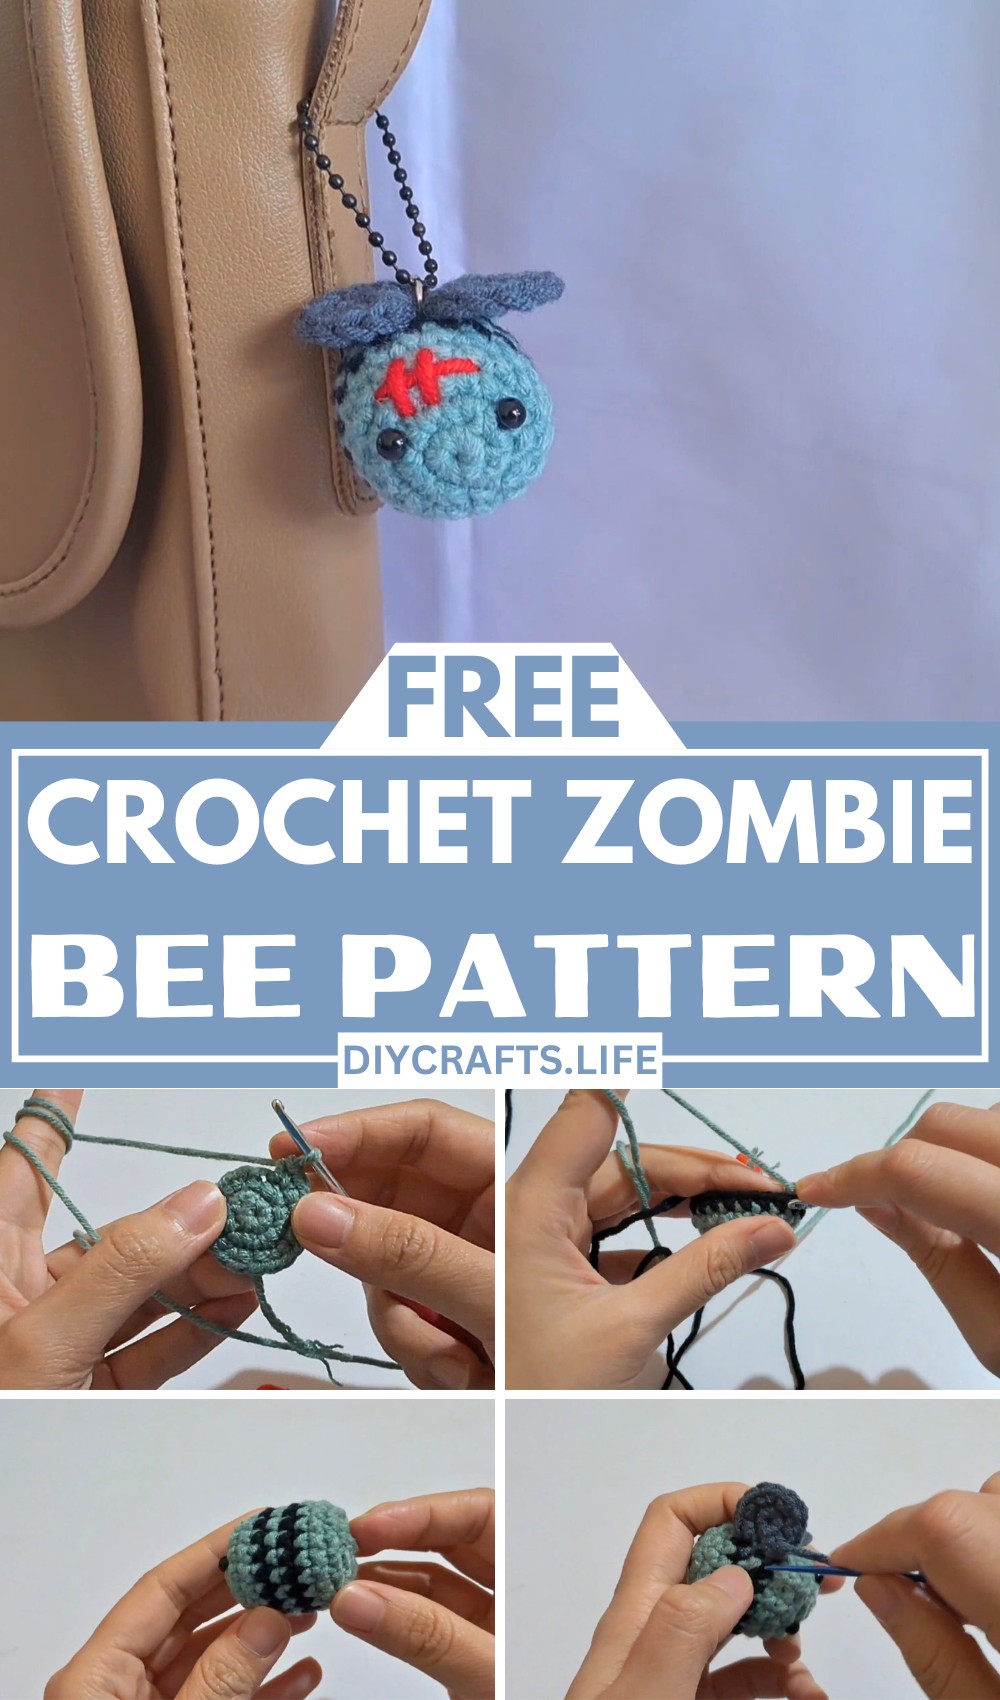
Crochet Spooky Zombie Bee
Crafting the Zombie Bee is beginner-friendly and fun for all skill levels! With options to customize color schemes or details like "stitched cuts" on the design, it has endless creative potential. Enjoy making this quick, spooky-cute item with simple stitches, suitable even for crochet newcomers.
Materials and Preparation
For this crochet Zombie Bee project, you will need:
- Yarn:
- Green yarn (for the body)
- Black yarn (for stripes)
- Gray yarn (for the wings)
- Red yarn (for embellishments like scars)
- Hook size: 3.5 mm crochet hook
- Additional tools:
- Scissors
- Stitch marker (optional, but helpful for marking the beginning of rounds)
- Tapestry needle (for sewing and weaving in ends)
- Polyester stuffing (to fill the bee’s body)
- 5 mm black safety eyes (or embroidery thread for eyes)
- Yarn weight: Recommended is light/medium weight yarn (e.g., DK weight).
Abbreviations and Notes
The pattern uses the following crochet abbreviations:
- MR: Magic Ring
- SC: Single Crochet
- INC: Increase (two single crochets in the same stitch)
- DEC: Decrease (close two stitches together by crocheting through the front loops of the stitches)
- ST: Stitch

Important Notes:
- The Zombie Bee is worked in a spiral (continuous rounds) unless stated otherwise. Use a stitch marker to keep track of the beginning of each round if necessary.
- Change yarn colors seamlessly on the last stitch of the previous round.
- Keep the tension consistent throughout.
Gauge, Approximate Size, and Pattern Notes
- Gauge: Not critical for this project but aim for fairly tight, neat stitches to prevent the stuffing from showing through.
- Finished size: Approximately 8–10 cm (3–4 inches) in length, depending on yarn weight and hook size.
Step-by-Step Pattern
Body of the Zombie Bee
-
Foundation Rounds:
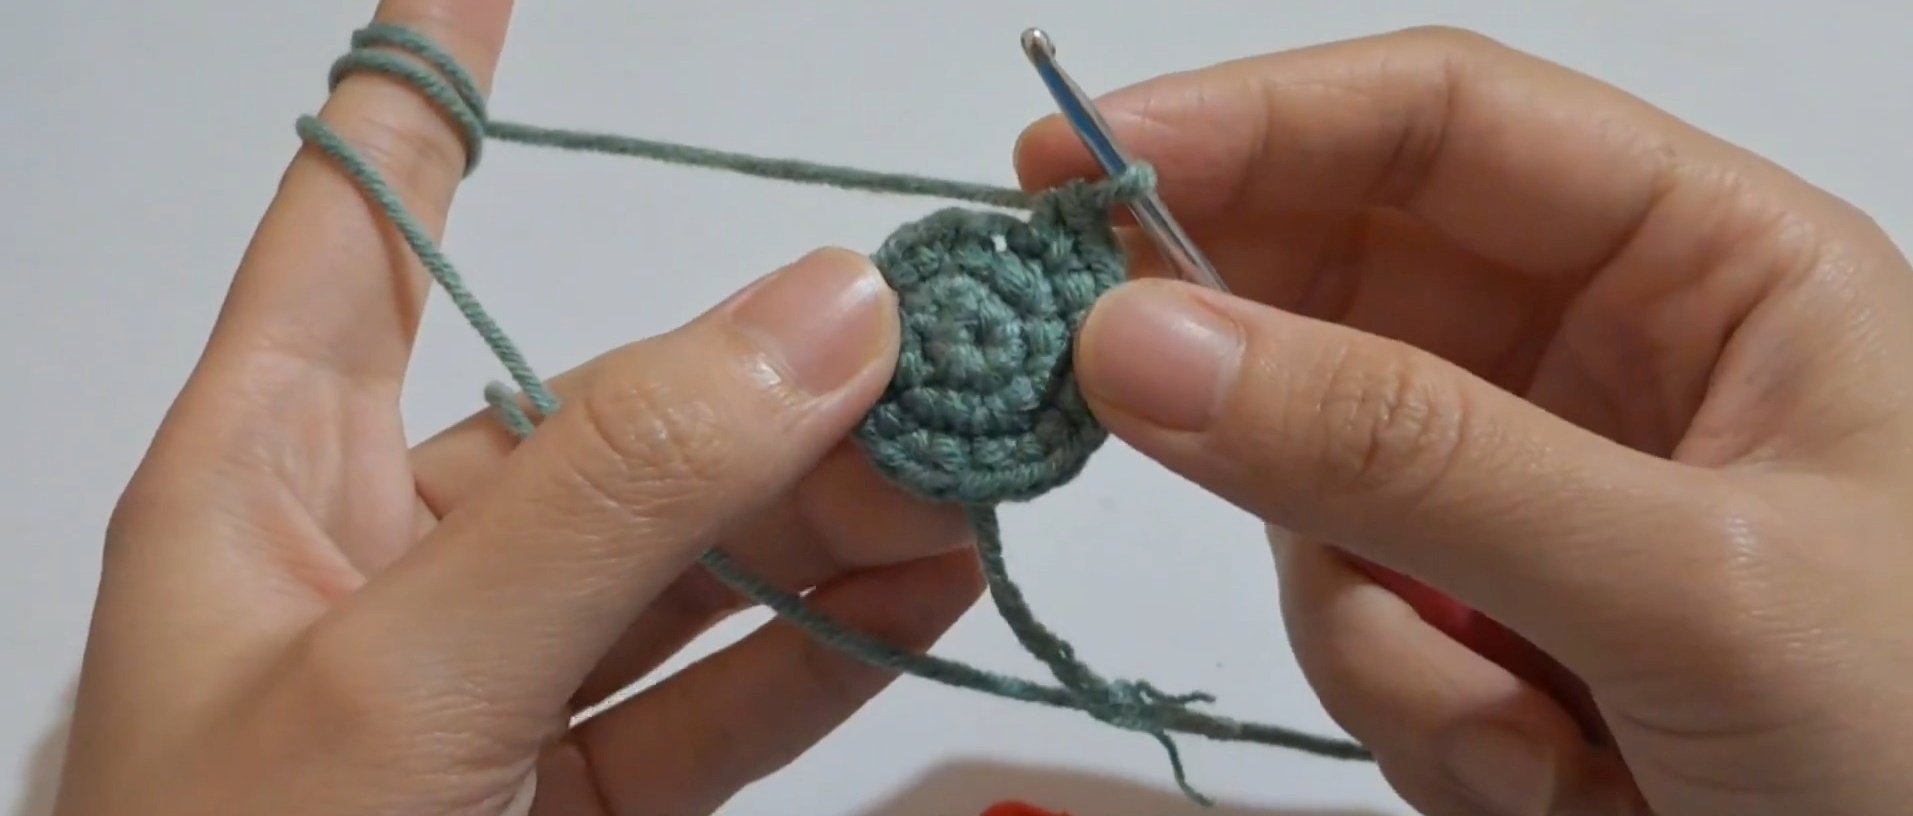
- Create a Magic Ring (MR) using green yarn.
- Round 1: Work 6 SC into the MR. Close the ring by pulling the yarn tight. (6 ST)
-
Increases:
- Round 2: INC in every stitch around. (12 ST)
- Round 3: 1 SC, 1 INC, repeat around. (18 ST)
-
Straight Rounds:
- Rounds 4–5: SC in each stitch around. (18 ST each round)
-
Color Changes for Stripes:
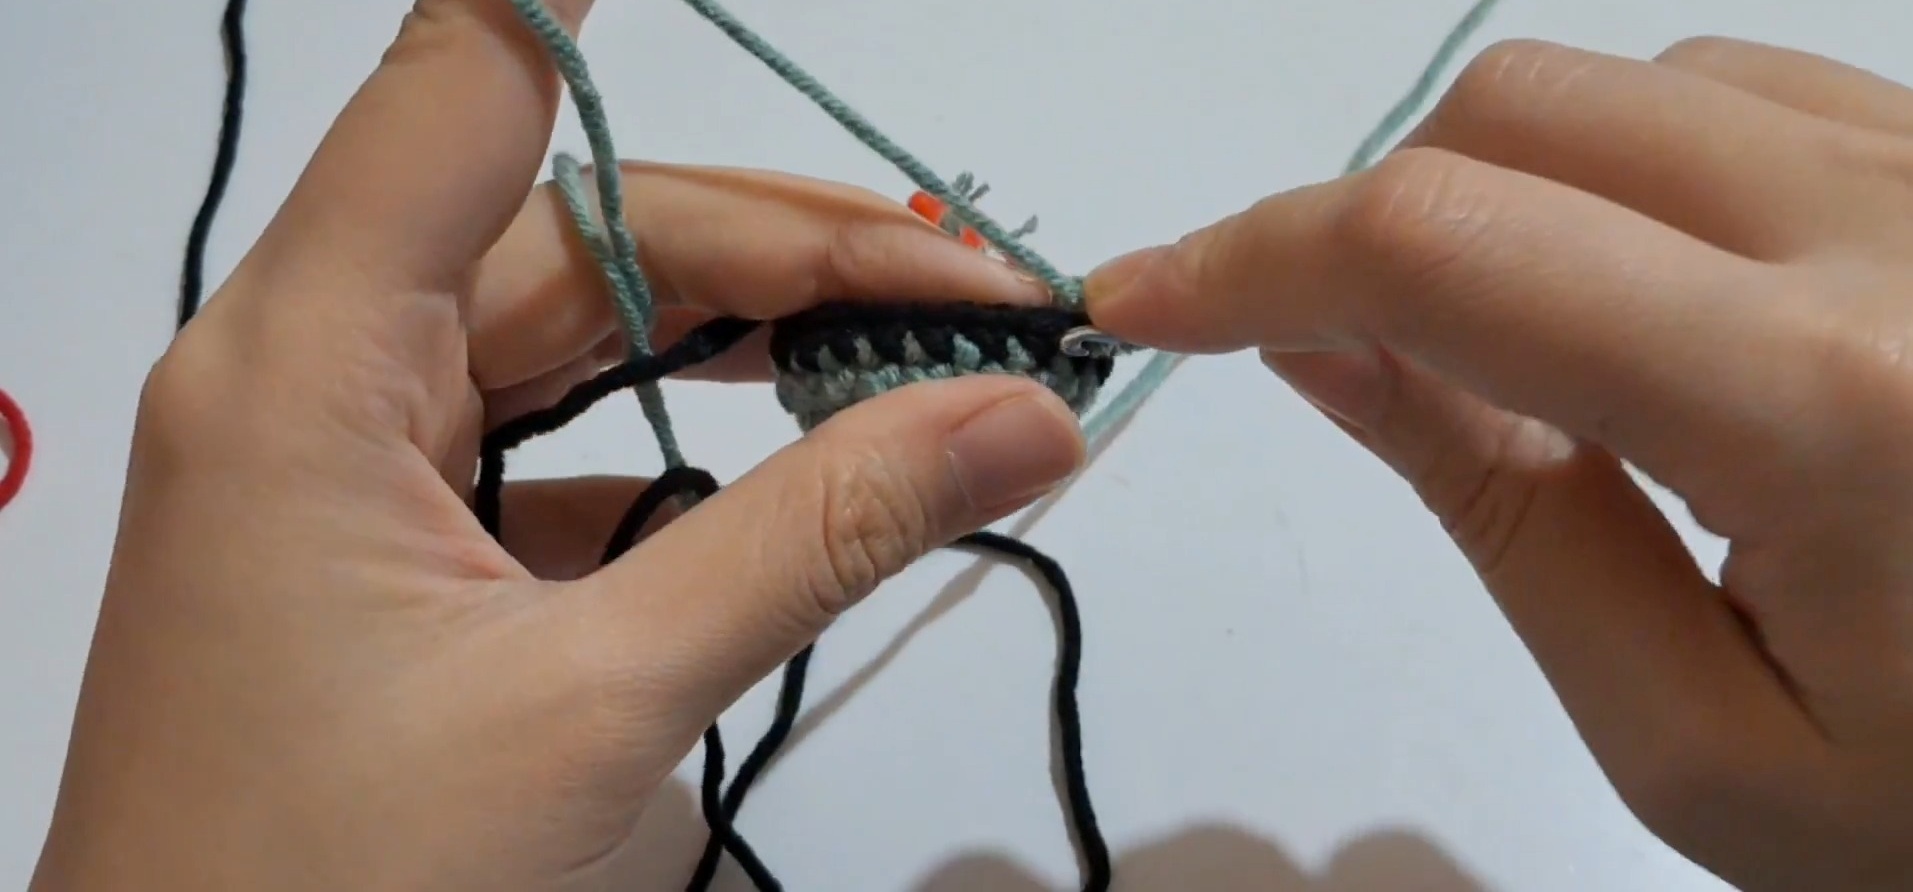
- After finishing Round 5, switch to black yarn for the bee’s stripe. Secure the color change with a double knot near the stitch base.
- Round 6: Using black yarn, SC in each stitch. (18 ST)
-
Return to Green Yarn:
- Round 7: Switch back to green yarn and SC in each stitch around. Insert safety eyes between Rounds 2 and 3, spaced evenly apart.
- Round 8: Switch to black yarn and work another round of SC in each stitch. After finishing, cut the black yarn and secure it with a double knot.
-
Final Green Rows:
- Rounds 9–10: Using green yarn, SC in each stitch around.
-
Decreases and Stuffing:
- Round 11: Work 1 SC, 1 DEC, repeat around. (12 ST)
- Add stuffing to the body at this stage.
- Round 12: Work DEC in each stitch around. (6 ST)
-
Closing the Body:
- Fasten off. Use the tapestry needle to close the small opening at the bottom by weaving through the front loops of the last row and pulling tight.

Wings
-
Foundation:
- Using gray yarn, create a Magic Ring (MR) and work 6 SC into the ring.
-
Increasing:
- Round 2: INC in every stitch around. (12 ST)
-
Finishing:
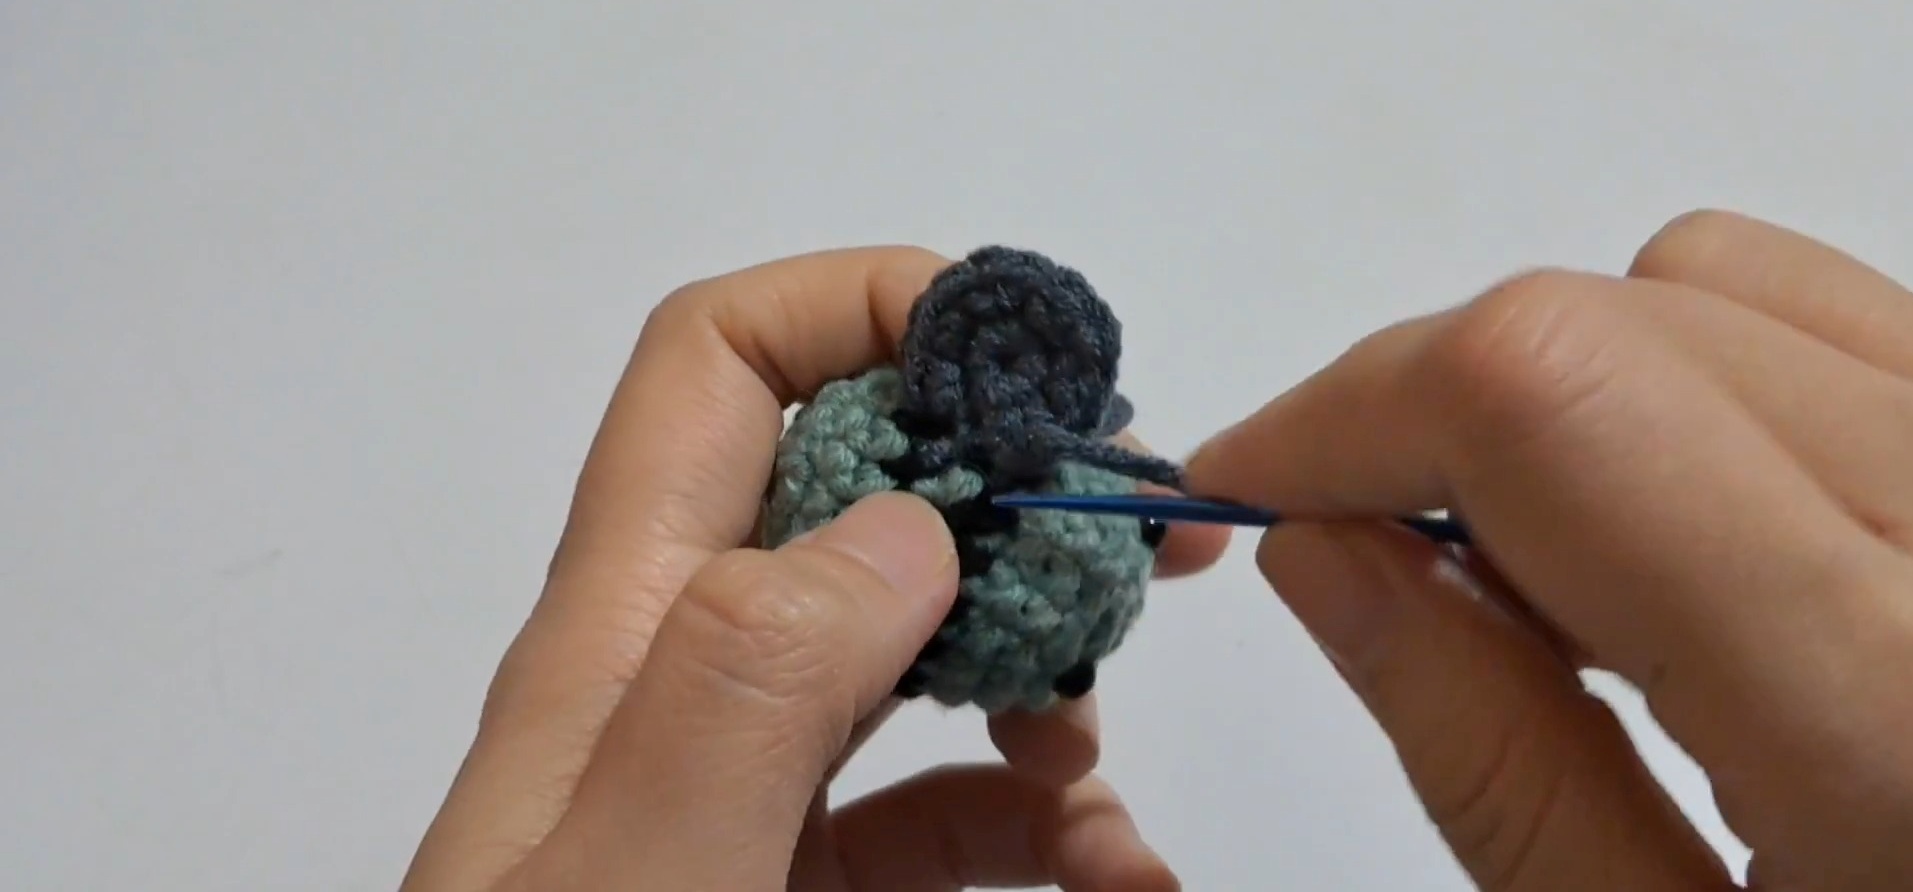
- Fasten off and leave a long tail for sewing. Create a second wing in the same way.
-
Attaching the Wings:
- Position the wings symmetrically on the top of the bee. Sew them securely in place using the long tail and tapestry needle.
Adding Zombie Details
- Using red yarn, embroider blood-like scars onto the bee’s face or body. You can place these scars anywhere to create your "zombie effect."
Finishing Touches
- Weave in all loose ends using the tapestry needle. Trim any leftover yarn.
- Your crochet Zombie Bee is now complete!
Pattern Question
Q: Can I use different yarn or hook sizes for this pattern?
A: Absolutely! You can experiment with other yarn colors and adjust the hook size to change the final size of the Zombie Bee. Just ensure the yarn and hook are compatible for a smooth finish.
Conclusion
This crochet Zombie Bee is fun, easy, and highly customizable, offering something for all Halloween and crochet enthusiasts. Its adorable and spooky vibe makes it worth adding to your project list. Start stitching your very own zombie bee today!