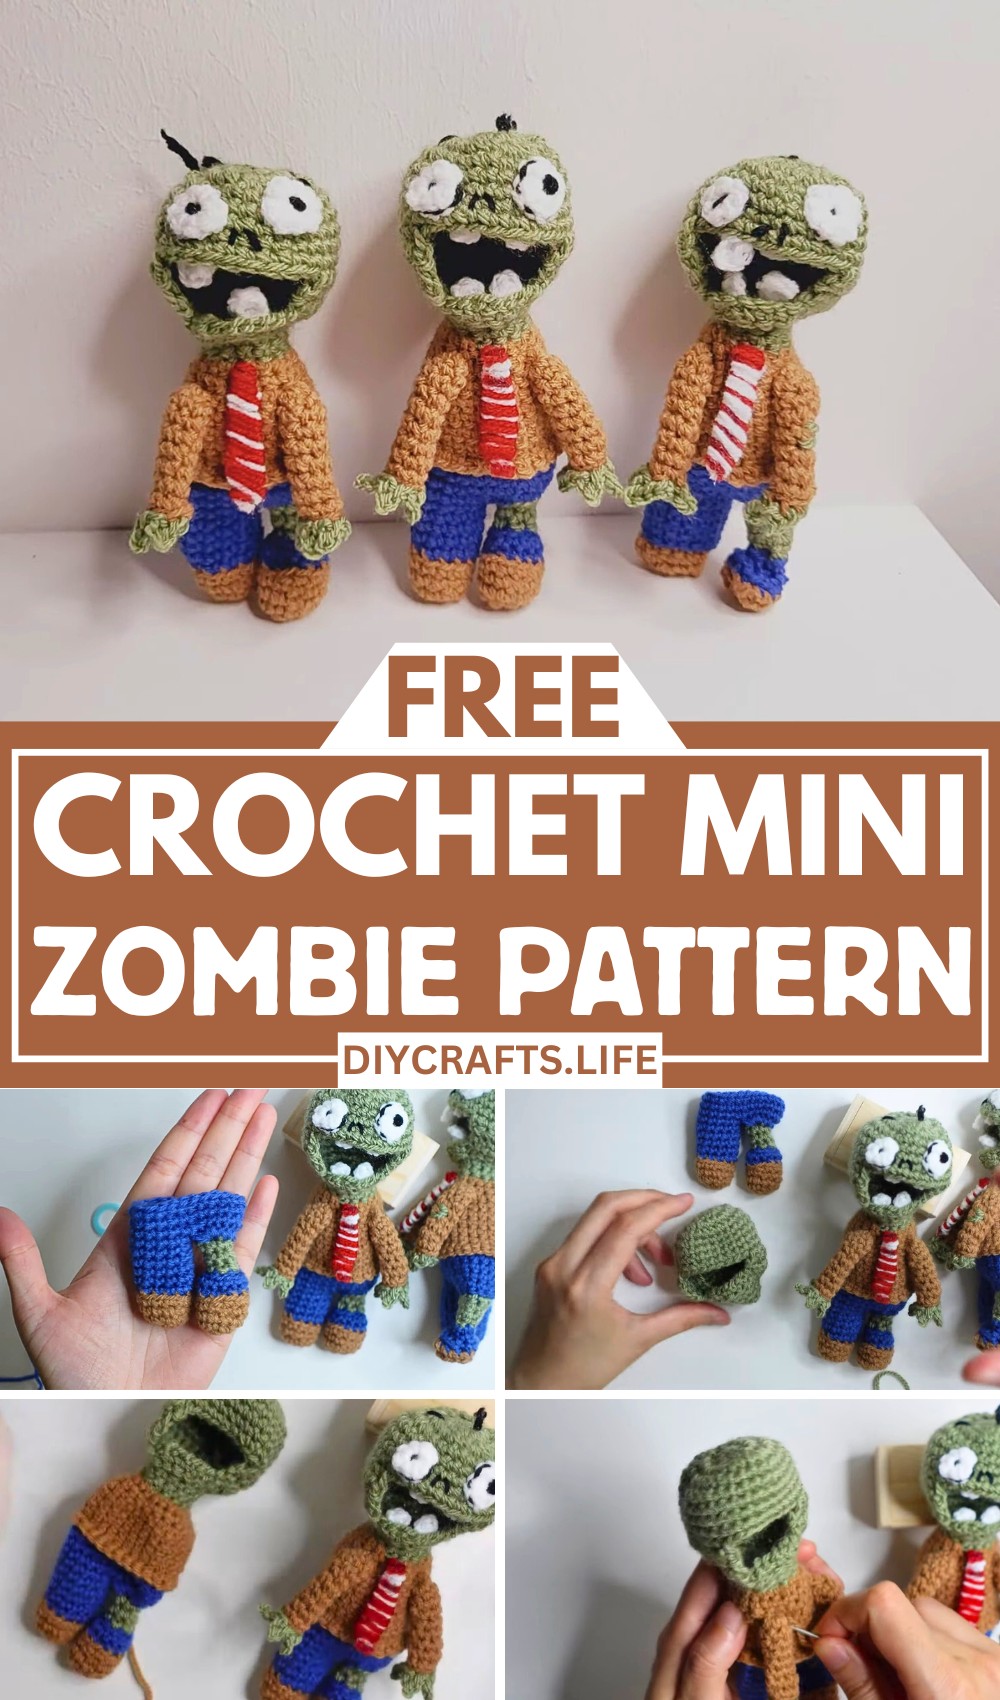
Crochet your very own zombie character—perfect for Halloween décor, gifts, or fun collectibles. This crochet project combines creativity with versatility, resulting in a decorative zombie that showcases detailed craftsmanship. It’s a wonderfully imaginative addition to any handmade collection.
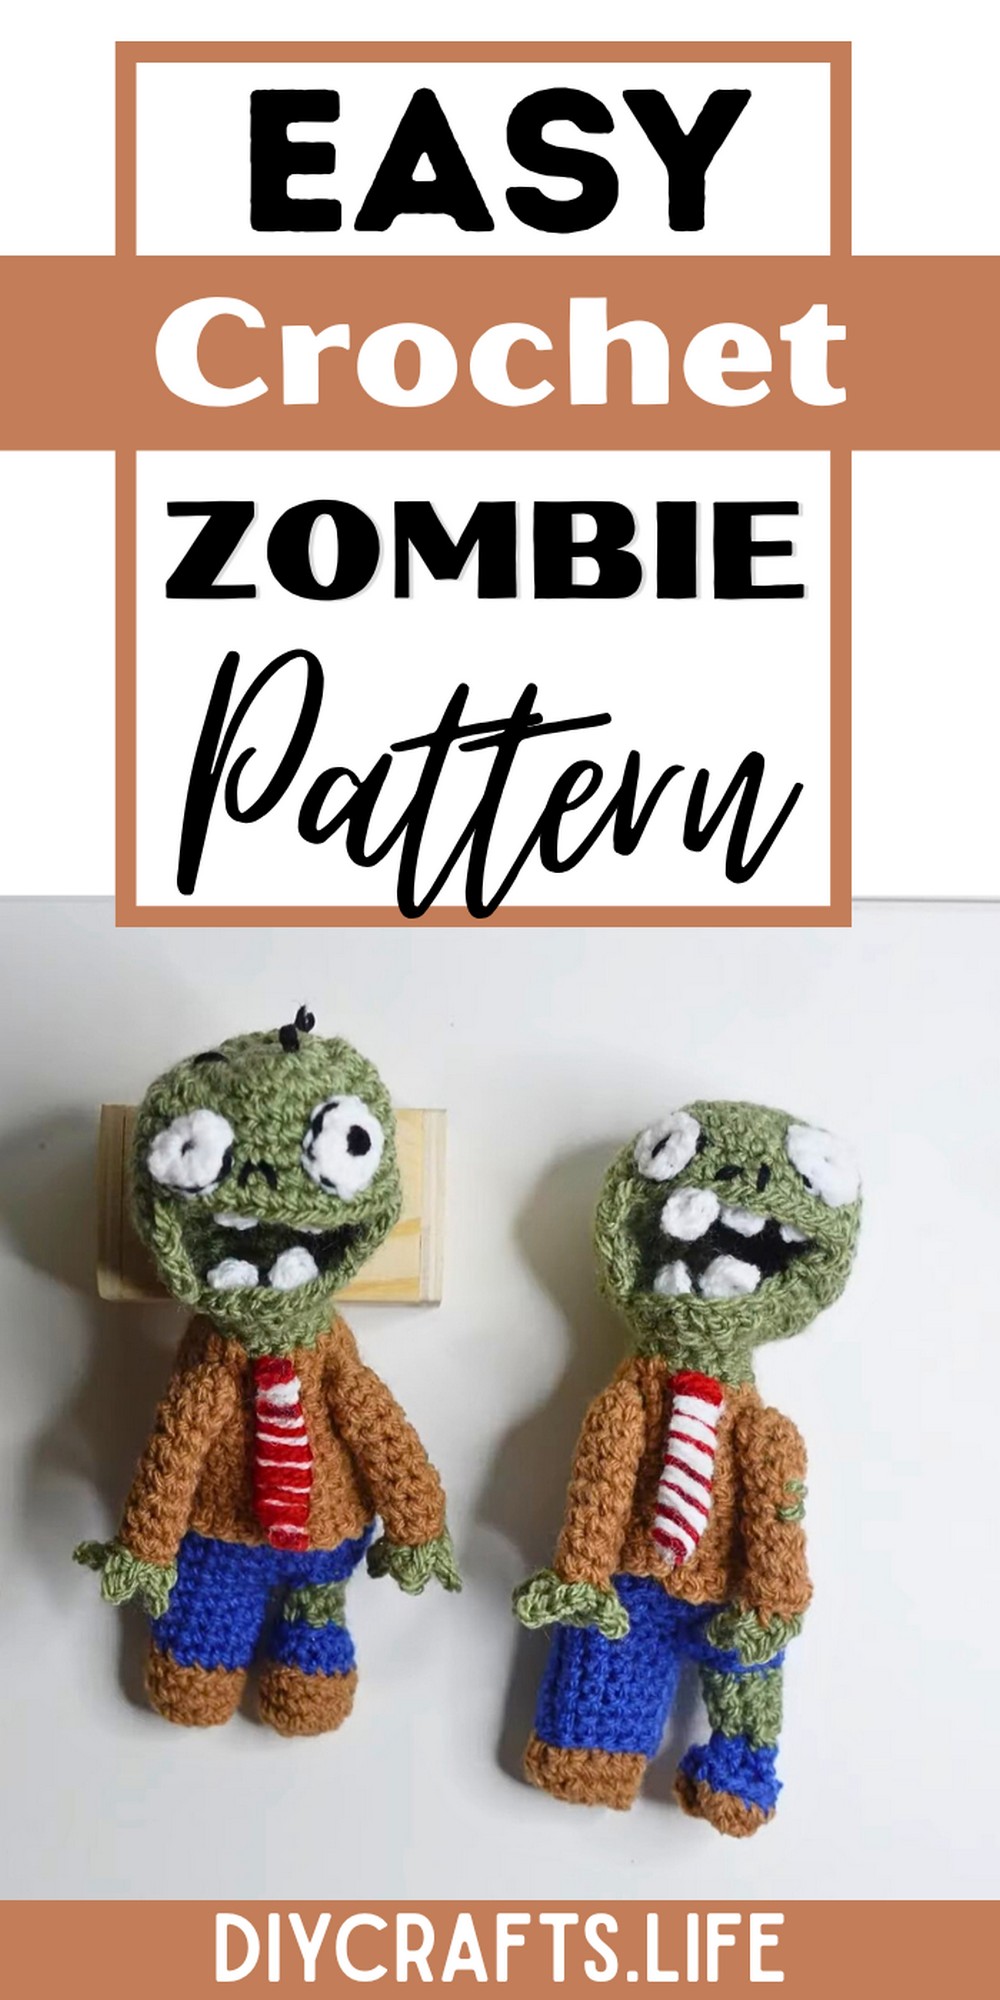
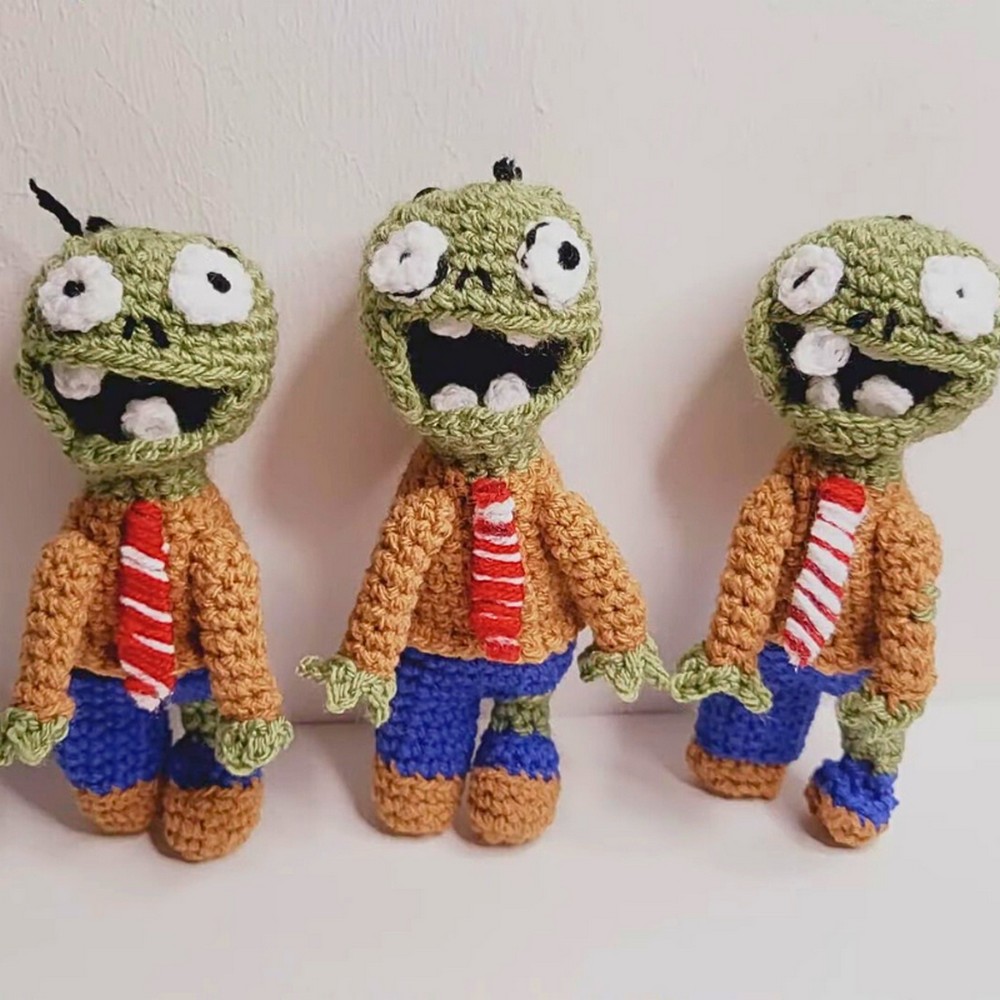
This crochet zombie is both adorable and durable, perfect for decoration or playful displays. Its detailed features, like a mini jacket and pants, make it a standout piece. Crafted to last, it’s suitable for gifting or showcasing in themed spaces year-round—not just during spooky seasons.
Crochet Mini Zombie
This zombie crochet pattern is beginner-friendly yet customizable for advanced crafters. Enjoy tailoring colors, adding accessories like teeth or neckties, and exploring creative designs. Whether starting out or experienced, this project is a fun way to express your creativity with satisfying results.
Materials and Preparation
To crochet your own zombie amigurumi, you will need the following supplies:
- Yarn:
- Size 3-3.5 yarn in the following colors:
- Green (for the zombie body)
- Blue (for the pants)
- Brown (for the jacket)
- Black or dark yarn (for sewing details)
- Optional: White and gray yarn for the eyes and teeth.
- Size 3-3.5 yarn in the following colors:
- Hook:
- 3.5mm crochet hook.
- Other Tools:
- Darning needle.
- Scissors.
- Stitch markers.
- Additional Materials:
- A small piece of cardboard for the zombie's necktie.
Abbreviations and Notes
Here are the abbreviations used in this pattern:
- MR: Magic Ring
- SC: Single Crochet
- INC: Increase (work 2 SC into the same stitch)
- DEC: Decrease (single crochet two stitches together)
- BLO: Back Loop Only
- FO: Fasten Off
Important Notes:
- This pattern is worked in rounds, so use a stitch marker to keep track of your rounds.
- Hide yarn tails inside the stitches to give your zombie a clean finish.
- The project involves some sewing, so keep your darning needle handy.
- The tutorial includes minor shaping details that require careful attention to the instructions.
Gauge, Approximate Size, and Pattern Notes
Gauge:
A specific gauge swatch is not required for this project. However, aim for tight stitches to ensure no stuffing shows through the crochet.
Approximate Size:
The finished zombie is approximately 6-8 inches tall, though size may vary depending on your yarn and hook.
Special Techniques:
- Magic Ring (MR): This is used for starting each circular piece.
- Back Loop Only (BLO): Gives texture to sections like pants and jacket.
- Shaping with Decreases: Ensures the zombie's body is three-dimensional and proportional.
Step-by-Step Pattern
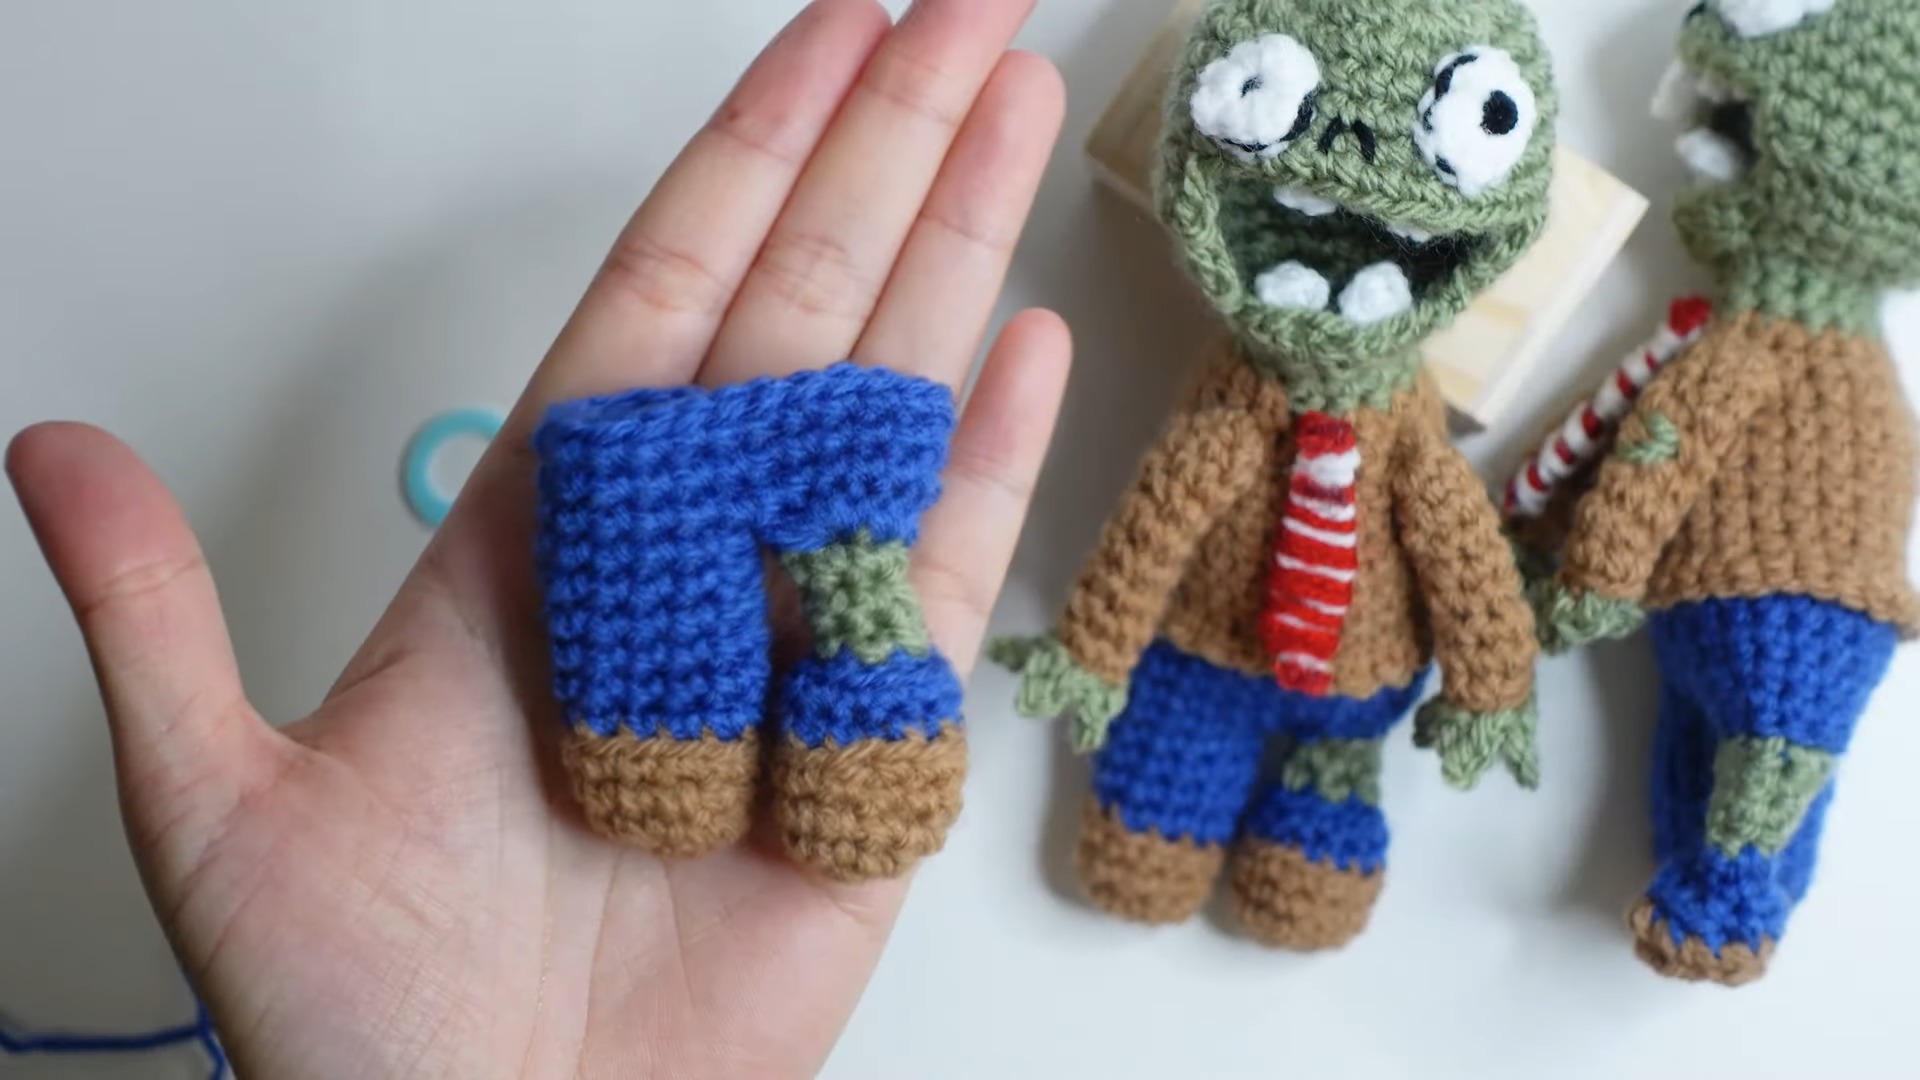
1. Making the Feet and Pants
-
Begin with blue yarn (pants):
- Round 1: Create a Magic Ring (MR), chain 1, and work 8 SC inside the magic ring. (8 stitches)
- Round 2: SC in the first stitch, then INC in the next. Repeat around for a total of 12 stitches.
- Round 3-4: SC around in every stitch. (12 stitches per round)
- FO.
- For shaping, cut the yarn, pull tight, and hide the tail using the darning needle.
-
Repeat the same steps to make the second leg, and attach them together:
- Insert blue yarn in the back loops of stitching, work across both legs, and crochet around to connect (24 stitches in total across both legs).
2. Making the Zombie’s Body
- Round 1: After attaching the legs, continue working in rounds with blue yarn for the pants and switch to green yarn for the upper body.
- Round 11-13: Work SC 24 stitches per round for the zombie’s torso.
- FO and hide yarn when you've reached your desired body length.
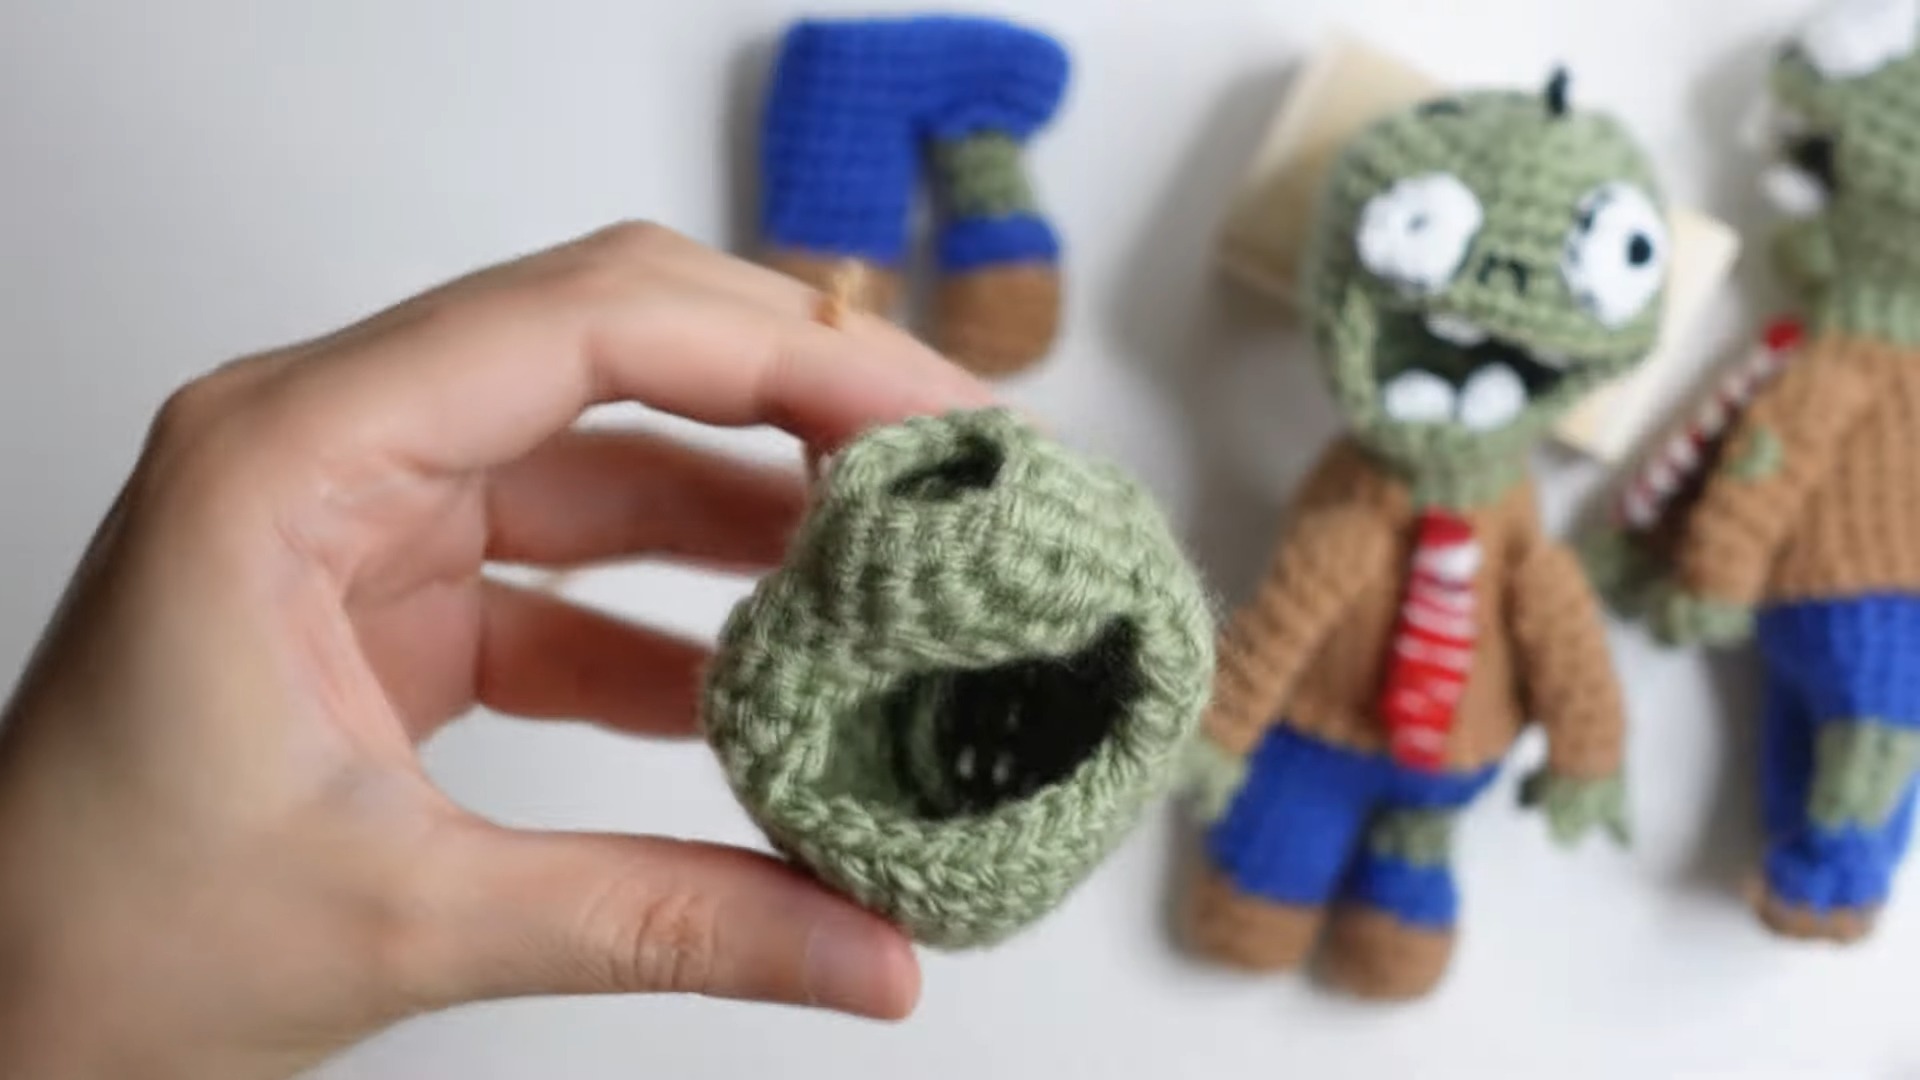
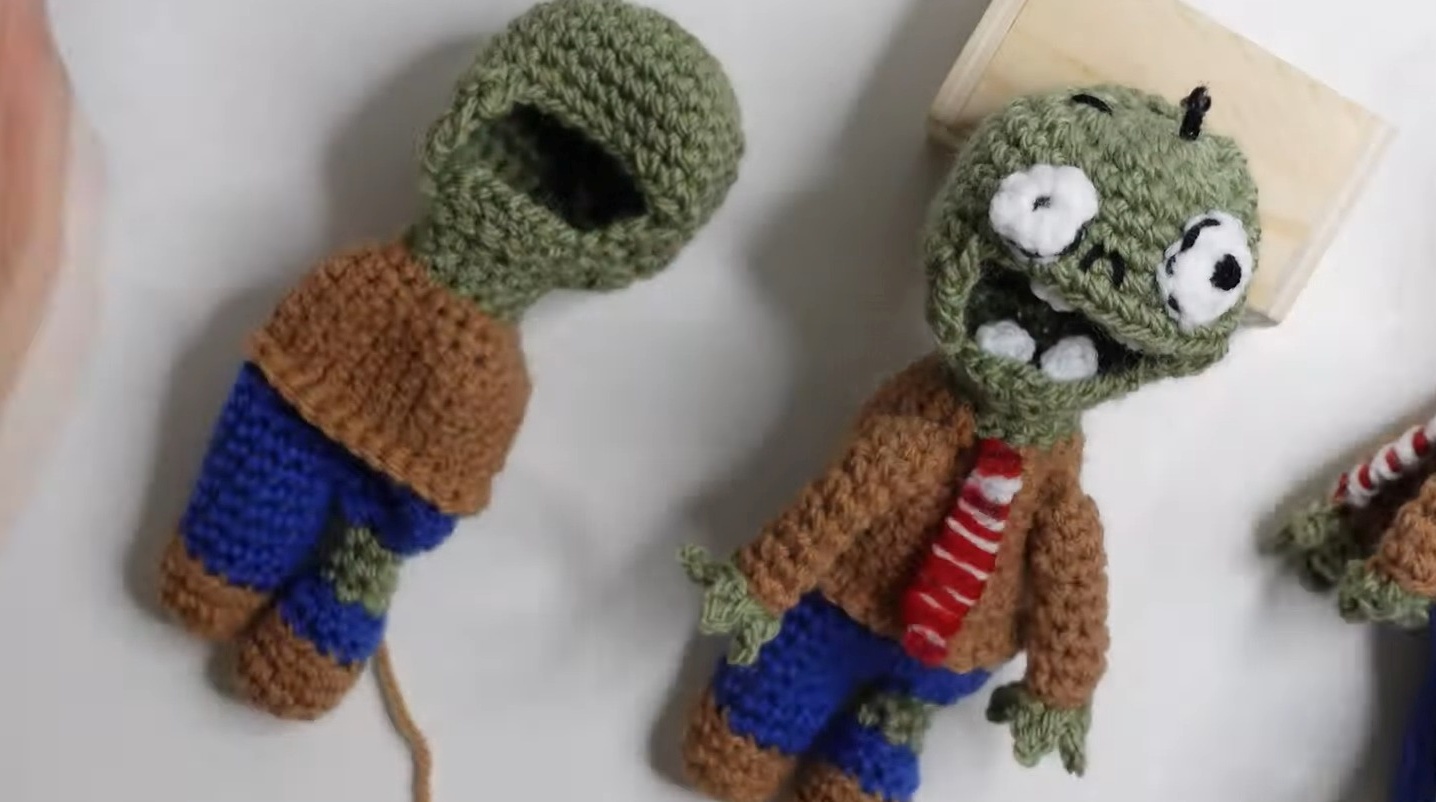
3. Making the Head
- Switch to green yarn for the zombie head:
- Round 1: Start with a Magic Ring (MR), chain 1, and work 10 SC into the ring. (10 stitches)
- Round 2: INC in every stitch around. (20 stitches)
- Round 3: SC in the first stitch, INC in the next. Repeat around. (30 stitches)
- Round 4-8: SC around in every stitch. Maintain the 30-stitch circumference.
- Taper the head:
- Round 9-10: Work SC followed by DEC to reduce the count.
4. Making the Arms
- Using green yarn, create arms and fingers:
- Round 1: Create a Magic Ring (MR), work 6 SC into the ring.
- Rounds 2-9: SC in continuous rounds. (6 stitches per round)
- Fingers: Attach yarn to the edge of the arm and slip stitch to create three or more fingers.
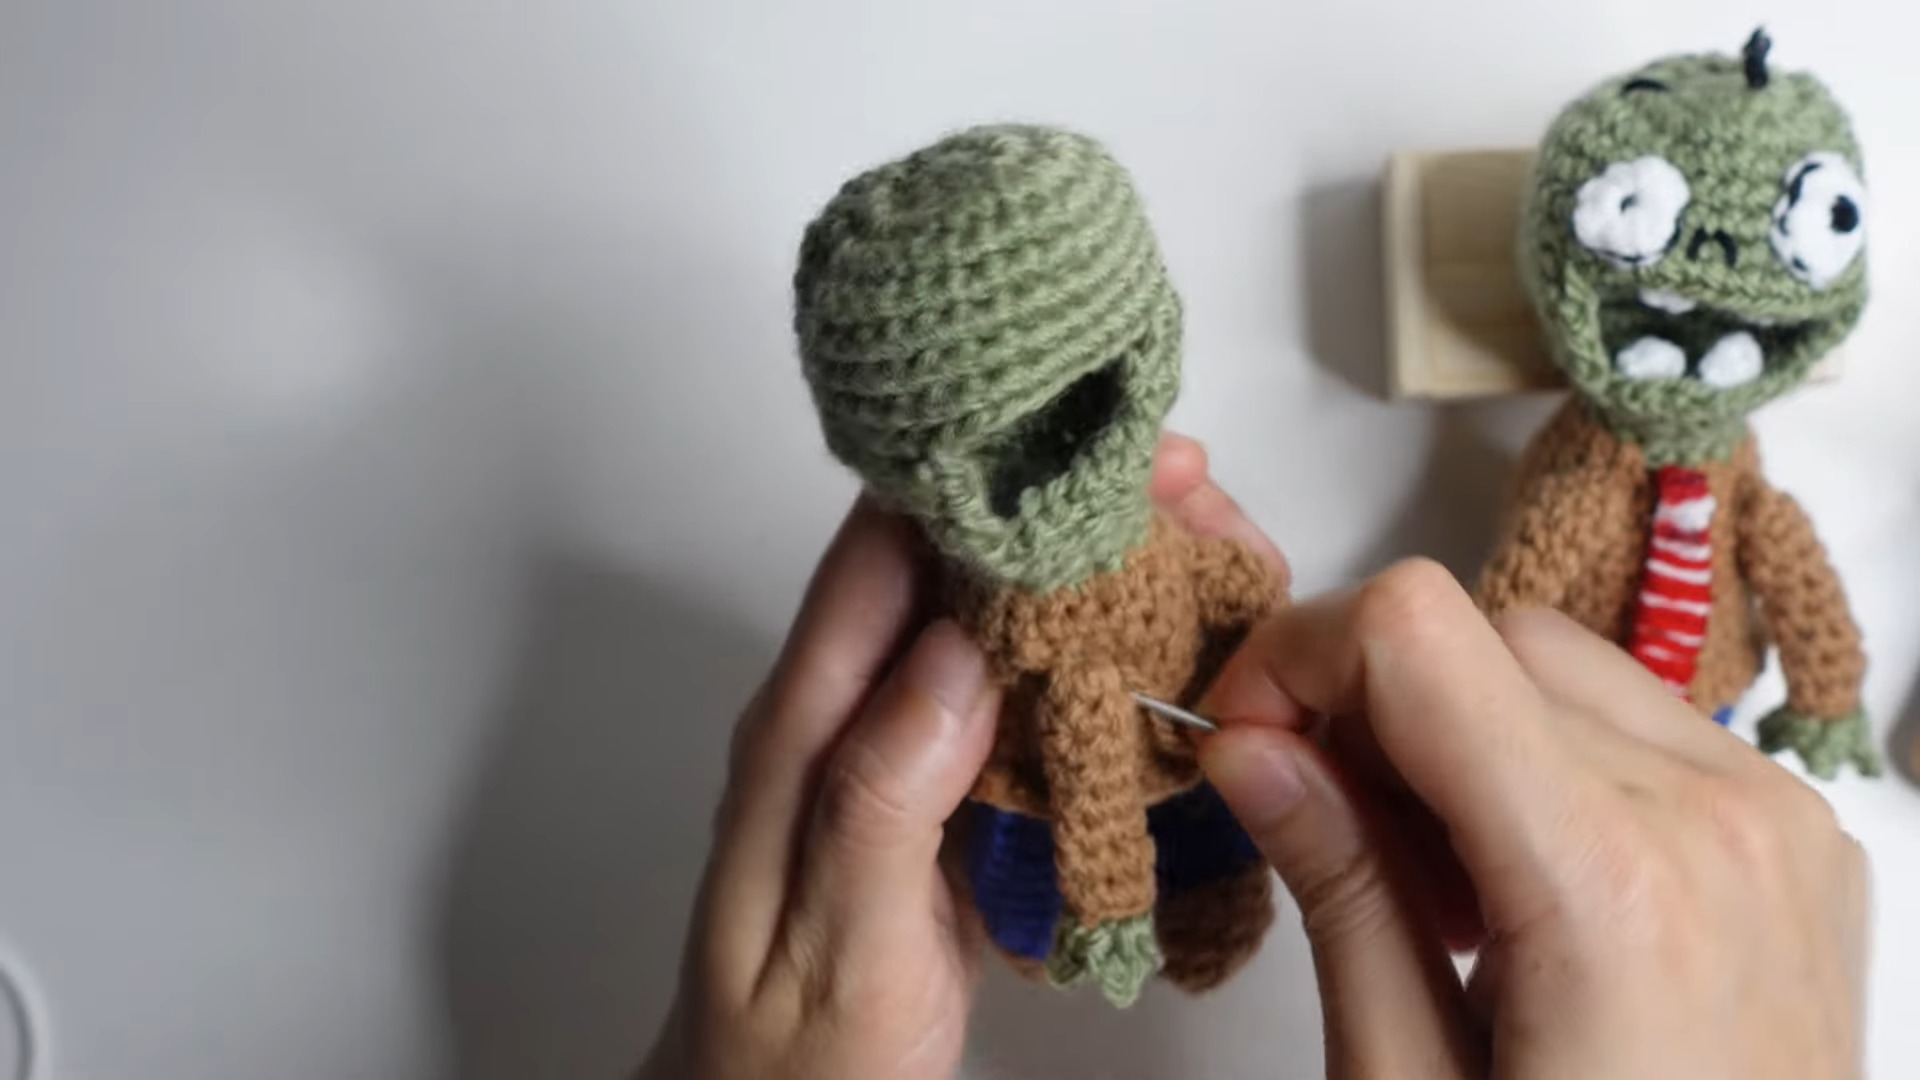
5. Creating the Jacket
- Attach brown yarn to define the jacket collar:
- Work in the BLO for the final row of the torso to give the jacket a defined edge.
- Insert darning needle and use additional stitches to "sew" the jacket shape.
6. Facial Details
- Eyes: Use white yarn to make small circular patches (MR with 8 or 12 SC) and sew them onto the face. Add black yarn details for pupils.
- Mouth and Teeth: Use dark yarn to embroider a sad or creepy mouth. Use gray or white yarn to create small teeth.
7. Assembly
- Attach the arms to the shoulders.
- Sew the head onto the torso securely.
- Add finishing details as desired (e.g., a necktie using the cardboard template).
Pattern Question:
Q: How do I ensure the arms and legs attach securely to the zombie?
A: Use the tail ends of your yarn to sew them firmly into place using a darning needle. Align the limbs evenly and stitch securely with hidden finishes for a clean look.
Conclusion:
Creating a crochet zombie is fun, rewarding, and practical for gifting or decoration. Its charming design and customization options make it worth trying, while its simplicity ensures that anyone can enjoy the process, turning yarn into a delightful zombie masterpiece!


