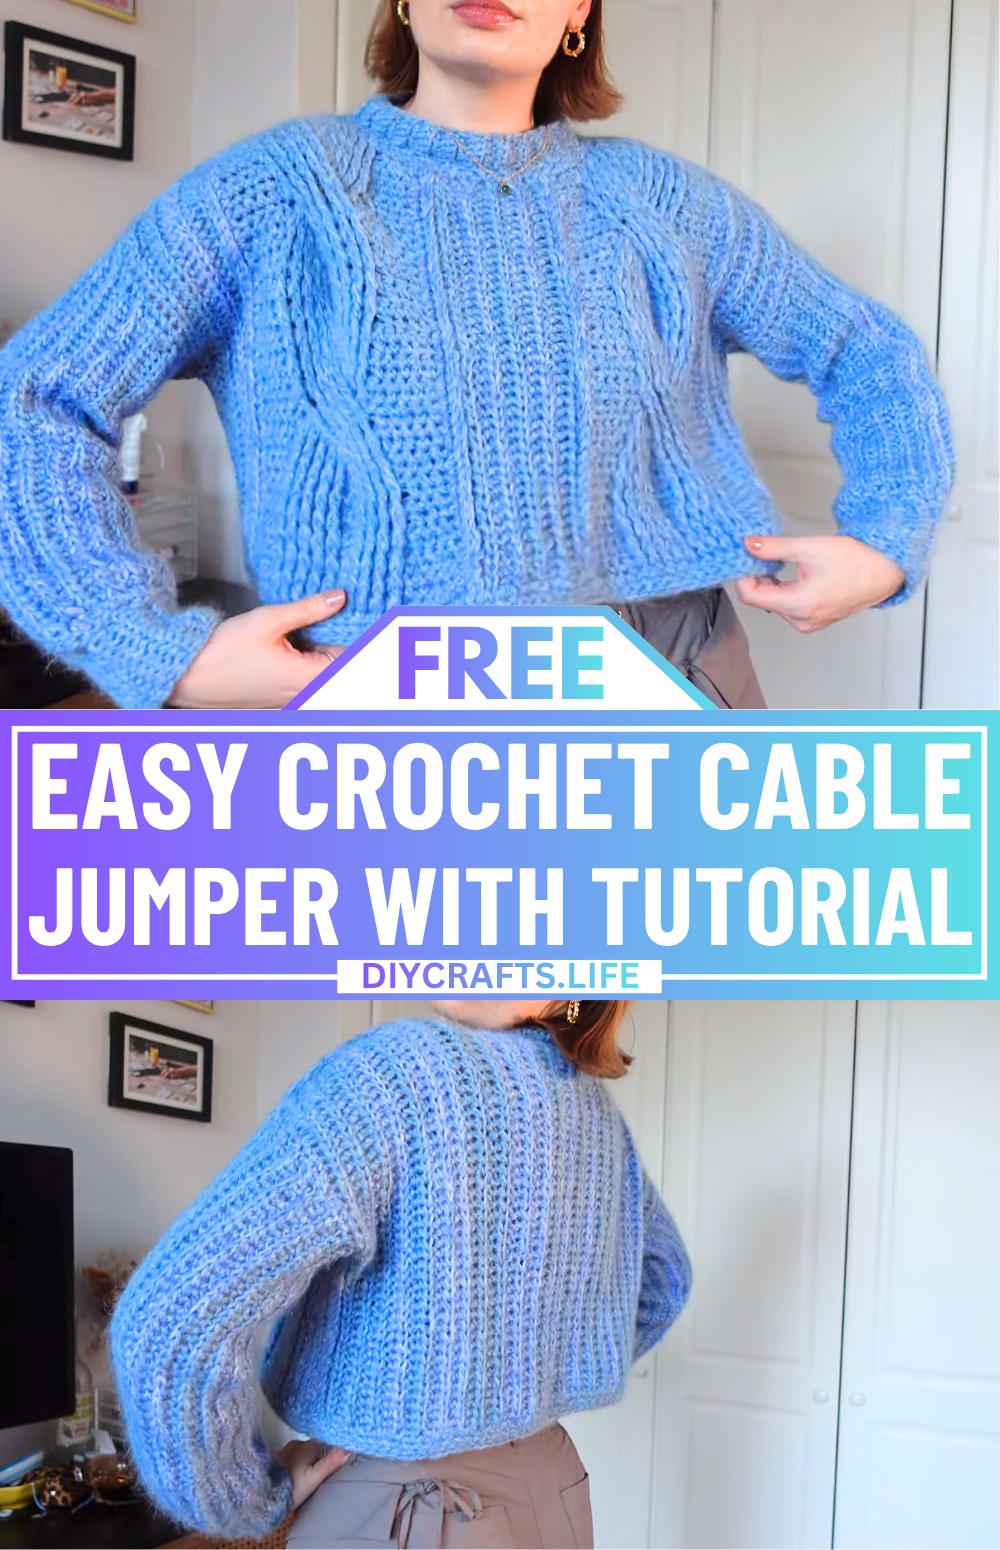
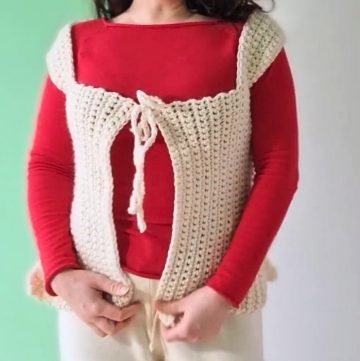
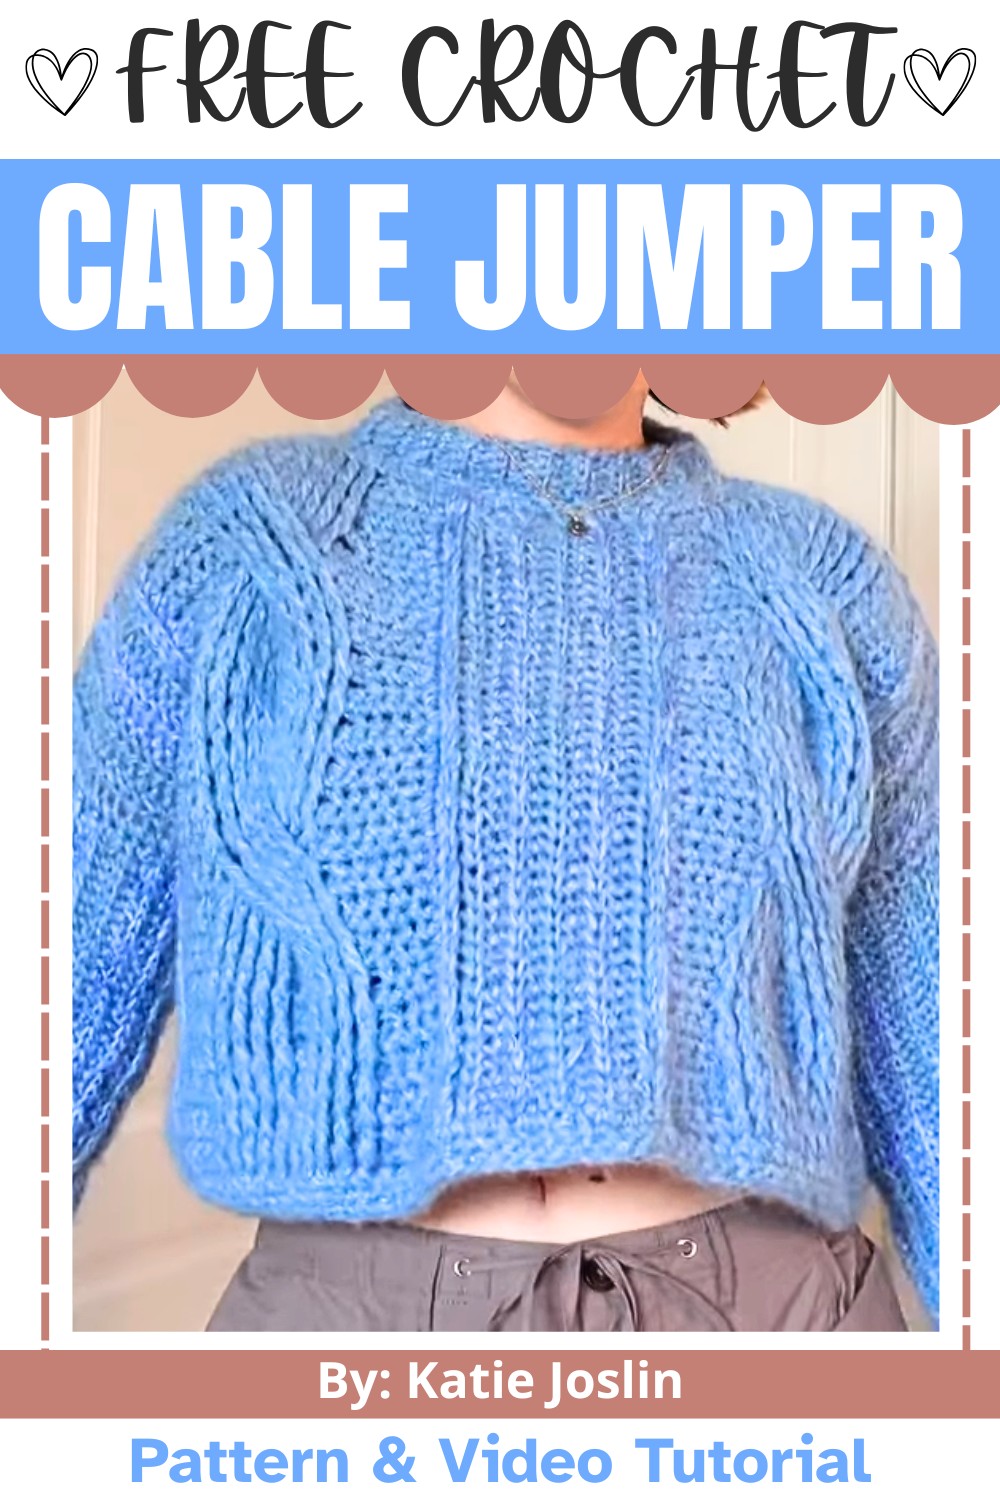
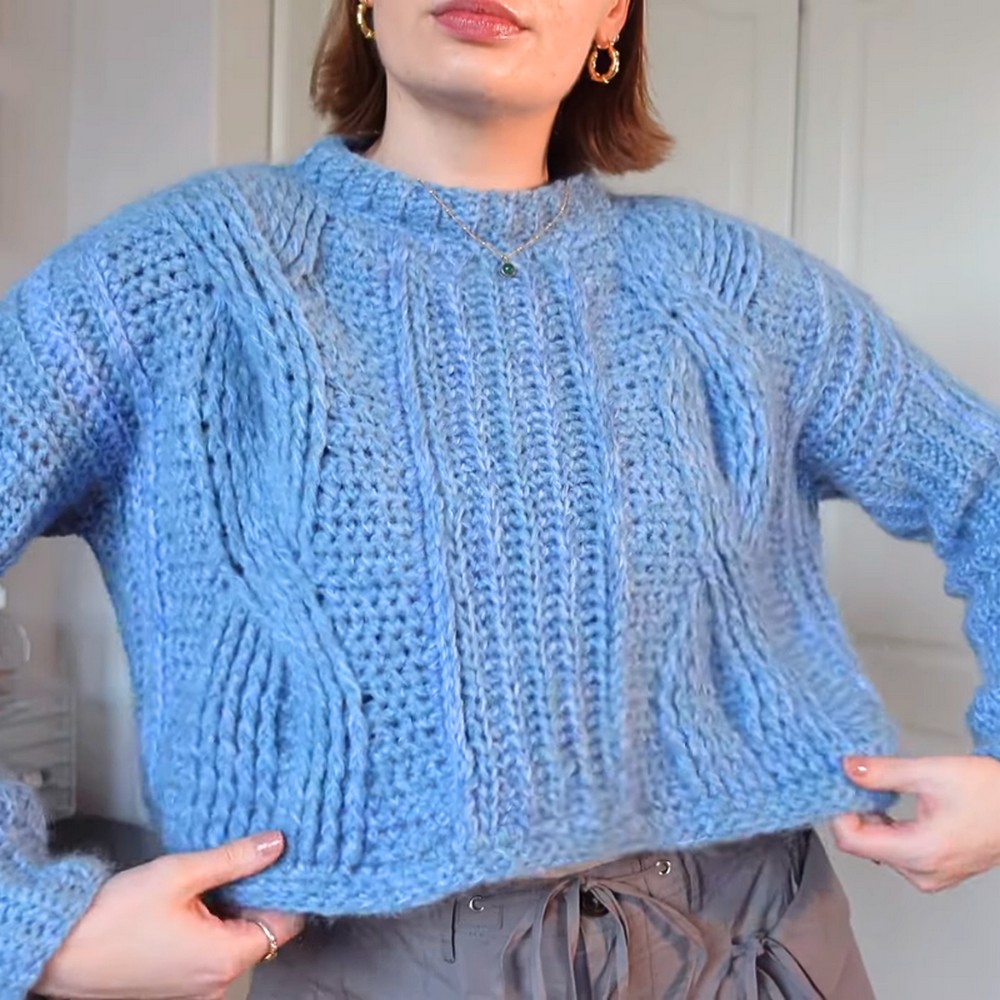
This crochet cable jumper is cozy, stylish, and fully customizable, making it a versatile handmade piece. Featuring intricate cable patterns on the front and simple ribbed panels that enhance its handmade charm. It offers the perfect balance of comfort and texture, making it ideal as a warm layer during colder months. The real charm of this crochet piece is revealed in the details below.
Free Crochet Cable Jumper Pattern
What makes this crochet jumper truly special is its flexibility; you create it just the way you like. You can add extra cable details, adjust the size, or use different yarns for a personalized look and feel. Choose a soft, fuzzy yarn for a cozy winter finish or cotton yarn for more defined and breathable stitches. The crochet jumper design is made in separate panels, including front, back, and sleeves, which are then joined together to create a clean and seamless design. Even beginners will enjoy learning these simple techniques that produce such beautiful textured results.
Credit Katie Joslin
Materials & Tools Needed
- Yarn Options:
- Katie uses a blend of mohair yarns held together:
- 5 strands of Diablo Yarn held in different shades (Pastel Blue, Blue Hyacinth, Cornflower).
- Recommended substitutes:
- Hobbie Fluffy Day Yarn (acrylic for a similar fuzzy look).
- Cotton yarn (for stitch definition).
- Note: You’ll need approximately 10 balls of yarn for medium/larger sizes.
- Katie uses a blend of mohair yarns held together:
- Hook Size:
- 7mm crochet hook for most of the jumper.
- 4.5mm crochet hook for slip-stitched seams and finer finishing details.
- Notions:
- Scissors.
- Tapestry needle for weaving in ends.
- Stitch markers (optional but helpful for keeping track of rows).
Customization Ideas
- You can modify the cables (their number, size, frequency, and style):
- For example: Small cables directly down the middle or multiple thin cables.
- Customize panel sizes for a tighter or looser fit.
- Adjust the sleeve and torso length to suit your body.
- Narrow or widen the ribbed panels for different fits.
- Mix and match yarn colors for a more personalized look.
Pattern Abbreviations & Terminology
- Ch: Chain
- SC: Single Crochet
- HDC: Half Double Crochet
- Sl St: Slip Stitch
- FPDC: Front Post Double Crochet
- YOSS: Yarn Over Slip Stitch (also called HDC Slip Stitch)
- Rep: Repeat
Notes:
- This pattern uses US crochet terminology.
- The jumper is worked in panels (front, back, sleeves) and joined together.
- Cables are created using FPDC and involve intricate stitch placement for twists.
Step-by-Step Detailed Crochet Instructions
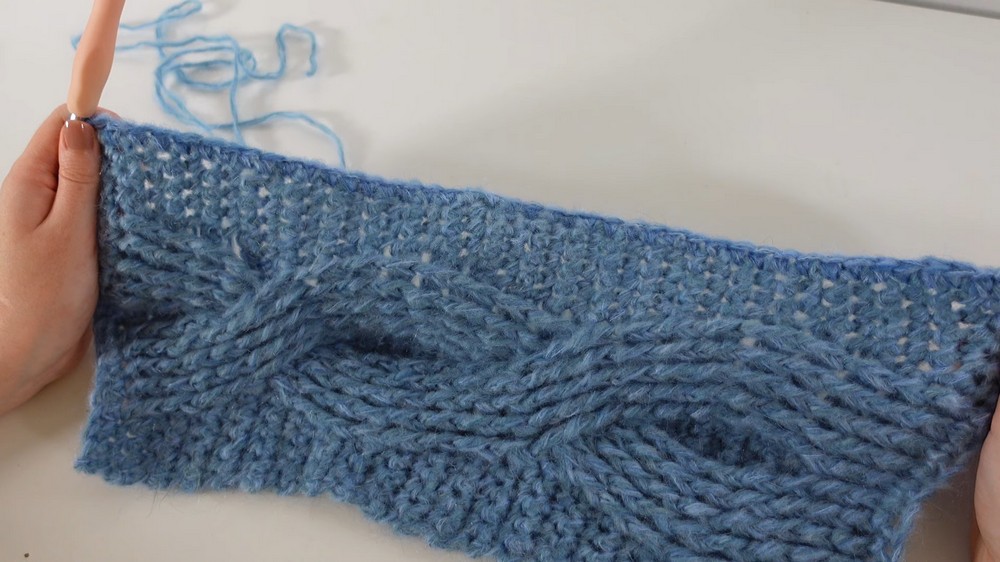
1. Cable Panel
The cable panel is the highlight of this jumper. Follow these steps to create a cable panel.
Step 1: Chain Foundation + Base Rows
- Make a slip knot on your hook and ch 21 (20 for the panel width, 1 for turning).
- Row 1: SC into the second chain from the hook and across. (20 SC)
- Row 2: Ch 1 to turn. SC across. (20 SC)
Step 2: Begin Cable Stitches
- The cable consists of 5 edge SC, 10 FPDC, 5 edge SC.
- Row 3 (Right Side):
- Ch 1, SC into the first 5 stitches.
- Starting with the 6th stitch, FPDC into the SC from Row 1.
- Repeat for the next 9 stitches (10 FPDC total).
- Finish with 5 SC.
- Row 4 (Wrong Side): Ch 1, SC across the row.
- Remember to work into the tops of the FPDC stitches, not the fabric visible on the back.
- Row 5: Repeat Row 3 (do FPDC stitches into the existing posts). (5 SC, 10 FPDC, 5 SC)
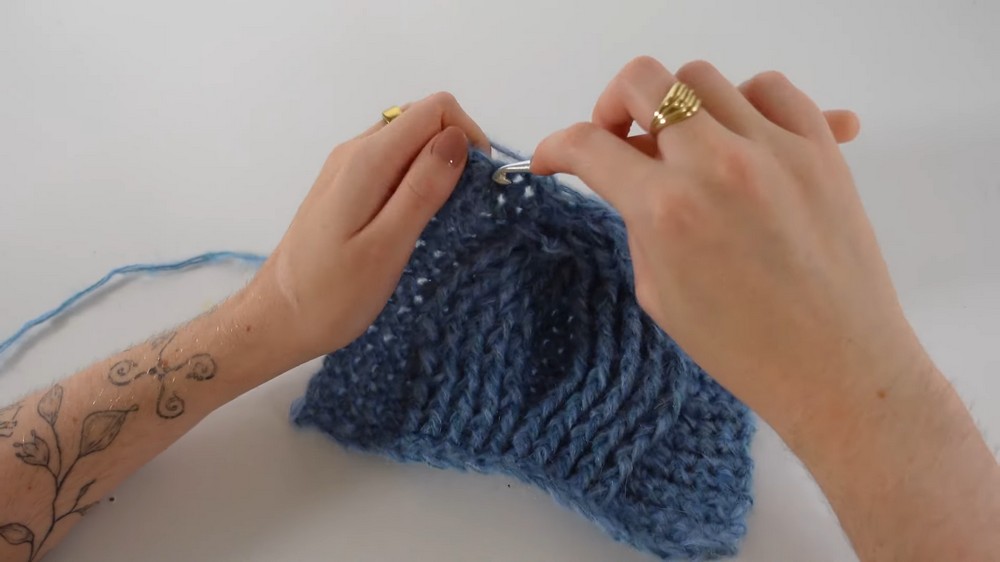
Step 3: Expand the Cable
Stretch the cable strands outward.
- Add gaps between the FPDC stitches to form the cable.
- This is done by replacing the middle 10 FPDC of the cable with 5 FPDC.
- Row 6 (Right Side): 4 SC, 5 FPDC, 2 SC, 5 FPDC, 4 SC.
- Row 7 (Wrong Side): SC into every stitch, working into the FPDC tops. Ch 1, turn.
Step 4: Repeat the Cable Twist
- Alternate between:
- Twist rows (where you cross over FPDC stitches).
- Base rows (FPDC into aligned posts).
- For a large twist, follow Katie's process to "weave" the left and right post stitches into one another.
- Rep the cable sequence until the panel reaches the correct height.
- Katie’s jumper used 44 rows for the cables.
2. Ribbed Panels
These panels form the body and arms of the jumper.
Step 1: Foundation Chain
- Ch desired width for the panel (e.g., 44 chains + 1 turning chain).
Step 2: Half Double Slip Stitch Rows
- Start in the second chain from the hook.
- Perform a YOSS (yarn over, push into the back loop, pull yarn through all loops).
- Alternate HDC slip stitch into back loops only for ribbing.
- Ch 1 to turn. Rep until panel reaches the right size.
- Body Ribbed Panels:
- Katie creates:
- 3 front panels (7 rows × 2 small, 9 rows × 1).
- 1 back panel (54 rows) total width.
- Katie creates:
- Add/subtract rows for size customization.

3. Assembly
3.1 Slip Stitch Panels Together
- Switch to the 4.5mm hook.
- Use slip stitches on the RIGHT side for visible seams.
- Alternatively, work on the wrong side for hidden seams.
3.2 Attach Panels
- Attach ribbed and cable panels:
- Left ribbing > left cable > middle ribbing > right cable > right ribbing.
- Join front and back pieces at shoulders first, then the sides.

3.3 Leave Room for Armholes
- Decide armhole size (Katie left ~half the side length open).
4. Sleeves
The sleeves are made directly onto the armhole.
Step 1: Attach Yarn
- Insert the yarn at the underarm with a slip knot.
- Work a round of SC across the armhole. (Katie had ~42 SC).
Step 2: Build Ribbing from Armhole
- Ch desired sleeve length (e.g., 44 + 1 turning chain).
- Work YOSS rows, attaching each row to the armhole:
- Slip Stitch on the next SC stitch, slip stitch again, then turn.
- Repeat until the sleeve goes fully around the armhole.
- Once complete, slip stitch the sleeve seam closed with RS facing.
Step 3: Add Cuffs
- SC around the wrist edge for the base.
- Add a ribbed cuff using SC in the back loops only for snugness. Katie chains 10 for her cuff length.

5. Neckline
- Perform the same cuff process around the neckline:
- Ch 6 for the ribbed neck (5 SC ribbing + 1 turning).
- Attach ribbing rows to neckline with slip stitches.
6. Bottom Border
Katie opted for a simple 2 rows of SC at the hem.
- Attach yarn, SC evenly across the bottom edge.
- Repeat for 2 rounds.
7. Finishing Up
- Weave in all loose ends.
- Optional: Use blocking techniques to shape your jumper and even out texture.
Final Notes
- Experiment with colors, cables, and ribbing widths to make this jumper uniquely yours.
- Happy crocheting!