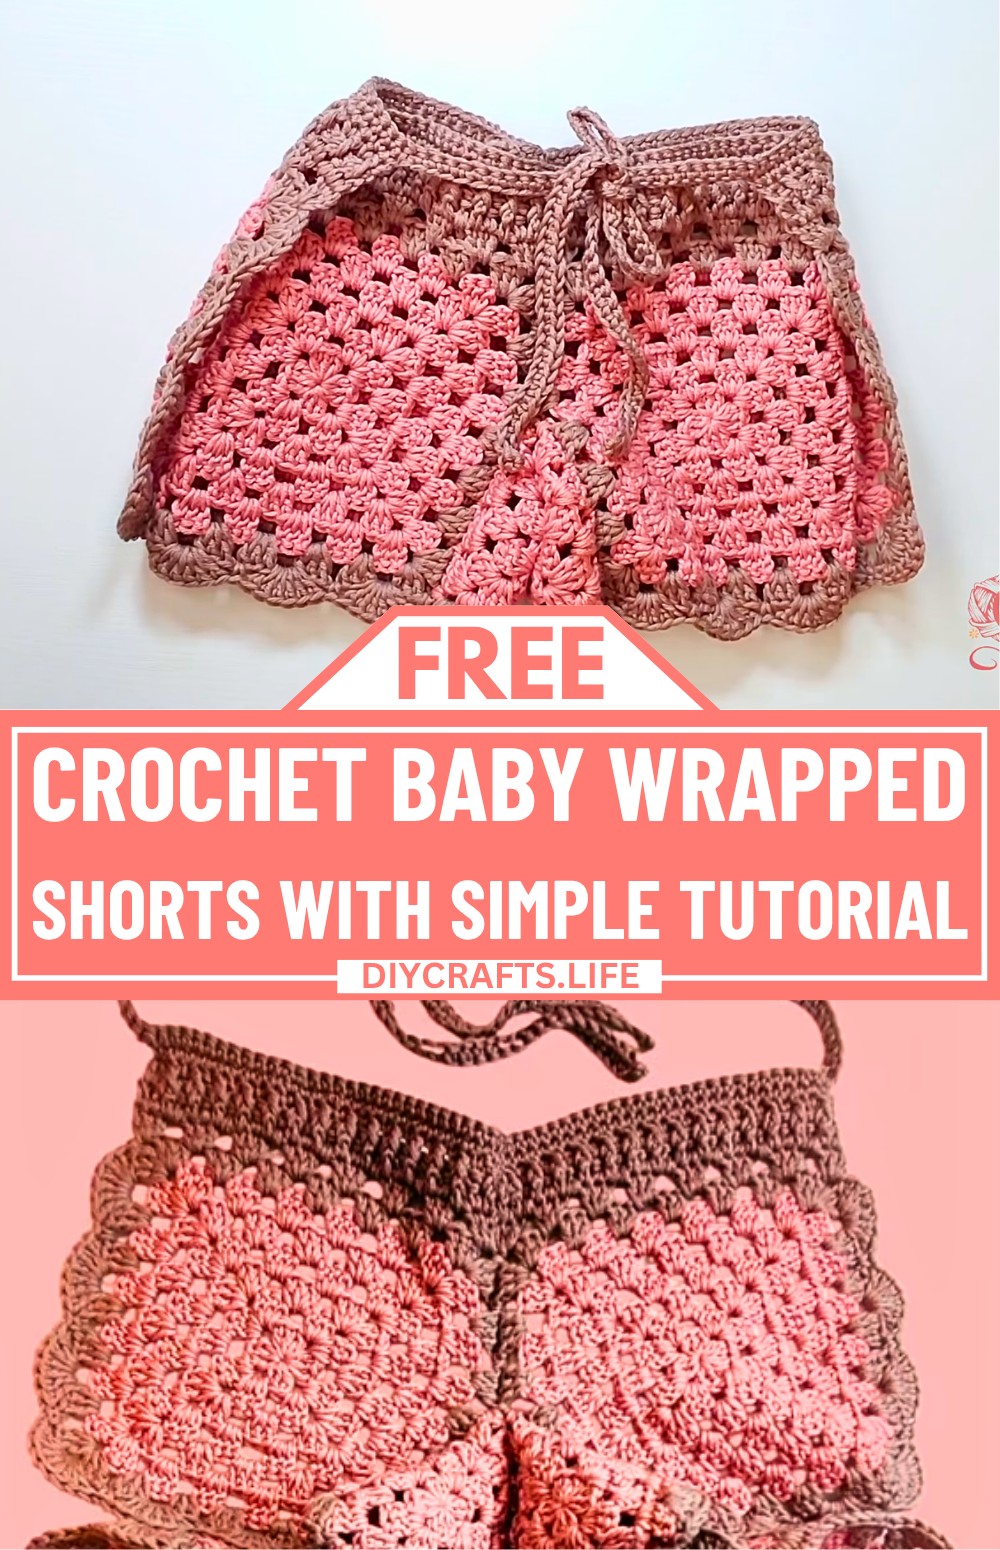
Crocheted baby wrap shorts are a perfect blend of adorable style and everyday comfort for little ones. Made with soft cotton yarn, they are breathable, gentle on lightweight skin, and comfortable enough for daily wear as well as special occasions. The handmade design features adjustable ties and a snug waistband, ensuring a secure yet flexible fit that can easily adapt to different baby sizes. But there's something about these tiny crochet shorts that makes them even more special than they first appear.
Crochet Baby Wrapped Shorts
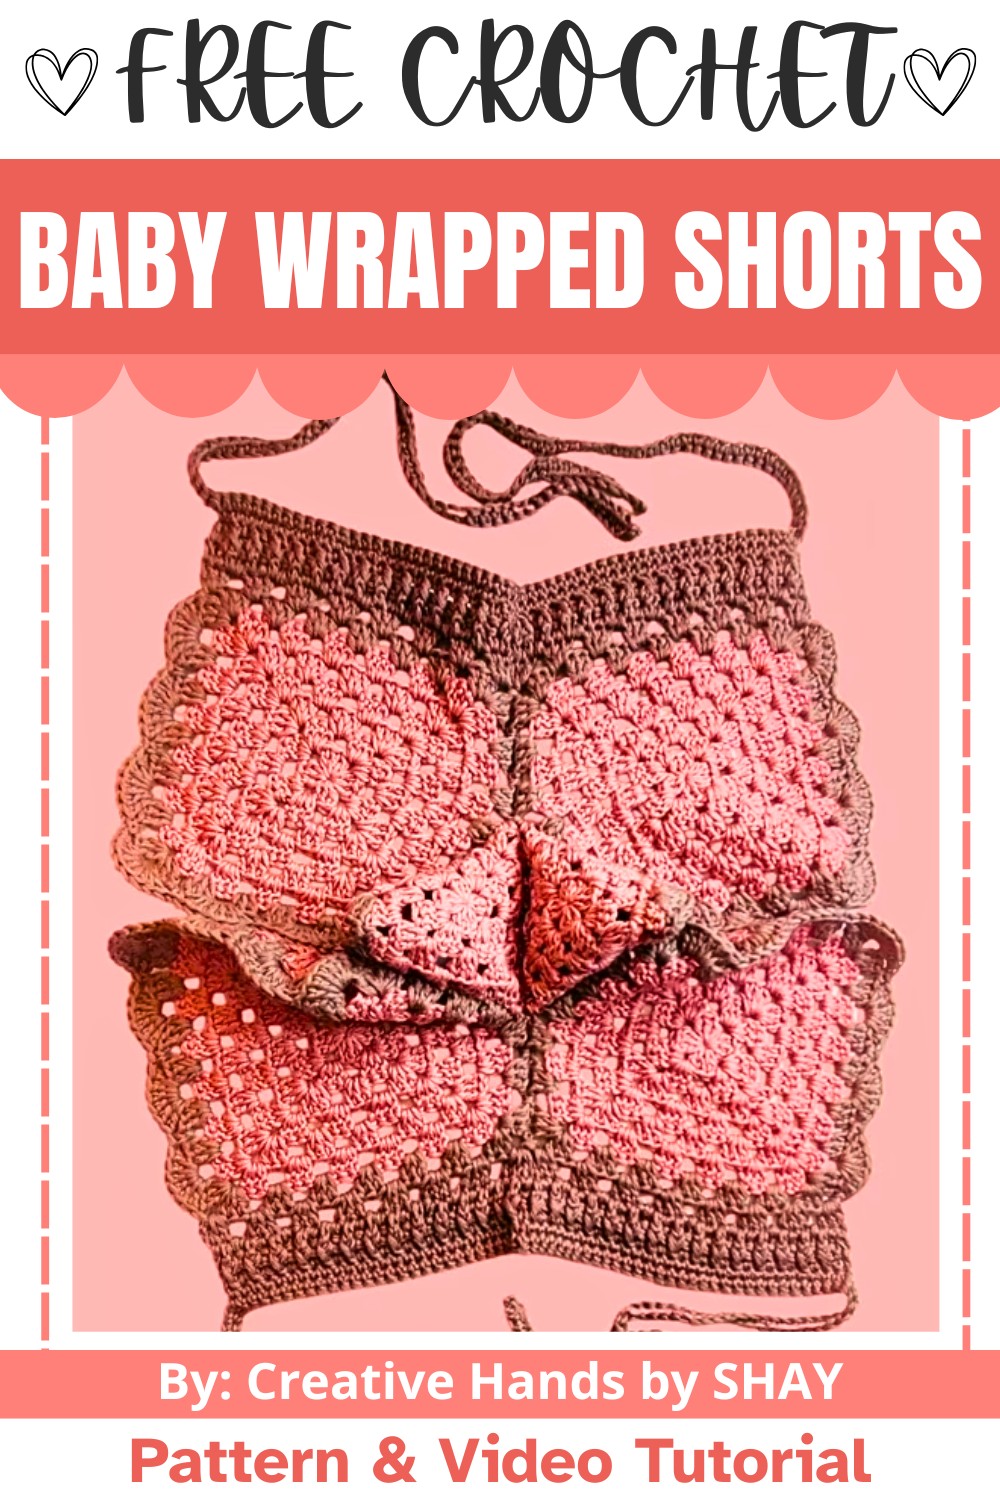
This adorable crocheted piece is simple to make and gives beginners a great chance to learn basic stitches. It usually involves granny squares and simple stitching techniques, making it both approachable and enjoyable to follow. You can also experiment with vibrant colours or soft pastel shades to match your personal style or coordinate with the baby's wardrobe. Beyond being a stylish clothing item, these crocheted shorts also make a thoughtful handmade gift for loved ones.
Credit Creative Hands by SHAY
Materials & Tools Needed
- Yarn: Size 3 (lightweight), cotton yarn (e.g., Coboo Lion Brand Yarn).
- Crochet Hooks:
- Main Squares: 4 mm hook.
- Joining Squares/Stitching: 3.5 mm hook.
- Notions: Stitch markers, scissors, tapestry needle for weaving ends.
Finished Size & Customization Ideas
- Squares:
- Large squares: 6 inches wide.
- Small squares: 3.5 inches wide.
- Customization:
- Base measurements: Example provided is for a baby with a hip measurement of 22 inches.
- To customize, measure the baby’s hip circumference and adjust the size of the squares accordingly to achieve a proper fit.
Pattern Abbreviations & Terminology
- Ch: Chain.
- SC: Single crochet.
- DC: Double crochet.
- Sl st: Slip stitch.
- Cluster: A group of 3 double crochets worked into the same stitch.
- Front post DC / Back post DC: Techniques for ribbing texture.
Step-by-Step Detailed Crochet Instructions
1. Make the Squares
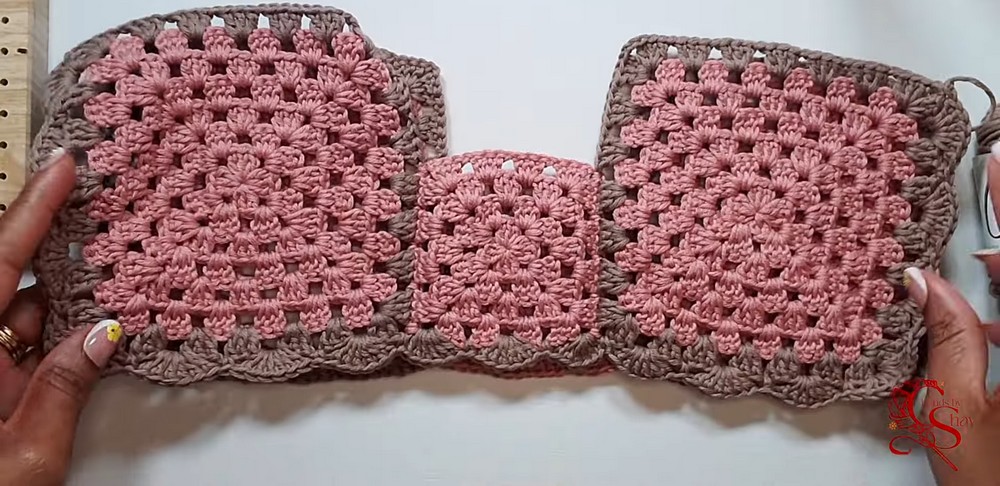
Large Squares (6 inches)
- Begin with a traditional granny square pattern.
- Continue working rounds until the square measures 6 inches wide.
- You will need 4 large squares.
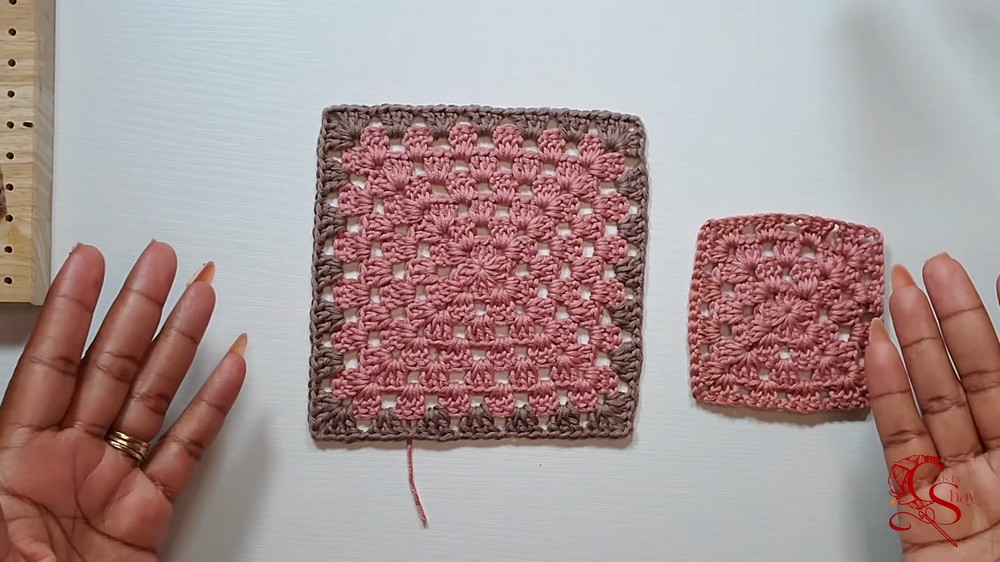
Small Squares (3.5 inches)
- Follow the granny square pattern, working fewer rounds until the square measures 3.5 inches wide.
- You will need 2 small squares.
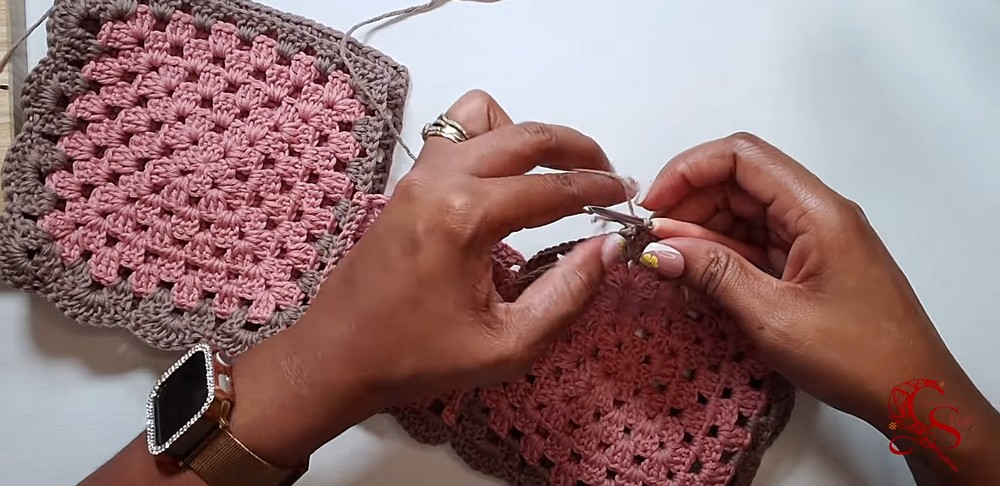
2. Joining the Squares
- Lay out the squares on a flat surface with the wrong sides facing up.
- Use stitch markers to hold the squares in place.
- Using a 3.5 mm hook, join squares by slip stitching into both loops (one stitch per side on both squares) until the squares are fully connected:
- Finish each section by fastening off and weaving in any ends.
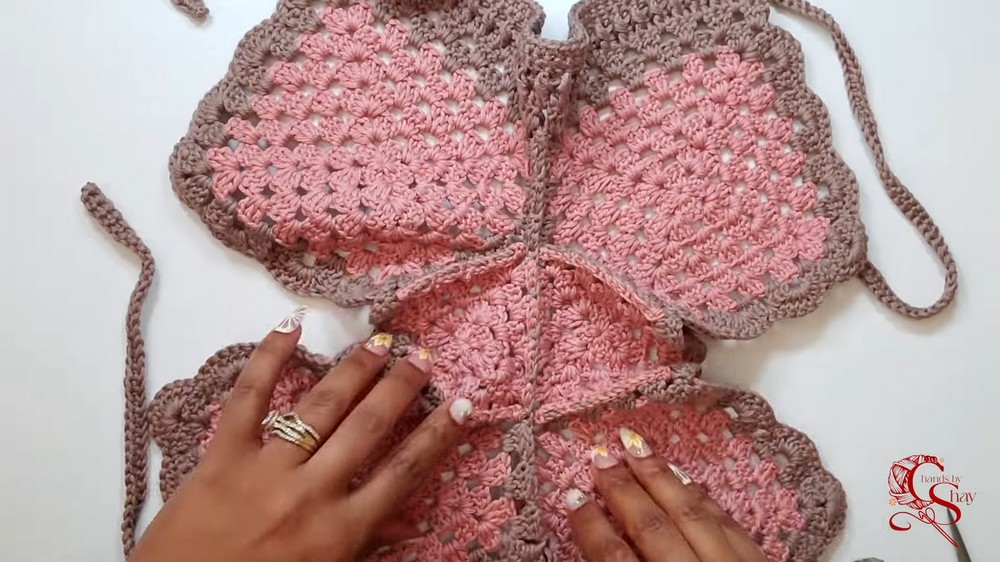
3. Add Edging to Both Panels
- Switch to a 4 mm hook and attach your yarn to the edge of one panel.
- Single Crochet into the first chain space.
- Work 6 DCs into the next chain space.
- Pattern: Single crochet → 6 DC → Single crochet into the next chain space.
- Corners: Work 8 DCs into corner spaces for a rounded effect.
- Repeat steps until the entire edge of the panel is complete.
- Fasten off and repeat for the second panel.
4. Assemble the Panels
- Place both panels with right sides facing each other.
- Join the panels at the crotch seams by slip stitching through both pieces.
- Attach yarn where desired, work single crochet into the first stitch, and slip stitch each stitch along the seam.
- Once complete, fasten off and turn the shorts inside out.
5. Add Waistband Ribbing
- Attach yarn at the top edge of the shorts using a 4 mm crochet hook.
- Row 1: Work one cluster (3 DCs) into each chain space created along the top.
- Chain 2 at the start of the row to count as the first DC.
- Row 2: Work one DC into each stitch from the previous row. (This forms a solid row of DCs.)
- Row 3: Alternate between front post DCs and back post DCs across the row:
- Skip the first stitch and start the ribbing on the second.
6. Create Straps
- Chain 60 to start (customize length depending on fit and preference).
- Begin single crochet along the chain, working one single crochet into each stitch back to the starting point.
- Once at the starting point, chain 60 again for the second strap.
- Work single crochet across this strap to match the first.
7. Final Assembly
- Attach the straps securely at the top of the shorts.
- Adjust placement to suit baby's size.
- Weave in all tail ends using a tapestry needle.
- Flip shorts right-side out and check for symmetry along seams.
Key Customization Notes
- Adjust individual square size based on baby’s measurements:
- For a hip circumference of 22 inches, follow the tutorial’s exact measurements:
- Large Squares (6") and Small Squares (3.5").
- For different sizes, measure the hip circumference and divide by the number of squares to determine the width.
- For a hip circumference of 22 inches, follow the tutorial’s exact measurements:
Finishing Instructions
- After weaving in all ends, use steam blocking or light pressing to ensure the shorts retain their shape.
- Double-check seam closures and strap placements for durability.