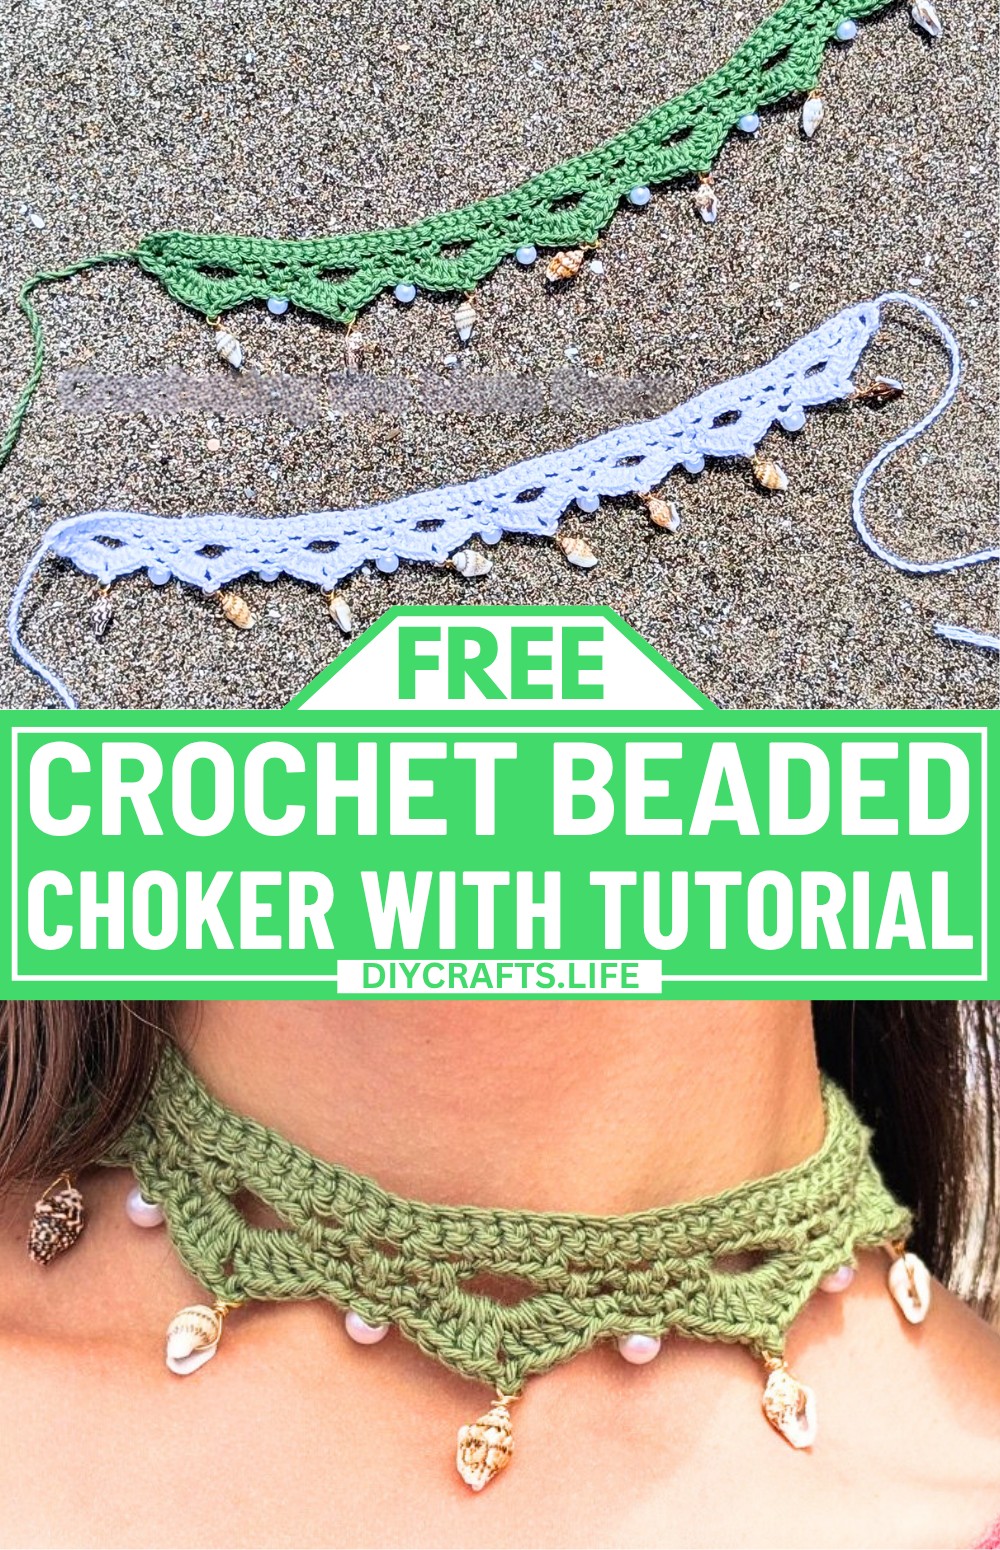
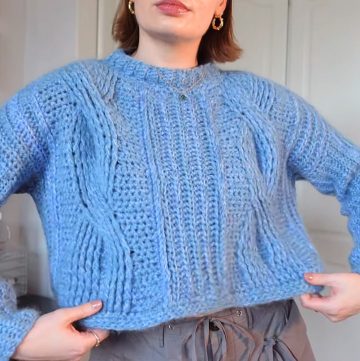
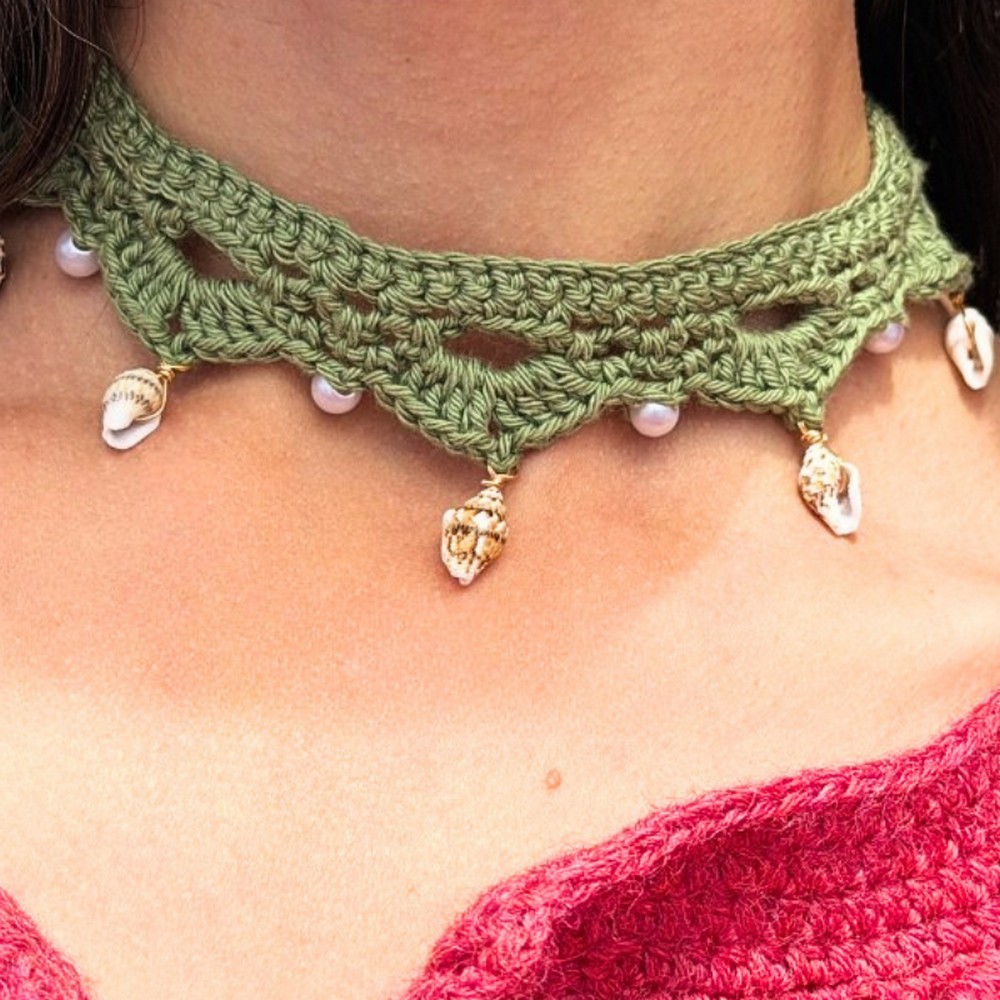
This crocheted choker is stylish, elegant, and full of personality, making it a perfect accessory for summer outings such as a beach day or a casual coffee meetup. Its lightweight crochet design, enhanced with beads and shells, adds a unique charm. And just when you think it's simply a pretty summer accessory, the real charm of its handmade choker details begins to unfold in ways you might not expect.
Crochet Beaded Choker Tutorial
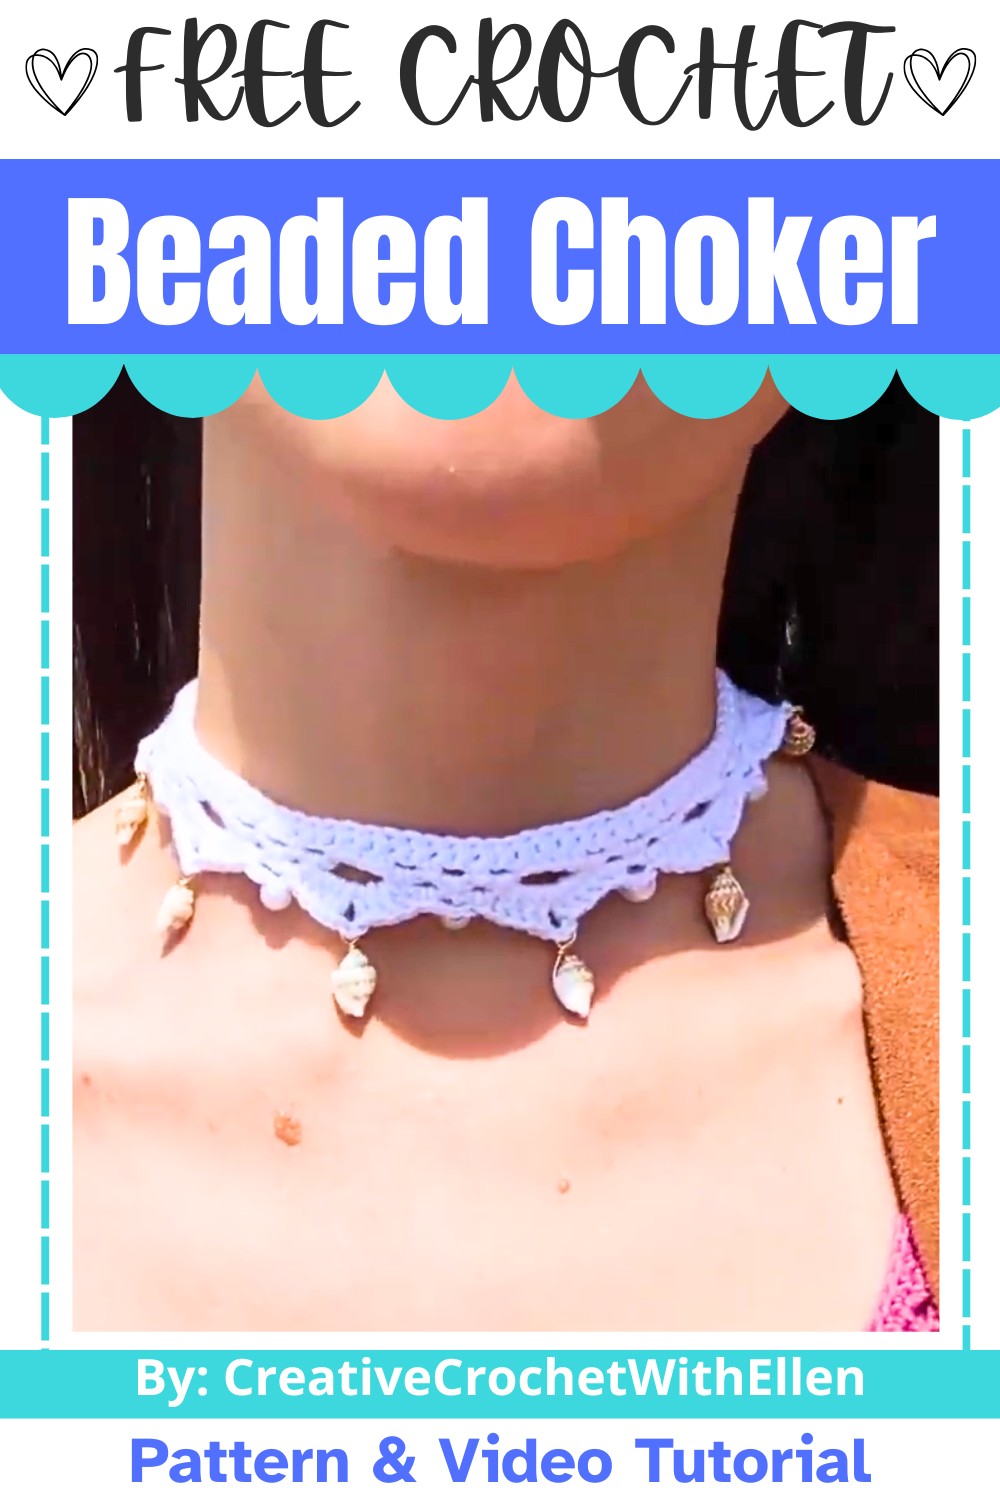
This choker is easy to create and ideal for anyone just starting their crochet journey. With just yarn, a hook, and a few beads or shells, you can quickly bring a beautiful piece to life. Soft cotton yarn works especially well as it is breathable and ideal for warmer weather. Once finished, adjustable ties allow it to sit comfortably around the neck, while the added beads or shells give it a distinctive finishing touch. Overall, it's a quick, creative handmade crochet piece for anyone who wants to make something stylish, personal, and handmade.
Credit CreativeCrochetWithEllen
Materials & Tools Needed
- Yarn: Cotton or cotton & acrylic blend. Suggested: Yarn Art Begonia (50g, 169m/185yd)
- Choose any color you like.
- Hooks:
- Size 2.5 mm (for the starting chain).
- Size 2 mm (for the rest of the project).
- Optional: Very small hook (e.g., 1.3 mm) for threading charms or beads if needed.
- Beads & Charms:
- Recommended hole size for beads/shells: approximately 2 mm.
- Scissors
- Measuring tape (if sizing the choker).
- Yarn needle (for weaving in ends).
Finished Size & Customization Ideas
- Standard Adult Size: For a snug fit, make the choker slightly shorter than the circumference of your neck.
- Examples: Green choker = 63 chains; White choker = 72 chains.
- Customization:
- Adjust the number of chains based on neck size.
- Ensure the chains are divisible by 9, as the pattern requires this for repetition.
- Add beads, shells, or other charms to personalize the design.
Pattern Abbreviations & Terminology
- ch: Chain
- sc: Single Crochet
- dc: Double Crochet
- tr: Treble Stitch
- sl st: Slip Stitch
- YO: Yarn Over
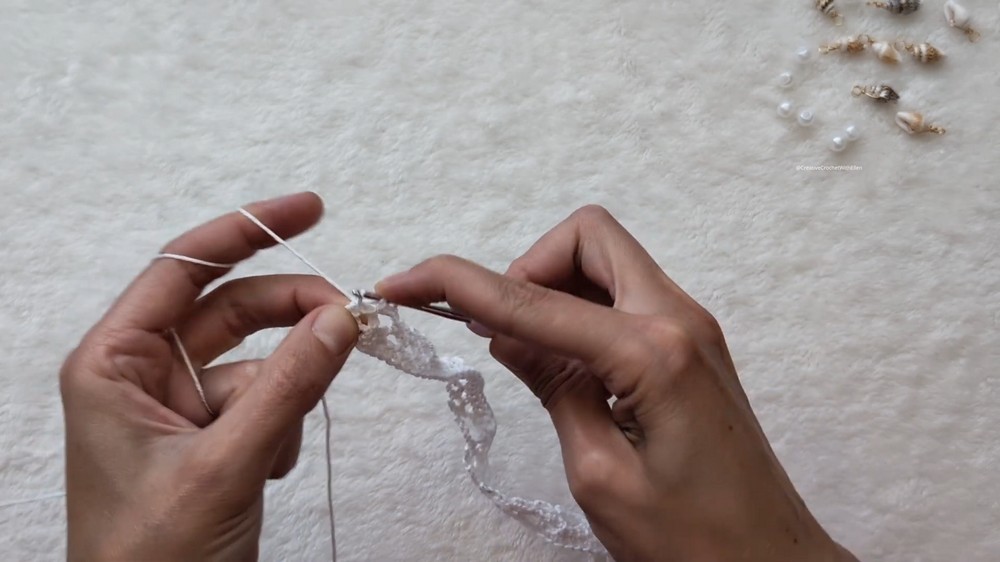
Step-by-Step Detailed Crochet Instructions
Below is a breakdown of the tutorial choker pattern into numbered steps.
Step 1. Starting the Foundation Chain
- Make a slip knot, leaving a long yarn tail (to use later for finishing).
- Decide the number of chains based on size (e.g., 63 for the green or 72 for the white choker).
- With the 2.5 mm hook, chain the desired number of stitches.
Step 2. Row 1: Single Crochet Foundation
- Switch to the 2 mm hook for the rest of the project.
- Add 1 turning chain.
- Rotate the chain to work into the back loops for a clean, braided edge.
- Work 1 sc into every chain across.
- You will end with the same number of single crochets as chains (e.g., 63 sc).
Step 3. Row 2: Mini Arches
- Ch 1, turn your work.
- Make 1 sc into the first stitch.
- Ch 3, skip the next stitch, and make 1 sc into the following stitch (forming a small arch).
- Make 3 sc into the next three stitches.
- Repeat this pattern across:
- Ch 3, skip 1 stitch, sc in next.
- Repeat twice more.
- Follow with 3 sc.
- At the end of the row, after the last set of 3 sc, finish with Ch 3, skip 1 stitch, and sc in the last stitch.
Step 4. Row 3: Larger Arches
- Ch 4, turn your work.
- Work into the arches from Row 2:
- Make 1 sc into the first arch.
- Ch 5, sc into the next arch.
- Ch 3, sc into the next arch. Repeat another Ch 3, sc into the next.
- When you reach groups of 3 sc from Row 2 (between mini arches), make 1 large arch:
- Ch 5, sc into the next arch.
- Continue repeating the same pattern across:
- Ch 3, sc into the next arch (twice).
- Ch 5, sc into the next arch (around groups of 3 sc).
- Finish the last row with Ch 1, 1 dc into the edge stitch.
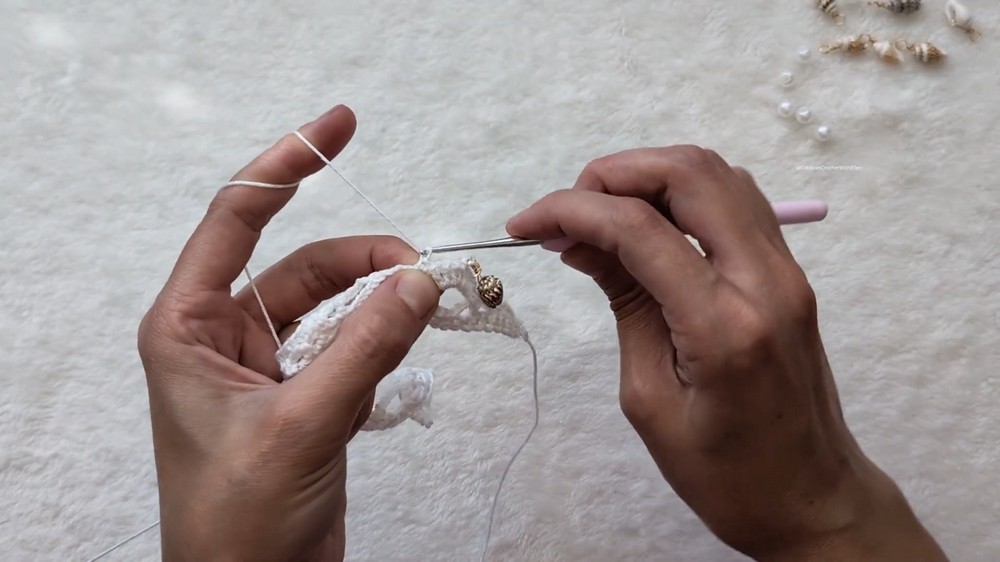
Step 5. Row 4: Decorating with Shells and Beads
- Ch 1, turn your work.
- Into the first small arch of Row 3, make 1 sc.
- In the next large arch, create a shell by working:
- 4 dc, ch 1, pull through the shell, secure with 1 ch, and adjust.
- Work 4 dc into the same arch.
- Into the next small arch, make 1 sc, securing it with ch 1.
- To add a bead:
- Place the bead on your hook, yarn over, pull through the bead, and fix it with ch 1.
- Work 1 sc into the next arch.
- Continue this pattern across:
- Shell in large arches (4 dc, ch 1, secure shell, 4 dc).
- Beads in small arches (sc + bead).
Step 6. Edging the Sides
- On one side of the choker:
- Ch 4, YO twice, and make 1 tr into the first chain of ch-4.
- Attach the "treble stitch on a leg" to the choker’s edge using sl st.
- Cut the yarn, tie a knot, and weave in the ends.
- Repeat the same edging on the other side using the long tail left from the slip knot:
- Make the treble in the same fashion and attach.

Step 7. Making the Cord Ties
- Cut two yarn pieces, each approximately 60 cm (24 inches) long.
- Attach one piece:
- Insert the hook into the space between the choker and treble stitch and pull the yarn through.
- Twist the yarn tightly:
- Hold one end firmly while twisting the other in the yarn’s natural direction for about a minute.
- Fold the twisted yarn in half carefully, adjusting ends to match.
- Tie a knot to secure the cord.
- Repeat for the other side of the choker.
Finishing Techniques
- Straighten and ensure the shells, arches, and beads are in place.
- Check the cords and ties for tightness and symmetry.
- Style and wear your choker proudly.