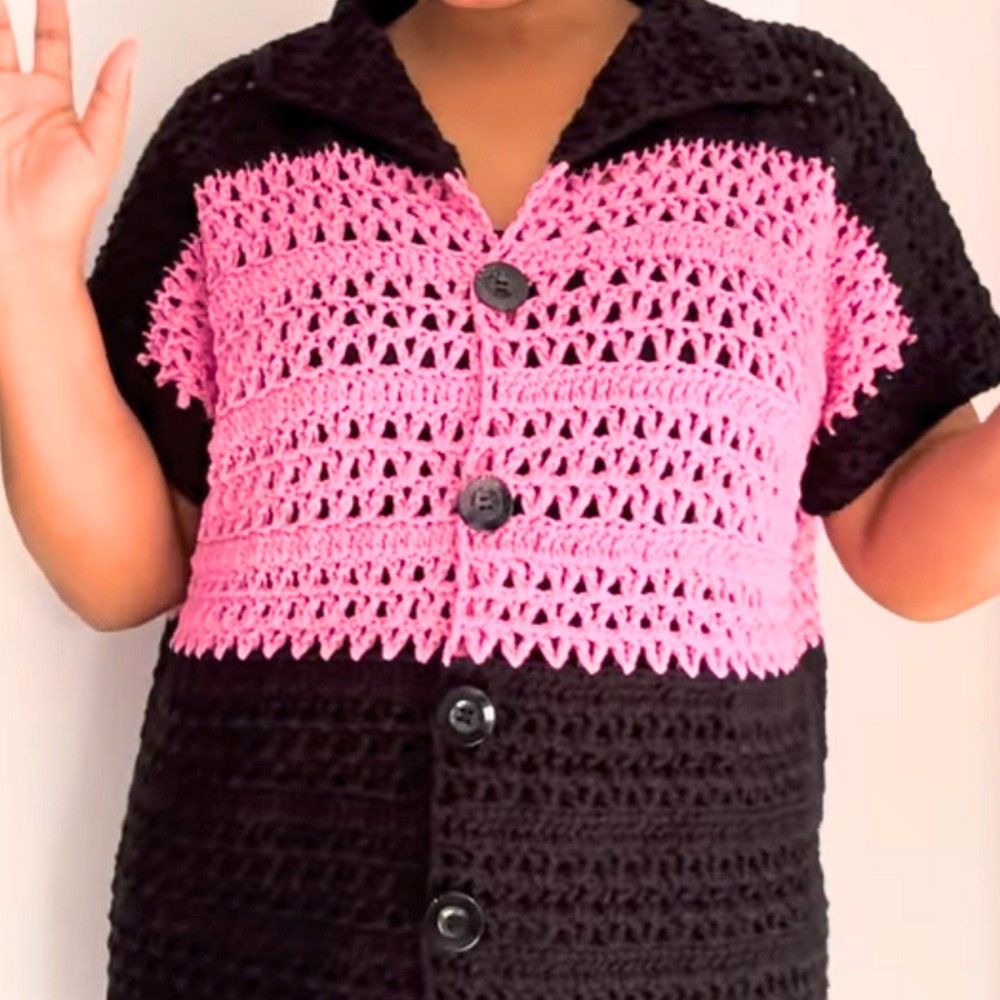
This crochet shirt is a beautiful combination of simplicity and style. It’s perfect for anyone—no matter their age or gender. The design is light and casual, making it ideal for daily wear or special occasions. You’ll love how versatile it is! Whether paired with jeans for a laid-back look or layered for cooler days, this shirt adds a personal, handmade touch to your wardrobe.

Unisex Crochet Shirt Tutorial
What’s great is that this shirt is beginner-friendly. It uses a repeating pattern of double crochet stitches and V-stitches to create a stunning texture that's easy to recognize after a few rows. With step-by-step guidance, you can crochet it in three separate panels—two for the front and one for the back—before joining them together. Plus, it features a smart button-up design and optional collar customization, allowing you to style it your way.
This crochet shirt can be made with your favorite yarn colors, giving you the freedom to personalize it. The balance of creativity and practicality makes it a joy to crochet and even better to wear!
Credit FTK Crochet
Materials & Tools Needed
- Yarn: Milk cotton yarn, 5-ply (used in black and a pink or lilac shade in the tutorial). You can use colors of your choice.
- Hook: 5mm crochet hook.
- Scissors
- Tapestry needle
- Stitch markers
- Measuring tape
Pattern Abbreviations & Terminology
- ch: Chain
- dc: Double crochet
- st(s): Stitch(es)
- V-stitch: A group of stitches made into one stitch as [dc, ch 1, dc].
- sl st: Slip stitch
Terminology used in this pattern is in US terms.
Measurement Details
You will need the following measurements before starting:
- Chest Measurement: For this pattern in the tutorial, a 48-inch chest measurement is used.
- Front Panels: Two panels, 12 inches each.
- Back Panel: One panel, 24 inches.
- Shirt Length: Desired length of the shirt. In the tutorial, the final length is 26.5 inches, achieved with 41 rows.
- Armhole Circumference: Around your arm where the sleeve will fit. In the tutorial, 16 inches is used (8 inches each for front and back).
Step-by-Step Crochet Instructions
Overview of Construction
The shirt consists of three main panels:
- Two Front Panels (identical)
- One Back Panel (wider than the front panels combined)
These panels are worked flat, using a combination of double crochet rows and V-stitch rows, then joined together. Sleeves, a collar, and optional buttons are added in the finishing steps.
1. Front Panel (Make 2)
Step 1: Foundation Chain
- Start with a foundation chain of 45.
- Always chain in multiples of 3 + 1. For instance, 45 ch + 1 = 46 chains total.
Step 2: Row 1 (Double Crochet Row)
- Ch 3 (counts as the first dc), then turn your work.
- Start in the 4th chain from the hook and make 1 dc in each ch across.
- Stitch Count: 46 dc.
Step 3: Row 2 (V-Stitch Row)
- Ch 3, turn.
- Skip 1 st, and in the next st, make a V-stitch (dc, ch 1, dc in the same st).
- Continue: Yarn over, skip 2 sts, and in the 3rd st, work a V-stitch (dc, ch 1, dc).
- Repeat across, ending the row with 1 dc in the turning chain.
Step 4: Rows 3–4
- Rows 3 & 4 are more V-stitch rows.
- For these rows, place each V-stitch into the ch-1 space of the V-stitch below.
Step 5: Row 5 (Double Crochet Row)
- Repeat Row 1, working 1 dc in every st across (including each ch-1 space in the V-stitch rows).
Step 6: Repeat Pattern
- Alternate between 1 row of dc and 3 rows of V-stitches.
- Repeat until the panel reaches your desired length. In the tutorial: 41 rows total for ~26.5 inches.
Repeat the process for the second front panel.

2. Back Panel
The back panel is made similarly to the front panels but is wider.
Step 1: Foundation Chain
- Ch 90 + 1 = 91 chains in total.
Step 2: Follow the Front Panel Pattern
- Work the same stitch pattern as the front panels:
- Start with 1 row dc.
- Alternate between 1 row of dc and 3 rows of V-stitches.
- Continue until the back panel matches the length of the front panels (e.g., 41 rows).

3. Join Shoulder Seams
Step 1: Align Panels
- Place the 2 front panels on top of the back panel (RS facing each other).
Step 2: Mark Neckline Space
- Leave an 8-inch opening for the neckline. Use a measuring tape and mark the space with stitch markers.
Step 3: Join with Tapestry Needle
- Use the whipstitch technique (or your preferred stitch) to join the remaining stitches of the shoulders.

4. Collar
- Attach yarn at the neckline edge.
- Work 1 row of V-stitches completely around the neckline opening.
- Continue in pattern, alternating 3 V-stitch rows and 1 dc row.
- In the tutorial: 3 V rows + 1 dc row make up the collar.
5. Join Side Seams & Create Armholes
Step 1: Mark Armhole Space
- Use a measuring tape to leave out 8 inches for the armhole. (Adjust based on your arm circumference.)
- Mark this space on both sides, starting from the top down.
Step 2: Join Sides
- Turn the work inside out for a seamless join.
- Use a single crochet seam or whipstitch to join the sides from the bottom hem up to the armhole marker.

6. Sleeves (Optional Length)
Step 1: Attach Yarn
- Reattach yarn at the underarm seam.
Step 2: Work First Row of Sleeve
- Work 2 dc in each space evenly around the armhole.
Step 3: Follow Pattern
- Alternate between 1 dc row and 3 V-stitch rows as you did for the body.
- Continue until your sleeve reaches the desired length. (In the tutorial: 3 additional rows).

7. Finishing Touches
Buttons (Optional):
- Sew buttons to one side of the front panel. Use the V-stitch spaces as buttonholes or create loops if smaller buttons are used.
Weave in Ends:
- Use a tapestry needle to weave in all loose ends throughout the work.
Final Notes
- The shirt combines flexibility and clean patterns, making it perfectly unisex.
- Adjust sizes and colors to your preference by altering chain numbers and yarn colors.
- In the tutorial, the shirt features bold black and pink/lilac tones, but feel free to experiment!