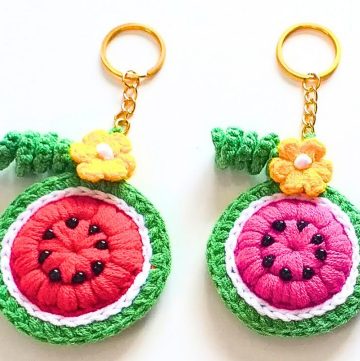
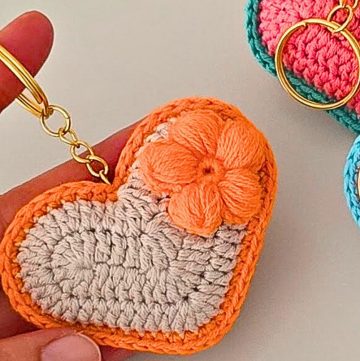
Create a beautifully handcrafted Crochet Christmas Wreath to brighten up your holiday décor. Using cotton yarn and a 3mm crochet hook, this project combines creativity and festive charm. With its versatile design, it makes a perfect addition to doors, walls, or as a unique handmade gift.
This crochet wreath is the perfect holiday decoration—lightweight yet durable due to the sturdy cotton yarn. Its delicate clusters and hanging loop give it an elegant and festive appearance. Use it as a door adornment, tree accessory, or wall décor to bring a cozy touch to your space.
Crochet a Christmas Wreath
Crafting this Christmas wreath is beginner-friendly and enjoyable. Wrapping yarn into loops, crocheting single crochets, and forming clusters are satisfying yet straightforward steps. Changing colors for the finishing trim adds a festive flair, making this a rewarding handmade project for the holidays.
Credit Crochet Joy
Materials and Preparation
To make the Crochet Christmas Wreath, gather the following materials:
- Yarn: Cotton yarn in green (main body) and contrasting color (decorative edge). You can use a medium-weight yarn for a sturdy wreath.
- Crochet hook: 3.0 mm hook. Choose a hook size that works well with your chosen yarn.
- Additional tools:
- Scissors
- Stitch markers (optional, but helpful for marking rounds)
Preparation
- Select your yarn colors. Green is commonly used for the base of the wreath, but feel free to get creative with color combinations!
- Keep your workspace clear and organized, as this project's multi-step nature requires focus.
- Test your tension before starting the main project to ensure your stitches aren’t too loose or too tight.
Abbreviations and Notes
Here are the abbreviations used in this pattern:
| Abbreviation | Meaning |
|---|---|
| SC | Single Crochet |
| DC | Double Crochet |
| CH | Chain |
| Slip Stitch | Insert hook into a stitch, yarn over, pull through the loop on your hook |
| Cluster | A group of stitches (detailed below) |
Pattern Notes:
- You’ll begin by creating the wreath base using wrapped yarn loops.
- The number of single crochets in the base will depend on the size of your loop; adjust as necessary.
- For ease during the project, use a stitch marker to mark the first and last stitches in each round.
- Color changes can be done seamlessly by tying and securing the new yarn where you will begin crocheting the decorative edge.
- Clusters require you to repeat a sequence: (1 SC, 2 DC, 1 SC, skip 1, slip stitch).
Gauge, Approximate Size, and Pattern Notes
- Gauge: Not critical for this project. Focus on maintaining a consistent tension; tight stitches will provide structure to your wreath.
- Approximate Size: Finished size of the wreath will vary depending on the number of times the yarn loop is wrapped initially. Typically, the inner diameter is 2–3 inches, while the outer diameter can vary based on the thickness of the yarn.
- Special Techniques:
- Wrapped Yarn Loops: This technique is used to create the base for the wreath. Wrap the yarn around your fingers as instructed in the video.
- Clusters: Each decorative "leaf" edge is made using clusters, so understanding how they’re constructed is essential for achieving the final look.
Step-by-Step Pattern
1. Wreath Base
Materials: Green Cotton Yarn
- Begin by wrapping your green yarn around four fingers approximately 20 times to create a loop.
- Carefully remove the loop from your fingers, keeping its shape intact.
- Hold the loop and insert your crochet hook through all the loops. Yarn over and pull the yarn through all the loops, creating a starting loop.
- CH 1 to secure the loop.
- Work SC into the loop until the entire loop is filled. The number of SC stitches will vary depending on the size and thickness of the initial yarn loop.
- Mark the first and last stitch with stitch markers for easy identification.
- Use a Slip Stitch to join the last SC to the first SC, completing the round.
2. Creating the Hanging Loop
Materials: Green Cotton Yarn
- After joining the last stitch, start the hanging loop by CH 20.
- Once the chain is complete, form the loop by slip-stitching to join it to the starting stitch of the chain.
3. Adding Decorative Clusters
Materials: Green Cotton Yarn
Clusters will form the decorative "leaf-like" edge to your wreath. Each cluster consists of the following sequence, all worked into the same stitch:
- SC into the stitch you're working into.
- DC two times.
- SC (again into the same stitch as before).
- Skip one stitch, then slip stitch into the next stitch to secure the cluster.
Instructions:
- First Cluster: Insert your hook into the next stitch, work 1 SC, 2 DC, 1 SC, and skip a stitch before slip stitching into the next stitch.
- Second Cluster: Skip one stitch, then insert the hook into the next stitch. Repeat the cluster sequence (1 SC, 2 DC, 1 SC). Skip one stitch, then slip-stitch to secure the cluster.
- Continue working clusters around the wreath until the base is completely covered with evenly spaced clusters.
- Adjust spacing between clusters depending on the number of stitches in your wreath’s base, ensuring the final look is symmetrical.
4. Adding Decorative Edge (Optional)
Materials: Contrasting Cotton Yarn
- Change to your preferred contrasting yarn by inserting the crochet hook at any slip stitch position. Secure the yarn with a knot.
- To create the decorative edging, work along the edge of the clusters:
- Insert your hook in the middle of a cluster’s petal edge.
- Yarn over and pull through. Tie a small knot to secure the yarn in place.
Repeat the knotting process around the outer edge of the wreath for a pop of color and texture.
Finishing Touches:
- Ensure all loose yarn ends are neatly woven in using your yarn needle.
Congratulations! You've completed your Crochet Christmas Wreath! Use the hanging loop to display it on your wall, tree, or anywhere you’d like some festive cheer.
Feel free to experiment with different colors or embellishments, such as buttons, beads, or pom-poms, to customize your wreath.
Pattern Question
How do I adjust the size of the wreath?
The size of the wreath can be adjusted by varying the number of loops you wrap around your fingers at the start. More loops mean a larger inner base, allowing more crochet clusters around the circumference.
Conclusion
This Crochet Christmas Wreath tutorial offers simple, step-by-step instructions to create a stunning holiday accessory. With just yarn, a hook, and creative energy, you’ll craft a festive keepsake to cherish for years. Perfect for decorating your home or spreading holiday cheer as a gift!


