Create a cozy and festive Halloween Pumpkin Cardigan that blends seasonal charm with everyday comfort. This cardigan is not only eye-catching but also a versatile addition to your wardrobe. Whether styled casually or dressed up, it’s the perfect handmade piece for the spooky season.
This cardigan is a durable and functional staple, designed to keep you warm while showcasing playful pumpkin designs. Its unique patterns and customizable length make it both stylish and practical. Perfect for Halloween celebrations or everyday wear, this cardigan is crafted with care to ensure long-lasting appeal and usability.
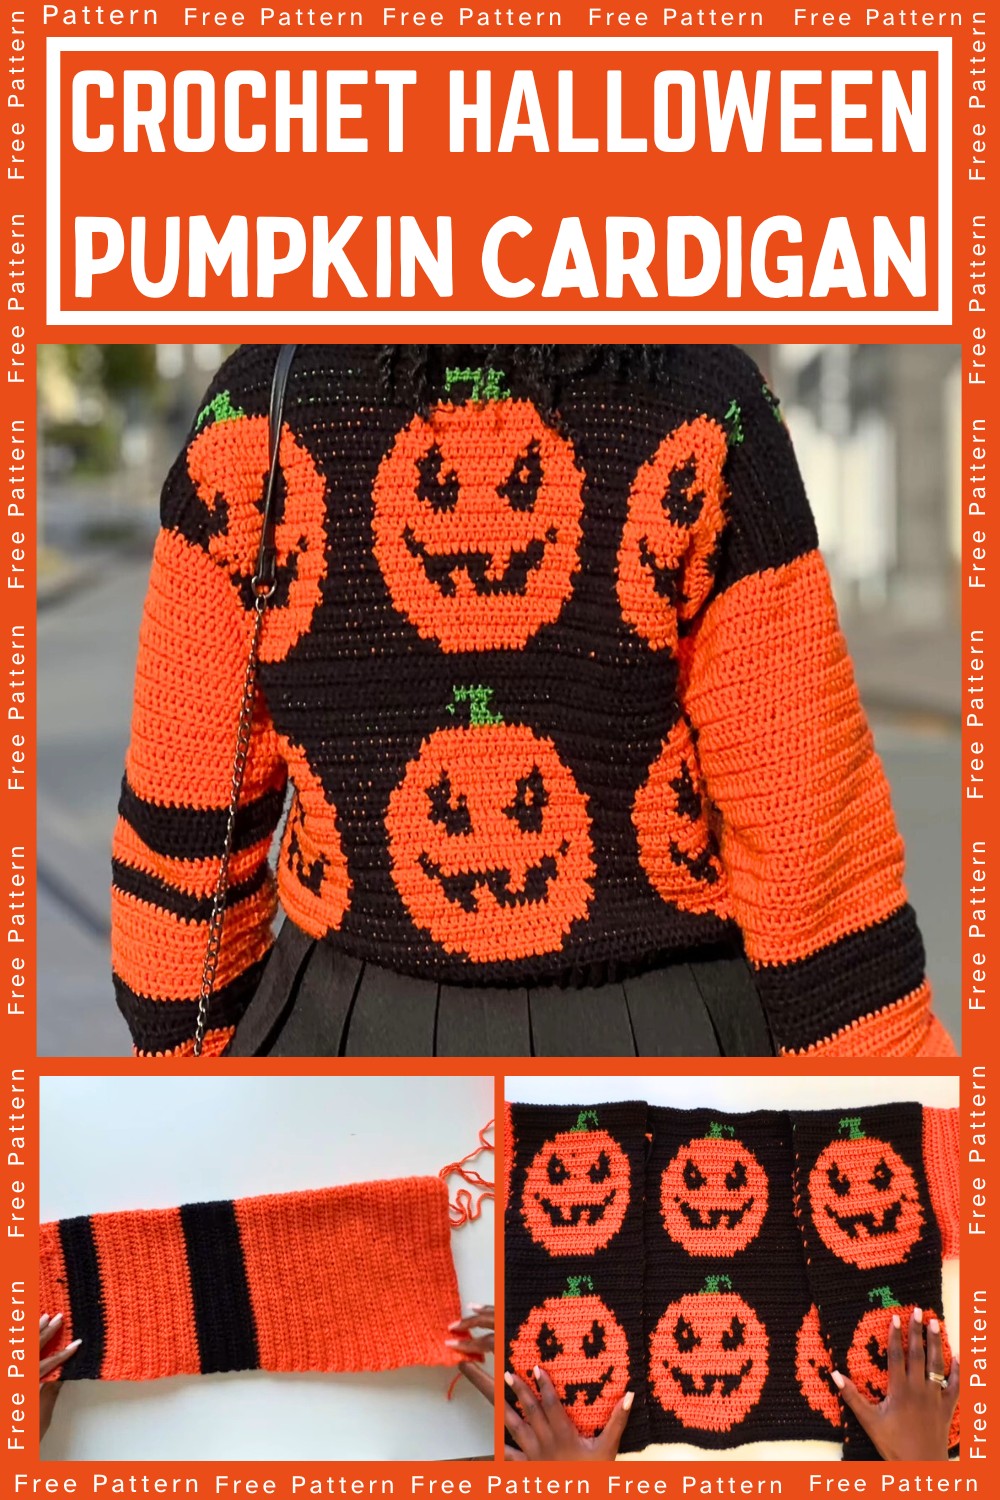
Crochet Halloween Pumpkin Cardigan
Perfect for beginners and experienced crocheters, this project is fun and adaptable. The cardigan’s design can be tailored to fit any size and style, making it enjoyable to create for yourself or as a thoughtful gift. The provided graph offers easy guidance to let your creativity shine.
Materials and Preparation
- Yarn: Acrylic yarn (50g skein, 133 meters per skein)
Recommended brand: Wollidu. You can substitute with any yarn of similar weight and hook size recommendations.
Colors needed: Black, Orange, and Green. - Quantity: Approximately 8 skeins (adjust depending on the size and length of the cardigan).
- Hook size: 3.5 mm crochet hook.
- Additional tools: Tapestry needle (for seaming and weaving in ends), stitch markers, measuring tape, scissors.
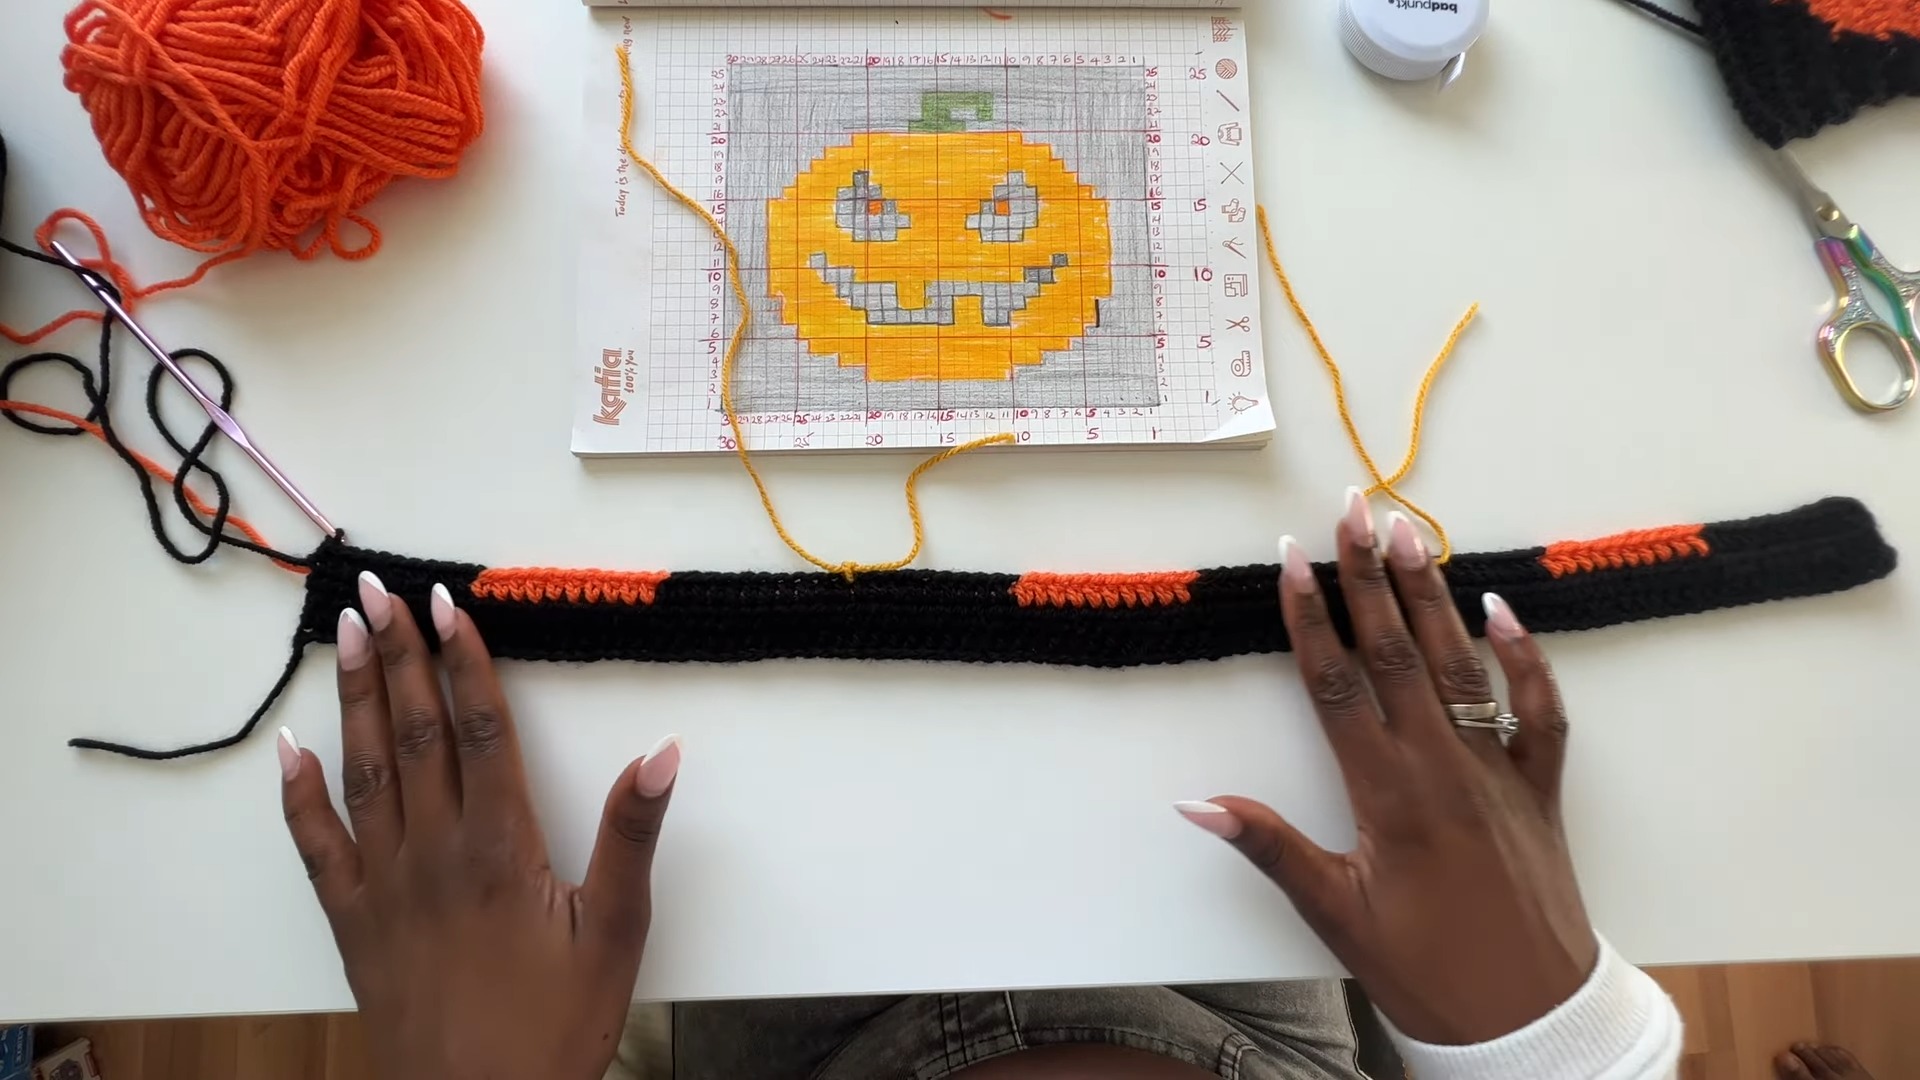
- Optional: Graph paper or a screenshot of the provided pumpkin chart for reference.
Abbreviations and Notes
Abbreviations
- CH: Chain
- SC: Single Crochet
- HDC: Half Double Crochet
- DC: Double Crochet
- SS: Slip Stitch
- FP: Front Post
- BP: Back Post
- YO: Yarn Over

Notes
- Gauge: A gauge swatch is essential to ensure the cardigan fits the desired size. Follow the pumpkin chart closely for stitch and row adjustments.
- Sizing Adjustments: The cardigan is beginner-friendly and can be customized easily for size or length. Refer to the "Size Adjustments" section below for instructions.
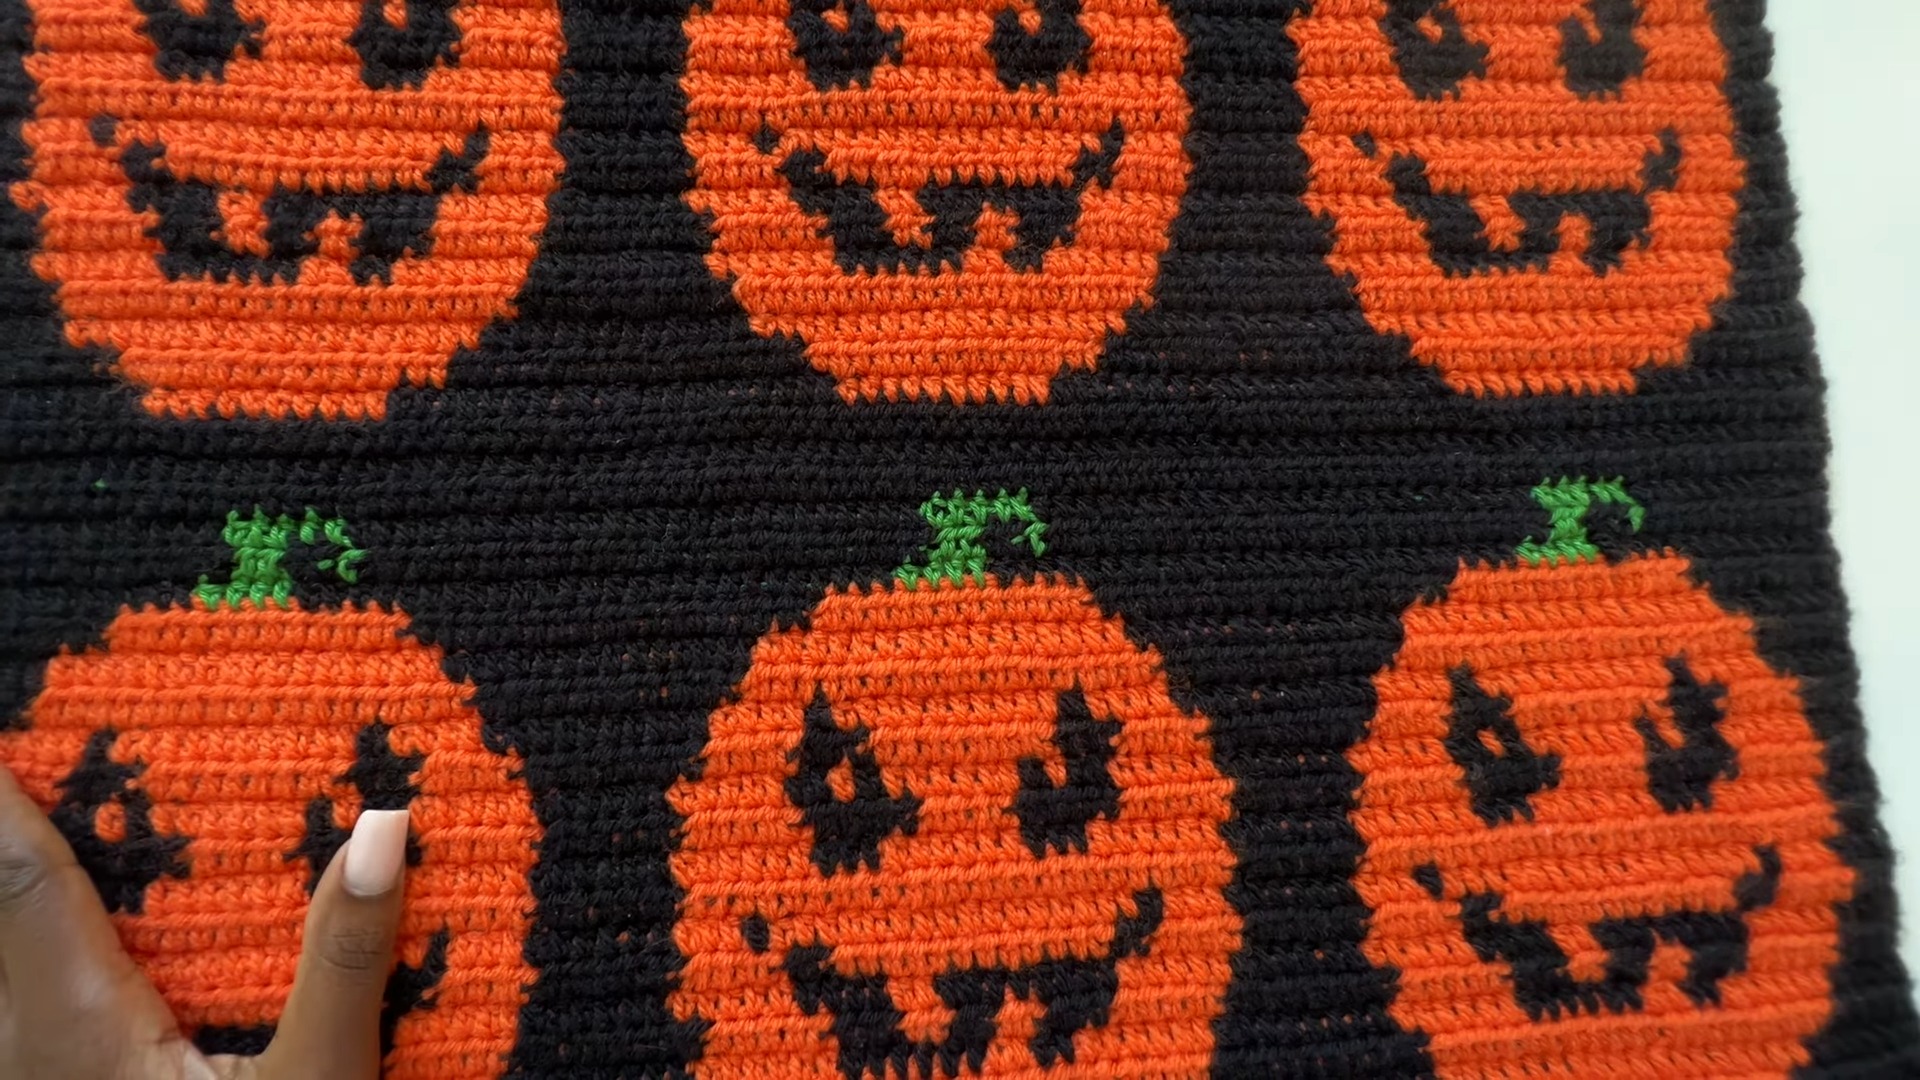
- Pumpkin Chart: Each pumpkin measures 8 inches in height and 10 inches in width.
- Color Changes: Maintain tension when carrying yarn (especially between color changes) to prevent misalignment. Use stitch markers if required for clarity.
- Foundation Chain: For different sizes, you must calculate the required number of foundation stitches based on the chart dimensions and measurements provided below.
Gauge, Approximate Size, and Pattern Notes
Gauge
- Gauge for HDC: Approx. 25 stitches x 12 rows = 8" (height) x 10" (width).
- Pumpkin Dimensions (using the chart): Each one measures about 8 inches tall x 10 inches wide.
Approximate Size
- Extra Small (XS): 90 foundation chains (3 pumpkins).
- Small/Medium (S/M): 120 foundation chains (4 pumpkins).
- Large/Extra Large (L/XL): 150 foundation chains (5 pumpkins).
Special Techniques
- Pumpkin Graph: Each individual stitch corresponds to one graph box.
- Carrying Yarn: After switching colors, carry the unused yarn along the back of your work to avoid cutting after every change—this enhances durability.
- Panel Construction: Work the cardigan in separate sections: Back Panel → Front Panels → Sleeves → Ribbing → Assembly.
Step-by-Step Pattern
Back Panel
-
Foundation Chain:
- XS: Chain 90
- S/M: Chain 120
- L/XL: Chain 150
- For larger sizes, add 30 chains for each additional pumpkin width.
-
Row 1:
Work 1 HDC in the 3rd chain from the hook, then HDC across the entire foundation chain. You should end with 90 HDC for XS, 120 HDC for S/M, or 150 HDC for L/XL. -
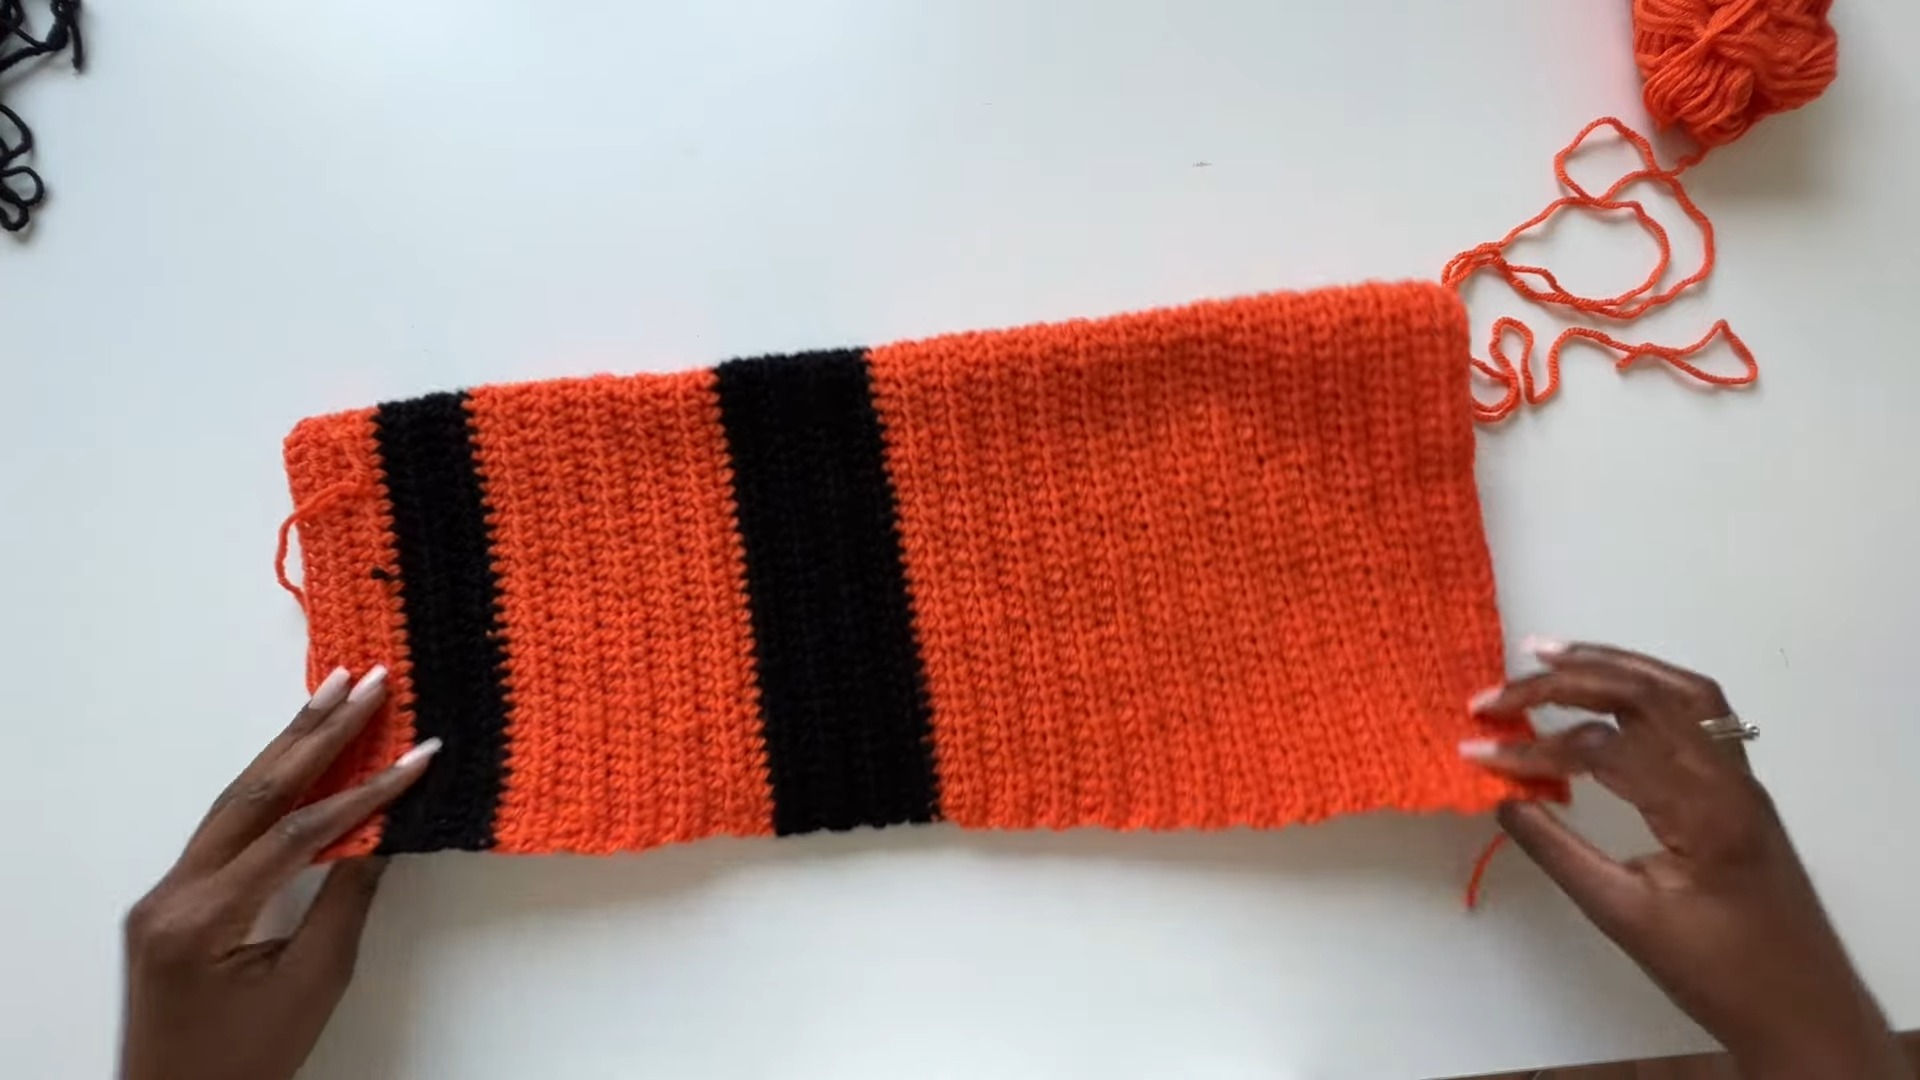
Rows 2-6:
HDC in each stitch across—no increases, no decreases. Always chain 2 at the beginning of each row and turn your work. Follow alternating rows of pumpkin colors using the graph pattern:- Row 3: Work 10 Black, 10 Orange, 10 Black (repeat across).
- Row 4: Reduce black sections by working 8 Black, 14 Orange, 8 Black (repeat across).
Continue following the graph row-by-row for the full pumpkin pattern until the back panel is complete.
-
Length Adjustments:
If 2 pumpkins (approx. 16 inches) aren’t long enough for your desired fit, continue working in the chart or add rows of black before starting the next pumpkins.
Front Panels
-
Foundation Chains:
- Using the total count from the back panel, calculate:
- XS: 30 chains each (1 pumpkin).
- S/M: 45 chains each (1 ½ pumpkins).
- L/XL: 60 chains each (2 pumpkins).
- Using the total count from the back panel, calculate:
-
Work Separately: Follow the same pumpkin graph and stitch pattern rules as the back panel. Ensure symmetry by leaving a 30-stitch space for the neckline gap during assembly.
Sleeves
-
Measure and Chain:
- Wrap measuring tape around your upper arm and add 6 inches. This determines your sleeve circumference. Use these measurements to chain the foundation row (e.g., XS: 69 chains).
-
Work Rows:
Begin by working HDC rows—with no reductions for the first 6 rows. -
Reduce Size:
Starting from row 7, reduce stitches every 7th row:- Work 2 stitches together using front loops only (1 reduction at the row start, 1 at the row end).
-
Length:
Work until the sleeve measures from your underarm to wrist. Adjust as required to fit your arm length comfortably.
Assembly
-
Join Panels:
Lay the back panel flat and align the front panels symmetrically on each side. Use a tapestry needle to seam together using whip stitches or slip stitches. -
Add Sleeves:
Attach sleeves to the armholes by aligning them with the shoulder seam. Use stitch markers to define attachment points, then seam them securely into place. -
Side Seams:
Seam from the cuff of the sleeves to the bottom of the cardigan body.
Ribbing (Bottom, Sleeves, and Neckline)
-
Bottom Ribbing:
- Attach yarn at the bottom edge and complete 1 round of DC stitches.
- Begin Row 2: Work alternating FP/BP double crochets across (repeat for 5-6 rows).
-
Cuffs:
- Attach yarn at the sleeve opening. Begin with a reduction row (FP/BP using every 2 stitches together).
- Continue working FP/BP rows until desired cuff length.
-
Neckline and Front Edges:
- Attach yarn at the bottom corner and work DC stitches up one front panel, around the neckline, and down the opposite panel.
- Begin FP/BP around (repeat for 5-6 rows).

Finishing Touches
- Weave in Ends: Use a tapestry needle to hide all loose ends inside the project.
- Block (Optional): Steam block or wet block the cardigan for a polished presentation.
Pattern Question
Question: How do I adjust the cardigan to fit larger sizes?
Answer: Add extra foundation chains in multiples of 30 for each pumpkin pattern. This ensures the design stays proportional while accommodating larger measurements.
Conclusion
Making the Halloween Pumpkin Cardigan is a rewarding crochet experience that adds festive flair to your wardrobe. Its playful design and custom options make it a fun and practical project. Stitching together pumpkins to craft something wearable is both satisfying and inspiring.


