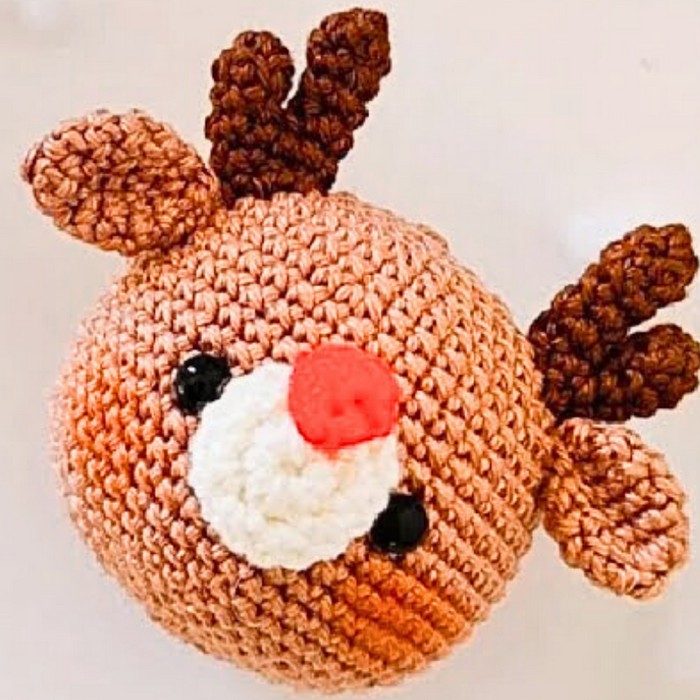
Create a festive Crochet Reindeer Amigurumi with cosmic-inspired charm and adorable antlers! Perfect for holiday decorations or thoughtful gifts, this project is crafted with impressive detail —from the snout and safety eyes to the structured antlers —making it both whimsical and functional.

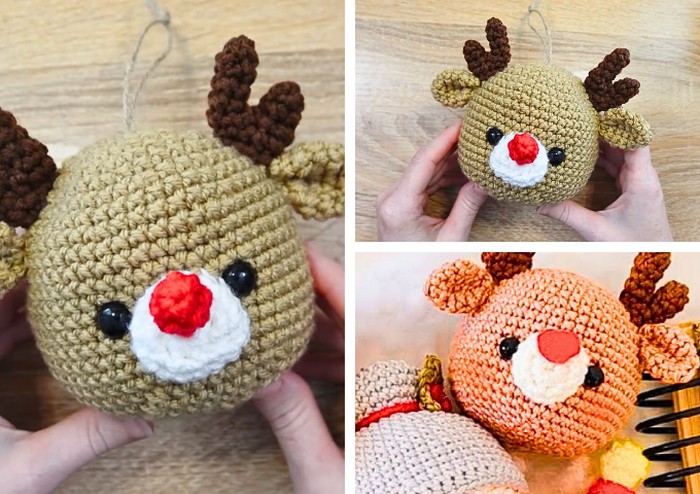
This reindeer amigurumi is charming and durable, featuring realistic antlers, a bright red nose, and a hanging loop for easy display. Whether used as a Christmas tree ornament or a gift, its sturdy design ensures it remains a memorable piece for seasonal displays year after year.
Crochet Reindeer Amigurumi
Crafting the Crochet Reindeer Amigurumi is a joyful experience! Starting with a magic ring and incorporating techniques such as forming safety eyes, shaping ears and antlers, and sewing the pieces together, this step-by-step project guarantees a polished, professional holiday creation.
Credit The Kindness Company
Materials and Preparation
To crochet Comet the Reindeer Amigurumi, you will need the following materials:
Yarn
The pattern can be made with sport/DK yarn, plush yarn, or worsted-weight yarn, depending on your preference and desired size. In this tutorial, worsted-weight yarn is used. Suggested colors:
- Brown: For the head, ears, and main body
- White: For the snout
- Red: For the nose
- Dark Brown: For the antlers
Hook and Tools
- Crochet Hook: 4mm hook (adjust hook size if using a different yarn weight)
- Stuffing: Fiberfill or similar material
- Stitch Marker: To keep track of each round
- Yarn Needle: For sewing and weaving ends
- Safety Eyes: Size 12–15mm (optional – embroider the eyes if intended for young children or pets)
- Scissors
- Jute: Optional, for creating a hanging loop
Abbreviations and Notes
Abbreviations:
- MR: Magic Ring
- SC: Single Crochet
- INC: Increase (2 SC in the same stitch)
- DEC: Decrease (combine 2 stitches into 1)
- SL ST: Slip Stitch
- CH: Chain
Important Notes:
- Working in Rounds: Parts of Comet, like the head and snout, are worked in continuous or joined rounds. Use a stitch marker to mark the start of each round.
- Safety Eyes: Place safety eyes between rounds 14 and 15 and ensure there is 5 stitches space between them.
- Customization: Make Comet unique by adjusting the antler and ear positioning or skipping the jute hanger for a table decoration.
- Gauge: Gauge is not crucial for this pattern, but small, tight stitches will help the amigurumi maintain its shape.
Gauge, Approximate Size, and Pattern Notes
Gauge:
While gauge is not critical, using worsted weight yarn and a 4mm hook generally creates a 4–6 inch tall reindeer.
Techniques:
- Magic Ring: A key technique used to create a tight, circular foundation for pieces like the head, snout, ears, and antlers.
- Stuffing: Add fiberfill incrementally to avoid overstuffing and distorting the shape.
Step-by-Step Pattern
Part 1: The Head
- Round 1: Start with a Magic Ring (MR) using brown yarn. Place 6 SC into the magic ring. Pull the tail to close tightly.
- Round 2: INC in each stitch around (12 SC).
- Round 3: SC 1, INC. Repeat 6 times (18 SC).
- Round 4: SC 2, INC. Repeat 6 times (24 SC).
- Round 5: SC 3, INC. Repeat 6 times (30 SC).
- Rounds 6–19: Work 1 SC in each stitch around for 14 rounds to create the height of the head.
- Insert Safety Eyes between rounds 14 and 15, leaving 5 SC space. Snap on the safety backs securely before moving forward. You may also choose to embroider eyes in place of this step.
- Round 20: (SC 6, DEC). Repeat 6 times (42 SC).
- Round 21: (SC 5, DEC). Repeat 6 times (36 SC).
- Round 22: (SC 4, DEC). Repeat 6 times (30 SC).
- Round 23: (SC 3, DEC). Repeat 6 times (24 SC).
- Round 24: (SC 2, DEC). Repeat 6 times (18 SC).
- Round 25: (SC 1, DEC). Repeat 6 times (12 SC).
- Stuff the Head: Add fiberfill stuffing, ensuring the shape is firm but not distorted.
- Closing the Head: Finish with slip stitches through the front loops of the remaining 12 SC to cinch the last round closed. Tie off the tail with a knot and weave it into the body of the head.
Part 2: Snout
- Round 1: Form an MR using white yarn. Place 8 SC inside the ring. Pull it closed.
- Round 2: INC in every stitch around (16 SC).
- Round 3: Work 1 SC in each stitch around (16 SC).
- Round 4: (SC 1, SC 1, DEC). Repeat 4 times (12 SC).
- Attach the Snout: Position the snout between rounds 12 and 16 of the head and sew it in place using the yarn needle and snout tail. Add light stuffing behind the snout for better definition.
Part 3: The Nose
- Round 1: Form an MR using red yarn. Add 6 SC into the ring. Pull it closed.
- Round 2: Work 1 SC in each stitch around (6 SC).
- Attach the Nose: Position the nose at the snout tip and sew it on using the tail from the nose. Fasten off, weave in the tail, and trim.
Part 4: The Ears
- Make 2: The ears are crocheted in brown yarn using continuous rounds:
- Round 1: MR + 6 SC.
- Round 2: (SC, INC). Repeat 3 times (9 SC).
- Round 3: (SC 2, INC). Repeat 3 times (12 SC).
- Round 4: SC in each stitch around (12 SC).
- Round 5: (SC 2, DEC). Repeat 3 times (9 SC).
- Round 6: (SC, DEC). Repeat 3 times (6 SC).
- Flatten and Pinch: Fold each ear flat and pinch to create an indentation. Sew through the folds to reinforce the shape.
- Attach Ears: Position the ears on either side of the head around round 9. Sew securely into place using whip stitches.
Part 5: The Antlers
- Make 2: The antlers are made in two sections using dark brown yarn. Begin with the larger section:
- Round 1: MR + 5 SC. Pull the tail to close.
- Rounds 2–4: SC in each stitch.
- Fasten Off: Trim the tail and weave it into the larger section to secure.
- Small Section of Antler:
- Repeat the above instructions, but work only 3 rounds of SC instead of 4.
- Join the Sections: Using your hook, slip stitch through one of the stitches of the larger section to join the two parts. Then crochet 1 SC in each stitch of both sections.
- Finish the Antlers: Use slip stitches to close the top of the antlers, cut the tail to sew it, and neatly finish off the edges.
- Attach Antlers: Position the antlers above the ears on either side of the head. Whip stitch through the base of the antlers and fabric of the head.
Part 6: Optional Hanging Loop
- Cut about 6 inches of jute (or any sturdy yarn). Tie the ends together to form a loop.
- Insert the crochet hook through the fabric of round 1 on the top of the head. Pull the jute through and loop it around to secure tightly.
Pattern Question:
Q: Can I customize the size of the reindeer?
A: Yes! You can adjust the yarn weight and hook size to create different sizes. Be sure to use proportionally sized safety eyes and enough stuffing to maintain the reindeer’s shape.
Conclusion:
The Crochet Reindeer Amigurumi combines holiday spirit and expert craftsmanship, resulting in a delightful handmade piece. Whether you hang it on your tree or gift it to loved ones, its detailed design and charm make it perfect for spreading seasonal cheer.


