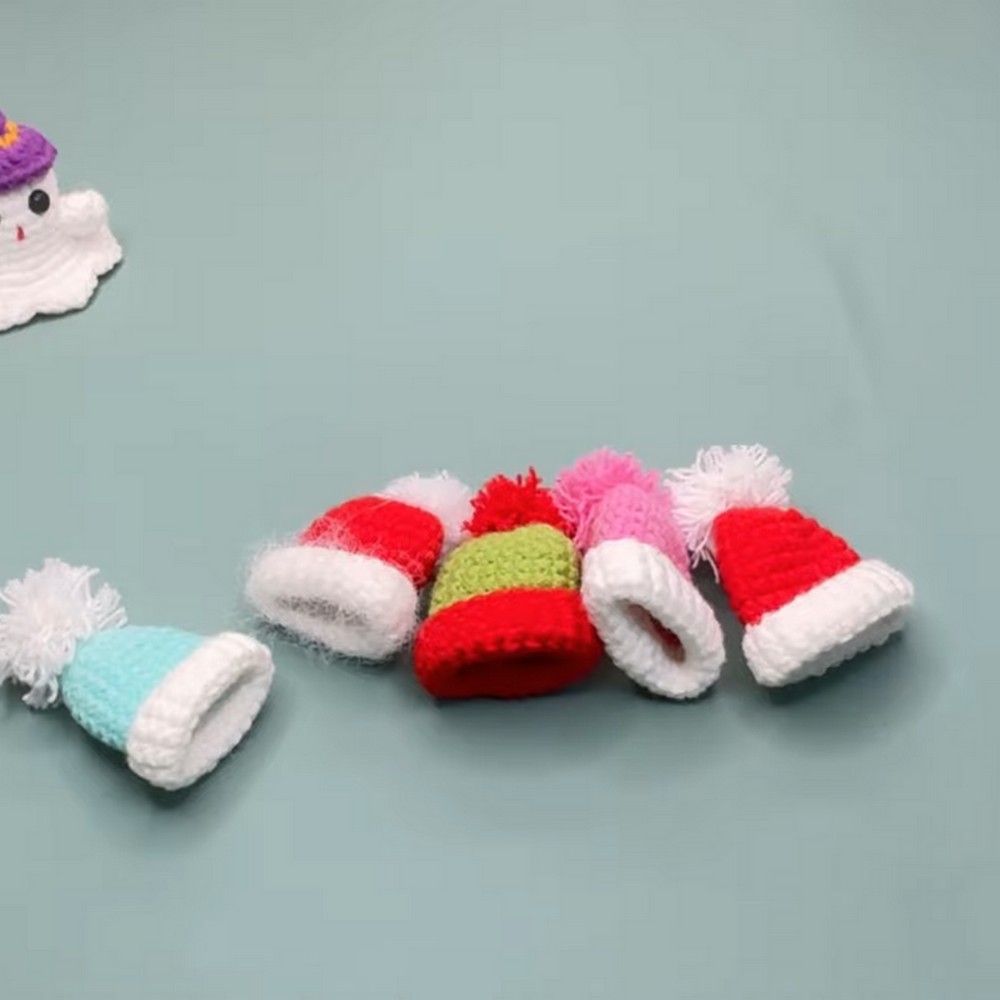
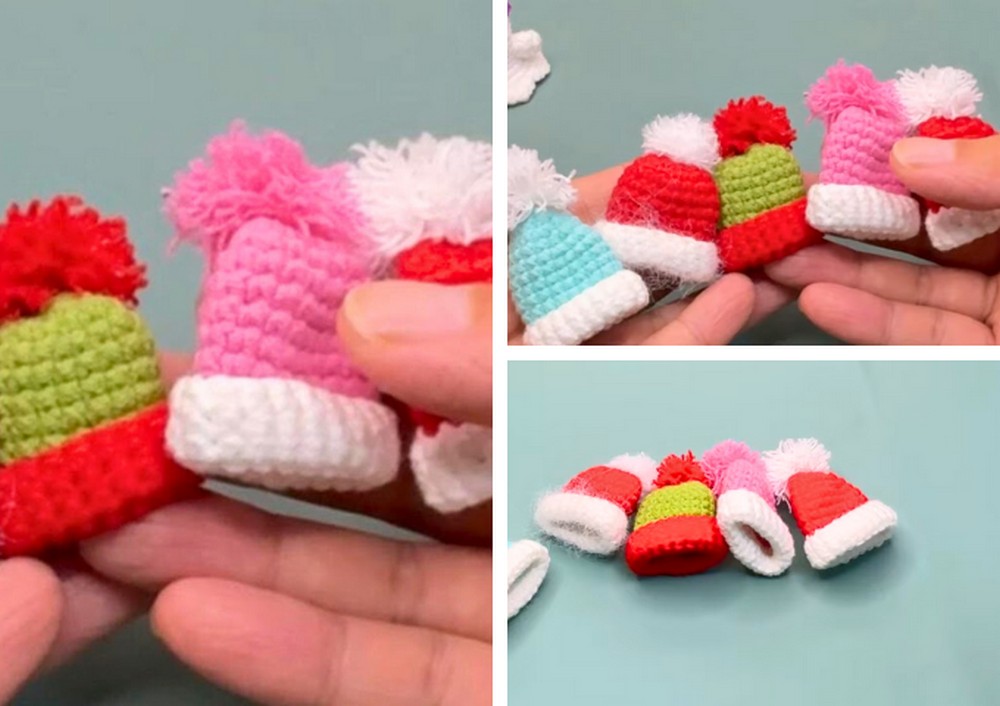
Create an adorable, tiny Crochet Christmas Hat that's perfect for festive decorations or miniature accessories! With a charming pom-pom topper and vibrant two-tone yarn, this project is small, chic, and versatile. Ideal as a tree ornament, gift topper, or holiday decor.
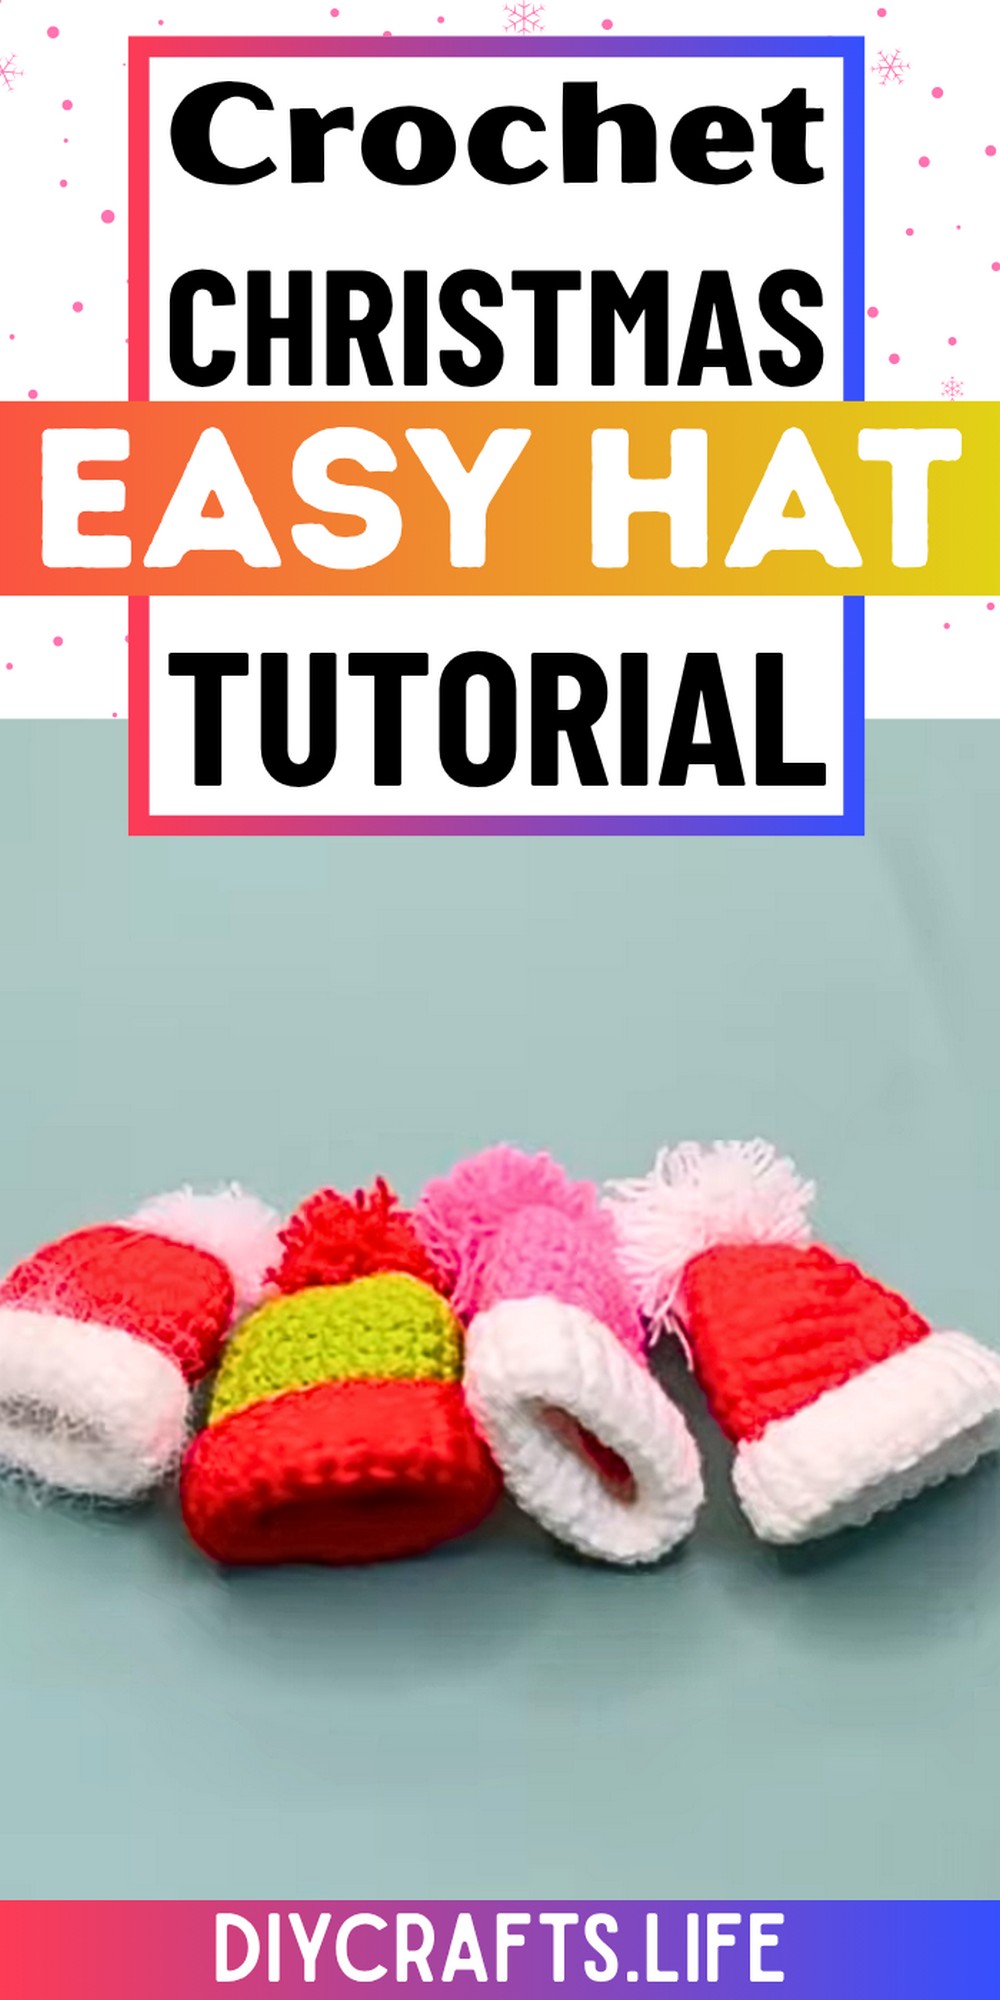
This tiny Christmas hat is the perfect festive detail—crafted with durable cotton yarn, it's lightweight yet long-lasting. Its soft texture and vibrant two-color design, complete with a delightful handmade pom-pom, make it charming and multifunctional, suitable for decorating or gifting.
Crochet Tiny Christmas Hat
Making this mini Christmas hat is fun and beginner-friendly! You'll start with a magic ring and work rounds of single crochets, adding neat increases for shaping. The color change at the end adds dimension, while crafting the pom-pom topper is a simple step to complete your cute hat.
Credit Crochet Joy
Materials and Preparation
To crochet your own Christmas hat, gather the following materials before beginning:
- Yarn: Cotton yarn in at least two colors; one for the body and another for the decorative edge and pom-pom (e.g., red and white for a traditional Christmas look). Medium-weight yarn works best for this project.
- Crochet hook: 3.0mm hook is recommended
- Additional Tools:
- Scissors
- Yarn needle for sewing
- Stitch markers (optional, to mark rounds)
Abbreviations and Notes
Below are the crochet abbreviations used in this pattern:
| Abbreviation | Meaning |
|---|---|
| MR | Magic Ring |
| SC | Single Crochet |
| INC | Increase (2 SC in the same stitch) |
| CH | Chain |
| SS | Slip Stitch |
Pattern Notes:
- The pattern starts with a magic ring and works in rounds, meaning you will need to mark your first stitch in each round.
- The increases are performed by working two stitches into the same stitch.
- A color change is done seamlessly between the ninth and tenth rounds. Refer to the video tutorial for best practices.
- Sewing and shaping the pom-pom is the final step and adds a festive touch.
Gauge, Approximate Size, and Pattern Notes
- Gauge: While this project doesn't heavily depend on gauge, aim for tight, consistent stitches to ensure the hat maintains its shape.
- Finished Dimensions: This pattern creates a Christmas hat approximately 5–6 inches tall, with a circumference suitable for small decorations or for small dolls to wear. Use a heavier yarn or larger hook to scale up the size, depending on your needs.
- Special Techniques:
- Magic Ring: Key to creating a tight and neat crown for the hat.
- Color Change: A tidy color change will make the decorative edge pop.
Step-by-Step Pattern
1. Start the Magic Ring
- Create a magic ring using the primary yarn color (e.g., red).
- Insert your hook through the loop, yarn over, and pull up a loop.
- CH 1 inside the magic ring to begin.
2. Rounds 1–5 (Increasing the Hat Base)
Round 1:
- Work 6 SC into the magic ring.
- Pull the loop tight by gently pulling the tail to close the center.
- SS to the first stitch to join.
- CH 1.
Round 2:
- Work 1 SC into the same position as the previous SS.
- Work 1 INC (2 SC in the same stitch) into the next position.
- Continue this alternating pattern of 1 SC, 1 INC to form 3 groups of increases.
- SS to the first stitch to join. CH 1.
Round 3:
- Insert into the SS position and work 1 SC.
- Work 1 INC in the next stitch, then SC into the next stitch.
- Repeat this pattern (SC, INC, SC) to form 3 groups.
- SS to the first stitch to join. CH 1.
Round 4:
- Work 3 SC, 1 INC in each group until the round is complete (total of 3 groups).
- SS to the first stitch, then CH 1 to begin the next round.
Round 5:
- Work 2 SC, 1 INC, 2 SC in each group until the round is complete (total of 3 groups).
- SS to the first stitch, then CH 1.
3. Rounds 6–9 (Creating the Body)
- Work 18 SC evenly around for each round.
- Ensure you maintain your tension consistently to keep the hat's shape.
4. Color Change: Adding the Decorative Edge
- At the last stitch of the ninth round, change the color of your yarn.
- Insert the hook through both loops of the last stitch.
- Yarn over with the new color and pull through.
- Tighten the loop, secure, and SS into the first stitch with the new color.
- CH 1 to begin the next round.
5. Rounds 10–15 (Building the Decorative Edge)
Round 10:
- Work 8 SC, then make 1 INC (2 SC in the same stitch).
- Repeat for a total of 2 groups.
- SS to the first stitch to join. CH 1.
Rounds 11–15:
- Work 20 SC evenly across each round.
- At the end of round 15, SS to the first stitch and CH 1.
6. Shaping and Finishing
- Weave in any loose yarn ends using a yarn needle.
- Shape the hat gently by massaging it into the desired shape with your hands.
7. Making the Pom-Pom
- Choose the second color yarn for the pom-pom (e.g., white).
- Wrap the yarn around your fingers or around a flat piece of cardboard about 15 times.
- Carefully slip the wrapped yarn off your fingers and tie the center tightly with another piece of yarn, leaving tails for sewing.
- Trim the ends of the loops to create the pom-pom shape.
- Use the leftover tails to attach the pom-pom to the top of the hat.
Final Touches:
- Ensure all ends are tied securely and hidden.
- Shape the hat again, ensuring it sits evenly.
- Display or gift your delightful handcrafted Christmas hat!
Congratulations! You've completed your Crochet Christmas Hat!
Feel free to add more decorative details, such as embroidery, buttons, or small ornaments to make your hat unique.
Pattern Question
How do I ensure the hat maintains its shape after weaving in the ends?
To shape the hat, gently mold it with your fingers after weaving in the ends. Focus on rounding out the crown and smoothing the body. Block lightly to retain the desired form for display or use.
Conclusion
This Crochet Tiny Christmas Hat tutorial simplifies every step from the magic ring to the pom-pom finishing touch! Its striking two-tone design and manageable size make it ideal for beginners. Create festive mini hats to liven up your holiday decorations or add a handmade touch to gifts.


