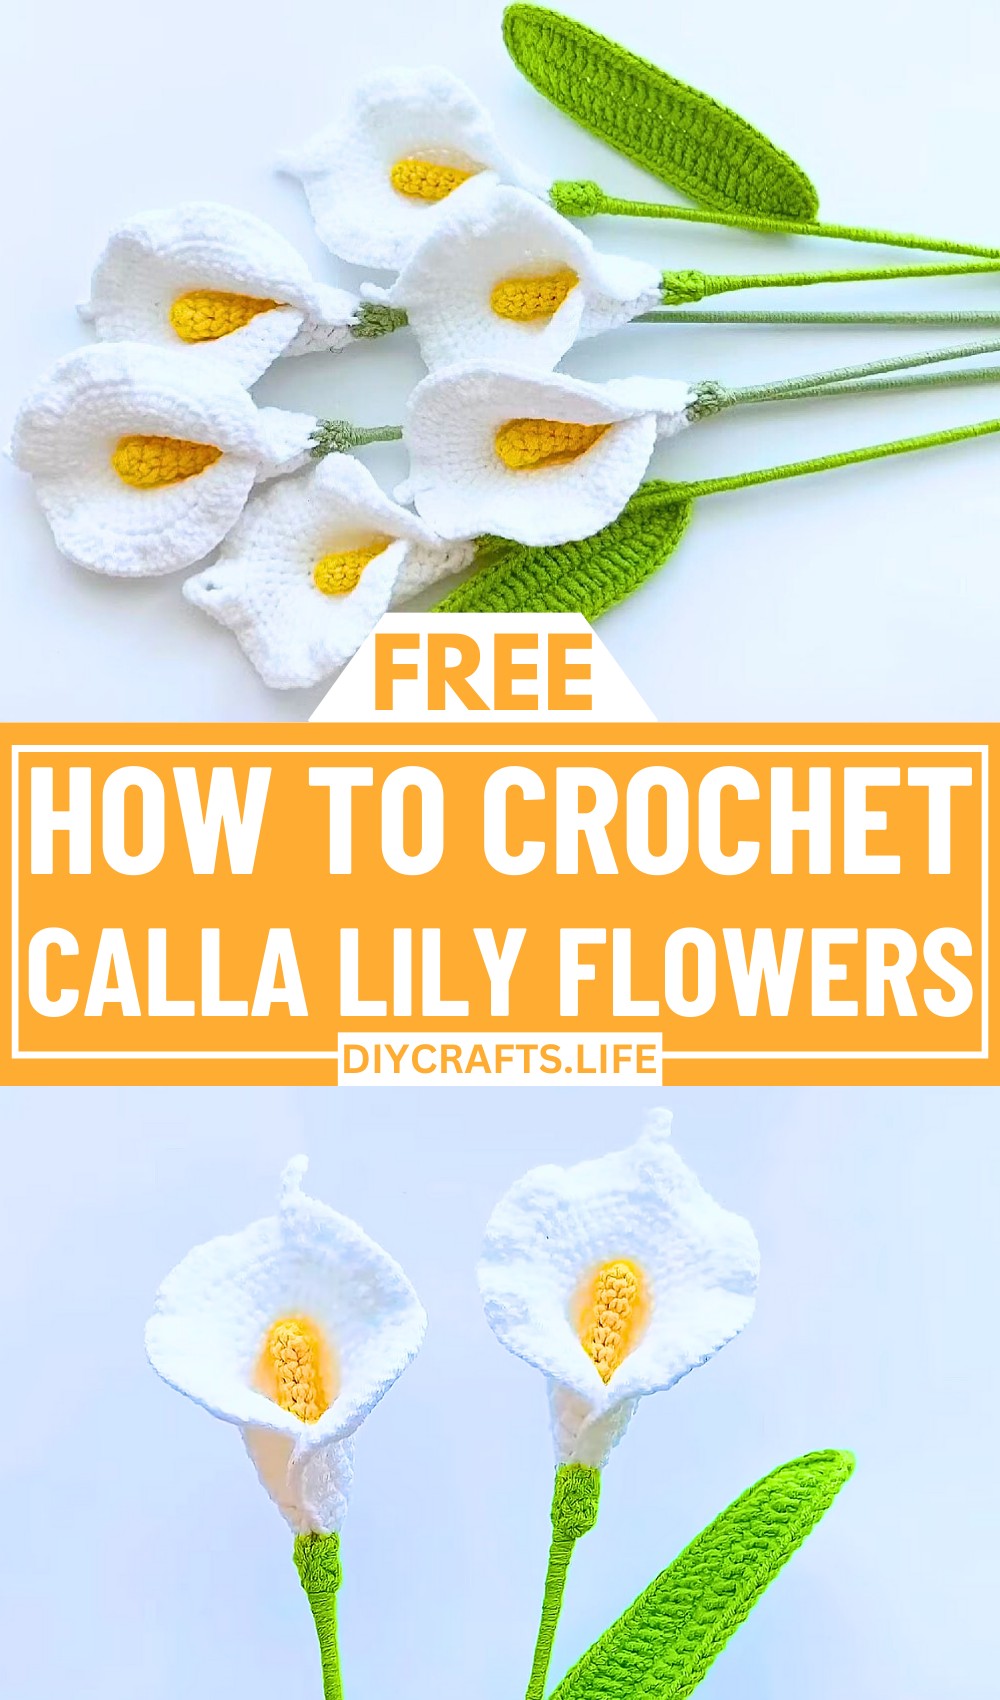
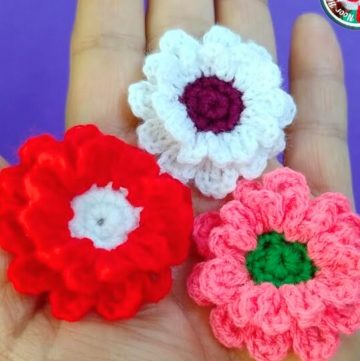
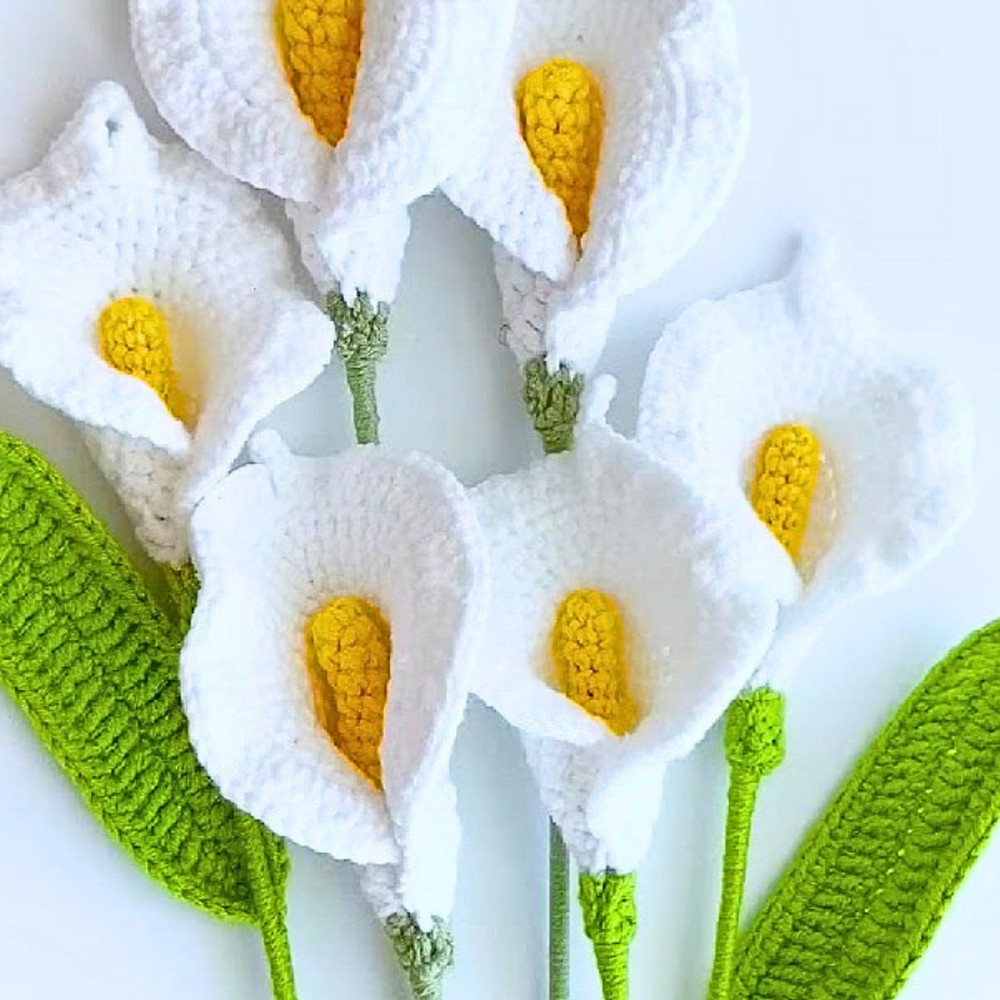
Bring the elegance of nature to your crochet creations with the timeless beauty of the Calla Lily flower. This design captures the graceful curves and delicate charm of the flower, making it perfect for brightening up home decor, enhancing accessories, or creating thoughtful handmade gifts. It’s a project full of life and graceful detail.
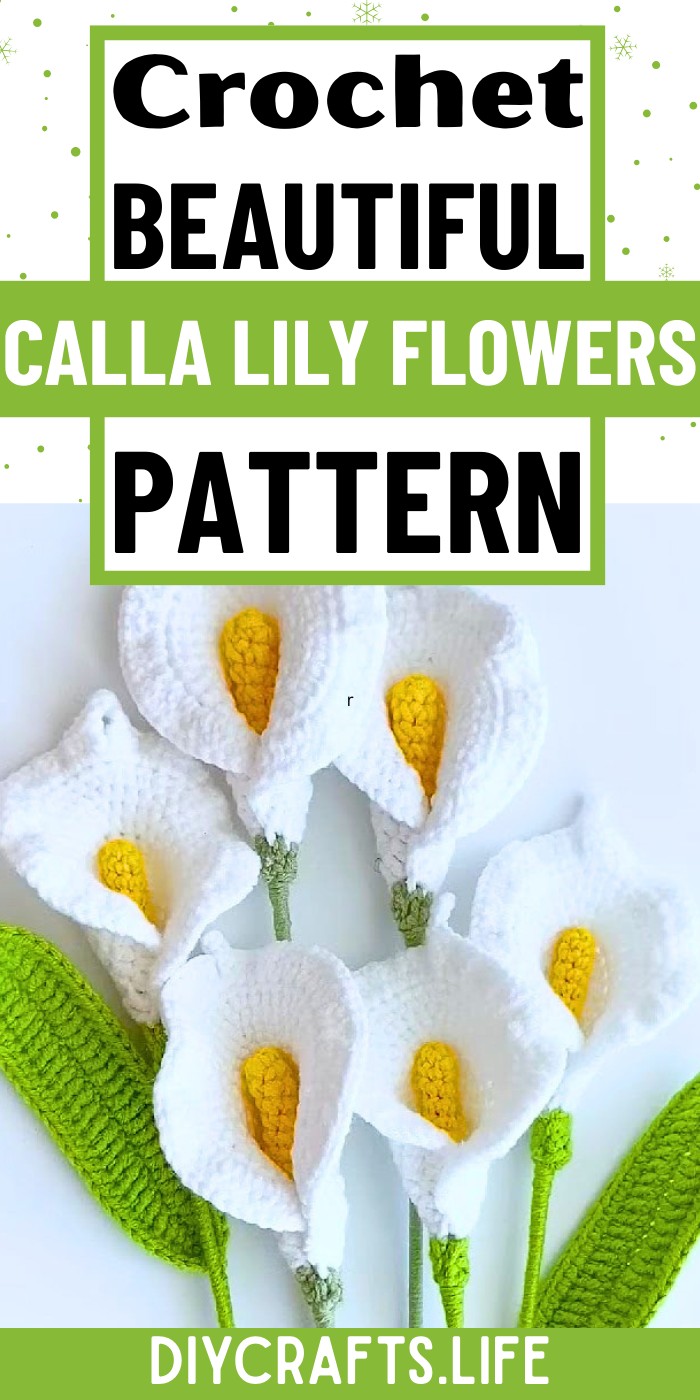
Crochet Calla Lily Flowers
This crochet Calla Lily design stands out with its realistic petal structure, beautifully layered textures, and added versatility. The detailed steps ensure a polished finish, from the soft, curved petals to the textured leaves and sturdy stem. By combining vibrant color choices and fascinating techniques like magic rings and spiral stitching, this flower pattern gives you creative freedom to craft your own blooming masterpiece.
Credit Crochet Academy
Required Materials
- Yarn: Choose any color for the flower petals (e.g., pink) and green for foliage.
- Crochet Hook
- Craft Wire (optional, for supporting the leaves).
- Scissors
- Slip Knot Tool (optional)
Important Notes
- Beginners are welcome—steps use simple crochet techniques and include pauses for you to follow along.
- Use a magic ring for the initial foundation of the flowers.
- Always hide yarn tails as you progress to maintain clean stitching.
- You’ll be working in rounds and sometimes spirals, especially for smaller flower components.
Step-by-Step Instructions
Creating the Flower Petal
- Start with the Magic Ring:
- Begin by forming a magic ring.
- Crochet 10 single crochets into the magic ring. Ensure that the first stitch is not counted as single crochet.
- Close the magic ring with a slip stitch through the first space.
- Round 2 (Double Crochet Increase):
- Chain 2 to begin the round (do not count the chains as a stitch).
- Work 10 double crochet increases:
- For each stitch, crochet 2 double crochets.
- Slip stitch to close the round.
- Round 3 to Round 5:
- Round 3: Chain 1 and repeat the pattern: one single crochet per space followed by an increase.
- Rounds 4 and 5: Follow a similar pattern but increase gradually as shown in the tutorial.
- Round 6:
- Chain 2. Work six half double crochets, followed by one half double crochet increase in the next space.
- Continue alternating three half double crochets and one increase (repeat twice).
- Close the round with a slip stitch.
- Round 7:
- Work seven double crochets into seven spaces.
- Begin double crochet increases with a repeat of 16 times across the round.
- Starting in the next space:
- Crochet one triple crochet, followed by four chains. Work slip stitches in 3 spaces for shaping.
- Complete the petal by alternating double crochet increases until the end of the round.
- Finish the Flower Petal:
- Cut the yarn and pull the tail to fasten off.
Working the Flower Base (Toral)
- Switch to Green Yarn:
- Start from the second space of the petal, and chain 2 (not counted as a stitch).
- Work four half double crochets in the next four spaces.
- Chain 2 and turn your work.
- Second Row:
- Skip the first space, and work five half double crochets across the row.
- Hide the yarn tail as you go.
Creating the Flower Hat
- Form a magic ring again with green yarn.
- Work six single crochets into the circle.
- From Round 2 to Round 10:
- Work one single crochet per space in a continuous spiral.
- At the end, turn the inside of the hat out and keep crocheting.
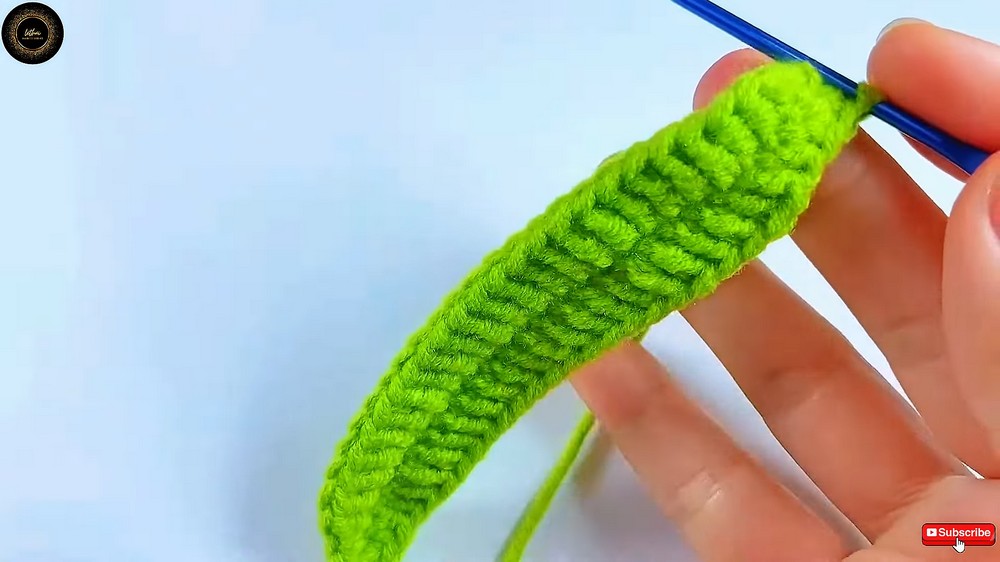
Making the Leaf
- Begin with 28 chains using green yarn.
- First Side:
- Start in the second chain from the hook:
- Crochet 2 single crochets, 2 half double crochets, and 20 double crochets.
- For the last three spaces, work one half double crochet and one single crochet in the first space, followed by three single crochets in the last space.
- Start in the second chain from the hook:
- Second Side:
- Turn to the other side and mirror the pattern:
- One half double crochet followed by 20 double crochets and the remaining single crochets.
- Slip stitch to close the round.
- Turn to the other side and mirror the pattern:
- Round 2:
- Insert craft wire to support the leaf structure.
- Work one single crochet per space, wrapping the craft wire with the yarn as you go.
- Slip stitch to finish.
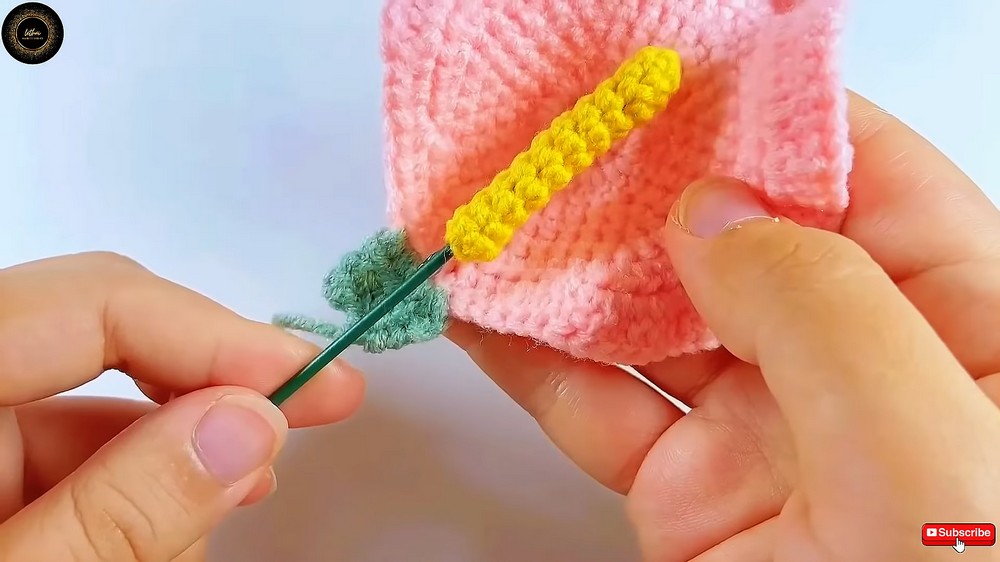
Final Assembly
- Attach the flower petals, hat, and leaves.
- Shape the leaf with the supported craft wire for an enhanced look.