Crochet Pillowcase Azura is a stylish and easy-to-make project that combines beauty with practicality. With its elegant design and customizable colors, it’s the perfect accessory to elevate your home décor while being functional and adaptable to any space.

Crochet Pillowcase Azura is perfect for decorating couches, beds, or cozy corners. Its sturdy stitchwork ensures long-lasting durability, while its intricate design adds charm to any room. The adjustable size lets you fit any pillow, making it both practical and visually appealing.
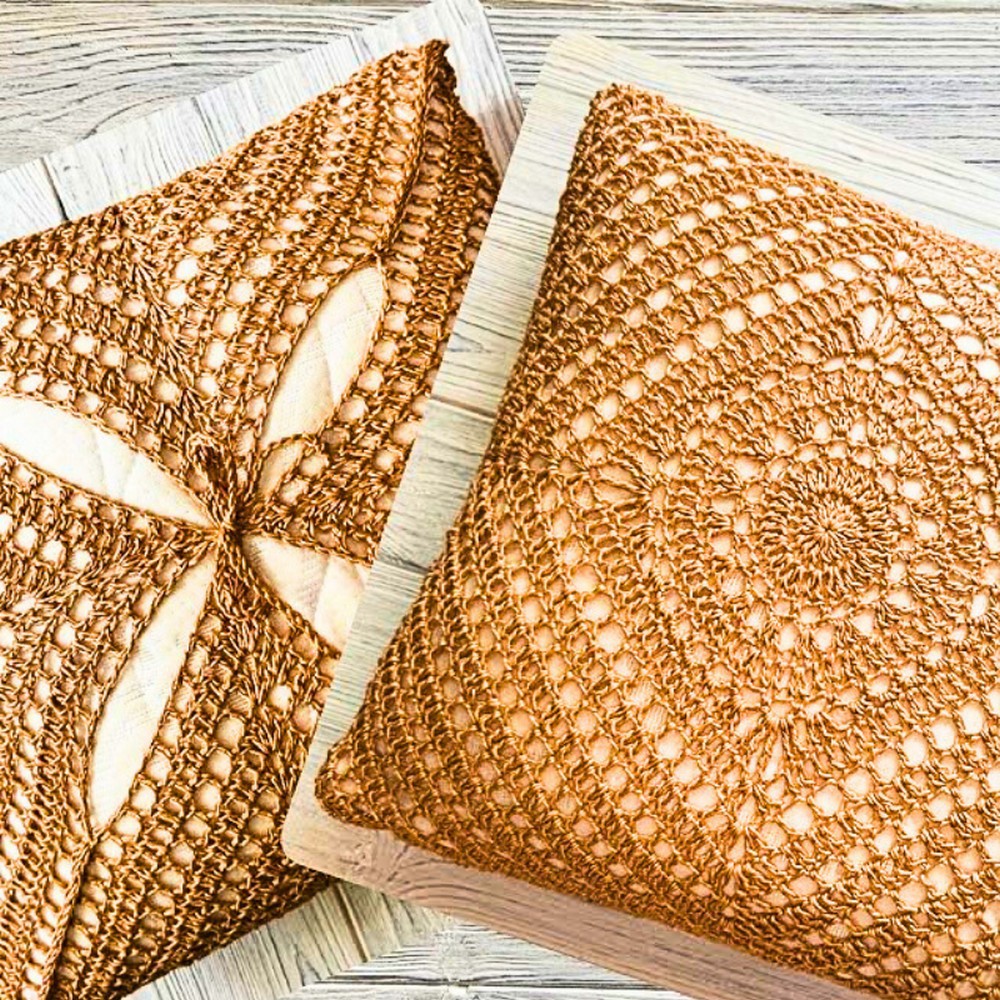
Crochet Azura Pillowcase
Crochet Pillowcase Azura is ideal for both beginners and experienced crafters. Its pattern is easy to follow, offering room for personalization in colors and sizes. You can enjoy the creative process while crafting a functional yet artistic piece to enhance your space.
Credit Irina Tsokalo
Materials and Preparation
To crochet the beautiful Azura pillowcase, you will need the following materials:
- Yarn: Mondial Cometa (50g/125m; soft and shimmering texture)
- Crochet Hook: Size 4mm hook
- Weight: Lightweight or DK yarn
- Additional Tools:
- Scissors
- Tapestry needle (for weaving ends)
- Blocking pins (optional, for finishing)
Ensure your yarn and hook work well together, as tension consistency is crucial for forming the perfect square pillowcase.
Abbreviations and Notes
Here are the abbreviations used in the pattern:
- SC: Single crochet
- DC: Double crochet
- TR: Treble crochet
- DTR: Double treble crochet
- CH: Chain
- SL ST: Slip stitch
- HDC: Half double crochet
Pattern Notes:
- This pattern begins with a magic ring and progresses into a square from a circular base.
- Pay attention when forming corners to ensure symmetry.
- Optional: You can block and starch the square for a polished look before assembly.
- Adjust the size of the square to match the dimensions of your pillow.
Gauge, Approximate Size, and Pattern Notes
Gauge: Not provided explicitly; ensure stitches are neat and even for proper sizing.
Finished Dimensions: The pillowcase is customizable to fit the dimensions of the pillow you have ("increase the square size till the square sides meet the corners of your pillow").
Special Techniques:
- The magic ring technique is used to start the circular base. If unfamiliar, you may need help practicing this technique first.
- Blocking the square with pins and starch may help achieve precise angles and edges for assembly.
Step-by-Step Pattern
Foundation Circle:
- R1: Start with a magic ring. Crochet 16 DC into the ring. Close with a SL ST.
- R2: Crochet 2 DC into each stitch from the previous round (total 32 DC). Close with a SL ST.
Forming Loops for the Design:
3. R3: 1 SC, CH 3, 1 SC into every other stitch (skipping one stitch each time). You'll form 16 chain loops around. Close with a SL ST into the 1st loop.
- R4: In the 2nd loop of each chain, crochet 3 DC into every loop. Close with a SL ST.
Adding Texture and Expanding:
5. R5: Follow this pattern: (1 DC, 2 DC, 1 DC) into each set of 3 stitches. Repeat this sequence around. Close with a SL ST.
- R6: 1 SC, CH 3, 1 SC into every other stitch (skipping 1 stitch). You should now have 32 chain loops.

Convert Circle to Square:
7. R7 (Corners): Into any loop, create the corner as follows:
- 2 TR, CH 2, 1 DTR, CH 2, 2 TR
- Follow up with 3 DC, 2 HDC
- Then 2 SC into the next 3 loops.
- Afterward, repeat 2 HDC, 3 DC before moving onto the next corner sequence: 2 TR, CH 2, 1 DTR, CH 2, 2 TR.
- Continue this pattern until the round completes. Close with a SL ST.
- R8: Crochet 1 DC into each stitch. At each corner, make 2 DC, CH 2, 2 DC. Close with a SL ST.
- R9 + Alternating Rows: Alternate the pattern to grow the square as needed:
- One round of 1 DC in each stitch.
- One round of 1 DC, CH 1 between stitches.
- Maintain the corner pattern (2 DC, CH 2, 2 DC) on every round.
Repeat these rounds until the square matches the size of your pillow.
Finishing Touches
- Blocking and Starching (Optional): Once the square reaches the desired dimensions, turn the project face-down. Block the square by stretching, pinning, and starching if you wish for a more polished finish.
- Assembly:
- Once blocked, lay the square flat and leave 8 free cells along each side.
- Join two sides together with SL ST (or another joining method you prefer).
- Make the Braid for Closure: Crochet a chain of 70-80 stitches to create a braid for tying. Secure the ends.
- Weave Ends: Weave in all loose yarn ends using a tapestry needle.
Your Azura pillowcase is now complete!
Pattern Question:
Question: How do I adjust the pillowcase size to fit my pillow dimensions?
Answer: Continue alternating rounds of single crochet and chain combinations until the square edges meet the pillow corners. Increase or decrease the braid's length for tying adjustments.
Conclusion
Crochet Pillowcase Azura is a delightful project that unites functionality, elegance, and creative freedom. Whether crafting for yourself or a loved one, this versatile and beautiful design is worth trying—creating the perfect touch for any space.


