Elevate your holiday décor with a handmade Crochet Candy Cane Ornament! Featuring classic red-and-white stripes and a charming twist, this pattern adds a sweet, festive touch to any space. Its simple yet elegant design makes it perfect for crafting unique gifts or personal tree decorations.

The Crochet Candy Cane Ornament is not only beautiful but also durable, thanks to its sturdy pipe-cleaner core that maintains its iconic shape. Its customizable size and lightweight design make it ideal for hanging from trees or gifting with holiday cards. Vibrant colors ensure its timeless festive appeal for years to come.
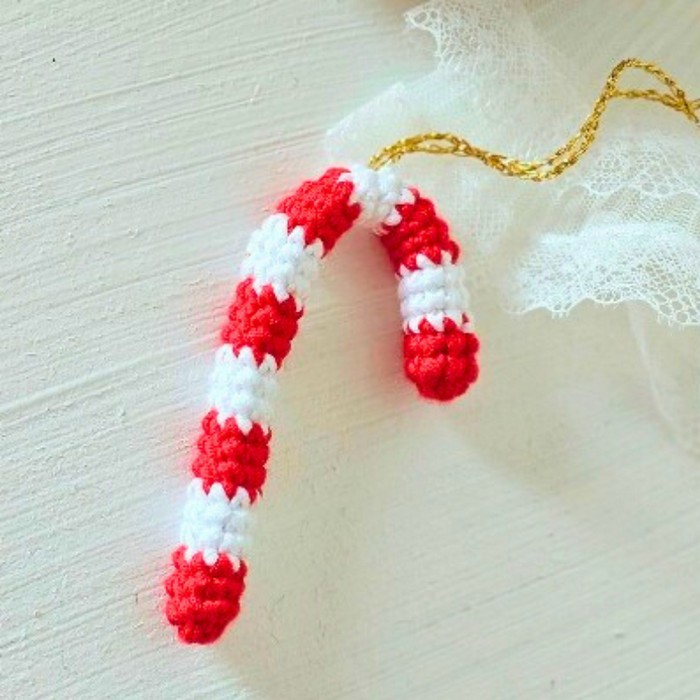
Crochet Candy Cane Christmas Ornament
Creating this ornament is fun and beginner-friendly, thanks to clear step-by-step instructions that simplify techniques like magic rings and color changes. Using DK yarn or adjusting for worsted-weight options, this pattern suits various skill levels—perfect for adding cozy creativity to your holiday preparations!
Credit The Kindness Company
Materials and Preparation
For this festive Candy Cane Christmas Ornament pattern , you’ll require the following materials:
- Yarn: DK weight yarn in red and white (Approx. 2.5g each)
Alternatively: You can use Worsted Weight Yarn, which will require slightly more yardage for larger stripes. - Crochet Hook: 3mm for DK yarn (or 4mm for worsted weight yarn)
- Additional tools:
- A few pipe cleaners for shaping the candy cane
- Yarn needle for sewing and weaving ends
- Stitch markers to mark the first stitch of every round
- Scissors
Tip: For this pattern , gauge isn’t crucial. You can use different yarn weights or hook sizes—ensure you adjust your yardage and pipe cleaner length accordingly to meet your size preference.
Abbreviations and Notes
Here are the abbreviations used in this pattern:
- SC = Single Crochet
- Sl St = Slip Stitch
- YO = Yarn Over
Pattern Notes:
- This pattern uses the magic ring technique, which is essential for forming the base of the candy cane.
- Color changes are made seamlessly by dropping one color and picking up another without fastening off. Always keep the unused yarn attached for convenience when switching back and forth.
- Pipe cleaners must be twisted and trimmed to fit the dimensions of your finished candy cane.
Gauge, Approximate Size, and Pattern Notes
- Gauge: Not critical for this pattern.
- Finished Size: Approx. 3.5 inches in length (depending on yarn and hook used).
- Special Techniques:
- Magic Ring: Used to begin the candy cane and create a neat, tightly closed circle.
- Color Changes: Stripes are created by alternating colors without cutting the yarn, ensuring a smooth and efficient transition.
Step-by-Step Pattern
Here is the complete, detailed pattern:
Step 1: Create a Magic Ring
- Begin with red yarn.
- Leave a 5-inch tail of yarn. Wrap the tail around your fingers to form two loops in an “X” shape.
- Insert your hook under the first loop (top loop closest to your fingers) and grab the second loop (lower loop). Pull it through the top loop to create a knot.
- Hold the tail in place and pull the loop tight to form the magic ring.
Step 2: Round 1: Single Crochet in Magic Ring
- Insert your hook into the magic ring and work 8 SC stitches into the ring.
- Work over both the tail and the ring to secure the base properly.
- Use a stitch marker to mark the first SC of the round.
- After completing the 8 SC stitches, pull the tail to tighten the magic ring fully—this closes it into a neat circle.
Step 3: Round 2
- Remove the stitch marker from the first SC of Round 1. Insert your hook into this stitch and work 1 SC to begin Round 2.
- Replace the stitch marker in the first SC of this round.
- Continue working 1 SC in each stitch from Round 1 (total of 8 SC).
Step 4: Round 3
- Repeat the steps from Round 2: Work 1 SC in each stitch around.
- At the end of the round, prepare for a color change:
- Drop the red color and pick up the white yarn.
- In the 8th SC of the round, yarn over and pull through with the white yarn, leaving the red yarn attached for future use.

Step 5: Rounds 4 - 6 (White Stripe)
- Switch to the white yarn and work 1 SC in each stitch for 3 rounds.
- For Round 4, work over the white yarn tail for the first three stitches to secure it firmly.
- After finishing Round 6, drop the white yarn to the back of the work and pick up the red yarn again.
Step 6: Rounds 7 - 9 (Red Stripe)
- Work 1 SC in red yarn for another 3 rounds, ensuring no tails need to be worked in since the red yarn remains attached.
- At the end of Round 9, prepare for another color change: drop the red yarn and pick up the white yarn again.
Note: Stripes alternate between 3 rounds of white and red. Repeat Rounds 4-9 to create the desired candy cane length. A 5 white stripes and 6 red stripes configuration is suggested for the finished pattern. Adjust for longer or shorter candy canes as needed.
Step 7: Fasten Off
- Once all rounds and stripes are completed, remove the stitch marker.
- Work a slip stitch into the marked stitch of the last round to finish the round neatly.
- Cut the working yarn, leaving approximately 6 inches of tail. Pull the tail through the final loop and tighten.
Step 8: Insert Pipe Cleaners
- Take three pipe cleaners (or more, depending on the size of your candy cane).
- Twist the pipe cleaners together to form a sturdy base. Compare against your candy cane’s length and fold/twist any ends to match its size.
- Insert the twisted pipe cleaners into the candy cane, ensuring they reach the bottom. If the pipe cleaners stick out at the top, trim any excess until they are flush with the candy cane opening.
Step 9: Sew and Shape
- Thread the remaining yarn tail through a yarn needle.
- Sew through the front loops of the final round (the last 8 stitches from the previous step). Pull tightly to close the top of the candy cane around the pipe cleaners.
- Secure the closure by tying a surface knot:
- Loop the yarn tail over the surface.
- Pass the needle through the fabric of a previous stitch.
- Sew through the loop to tie a knot, pulling it tight.
- Weave the remaining yarn tail into the body of the candy cane, securing it by sewing a few random stitches. Trim any remaining tail close to the fabric.
Final Step: Shape the candy cane carefully by bending the inserted pipe cleaners to achieve the classic curved candy cane design.
And that's it! You've now crocheted your very own Candy Cane Christmas Ornament—a beautiful handmade decoration for your tree or a thoughtful gift for loved ones.
Pattern Question:
Question: Do I need to follow the exact yarn weight mentioned in the pattern?
Answer: No, you can adjust freely. Using a larger yarn or hook will require more yardage, but the gauge is not crucial. Just ensure the candy cane is proportionally shaped to match your materials.
Conclusion:
With its striped beauty, seamless construction, and adjustable size, this Crochet Candy Cane Ornament is a fun and gratifying holiday craft. Whether for your festive tree or handmade gifts, this durable pattern is a delightful way to add holiday cheer to your celebrations.


