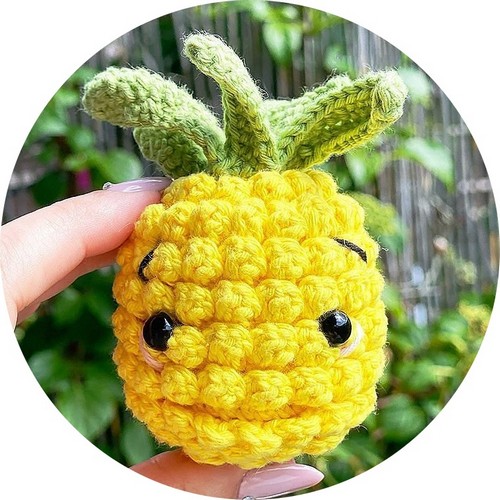
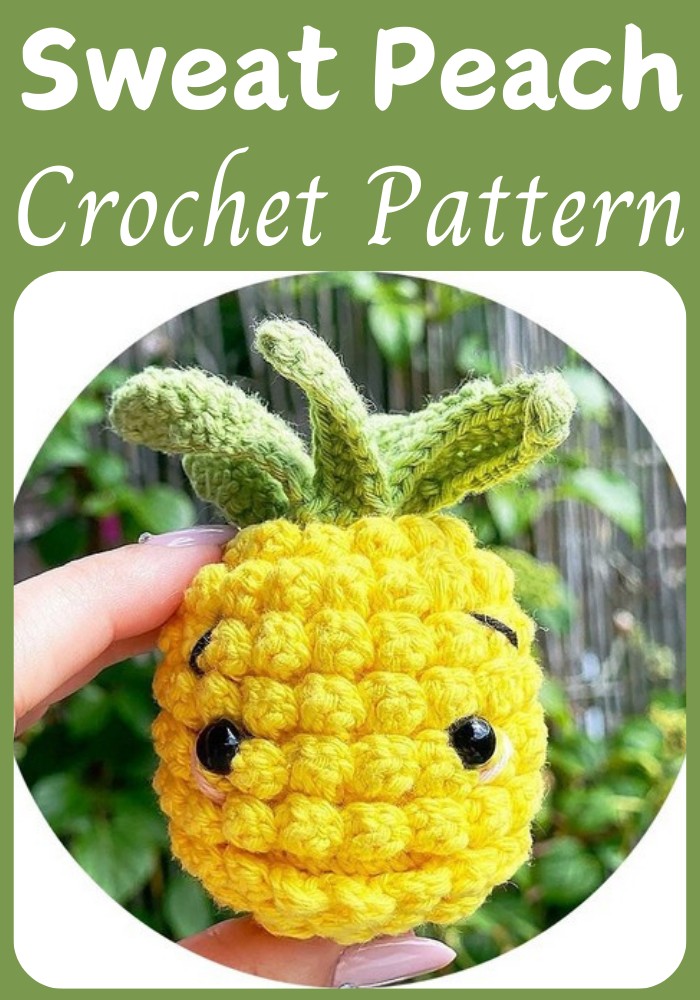
Immerse yourself in the joy of crocheting with the Crochet Pineapple Pattern, a delightful symbol of tropical sweetness. This unique project features a beautifully textured body and a lush green crown that perfectly captures the essence of a ripe pineapple. Complete with cute safety eyes and eyebrows fashioned from black yarn, this pattern is designed in a convenient, handy size. Ideal for crocheters looking to create a plump, vibrant piece, it promises a decorative and fun addition to any collection or as a charming gift.
Materials:
- Colour A: Rico Ricorumi DK - Yellow (006)
- Colour B: Rico Ricorumi DK - Pistachio (047)
- Colour C: Rico Ricorumi DK - Black (060)
- Colour D: Rico Ricorumi DK - Rose (008)
- Crochet Hook: 2.5mm
- 8mm safety eyes
- Toy stuffing
Step By Step Pattern
Pineapple Part 1:
Please note: I added my safety eyes after part 2 of the pineapple was done and secured with glue. You can add the eyes in row 12, with 8 rows in between if preferred.
- 1. Using colour A, work 6 sc in the magic ring (6)
- 2. Inc in each st (12)
- 3. BLO [1 sc, 1 inc] x6 (18)
- 4. [2 sc, 1 inc] x6 (24)
- 5. BLO [3 sc, 1 inc] x6 (30)
- 6. [4 sc, 1 inc] x6 (36)
- 7. BLO sc in each st
- 8. Sc in each st
- 9-16. Repeat rows 7 and 8
- 17. BLO [4 sc, 1 inv.Dec] x6 (30)
- 18. [3 sc, 1 inv.Dec] x6 (24)
- 19. BLO [2 sc, 1 inv.Dec] x6 (18) Stuff the pineapple firmly.
- 20. [1 sc, 1 inv.Dec] x6 (12)
Top up the stuffing if needed.
- 21. Change to color B, BLO [Inv.dec] x6 (6)
Fasten off, leaving a long tail for sewing the last sts together
Pineapple Part 2:
With the bottom of the pineapple facing away from you, fasten your yarn in the last st of row 3.
- 1. ([Ch 2, dc, dc] in the same st, sl st in the next st) Repeat until the end of the row (6 times), do not cut the yarn.
- 2. Crochet straight up into the last st of row 5 from row 3 to make a seamless transition. [Ch 2, dc, dc] in the same st, sl st in the next st) repeat until the end of the row (12 times), do not cut the yarn.
- 3. Continue the same process until row 19
Pineapple Part 3:
With the bottom of the pineapple facing towards you, fasten your yarn in the first st of row 21.
- 1. [Ch 10, starting in the second st from the hook, sc 9, sl st in next st, ch 14, starting in the second st from the hook, sc 13, sl st in next st] Repeat these 4 steps until the end of the row (3 times)
- 2. [Sc 9 up the side of the leaf, [sc, dc, sc] in the same st, sc 8 down the other side of the leaf, sl st in the same st as you sl st'd in on the previous row. Sc 13 up the side of the next leaf, [sc, dc, sc] in the same st, sc 12 down the other side of the leaf, sl st in the same st as you sl st'd in on the previous row] repeat this process for the next 4 leaves.
Fasten off and tie in loose ends.
Details:
- If you prefer to add the safety eyes now with glue, add them to row 12 with 8 rows in between.
- Using color C, add the eyebrows in the leaves you made in row 16 (two rows of leaves up from the eyes). Make a horizontal st across the leaves that sits next to the one directly above the eye.
- Add the rosy cheeks by making a horizontal st (color D) in the leaves below the eyes, go over the same st one more time.
- If you'd like a mouth you can simply bend down some of the leaves in row 7 to make a little gap, how cute! And TA-DA you're done!
Designer: Catknit_ On Instagram