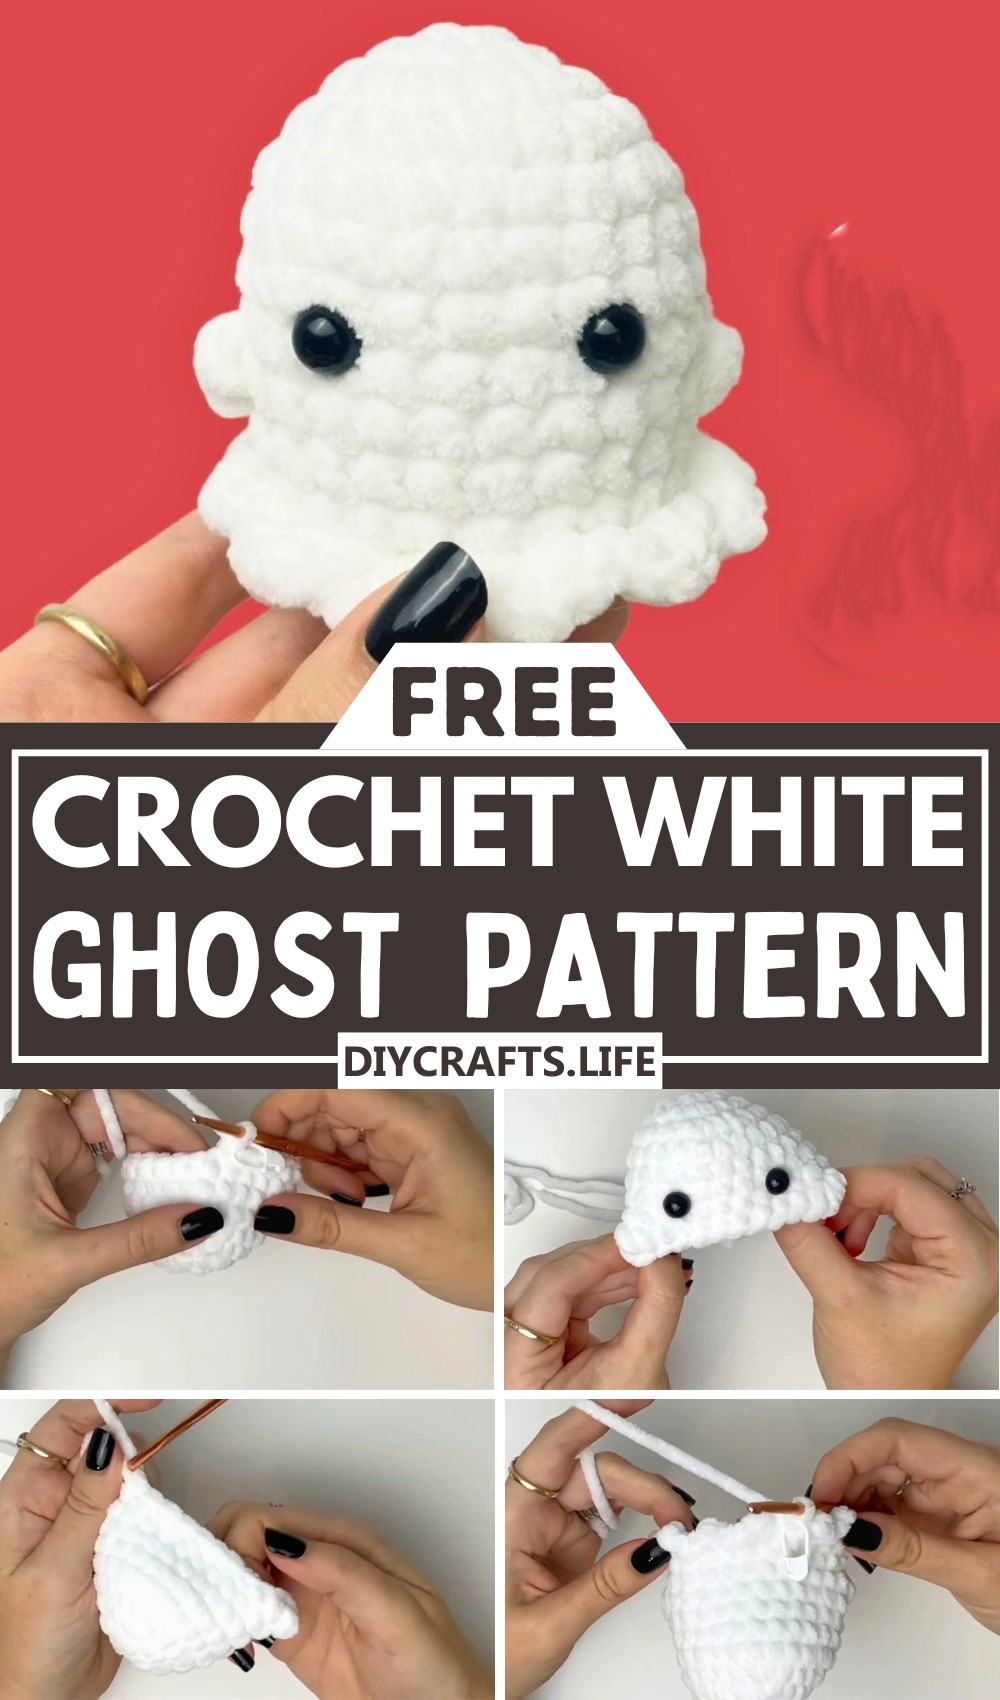
This Crochet Ghost project is a quick and delightful craft that combines charm and practicality. With its lovely wavy details and adorable personality, this design is perfect for seasonal decor or gifting. Its simplicity makes it an excellent choice for crafting enthusiasts.
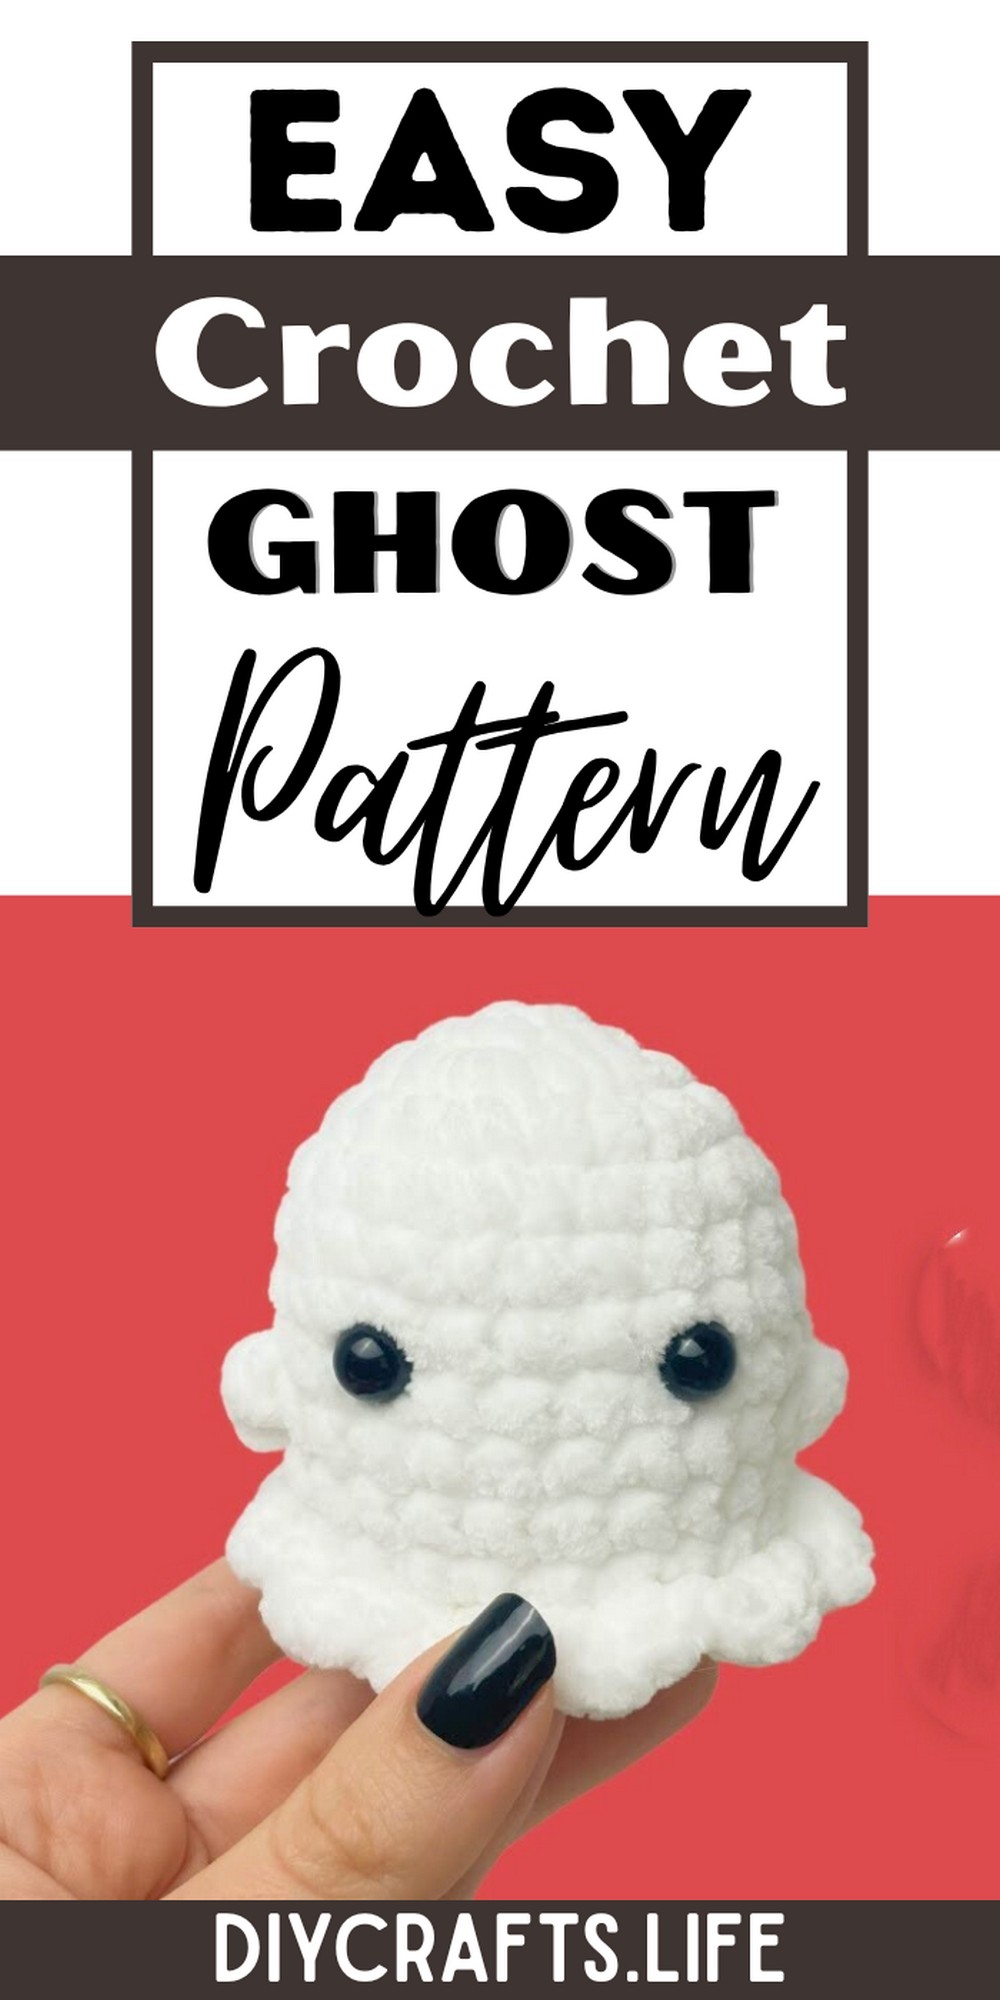
The Crochet Ghost is durable and has a playful design that stands out. Its sturdy craftsmanship ensures lasting quality, while its soft texture and cute arms make it appealing as a festive decoration, keepsake, or toy. Its compact size also makes it easy to display anywhere.
Crochet Ghost
Crafting the Crochet Ghost is enjoyable for beginners and advanced crocheters alike. The design allows for customization, from yarn choices to variations in size, and encourages creativity. With clear instructions, it's easy to add personality and flair to your ghost.
Materials and Preparation
Required Materials:
- Yarn: Bulky or super bulky strand in white
- Hook: A USG crochet hook or any crochet hook size that matches your yarn strand
- Stuffing: Synthetic fiber stuffing for the ghost
- Safety Eyes: Two safety eyes for the face
- Tools:
- Scissors
- Yarn needle
- Stitch markers
Yarn Weight:
Use bulky or super bulky yarn to ensure the ghost is plush and well-formed.
Abbreviations and Notes
Crochet Abbreviations:
- MR: Magic Ring
- SC: Single Crochet
- SL ST: Slip Stitch
- HDC: Half Double Crochet
- INC: Increase (two stitches in one stitch)
- DEC: Decrease (merge two stitches into one)
- FLO: Front Loops Only
- BLO: Back Loops Only

Pattern Notes:
- This ghost is worked in rounds, beginning at the top of the head. Use a stitch marker to keep track of the last stitch in each round.
- Special techniques include the garter stitch (explained step-by-step in the pattern) and working in front and back strands for the wavy detail of the ghost’s base.
- It is recommended to reference a detailed magic ring tutorial if unfamiliar.
Gauge, Approximate Size, and Pattern Notes
Gauge:
Gauge is not crucial for this project, as it is a decorative item. However, match your yarn and hook sizes for consistent results.
Finished Size:
The ghost will measure approximately small-to-medium plush size depending on the yarn and hook used.
Pattern Notes:
No specific gauge swatch is needed for this project. Use bulky or super bulky yarn to ensure a consistent ghost shape. Special techniques include:
- Garter stitch for the arms.
- Transitioning between FLO and BLO for the wavy ghost design.
Step-by-Step Pattern
Head and Body
- Round 1: Begin with a Magic Ring (MR) and create 6 SC inside the ring. Pull the ring tight and place a stitch marker in the last stitch.
- Round 2: Make 2 SC in each stitch around (6 INC). This brings the stitch count to 12 stitches total.
- Round 3: Alternate 1 SC and 1 INC for each stitch around (6 INC). This brings the stitch count to 18 stitches total.
- Round 4: Alternate 2 SC and 1 INC for each stitch around (6 INC). This brings the stitch count to 24 stitches total.
- Rounds 5 to 8: Work 24 SC in each stitch around (no increases).

Arms
- Round 9: Begin adding garter stitches for the ghost’s arms.
- Create 6 SC.
- Work the garter stitch in the next single stitch as follows:
a. Yarn over, insert hook, yarn over, pull through.
b. Repeat this process 5 times in the same stitch to create the garter stitch. Adjust to 3–4 repetitions if your yarn is too thick. - Complete the garter stitch by pulling off all loops from the hook and tightening the working yarn.
- Create 10 SC to reach the second arm.
- Add the second garter stitch in the same manner.
- Finish the round with 6 SC.
Face Details
- Place safety eyes between Rounds 7 and 8, positioned 5 stitches apart and symmetrical with the arms. Adjust placement until satisfied and attach the backs securely.
Wavy Base
-
Rounds 10 to 11: Work 24 SC per round. Be cautious when working into the garter stitch areas.
-
Round 12: To create the ghost's wavy base, work only in front loops (FLO):
- In the first FLO stitch, work: 1 SC, 1 HDC, 1 SC.
- In the next FLO stitch, work: 1 SL ST.
- Repeat across the round to create 12 wavy segments.

Back Loops
- Round 13: Work 24 SC only in back loops (BLO) that were previously marked in Round 11. Use stitch markers for guidance in this round as BLO can be harder to spot.
Decrease and Stuff
-
Round 14: Work across both loops as normal, alternating 1 SC and 1 DEC. Repeat 8 times. There should be 16 stitches total.
-
Add synthetic stuffing to shape the ghost. Ensure arms and wavy edges are neatly defined.
-
Round 15: Work 8 DEC to reduce the stitch count to 8 stitches. Cut the yarn, leaving a long tail.

Finishing Touches
-
Use the long yarn tail and your yarn needle to sew the hole closed. Work through the front loops of the last 8 stitches and pull tightly. Flatten the underside of the ghost and secure by weaving the tail through multiple spots.
-
Tuck the yarn tail inside or trim any excess, ensuring no loose ends remain.
Pattern Question:
Question: How can I customize the wavy edge to match my yarn thickness?
Answer: If your yarn is thicker, reduce the number of waves or use fewer stitches in each wave to avoid overcrowding. Adjustments ensure the edges look smooth and balanced.
Conclusion:
The Crochet Ghost is a fun, rewarding project that’s both easy to make and incredibly versatile. It’s a charming addition to seasonal decor and a delightful gift. Its simple pattern makes every stitch enjoyable and ensures a cute result you'll love.